How to Smoke Crispy Chicken Wings on a Pellet Grill

How to Smoke Crispy Chicken Wings on a Pellet Grill

Football season? A weekend gathering? Just Wednesday night cravings? All great occasions to have some wings.

Add real hardwood smoke, crispy skin, and your favorite sauce, and you’ve got something even better.

With a pellet grill and Griller’s Gold hardwood pellets, making restaurant-worthy wings at home is easier than you might think.

What You’ll Need

For the wings:

  • 2–3 pounds of chicken wings, drumettes, flats, or a mixture of both

  • Your favorite BBQ dry rub

  • 1 tablespoon aluminum-free baking powder, optional, for crispier skin

  • 1 tablespoon olive oil, optional if not using baking powder

  • Griller’s Gold pellets

For serving:

  • Your favorite wing sauce

  • Ranch or blue cheese dressing

  • Celery and carrot sticks

  • Plenty of napkins

Choosing Your Griller’s Gold Pellets

For wings, we’re big fans of Griller’s Gold Pitmaster Blend.

Its combination of hickory, cherry, and maple delivers balanced hardwood smoke that complements chicken without overpowering your seasoning or sauce.

Competition Blend is another excellent all-around option, while Fruitwood Blend offers a milder, slightly sweeter smoke that works especially well with poultry.

Pick your favorite, fill the hopper, and let’s get cooking.

Step 1: Prepare and Season Your Wings

The secret to crispy wings starts before they hit the grill.

Pat the wings thoroughly dry with paper towels. Excess moisture makes it harder to achieve that golden, crispy skin.

For an extra-crispy finish, lightly coat the wings with aluminum-free baking powder before adding your dry rub. Baking powder helps promote browning and crisping as the wings cook.

Just make sure you’re using baking powder, not baking soda.

If you’re skipping the baking powder, a light coating of olive oil will help your seasoning stick. You’ll still get great wings with the right cooking temperature.

Toss the wings with your favorite rub until evenly coated.

For the best results, refrigerate them uncovered on a rack over a tray, on the bottom shelf of your refrigerator, for a few hours or overnight if you’re planning ahead. This gives the skin additional time to dry.

Short on time and big on appetite? Season them and head straight to the grill. They’ll still taste fantastic.

Step 2: Fire Up the Pellet Grill

Preheat your pellet grill to 225°F, following the manufacturer’s instructions.

Arrange the wings directly on the cooking grates, leaving a little space between each piece.

Close the lid and smoke for approximately 45–60 minutes.

Let the Griller’s Gold pellets do their work, giving you that unmistakable hardwood flavor.

That leaves you plenty of time to catch some football or make sure nobody’s eaten all the chips before the wings are ready.
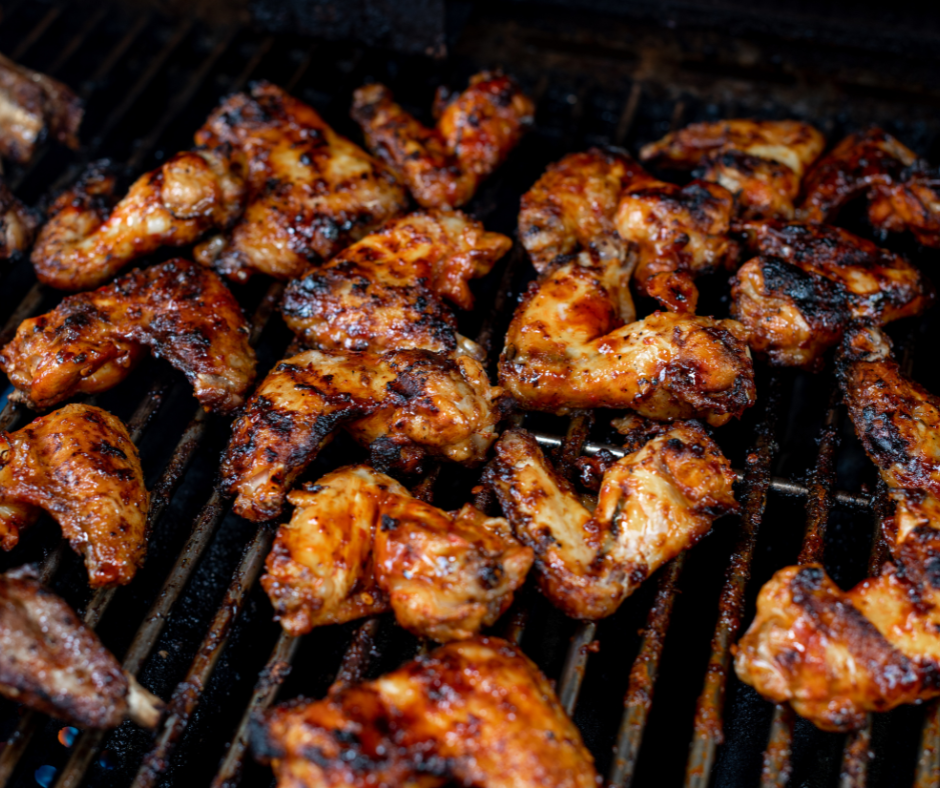
grilled chicken wings on grill grates with bbq sauce and grill marks

Step 3: Turn Up the Heat for Crispy Skin

After the initial smoke, increase your grill temperature to approximately 375–400°F.

Continue cooking for another 15–30 minutes, turning the wings as needed for even browning.

Cooking times will vary depending on your grill, outdoor conditions, and the size of your wings.

Chicken wings must reach a minimum internal temperature of 165°F, measured in the thickest part without touching bone.

For texture, many grillers prefer finishing wings closer to 175–185°F, where the dark meat becomes more tender and the skin can develop additional crispiness.

Trust your thermometer rather than the clock.

Once the wings are golden brown, crispy, and cooked through, you’re ready to serve.

Step 4: Sauce Them Up (Optional)

Some people love dry-rub wings. Others believe a wing isn’t finished until it’s covered in sauce.

We’re not here to settle that argument.

For sauced wings: Transfer the cooked wings to a clean bowl and toss with your favorite sauce until evenly coated.

For extra caramelization, return them to the grill briefly, watching carefully to prevent burning.

If you’re more of a dipper: Serve your wings with sauce on the side.

Either way, you’ve got smoky, crispy wings ready to enjoy.

Sauce Spotlight: Buffalo Ranch

Classic Buffalo wings are hard to beat, but sometimes it’s worth changing up the playbook.

This Buffalo Ranch sauce combines familiar Buffalo heat with creamy richness, buttery flavor, and a touch of sweetness.

Ingredients

  • ½ cup Frank’s RedHot or your favorite Buffalo-style hot sauce

  • ¼ cup unsalted butter, melted

  • 2 tablespoons ranch dressing

  • 1 teaspoon honey

  • A pinch of garlic powder

  • A few dashes of Worcestershire sauce, optional

Instructions

Combine the hot sauce and melted butter in a bowl, whisking until blended.

Add the ranch dressing, honey, garlic powder, and Worcestershire sauce if using. Whisk until smooth.

Taste and adjust to your preference. More honey softens the heat, while extra hot sauce gives it more kick.

If the sauce needs warming, heat gently without boiling.

Toss with your freshly cooked wings or serve on the side.

Want to experiment? Try a squeeze of lime juice or a splash of pickle juice for an extra tangy finish.

Sometimes the best wing sauce is the one you make your own.
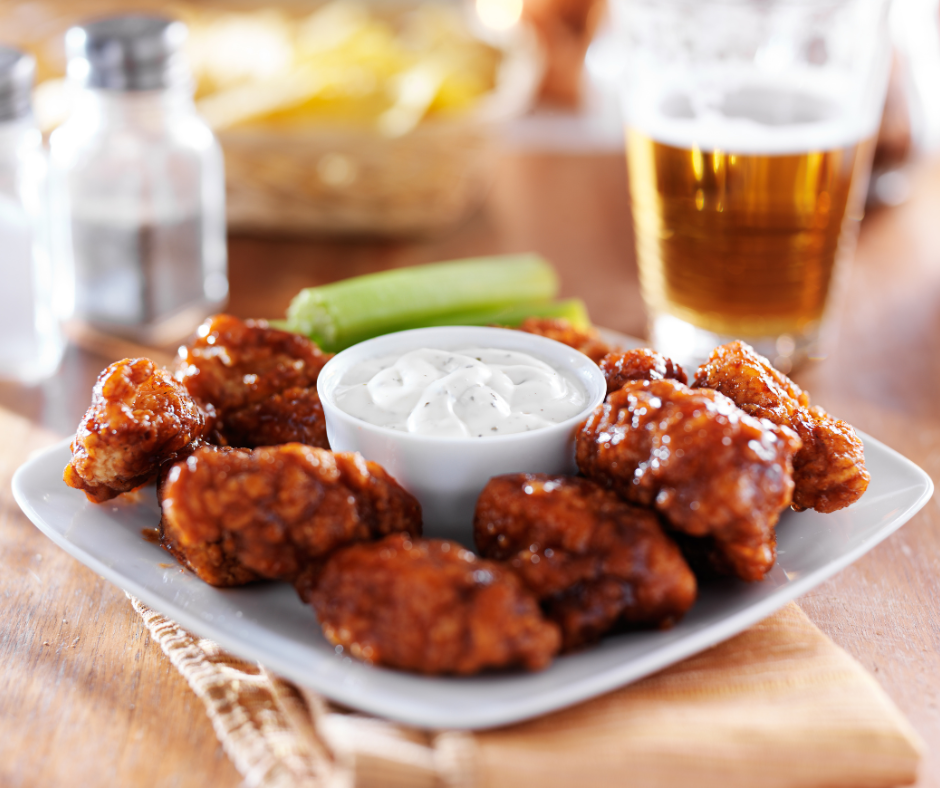
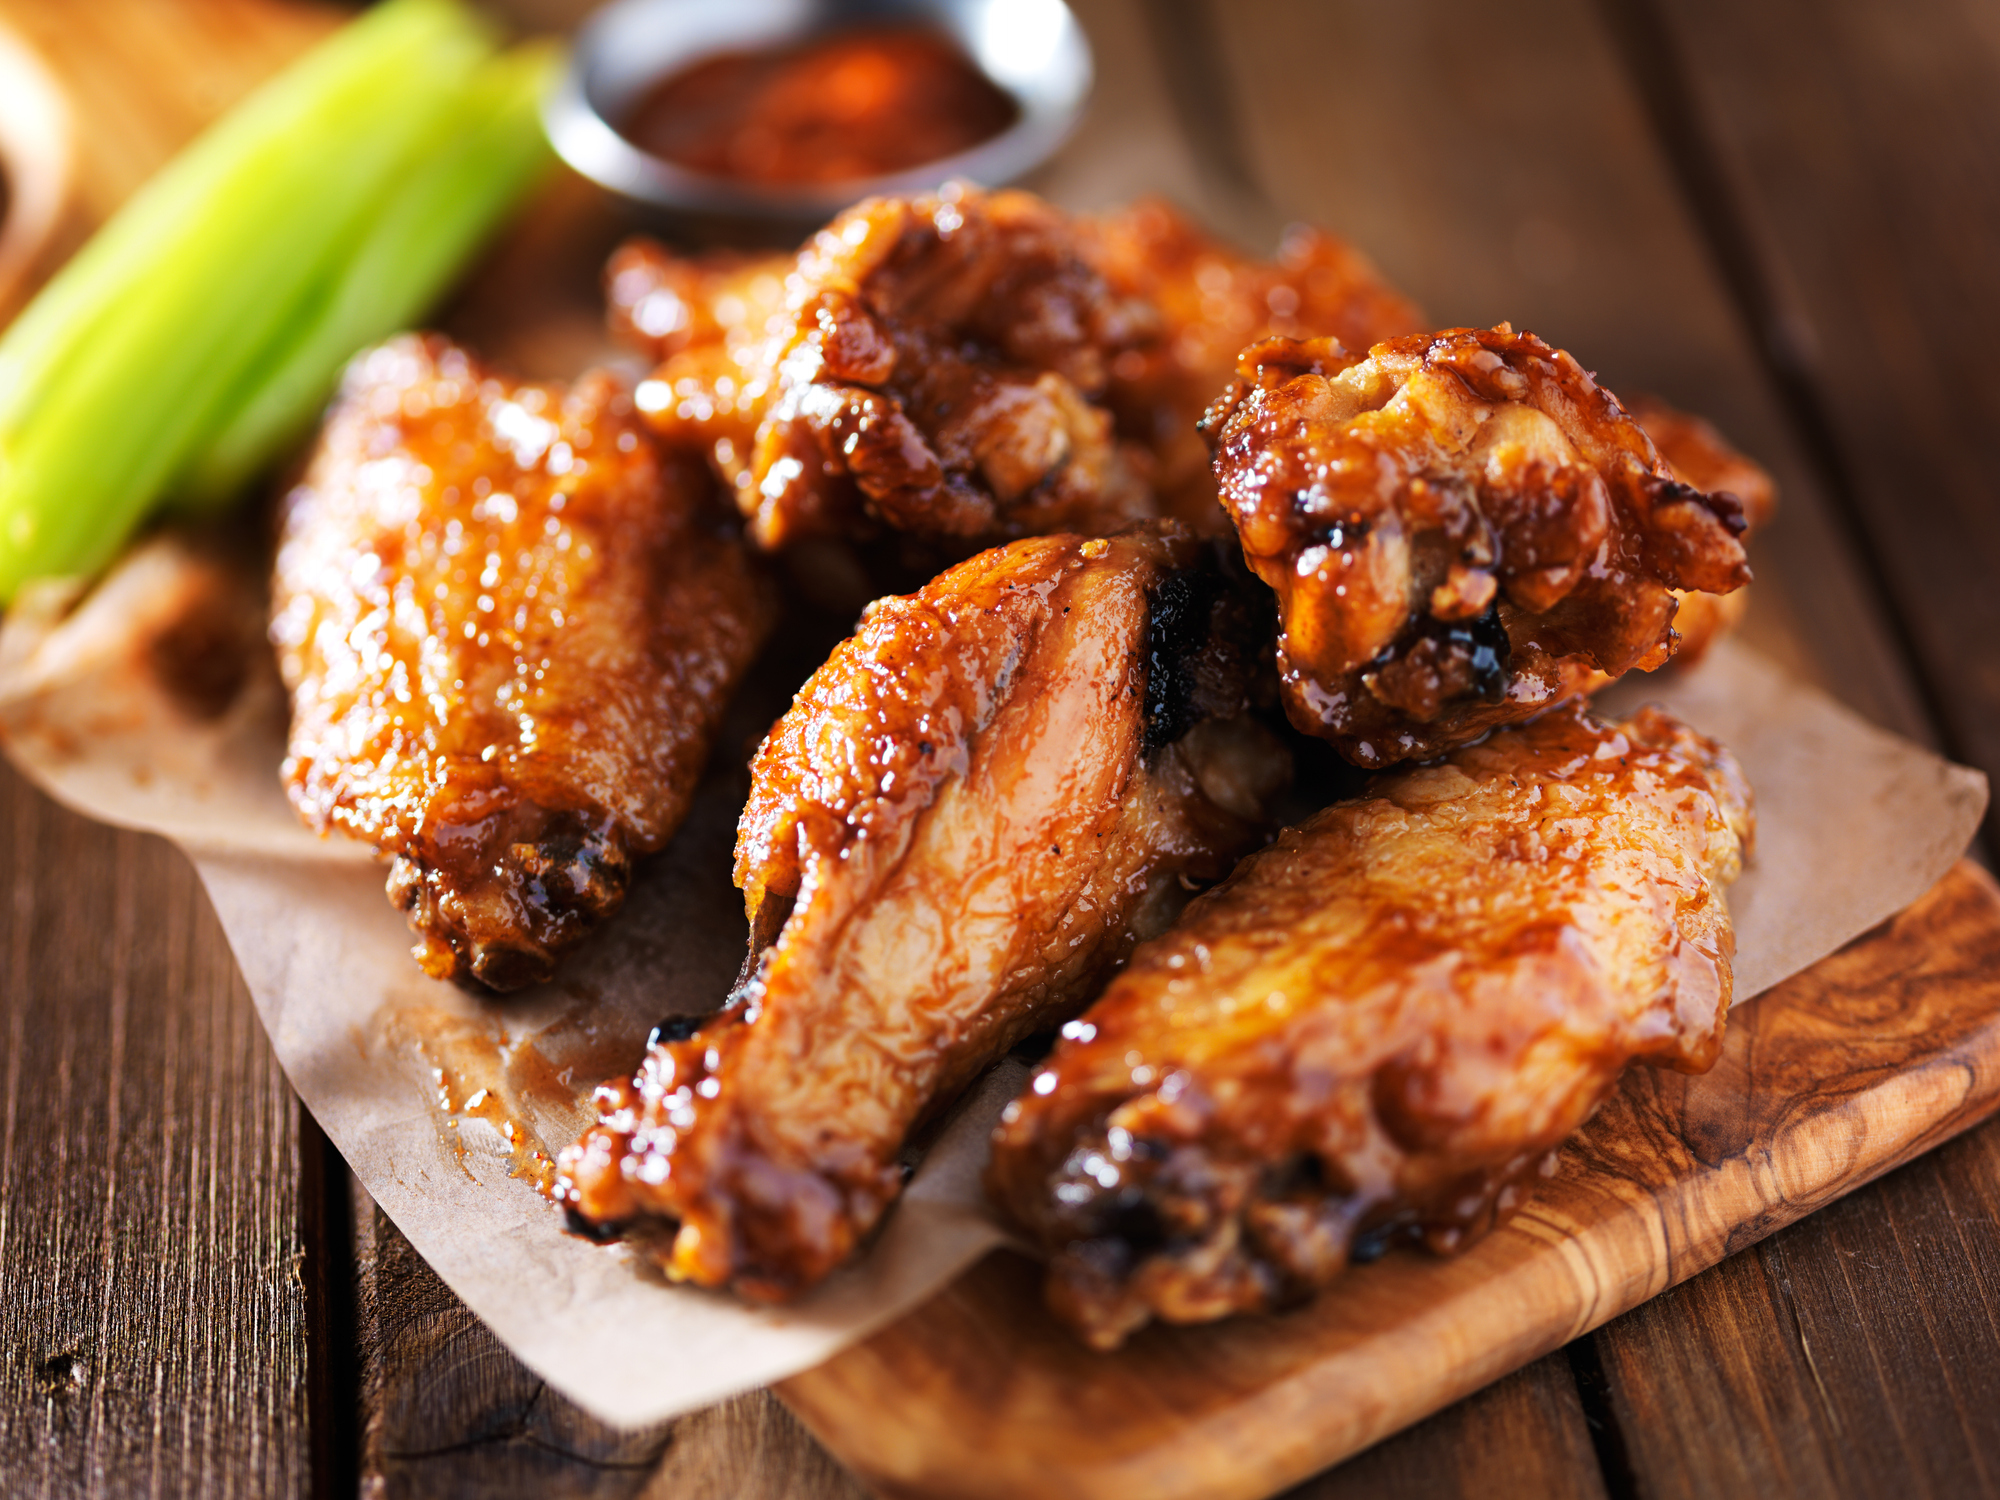
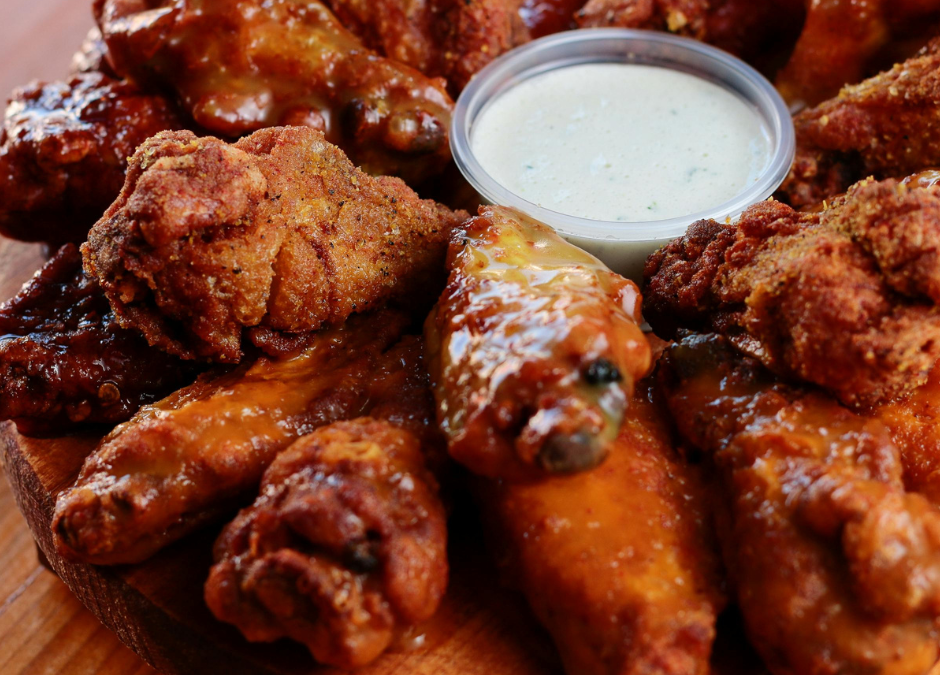
a white place with chicken wings arranged around a bowl with dipping sauce and celery Beer and water out of focus behind the plate

Make Your Next Game Day a Little Better

Whether you’re hosting friends for football or firing up the pellet grill for dinner, it’s hard to beat a platter of freshly smoked wings.

Feeding a crowd? Make two batches: one tossed in your favorite sauce and another with a simple dry rub. Add celery, carrots, and a few dips, then let everyone decide which version wins.

And perhaps most importantly, make more wings than you think you’ll need.

They have a habit of disappearing.

If you’re keeping cooked wings warm before serving, maintain them at 140°F or above. Refrigerate leftovers promptly rather than leaving them sitting out all afternoon.

With Griller’s Gold hardwood pellets in the hopper, you’re ready to bring wood-fired flavor to everything from game day gatherings to everyday dinners.

Because around here, grilling season never really ends.

Real Hardwood. Real Smoke. All Year Long.

Find Griller’s Gold at Menards, Fleet Farm, and other participating retailers.
Find Griller’s Gold Near You

Easy Summer Ribs

Easy Summer Ribs

“Summertime and the livin’ is easy”, goes the song. So should making great food to serve at summertime celebrations.  Here at Griller’s Gold, one of our summertime faves are pork baby back ribs. Now, many grillers and barbecuers are afraid of them – and there are a thousand techniques out there including the “3-2-1” method, preboiling them (NO NO NO!!!), fast cooking (it works, but not as good), etc.  So our topic today is how to make GREAT ribs with an easy to make method.

The great thing is that a pellet-fueled grill makes this super easy.  The grills are thermostatically controlled for even temps, and they self-feed fuel so there’s no fire maintenance. Speaking of fuel, Griller’s Gold Premium Hardwood pellets give great flavor to ribs.  We’ve used pretty much every pellet we make in making ribs, and they all work great, but that said, for pork baby backs, we love either Hickory or Fruitwood Blend.  So let’s do this!

This recipe delivers ribs that are tender, not chewy, with a nice clean “tug” of the meat coming off the bone. They are not “fall off the bone” ribs – those usually only happen when you braise ribs in a sauce after smoking.

What to Buy

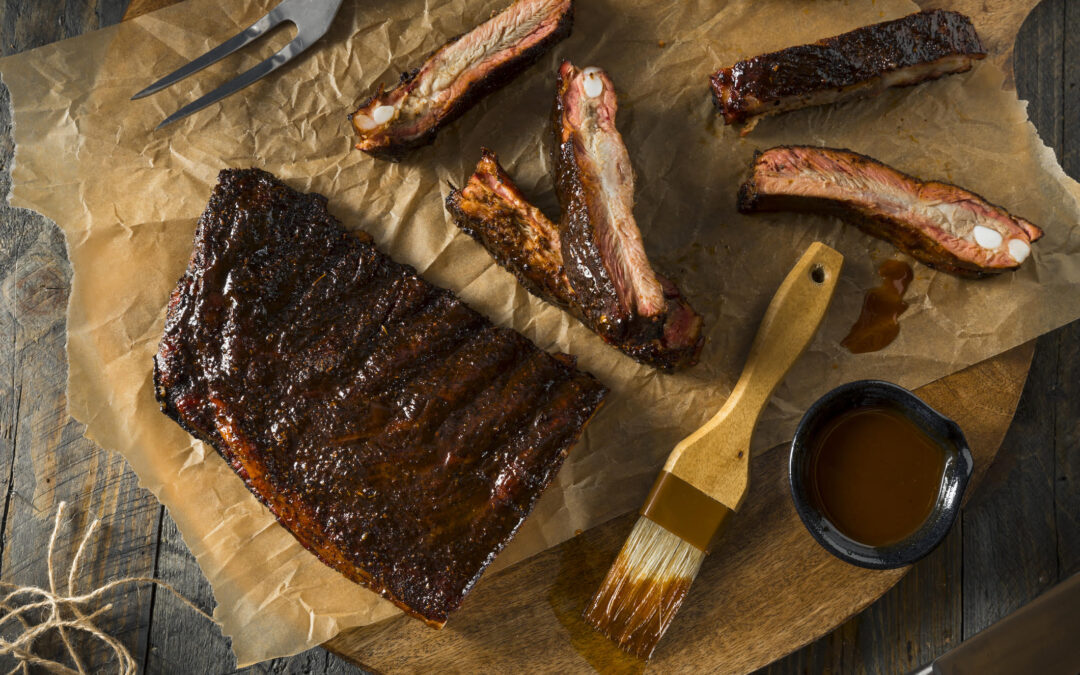
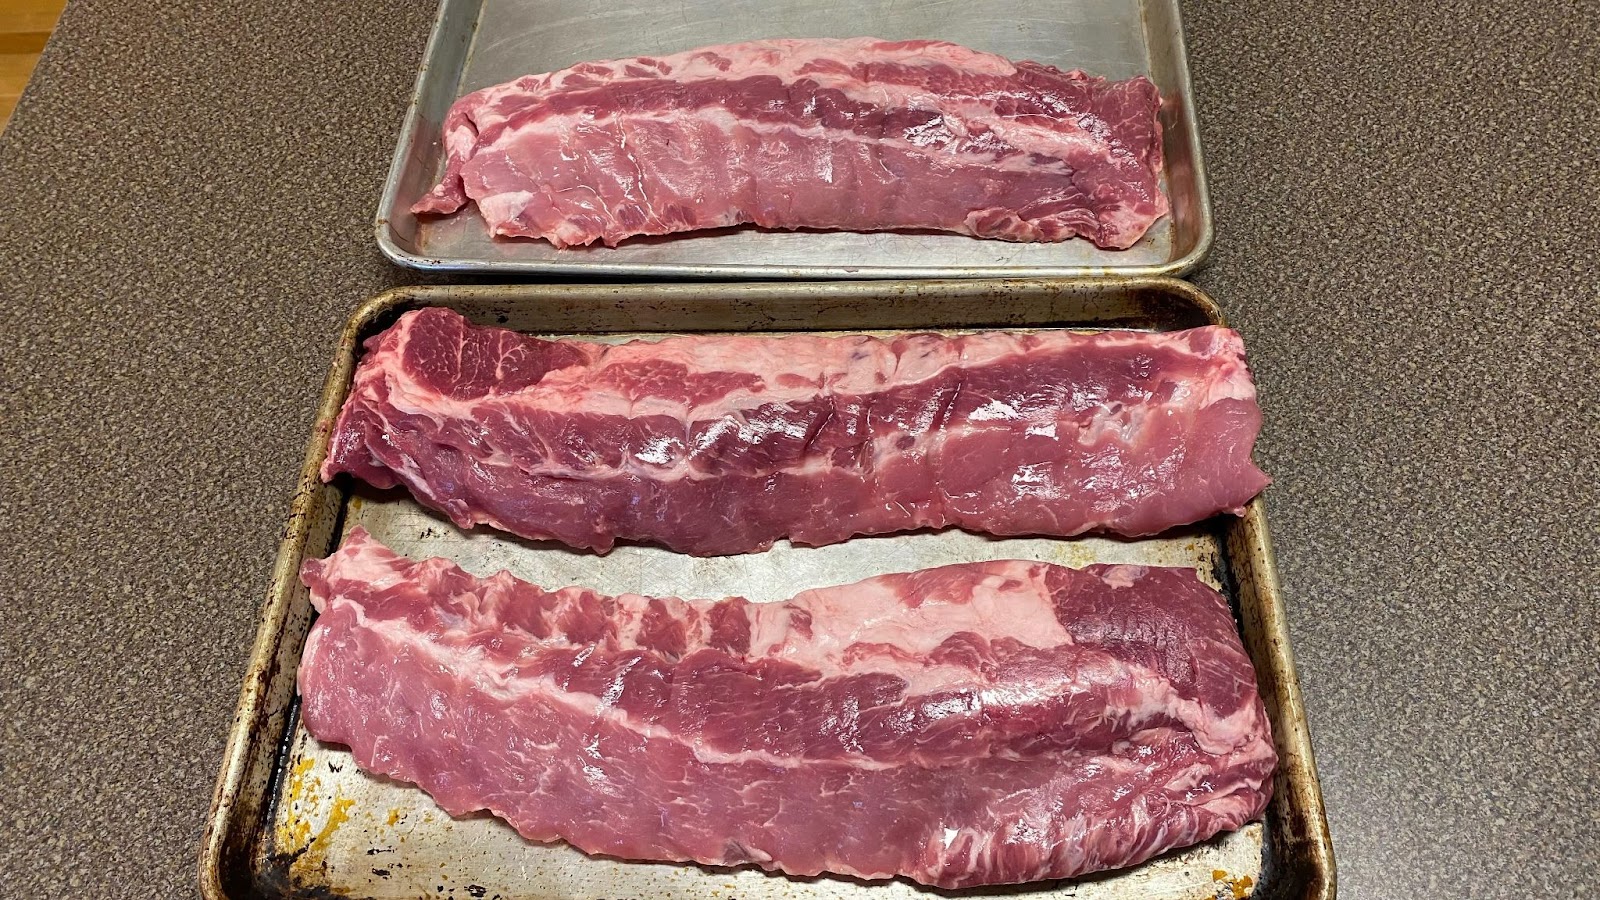
Pork Baby Back ribs – these are the rib sections from the back of the hog nearest the spine and have a lot of meat on them – much more meaty than St. Louis cut ribs.  We like to buy the minimally-processed ribs – often you’ll find them with a notation on the package of “contains up to 10% of a solution of …” which is that they are injected with a brining solution.  We find those to be too salty tasting for our taste.  Great sources for minimally processed ribs are at Costco and Sam’s of course – and they come in 3 packs.  Figure a half-slab of ribs per person, so a 3 pack should serve 12.

Ribs on a cookie sheet prepped for the grill


Prepping Your Ribs 

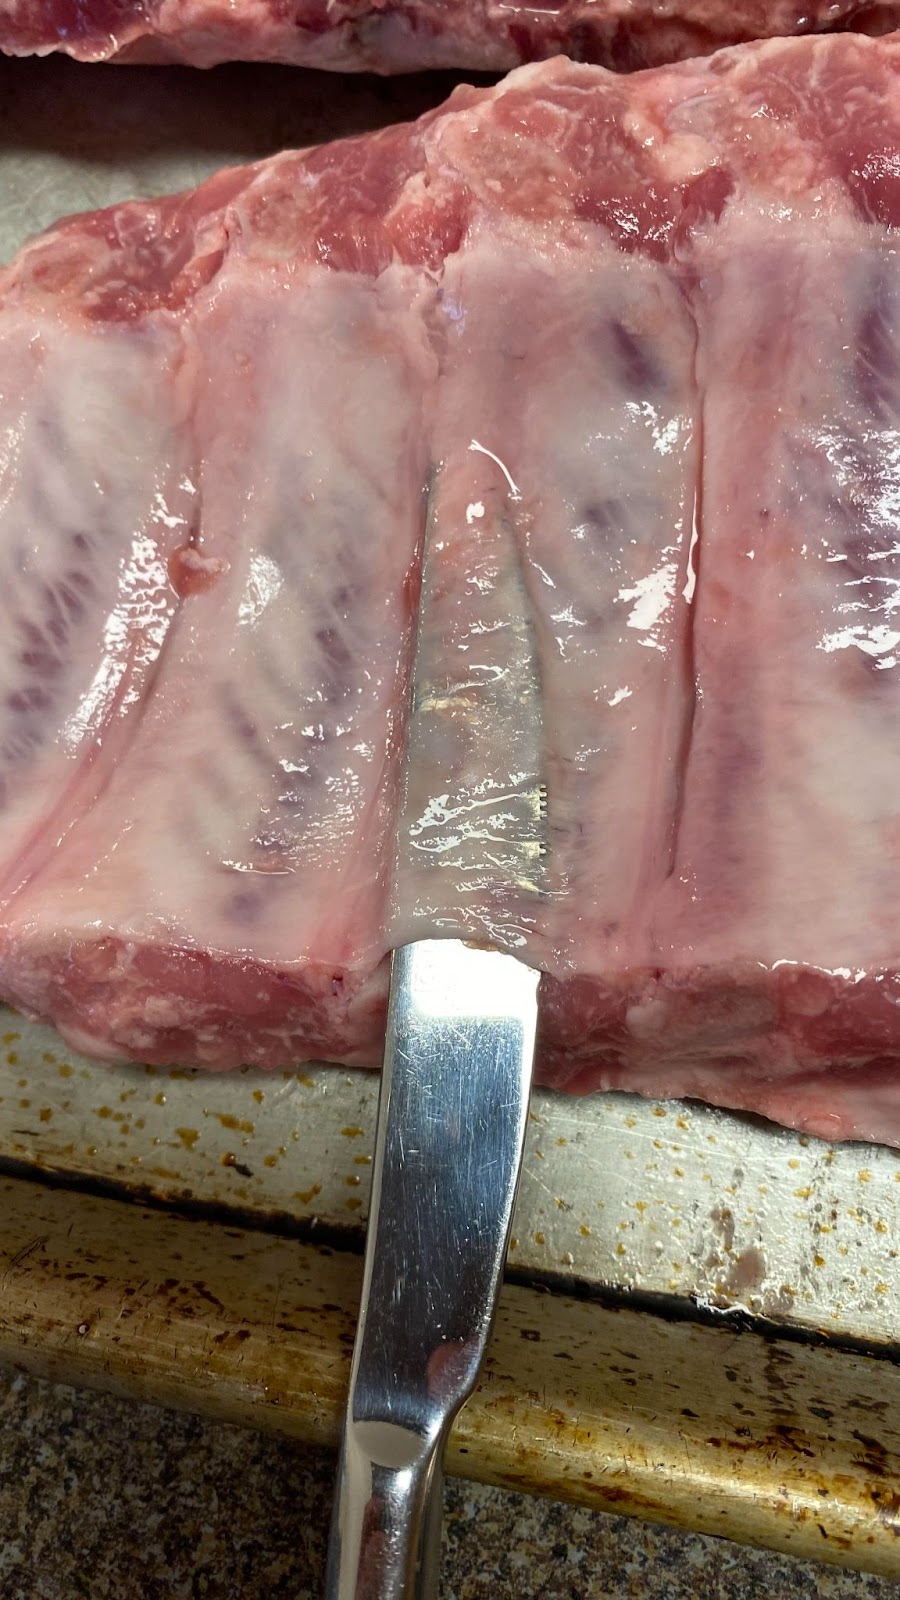
Generally speaking, ribs straight out of the package will have a membrane on the underside.  That needs to get removed as it gets chewy as it cooks.  Costco ribs frequently have had it removed. You can tell if it was already removed or not by how the underside of the ribs look – if they have a shiny/glossy coating – that’s the membrane. 

Now some people think this is a very difficult thing to do, but they just haven’t found the right technique yet. 

Here’s what to do:
1)  Get a butter knife – up, a non-sharp butter knife is ideal for this technique.

2)  Work from the side of the ribs away from the backbone. In the photo below one end of the ribs is sharply cut off at a near 90 degree angle while the other side sort of slants away. Start at the sharp cut off end.

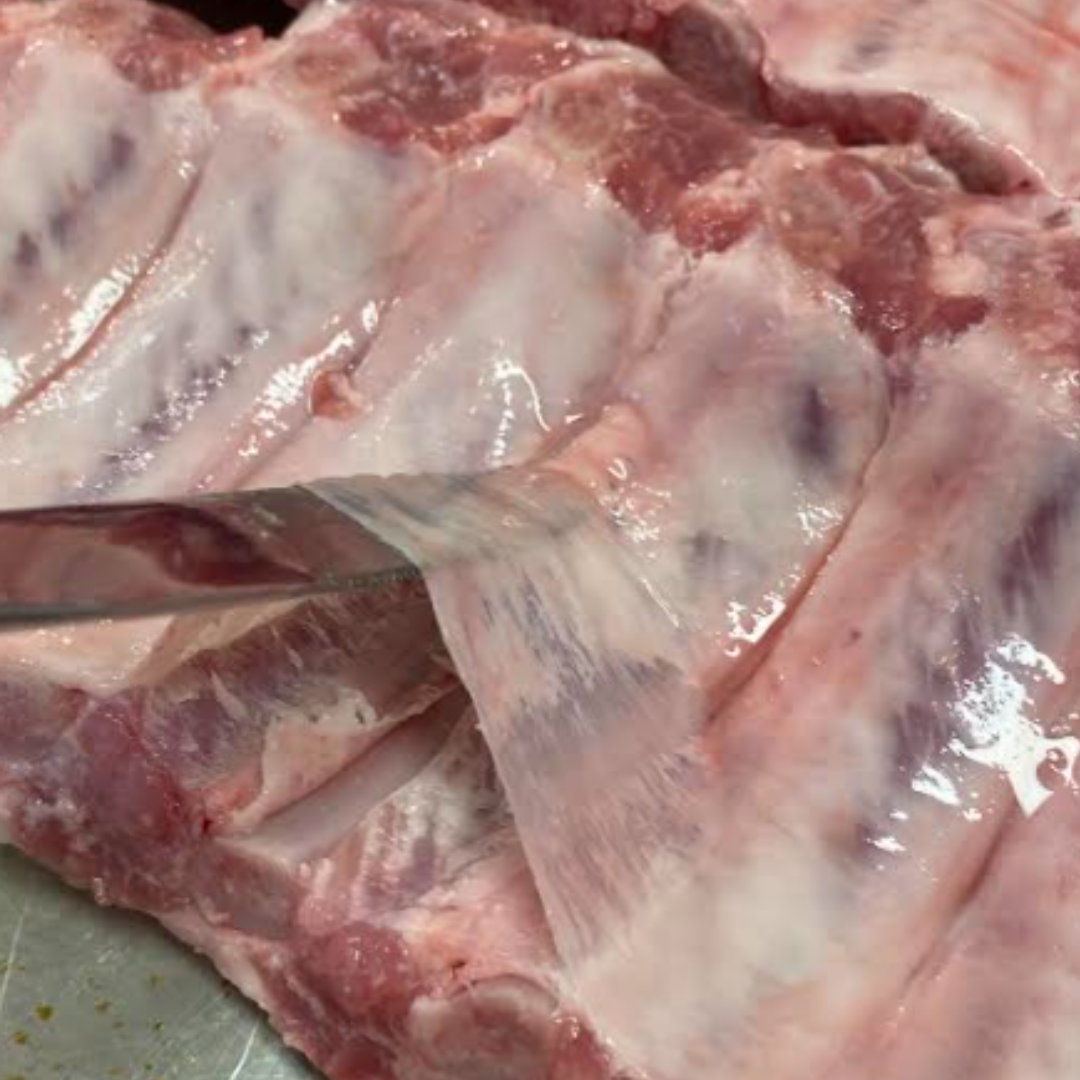
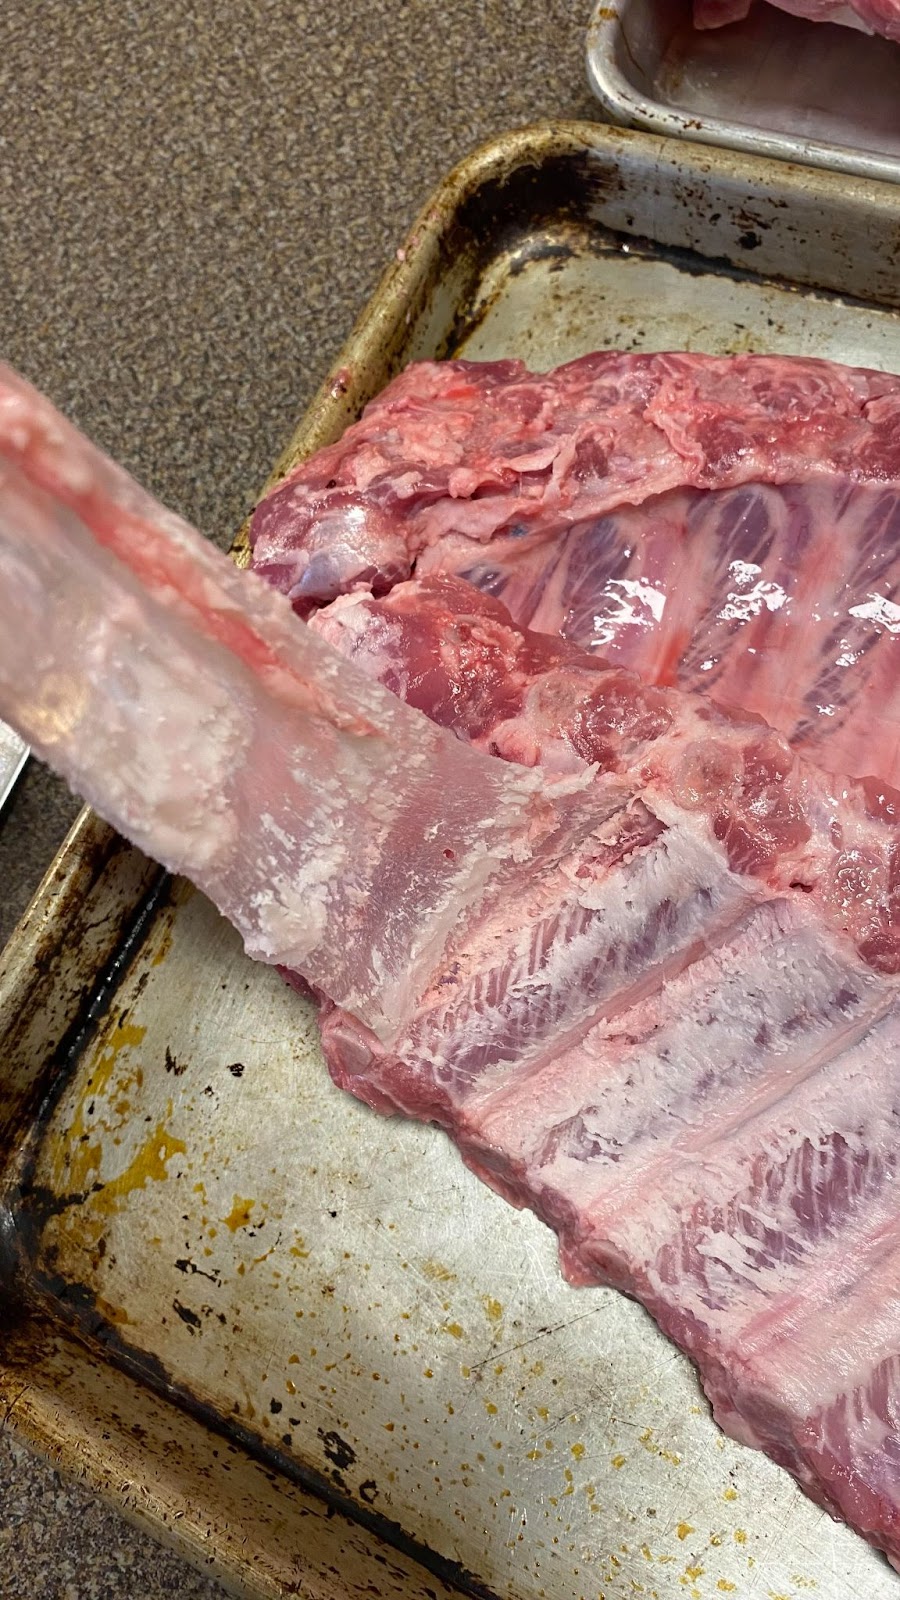
3)  At the rib that’s closest to the middle of the slab, slip the butter knife under the membrane – it’s sort of a scraping action where you’re scraping the membrane up off the bone. Once the knife is inserted about half the length of the bone, lever it upwards, levering the membrane up – you can hear it tearing away.  With a clean (not greasy/slimy) hand, get your thumb under the membrane and start pulling upwards – it will start peeling away. Work to one end and pull the membrane completely off, and then work the other direction to finish. Most of the time it will come off in one piece and the first time you do that you’ll feel like you pulled Excaliber from the stone!

Ribs with a butter knife showing where to insert the butter knife to remove the membrane

Ribs with butter knife illustrating how to remove the membrane
Removing the membrane from a slab of ribs before grilling

4) From there, clean the ribs up a bit – if there are little bits of meat hanging off anywhere, just cut those off as they typically will burn and become dry and hard anyway. 

Seasoning Your Ribs

Ok, we’re going to share a secret with you here.  Our head blogger developed this rub recipe about 30 years ago and we’re here to say that even with all the commercial rubs out there, this works the best. And it’s simple to make.  For enough Rub for 3 slabs of ribs:

  • 2 T (tablespoons) EACH of kosher salt, sugar, ground pepper, paprika, garlic powder and onion powder
  • 1 T chili powder
    2 t (teaspoons) dry mustard powder (we like the Colman’s brand)
  • 1 t ground cumin
  • ½ t ground ginger

Mix up well and put it into an empty shaker container. By the way, we use so much of this that we make it in quantities where the tablespoons above turn into cups!

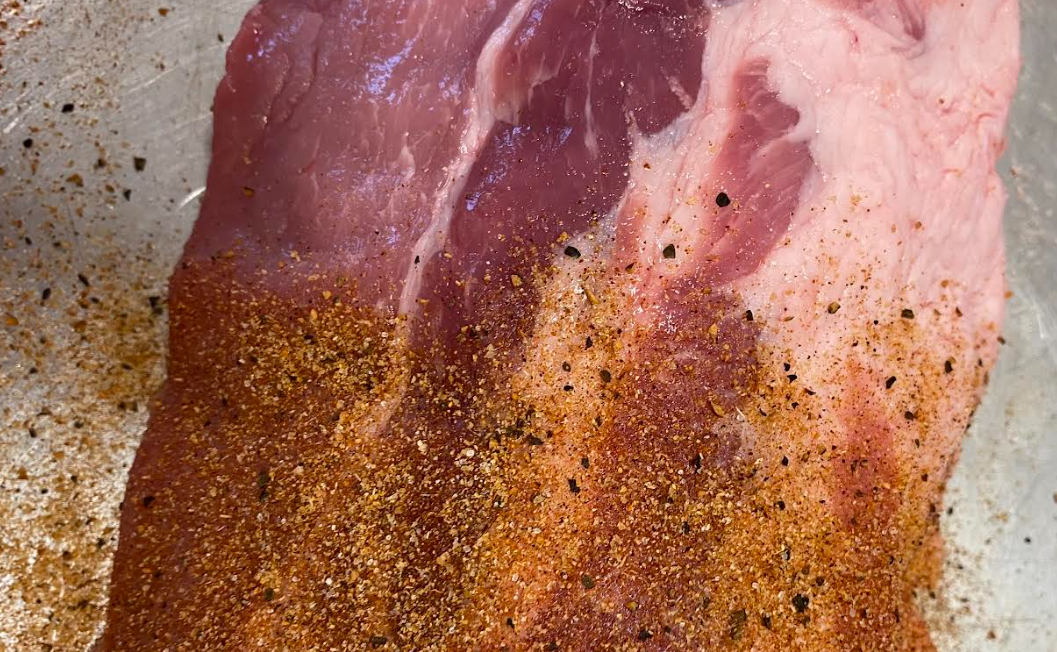
Generously shake the rub over the meaty side of the ribs, you don’t want to sprinkle it, you want to cover it!  See the photo below to see how much you need to apply.  Flip the ribs over and and give a good shake on the bone side but you don’t need as much on that side.

Adding a rub to a set of ribs

That’s it, let’s cook!

Grill Prep for Your Baby Back Ribs

Load your pellet grill’s hopper with Griller’s Gold pellets and fire it up to deliver 225F temp (the reason we say “deliver” is that some grills run a little higher, some a little cooler.  It pays to know how your grill behaves).  We like to let ours preheat for a solid 20 minutes, even though it comes “to temp” in 10 – it helps to get all that metal heated up evenly.

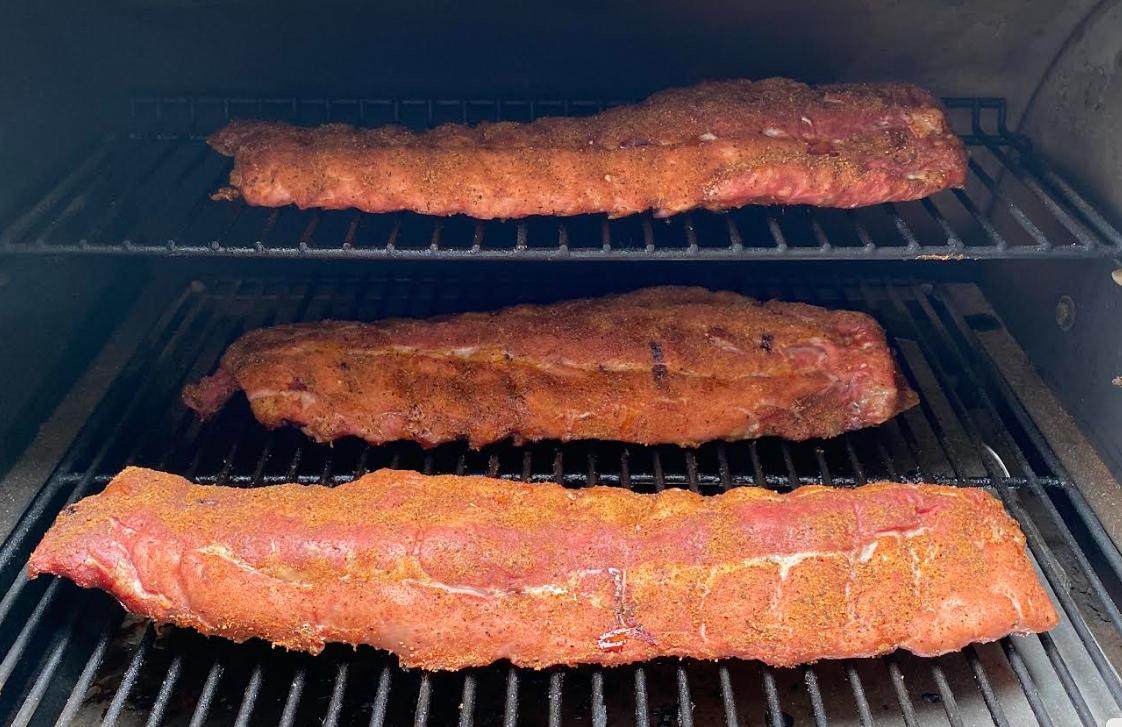
And go put them on the grill – meaty side up, bone side down. Leave some room around them to let the air and smoke circulate.  On the pellet grill we use the most (which is pretty small, truthfully), 3 slabs fit perfectly – 2 on the main grate, 1 on the upper. Close the lid, set a timer for 3 ½ hours and GO AWAY.  Seriously, leave it alone.  If you’re lookin’ they are NOT cookin’.  You don’t need to baste, spritz, etc.  They will cook just fine without your fussing.

3 racks of ribs on the smoker

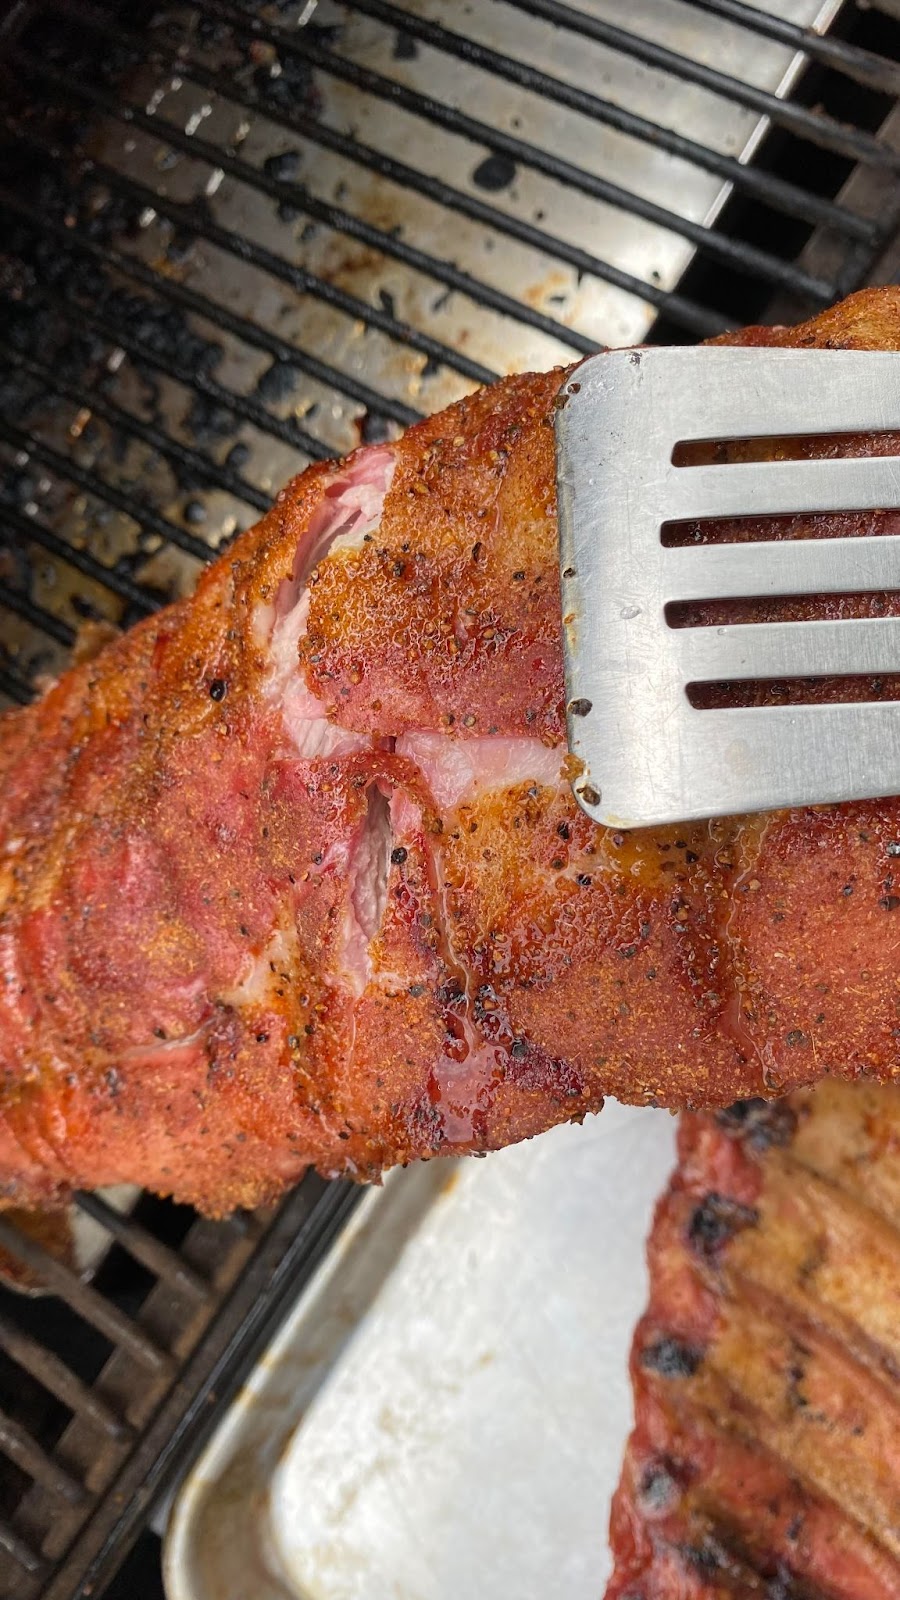
At 3 ½ hours, come back to do the “crack test”.  This is where you lift a slab up with a pair of tongs in the middle. If the ribs are done, you’ll see the bark crack and slab start to split in half.  When you see that split or crack, they are done on the grill – see the picture below.

An example of the rib "crack test"

Please note, not all slabs will get done at the same time – but that’s ok because you’re going to rest these!  If you have a slab that’s not quite cracking at the same time as the others, give it more time on the grill, usually an extra half hour will do the trick.

Resting Your Ribs

Here’s where this recipe becomes great for summer fun. We like to make these starting pretty early in the morning so that they are done late morning – say on at 7:30 and off around 11:00 AM.  They can go in the resting cooler for several hours until you’re ready to remove them, sauce them up and serve them!  Now this said, if you are having these for lunch, you can do without the rest, but your ribs will be more tender and tasty if you can build in some rest time. 

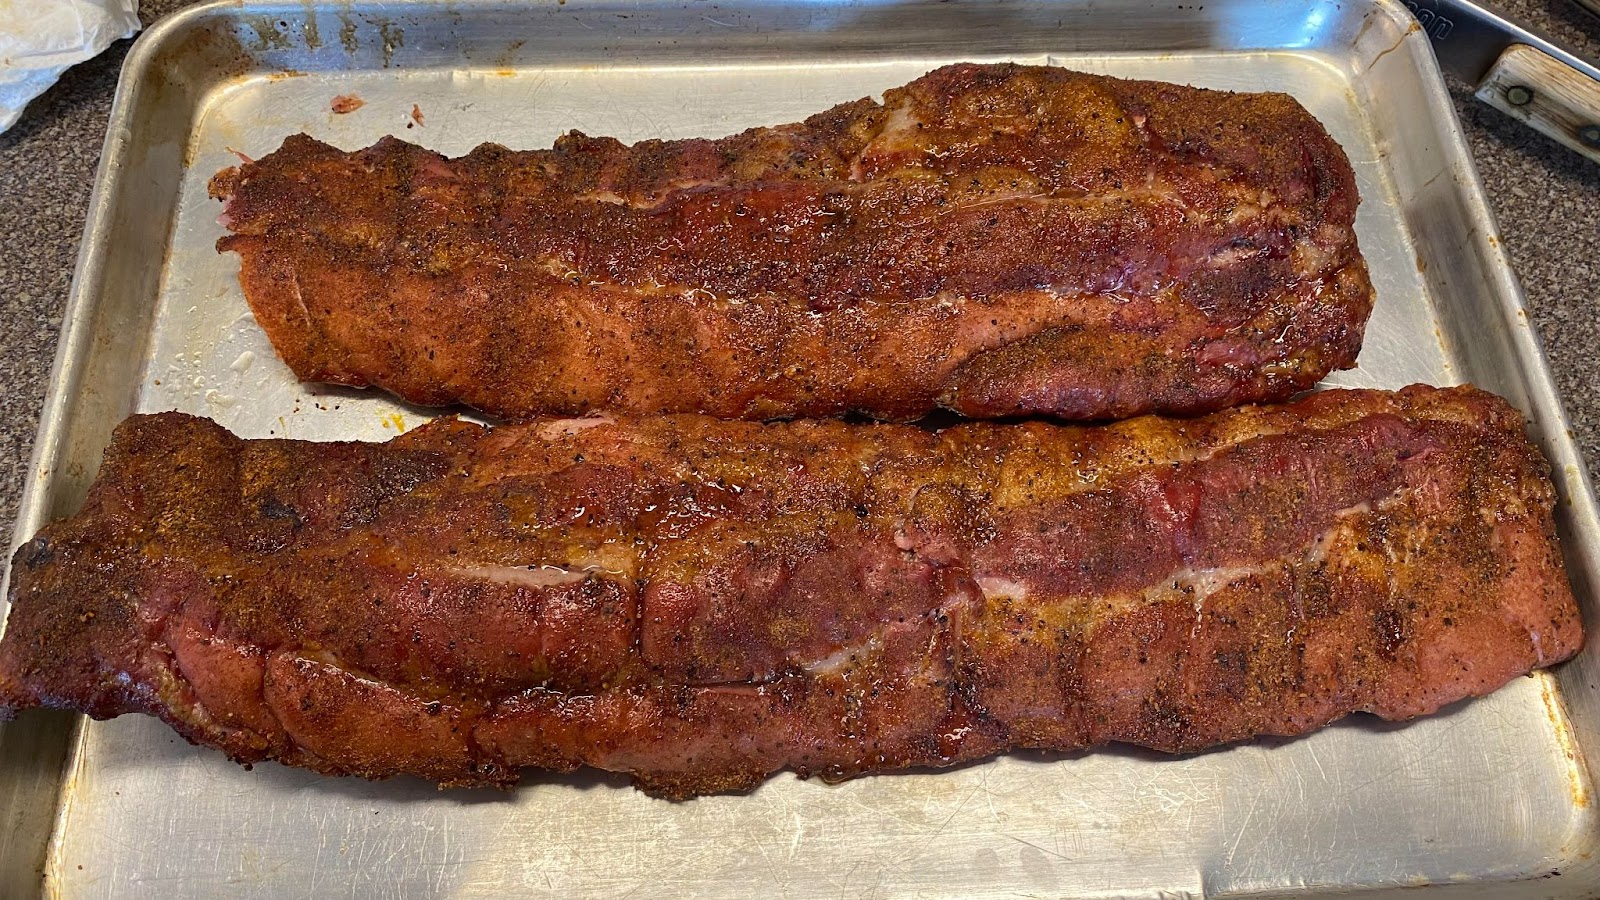
Two racks of ribs pulled off the grill and on a cookie sheet

Serving Your Baby Back Ribs

We like to cut the ribs at this point into serving  pieces – generally 2 ribs per piece.  Then make a double layer of heavy duty foil, pile the rib pieces in and close it up like a packet.  For 3 slabs it requires two packet.  Nestle the packets in the bottom of a picnic cooler. Then fold up an old bath towel and put it on top for some extra insulation, and close up the cooler.  Let rest at least an hour and up to 6 hours.  

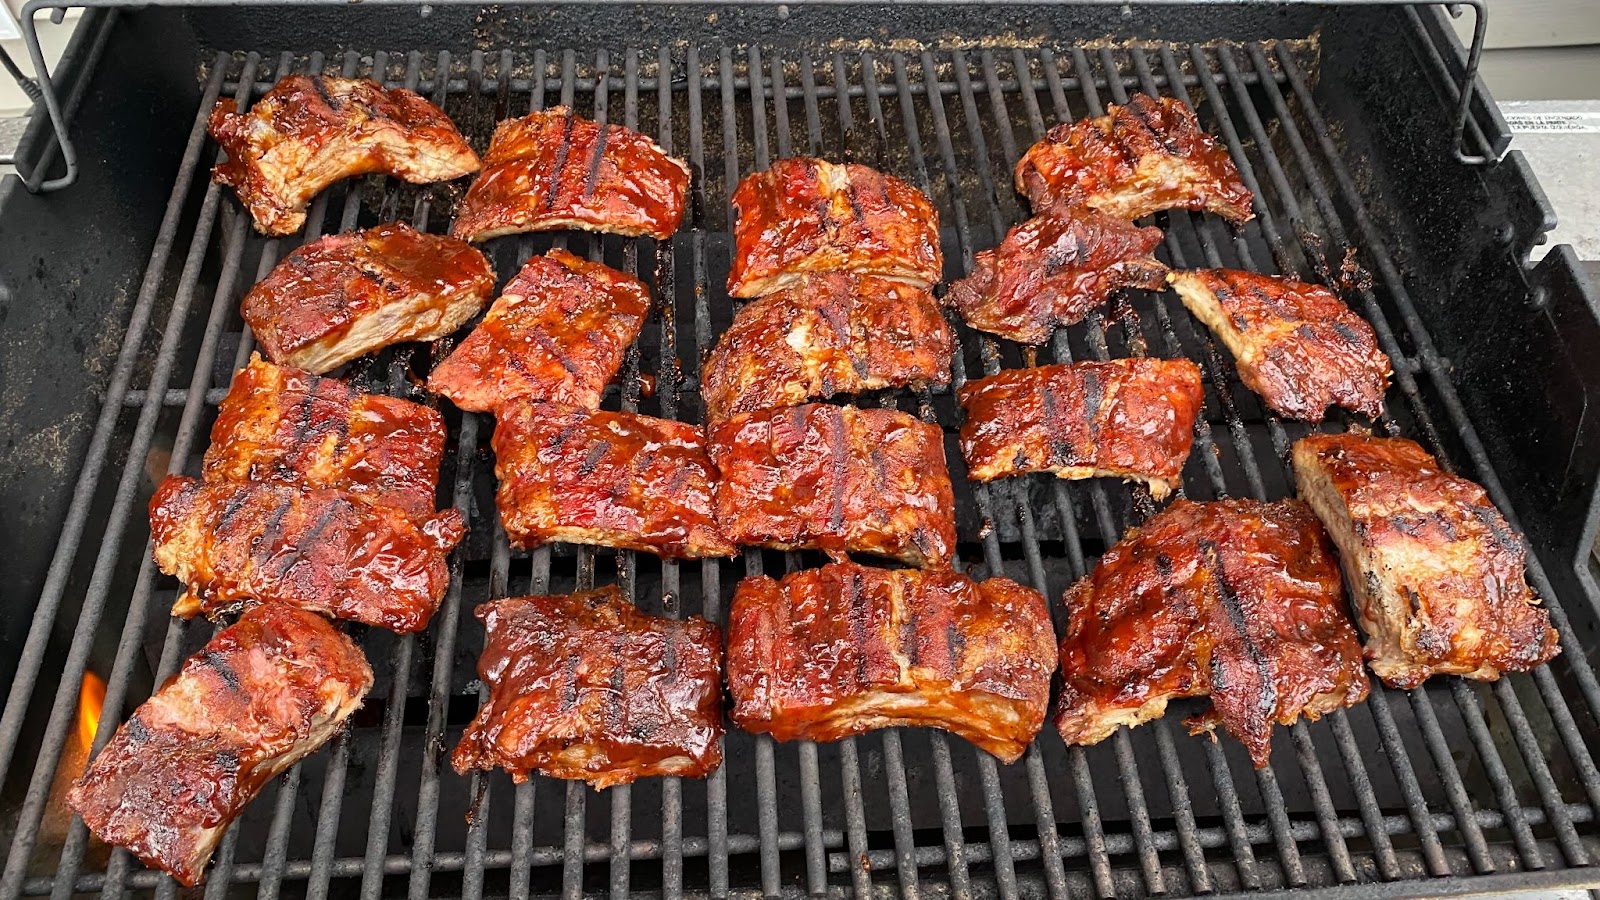
When you’re about 20 minutes from dinner, relight your pellet grill to 400F. Or, if you have one, a gas grill is fine for this step – run it at medium heat.  Before you head to the grill, generously brush your favorite barbecue sauce over the meaty sides of the ribs.  Head out to the grill, put the rib pieces sauce side down and close the grill. Set a timer for 3 minutes (time is important here as you don’t want to burn the ribs). At 3 minutes, give them a flip to the bone side down and heat for another 3 minutes. Then take them off and serve!

Ribs cut into smaller pieces with barbeque sauce

We love our ribs with cole slaw, baked beans, au gratin potatoes, mac and cheese, corn bread, and more for sides.

That’s it! Ribs can be so easy to make and so easy to get spectacular results just by keeping things simple!

Until next time!  Keep on grilling!

Taming the Tomahawk!

Taming the Tomahawk!

It seems that nothing strikes more fear into the hearts and minds of dedicated grillers and barbecuers like the awesome Tomahawk steak!

There’s something about its massive size, its formidable expense and its sheer amazingness that scares off a lot of folks from wanting to tackle making one or more of these. To that we say, FEAR NOT THE TOMAHAWK!

Read on and then prepare to conquer this incredible meaty achievement.


(Photo by Stew Campbell)

What is a Tomahawk Steak?

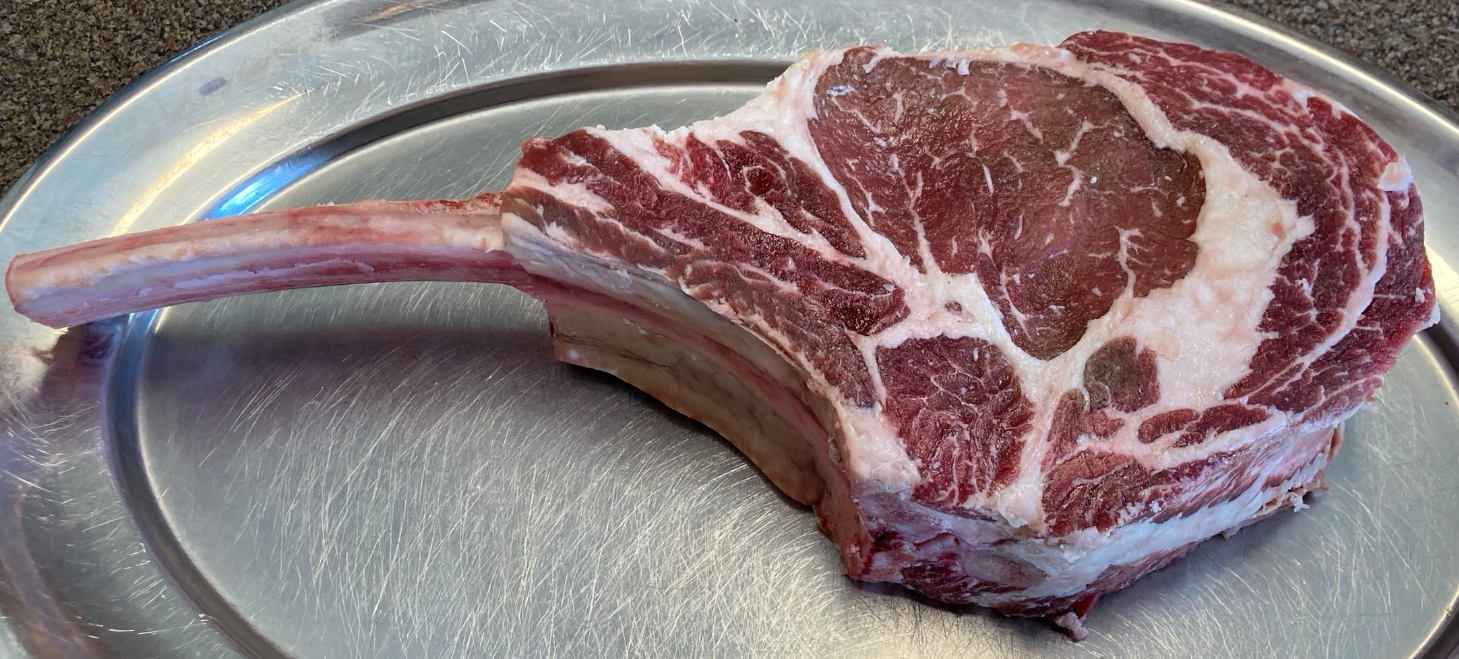
So, let’s start with the groundwork – in case you’re not fully familiar, a Tomahawk steak is basically a one-bone ribeye roast instead of having the bone cut flush with the end of the meat, a length of bone is left on and is “Frenched” – which is the technique of cutting away any remaining flesh to expose the bone. 

They are typically between 2 and 3 inches in thickness and typically weigh about 3-4 pounds, of which about 2 pounds is edible meat. This makes it look like the Native American weapon, the Tomahawk. It also looks like something Fred Flintstone would eat!

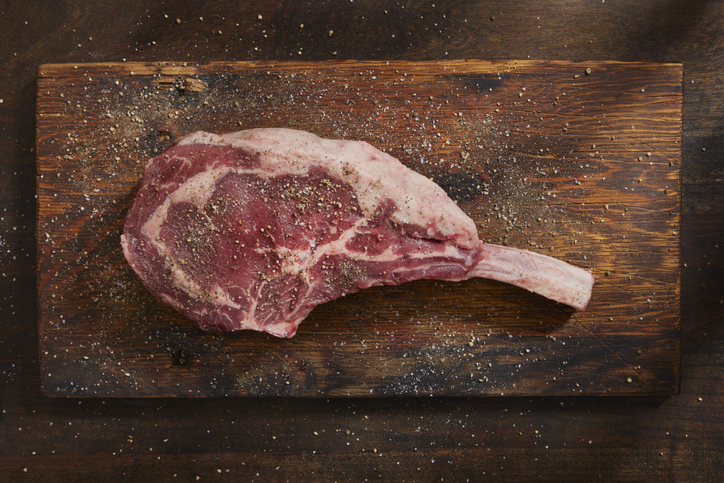
salt and pepper tomahawk steak on a wood board and a wood background

Buying Tomahawk Steaks

The great news is, with as popular as they have become, the prices have come down somewhat as they have become much more available. In fact, the Tomahawks featured in the pictures here … came from Walmart! 

They are also available at Sam’s Club, Costco and often in grocery stores.  That said, we are also very partial to local butchers and you can get some incredibly tender and delicious Tomahawks from a good local butcher. These Walmart steaks were on special at only $9.99/lb so each one was about $35. We’ve paid as much as $75 or more for these which does put the “scary” factor into making them.

Taming the Tomahawk comes down to one simple technique – the Reverse Sear, and fortunately, using a pellet grill fueled with Griller’s Gold Premium Hardwood pellets makes this SUPER easy.

To give a quick review (and for an in-depth look at that technique, have a look at this post from our blog), the “Reverse Sear”. This is where you cook the meat at a relatively low temperature until it is just short of the right doneness temperature. Then you give the meat a rest of 20-30 minutes while you preheat your grill to a very hot temperature. You then put it on and sear it for a few minutes to put that tasty crust on it. 

The result is amazing edge-to-edge perfect doneness.

Let’s break it down and then at the end, we’ll share some favorite side dish ideas to enjoy with this gorgeous hunk of meat!

The Tomahawk Grill Setup

Fire up your pellet grill with your favorite Griller’s Gold pellet – we like Competition Blend or Smokeshack Blend for beef, but you do you!  Set the temp to deliver 225F (know your grill and its variability!) and let it preheat for at least 20 minutes.  Also find your temp probe if you have one and have it ready to use.

Tomahawk Meat Prep

It sounds crazy, but our “rub” for this is just a generous sprinkle of kosher or sea salt over all of it – both sides and the edges, and we apply that about 4-6 hours in advance and let the meat sit in the fridge uncovered. 

This technique is called “dry brining.” This helps the salt absorb into the outside of the meat and dries the meat a bit which allows the smoke of the grill to flavor it more.

If you like, a nice hit of pepper with the salt is also good, as is Montreal steak seasoning. Our favorite other than just salt is Meathead Goldwyn’s “Mrs. O’Leary’s Cow Crust.” This is a salt-free rub you can make at home with pantry stuff, so you can also dry brine it without the worry of it getting too salty.

Temperature Management

Cooking to the right doneness temperature is really critical for this to be successful. If your grill has a thermometer probe, use it but be sure to know its variability (for example on one of our pellet grills the probe reads 10 degrees low). 

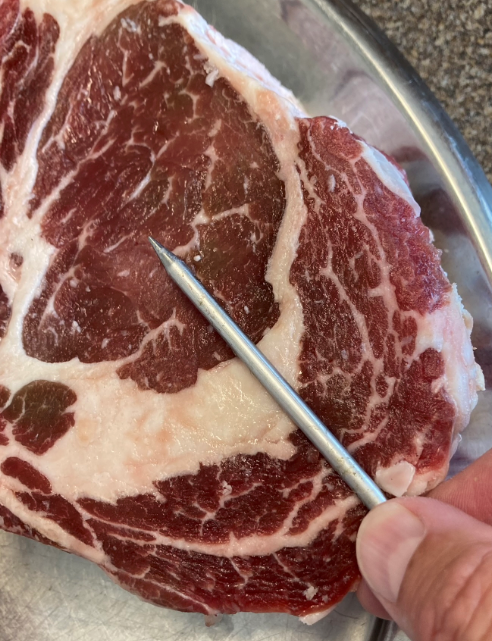
A great way to make sure you’re putting the probe in the right place and depth is to line it up outside of the meat, then put your fingers on the probe right where it needs to stop and insert it. Check the photo here to see what we mean. If you don’t have a probe, have an instant-reading thermometer handy to check it when you turn the meat over..

(photo by Stew Campbell)

Grill it!

Ok, you’ve got it (or them …) salted/seasoned, got a probe in one (if doing two, probe the thinnest one as it will get done quicker), you’re all set to go.  Place the meat in the center of the grill grate (or if doing two or more, down the center the long way) and close the lid!

Set a timer for 45 minutes and go away (this assumes your tomahawks are at least 2” thick) and don’t open the grill to peek.  After 45 mins, turn the meat over and using an instant-reading thermometer, “confidence check” your probe temp readout. 

Keep turning every 15 minutes until you’re about 10 degrees below the perfect doneness temp. 

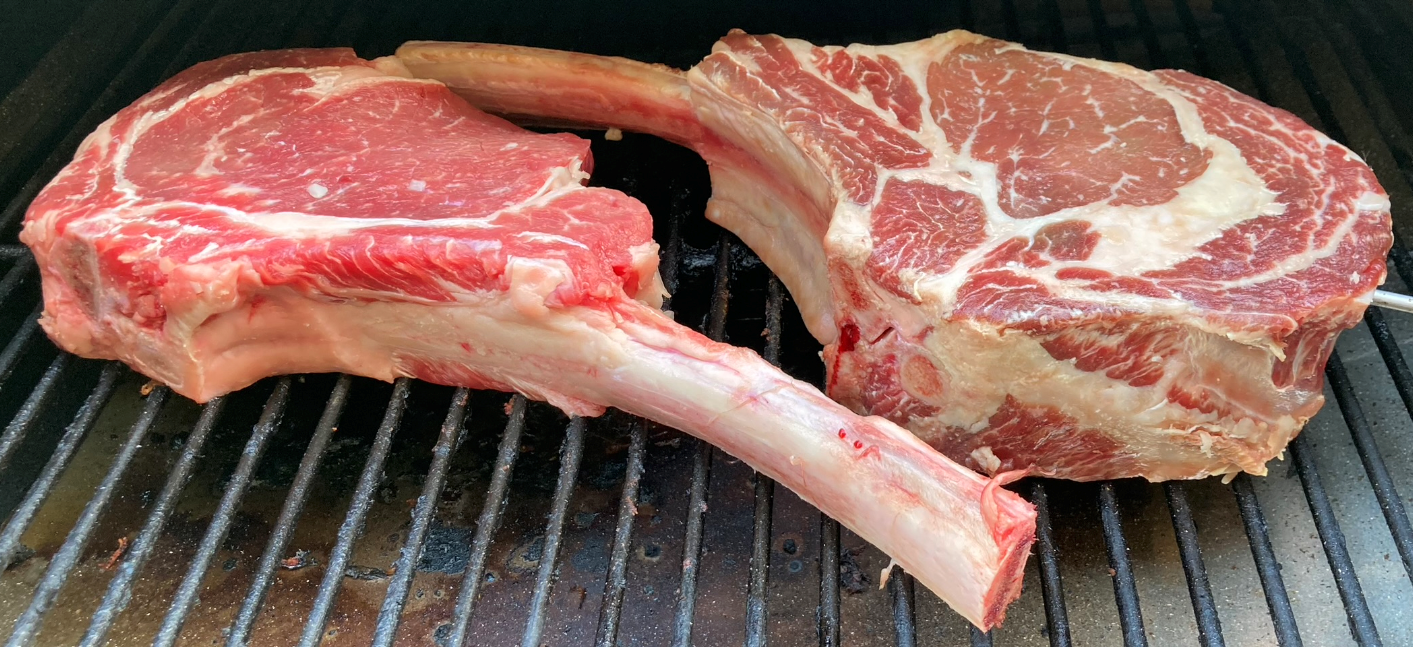
two thick cut tomahawk steaks on a grill

(Photo by Stew Campbell)

Know Your Done Temperature

As a review:

  • Blue Rare:  under 120F
  • Rare:  125F (remove at 115F)
  • Medium Rare:  135F (remove at 125F)
  • Medium: 145F (remove at 130F)

We’re really not joking here. Generally speaking don’t cook big beef like this to anything more than Medium, because the results really suffer.  If you have someone in your dining group that wants medium well to well done beef, you’re better off grilling them their own steak.

When it hits the “remove at” temp, pull it off, put it on a platter (and if two of them, stack them to “cuddle” the heat in them), cover with heavy duty foil then lay a folded heavy towel over them. All of that helps them retain heat and for the carryover cooking to do its magic.

Rest for at least 30 minutes.  While your meat is resting, either fire your pellet grill to its max, or preheat a gas grill to all burners on high or even light a hot charcoal fire. We like searing on the gas grill since the flavor is already in the meat and it’s easy to manage.

Sear the Tomahawk

Unwrap the steaks, retaining the accumulated juice in your pan, and put them on the grill.  Do NOT go away from the grill – you can go from “sear” to conflagration in seconds. We like to do our searing on our gas grill. We set the burners of our 3-burner gas grill on high to preheat and when ready to cook; we shut off the middle one to limit the chances of a flare up.

Ribeye’s have a LOT of fat on them and that fat can light off in seconds and ruin your steak. If your grill suddenly starts to smoke a lot, get that hood open and move the steaks away from the flareup. We keep a little squirt bottle of water handy to kill those flames. 

Turn the steaks about every 2 minutes until they have a nice even brown crust on them and beautiful grill marks. It usually takes 2 turns on each side – about 8 minutes total.

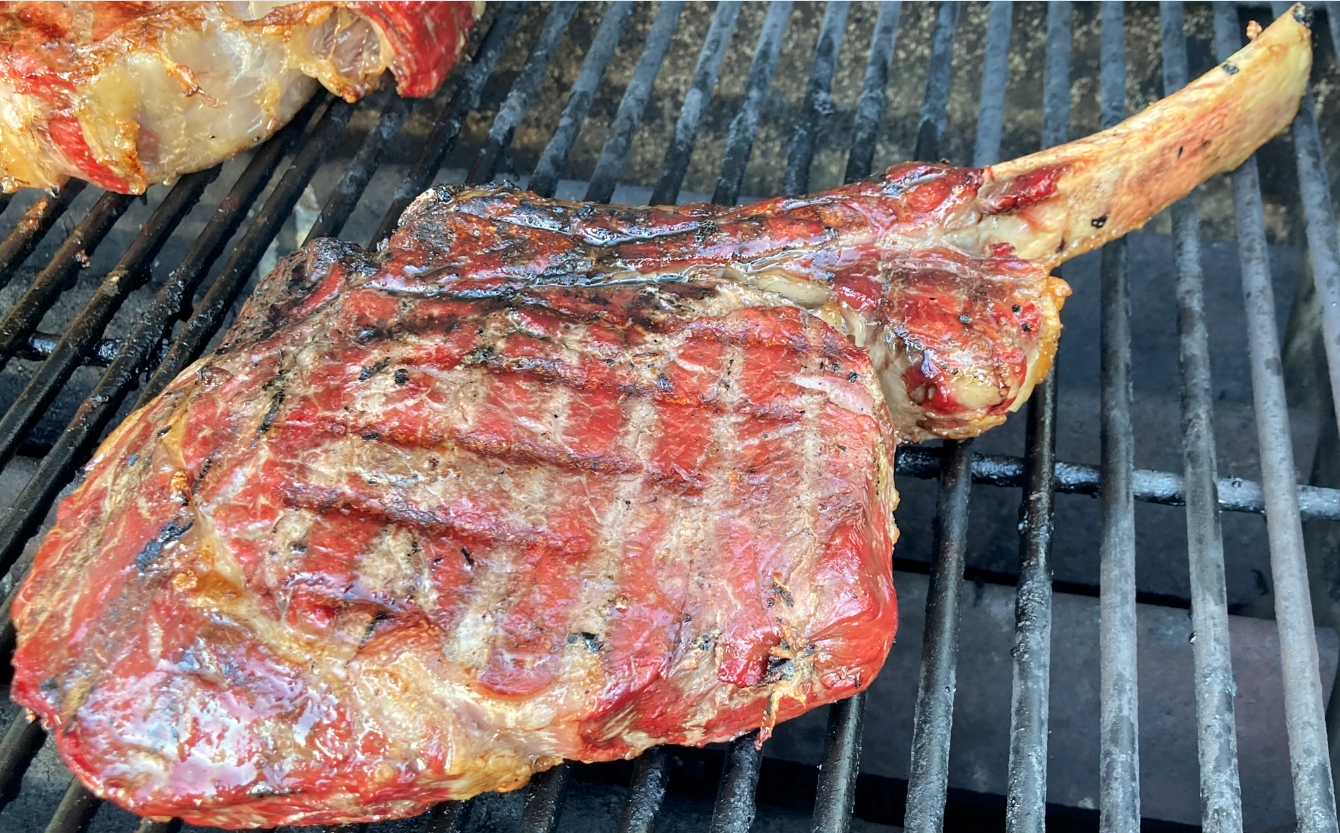
tomahawk steak on a grill with grill marks

(photo by Stew Campbell)

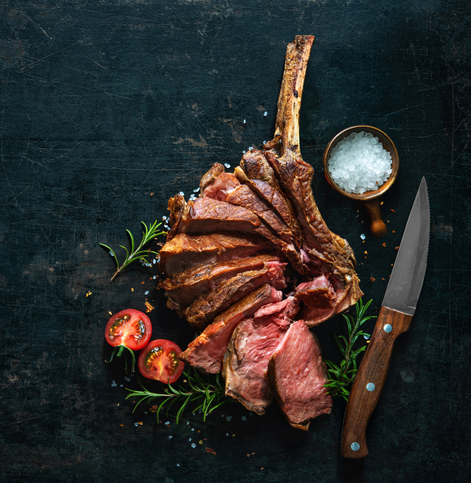
Move them back on your platter and then immediately carve the meat from the bone. Slice in ¼ thick slices across the grain, trimming out any big fat areas. Because the meat was already rested, you can slice and serve immediately hot off the grill.  Top on a serving platter with accumulated juices and serve!  It’s amazing!

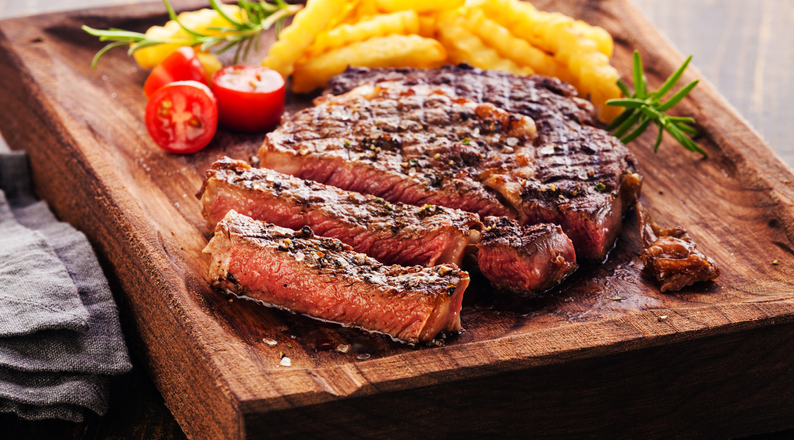
sliced tomahawk steak with fries and sliced tomatoes

The Tomahawk Meal

So, make a meal out of it!  Our recent Tomahawk meal, shared with a few friends on the patio included:

  • Two 3 ½ lb Tomahawks
  • Potato Galette (recipe by Southern Living Magazine)
  • Fresh corn on the cob – we like to prepare ours by simply loosening the husks and pouring about a tablespoon of water into the husks, then close them and grill them on a hot grill (great thing to do while the steaks rest) about 15-20 minutes until the outer husks are charred a bit
  • Creamed Spinach (recipe from The Berghoff Restaurant, Chicago IL)
  • Sauteed mushrooms (sliced mushrooms sauteed in butter with salt, pepper and thyme for seasoning)
  • A wonderful Cabernet Sauvignon
  • And for dessert – a trip to a local soft serve ice cream stand!

The Tomahawk steak is the ultimate “sharing” steak – and crowd pleaser! Make this recipe and show the Tomahawk that you’re the grill boss!

Until next time!

Pellet Grill Pizza

Pellet Grill Pizza

Let’s face it – there’s nothing better than fresh, hot pizza. There, we said it, change our minds! Oh, you agree!

Well then, let’s talk about making fresh, hot, wood-oven style pizza on your pellet grill fueled with Griller’s Gold Premium Hardwood pellets!

We’re going to break up this post into two parts – part 1 is simple. How to get a great wood-oven flavored pizza from your pellet grill using Griller’s Gold pellets for fuel.

This is easy! You can buy frozen pizzas, take and bake pizzas, etc., and just baking them in your pellet grill will add a kick of flavor to them that you won’t find in pizzas baked in your oven.

Part 2 however, is kicking it to the next level. Fresh homemade dough, fresh homemade sauce, and super fresh ingredients. All adding up to completely next-level pizza that will have your friends and neighbors begging you to make it over and over again. You’ll be a pizza rock star!


Part 1: Baking Pizza in a Pellet Grill

The scenario is you want pizza, it’s a gorgeous evening and you want to serve it hot off your pellet grill. Buzz out to your local grocery and buy either a fresh “take and bake” non-frozen pizza – most groceries have these including national chains like Walmart, Target and Aldi. OR you can also buy a frozen pizza, the brand being your choice.

Take & Bake Pizzas

It is as simple as this: most take and bake and frozen pizzas are designed to be cooked directly on your oven’s rack, aka the main grate on your pellet grill. Then cooked at a temperature that is easily attained by your grill – the most common being 425F. 

So simply preheat your pellet grill, using your favorite Griller’s Gold pellet choice – Competition Blend is a good choice here – to the temperature noted in your pizza’s instructions. Let’s assume 425F though.

Give it a good 20 minutes of preheat time to make sure it’s truly up to temp. Then just slide that pizza onto the grate, close the lid, and set a timer for the recommended time on the package. To remove it, it helps to have a pizza peel (large spatula like thing for getting pizzas out of an oven) or a rimless baking sheet.  Worst case scenario, use your barbecue tongs to grab it and slide it onto a tray for serving. Your pizza will have that “kissed by smoke” flavor that a good wood-oven pizza has and you’ll be very happy!

Notes for Great Grilled Pizza: 

First, for great pizza results, oven or grill, buy yourself a pizza stone. A pizza stone is a large piece of stone-like material that absorbs and concentrates heat and absorbs moisture. A pizza baked on a stone will have a nice crunch to the bottom crust and a great flavor that you just can’t get otherwise. These are pretty inexpensive on Amazon – here’s an example:  https://a.co/d/g6Aawyi

Second, if you want a smokier flavor for your pizza, use a smoke tube filled with Griller’s Gold pellets. We’ve covered those numerous times before – check out our December 2022 gift guide for examples.

Which leads us to part 2 and why you’re really here – to make amazing craft pizza on your backyard wood burning pizza oven, aka your pellet grill burning Griller’s Gold pellets!

Part 2: Making Craft Pizza

Craft pizza is made with delicious homemade crust, tasty tomato sauce that’s super easy to make, fresh cheeses and lots of love! All baked on your pellet grill with Griller’s Gold fuel, giving it that “kissed by wood smoke” flavor.  

First of all there are TONS and we mean TONS of resources online for making great pizzas. One of our faves to follow on YouTube is Vito Iacopelli – he is an Italian-born chef making incredible artisan pizzas. His techniques and recipes are a bit complicated, so in the interest of making this easy for you we have our own versions.  But check his channel out here: https://www.youtube.com/@vitoiacopelli

Here’s an easy-to-follow recipe for making great pizza dough. The key/trick to outstanding pizza dough is to let it ferment overnight in the refrigerator. Letting dough rise overnight in the fridge gives it a flavor and texture that just doesn’t come out in a short process. So, making great homemade pizza does take a touch of planning. 

Special gear – here’s where a pizza stone and a proper pizza peel are a must. This really won’t work without those two pieces of equipment. Also, to get the pizza to slide off the peel and onto the stone, the peel needs to be floured.

We have found that the best for doing this is not regular flour but semolina flour. Its granular texture makes it work like little ball bearings for sliding the pizza off the peel and onto the stone.

Making the Pizza Dough

Ingredients: 
  • 1 pound or 453 grams of flour (or if using cups, about 3 ½ cups)
  • 1 ⅓ cups of water at 100F temperature plus 2 tablespoons of water at 100F (or if by weight, 320 grams of water plus 10 grams of water)
  • 1 ¾ tsp kosher or sea salt.  If using iodized table salt, cut to 1 ¼ tsp
  • 1 packet instant yeast or 2 tsp if using bulk yeast
  • ½ tsp sugar
Pizza Dough Steps Day 1:
  1. The night before you want pizza, measure out the flour into a large mixing bowl and stir the salt into it.
  2. Measure out the 1 ⅓ cups of water, and put the 2 tablespoons of water in a separate small dish.
  3. Add the yeast and sugar to the 2 tablespoons of water and stir well.
  4. Let rest 5 minutes (this activates the yeast) then stir the yeast mixture into the larger container of water and mix that well with the flour to form the dough. 
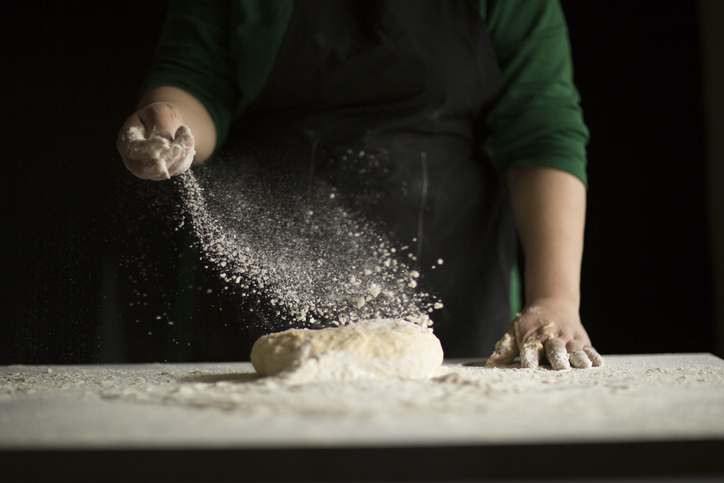
  5. Let the dough sit in your mixing bowl 10 minutes then stir again, and turn out onto a surface sprinkled generously with flour. 
  6. Fold the flour in half, pressing flat, turn ¼ turn and repeat.
  7. Repeat that 15 more times – if the dough is sticking to your hands, flour them.
  8. Then put the dough back in your mixing bowl and cover with plastic wrap. 
  9. Let rise 2 hours.
  10. Then wet your hand and reach into the bowl, grab the side of the dough and stretch it up and fold it over the dough. Do this 4 or 5 more times, turning the bowl ¼ turn each time.
  11. Let rise 1 more hour covered, then repeat the stretch and fold, then cover again with plastic wrap and put in the fridge until tomorrow.
Pizza Dough Steps Day 2:
  1. 2 hours before you’re ready to make pizza, turn your dough gently out onto a floured surface and shape it into a rough oval.
  2. Using a scraper or a sharp knife divide the dough into two more-or-less equal portions. 
  3. On each, gather the edges of the dough up to the top center forming a ball.
  4. Set the ball on a floured part of your surface and repeat with the other, then let the dough balls rest for at least 20 minutes, covered lightly with a sheet of plastic wrap.
To Form a Pizza Crust:

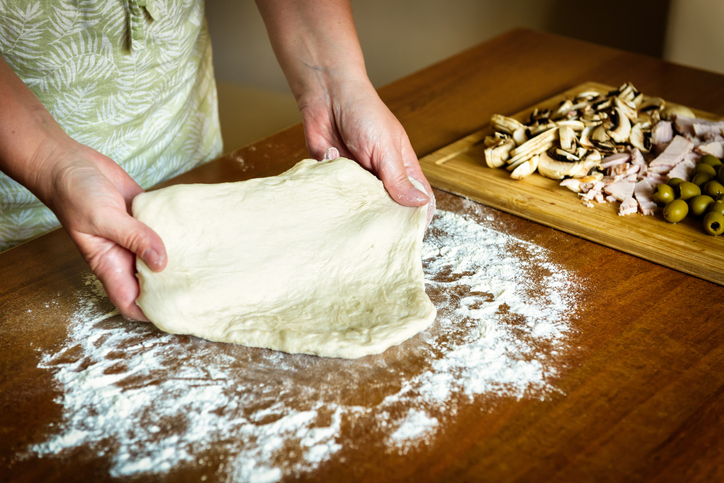
Put a dough ball in the middle of your floured work surface and using your finger tips, press down on it to flatten it – repeat all over – the dough will have little craters all over it.

Then pick up the flattened disc, and holding it about 1” from the edge, start shuffling it in a circle like you’re turning a steering wheel, keeping the bottom edge in contact with your surface.

After a few times around, lay the dough back on your floured surface, and using your hands, press any thickness out of the center of the dough, trying to flatten it to an even round of between 8 and 10 inches in diameter, leaving a thicker edge section. You can also lay it over the back of your fists and use them to stretch it.

Generously sprinkle flour or semolina over your pizza peel.  Brush the top surface of your pizza crust with olive oil then gently pick it up and lay it on your floured pizza peel. Now you’re ready to build your pizza.


To bake your pizza, fire your pellet grill up to it’s hottest temperature using Griller’s Gold pellets – ours goes to 500F. Give it at least 30 minutes to preheat.  Make sure your pizza stone is in there for the entire preheat. 

To “launch” a pizza into the oven (look up YouTube videos on this!), first give your peel a “shake” back and forth to make sure the pizza will slide – this is why flouring the peel is so important.  If it won’t slide, gently lift sections of the dough with a wide spatula and toss flour under it until you can slide it.

Then, open your grill, set the end of the peel about an inch from the far edge of the stone and holding the peel at about a 10 degree angle, give it a few back and forth shakes to get it sliding down the peel. As soon as the pizza touches the stone, gently start pulling the peel out back towards you.  The pizza will slide off the peel and onto the stone.

This does take practice!

Building Pizzas

Fresh Tomato Sauce

Ingredients:

  • 1 22 ounce can whole roma tomatoes, ideally imported San Marzano tomatoes from Italy
  • 2T extra virgin olive oil
  • ¾ tsp salt

    Dump the can of tomatoes into a mixing bowl, then using your hand, squeeze each tomato, breaking them up into chunks. If you don’t like chunky tomatoes, run the canned tomatoes through a blender or food processor to puree. But chunky is better!

Pizza Recipe Ideas

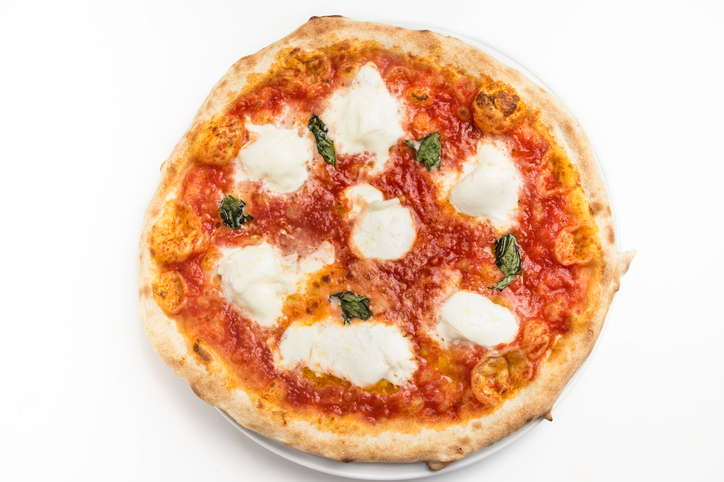
Margarita Pizza:

For the freshest, most authentic tasting Italian pizza, make a Margarita Pizza. For this, use fresh mozzarella (this is the stuff in large balls packed in liquid) sliced about ⅛” thick.

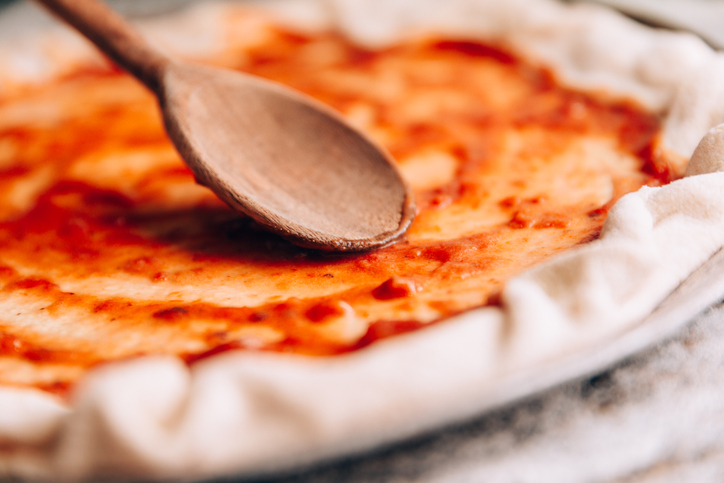
Spoon the sauce over your crust – you don’t want a LOT of sauce – be gentle with it. Then scatter the mozzarella slices over the sauce and finally, tear up some fresh basil leaves into big pieces and scatter over the top of the pizza. 

Bake according to the instructions above until the crust is golden and the cheese gets little dots of browning on it, about 12-14 minutes.

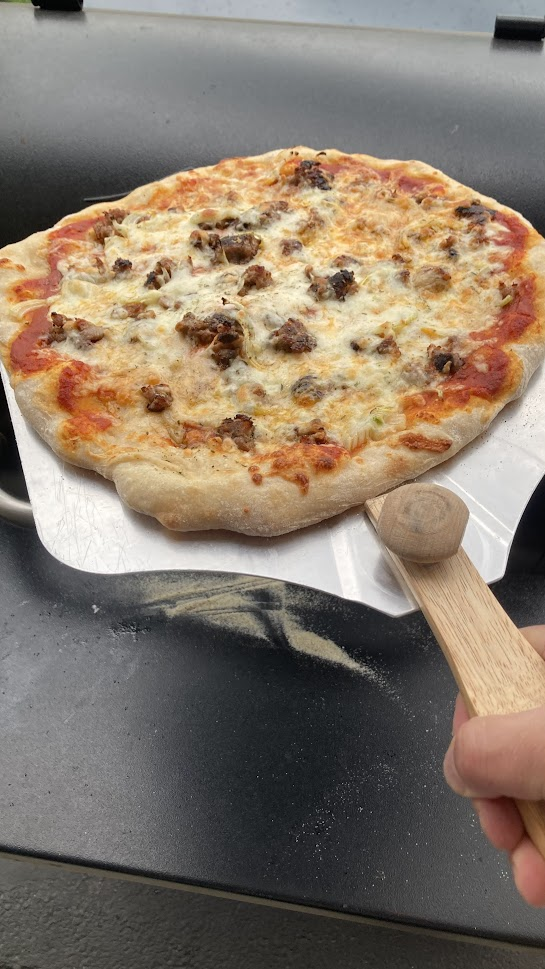
Traditional “Meat Lover” pizza: 

Brown crumbled Italian sausage in a hot pan then drain the grease.  After forming your crust and brushing with olive oil, spread sauce over the pizza in a thin layer. Then scatter the Italian sausage over it. 

Using either slices of fresh mozzarella or shredded commercial mozzarella cheese, add a layer of cheese to the pizza.  If you like extra meat,, scatter slices of pepperoni over the top of the cheese.  Bake until the pepperoni curls, the cheese is dotted with brown spots and the crust is golden – about 12-14 minutes.

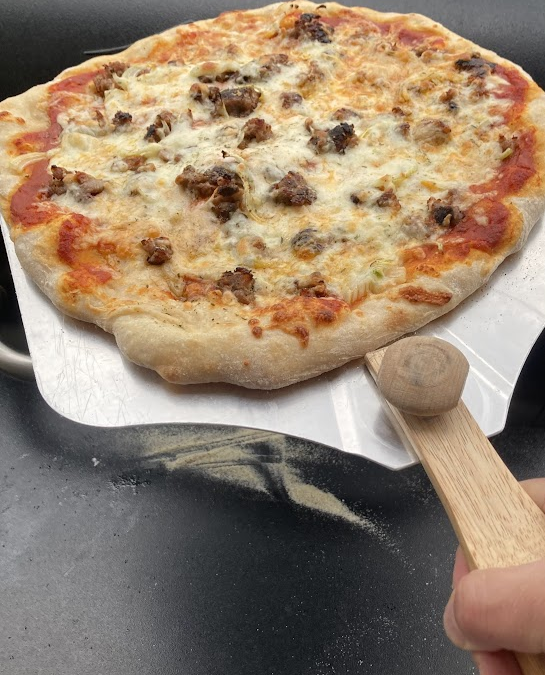
a sausage pizza on a pizza wooden handle being put on a plate

(Stew Campbell)

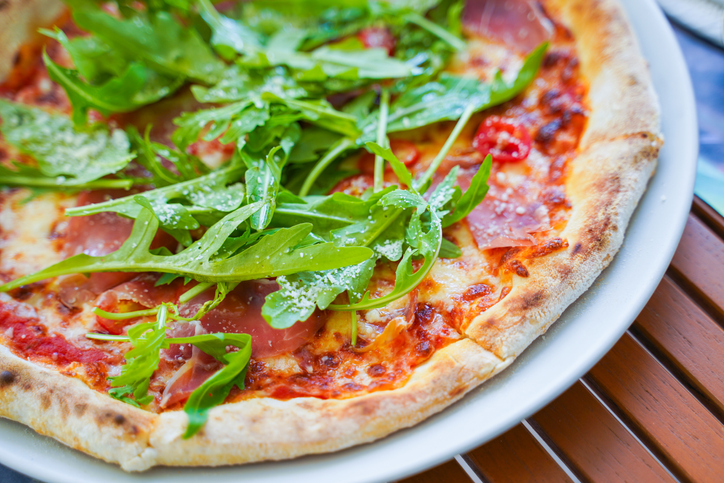
Salad Slice pizza:

The salad slice is a NYC Little Italy thing at lunch time. I guess having a crisp arugula salad on top of your pizza makes it seem healthier! 

For the pizza, build a classic Margarita pizza above, omitting the basil leaves. For the salad, make a quick lemon vinaigrette by whisking together the juice of a fresh lemon with ½ cup of extra virgin olive oil and one clove of garlic, smashed or pressed.

Add salt and pepper to taste, then stir in 1T of grated parmesan cheese.  The salad is just fresh arugula tossed with the dressing – this dressing is “a little goes a long way”. When the pizza is fresh from the oven, top with the dressed arugula salad. Then cut it into wedges, garnish with shaved parmesan and serve.

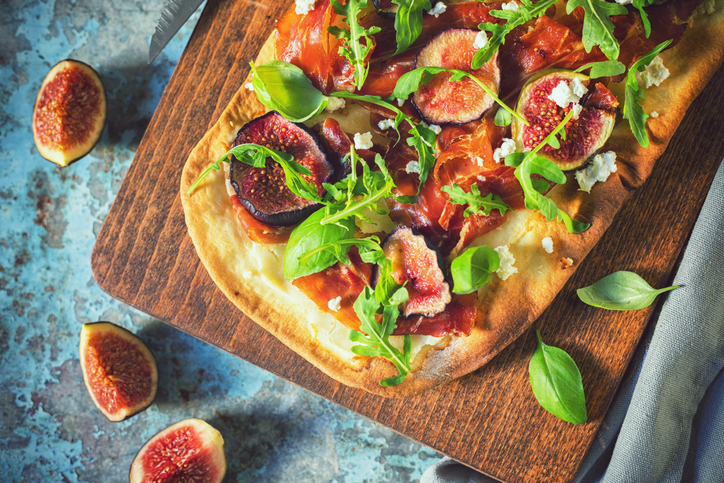
Fig/Goat Cheese/Prosciutto Pizza:

Now this one is extra tasty.  Make your crust but don’t brush with olive oil.

Take some fig jam and stir it with a bit of water just to make it more spreadable. Then spread it out over the top of your pizza crust. Lay slices of prosciutto over the fig jam, then dot generously with chunks of goat cheese. Garnish with slices of figs. 

Bake as usual. After it comes out, garnish with torn basil leaves and a drizzle of balsamic vinegar glaze.  AMAZINGLY GOOD!

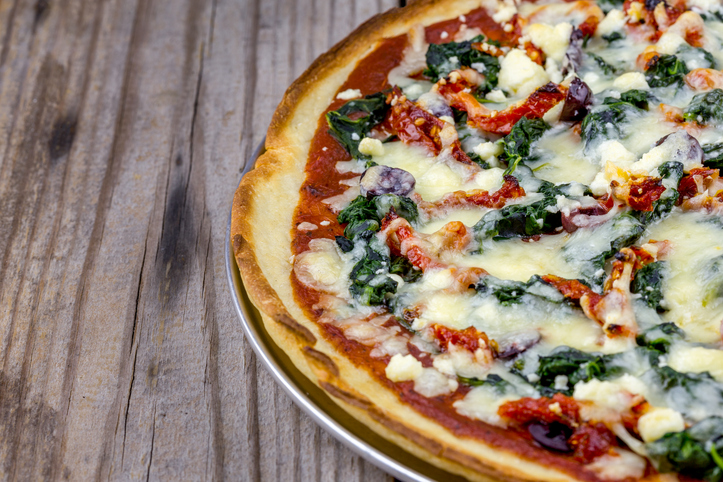
Spinach/Blue Cheese/Pine Nut/Sun Dried Tomato with Red Onion:

Rough dice a half of a red onion.

Prepare your crust and brush well with olive oil.

Scatter the red onion over the crust, then blue cheese crumbles, slices or strips of sun dried tomatoes (buy the oil packed for best results) and finally, pine nuts or chopped walnuts.  Bake until the cheese melts and browns and the crust is golden.

Scatter some fresh basil strips over the pizza for a nice garnish after baking. Super appetizer pizza!

And that’s it! You’re a craft pizza expert!

Until next time!!

How to Smoke a Thanksgiving Turkey on a Pellet Grill

How to Smoke a Thanksgiving Turkey on a Pellet Grill

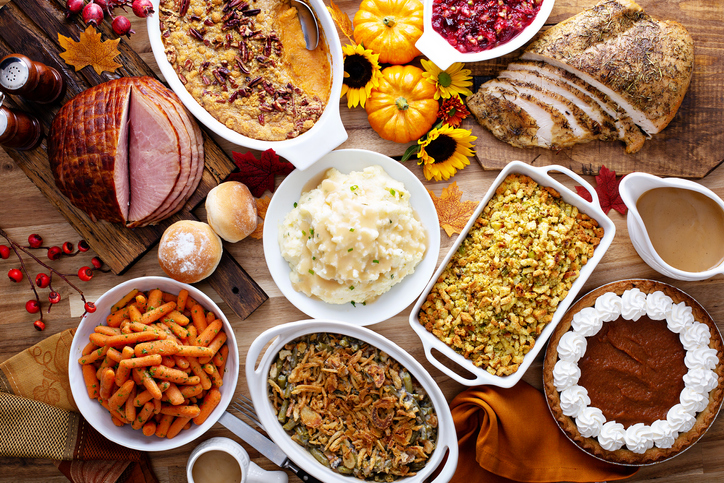
Thanksgiving is all about good food, family traditions, and finding enough room in the oven for everything on the menu.

That’s where your pellet grill comes in.

A pellet grill isn’t just for brisket, ribs, and weekend barbecue. It’s also a wood-fired oven that can handle your Thanksgiving turkey while freeing up kitchen space for all those sides everyone looks forward to.

And with Griller’s Gold pellets in the hopper, you get something a conventional oven can’t deliver: real hardwood smoke that adds another layer of flavor to the centerpiece of your Thanksgiving feast.

Whether this is your first time smoking a turkey or you’ve been doing it for years, here’s how to bring some wood-fired flavor to the holiday table.

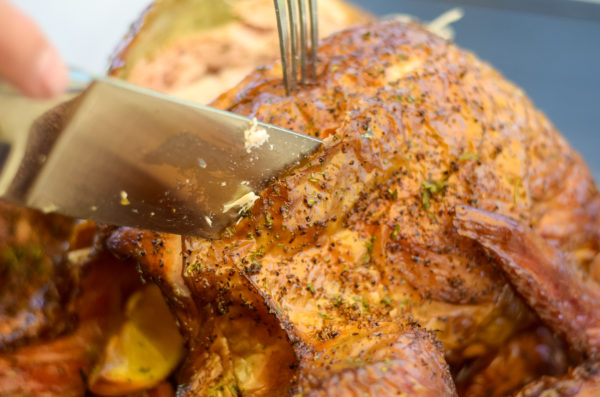
Up close shot of Thanksgiving turkey being carved

A Thanksgiving Turkey Worth Talking About

You don’t need a complicated recipe to make a great turkey on a pellet grill.

At its simplest, you can season a thawed turkey with salt, pepper, and your favorite herbs, set your grill to 350°F, and roast until the bird reaches a safe internal temperature of 165°F.

But Thanksgiving deserves a little extra attention.

Our preferred approach starts with a lower-temperature smoke to introduce hardwood flavor, followed by a hotter roast to finish cooking the turkey and brown the skin.

The result is a beautifully roasted bird with savory, wood-fired flavor that complements rather than overwhelms the traditional Thanksgiving meal.

Choosing and Preparing Your Turkey

Start with a fresh or completely thawed turkey.

If you’re working with a frozen bird, plan ahead. Refrigerator thawing takes approximately 24 hours for every four to five pounds, meaning a 15-pound turkey will generally need three to four days.

Before seasoning, remove the packaging, neck, and giblets. Pat the turkey dry with paper towels.

Take a look at the label, too. Many grocery-store turkeys are already treated with a salt solution. If yours is, you can skip the additional brining and go easy on the salt.

For a minimally processed turkey without added solution, an overnight dry brine can help season the meat and retain moisture.

Either way, keep the turkey refrigerated until you’re ready to put it on the grill.

Seasoning Your Thanksgiving Bird

Turkey works wonderfully with traditional holiday herbs.

We like a blend of parsley, sage, rosemary, thyme, oregano, and a little black pepper. If you have a favorite poultry seasoning, that works just as well.

One excellent option is barbecue expert Meathead Goldwyn’s Simon and Garfunkel Rub, which brings together many of the herbs associated with a classic Thanksgiving dinner.

Lightly coat the turkey’s skin with cooking oil, then apply your seasoning evenly over the bird. Add salt according to whether the turkey has already been brined.

For roasting, place the bird breast-side up on a rack in a shallow roasting pan.

You can add large pieces of onion, carrot, and celery to the bottom of the pan. They’ll collect some of the flavorful drippings and make an excellent base for gravy.

We recommend cooking the stuffing separately rather than inside the turkey. That makes it easier to cook both dishes properly without drying out the breast meat.

Now we’re ready for the grill.

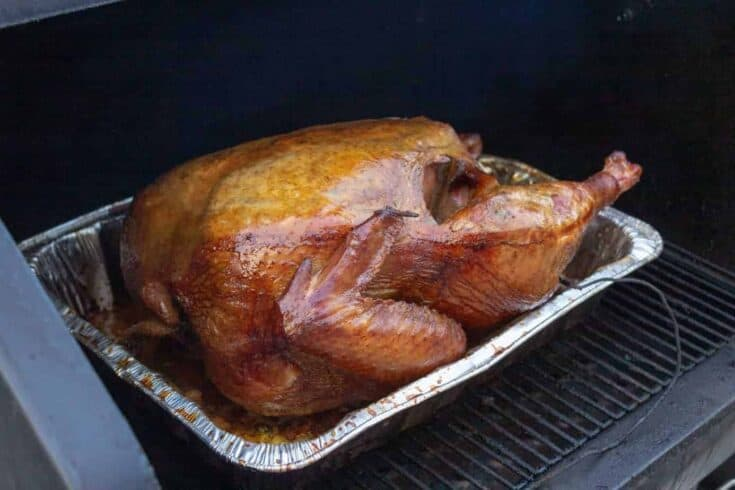
Thanksgiving turkey in the roasting pan on the grill

Fire Up the Pellet Grill

For Thanksgiving turkey, our first choice is Griller’s Gold Competition Blend.

Its combination of maple, hickory, and cherry delivers balanced hardwood smoke with a touch of sweetness. It’s enough to give the turkey some character without competing with the herbs, gravy, or other dishes on the table.

If you prefer a milder smoke profile, Griller’s Gold Fruitwood Blend is another excellent option, combining maple, cherry, and apple.

Step 1: Start With Smoke

Preheat your pellet grill to 225°F, following the manufacturer’s instructions.

Once the grill has reached a stable temperature, place the roasting pan and turkey on the grates. Insert an oven-safe meat probe into the thickest part of the breast, avoiding bone.

Close the lid and let the turkey smoke for approximately 60–90 minutes.

This initial stage gives the skin and meat time to pick up the natural hardwood flavor from your pellets.

And yes, this is a great opportunity to crack open a cold one and watch some Thanksgiving football.

Step 2: Turn Up the Heat

After the initial smoke, increase the grill temperature to 350°F.

Continue roasting until the turkey is fully cooked and the skin has developed a beautiful golden-brown color.

If your grill has noticeable hot spots, rotate the roasting pan once during cooking to promote even browning.

Cooking time will depend on the turkey’s size, starting temperature, weather, and your particular grill. Allow several hours for the full process, but let your thermometer—not the clock—determine when dinner is ready.

Step 3: Check the Temperature

This is the most important step. Your turkey is ready when a food thermometer reads at least 165°F in all three locations:

  • The thickest part of the breast
  • The innermost part of the thigh
  • The innermost part of the wing

Avoid touching bone with the thermometer, which can give you an inaccurate reading.

Checking multiple locations matters because different parts of a whole turkey don’t always cook at exactly the same rate.

Don’t rely on skin color or a pop-up timer alone.

Step 4: Let It Rest

Once the turkey is fully cooked, transfer it to a clean platter or cutting board.

Tent it loosely with aluminum foil and let it rest for approximately 20–30 minutes before carving.

This gives the juices time to settle and makes carving easier.

It also gives you a chance to finish the gravy, warm up the sides, and get everyone to the table.

Then carve, serve, and enjoy the wood-fired flavor courtesy of Griller’s Gold.

Thanksgiving Side dishes

Thanksgiving Sides on the Pellet Grill

One of the biggest advantages of a pellet grill is its versatility. Once the turkey comes off, the grill can keep working while you finish the rest of the meal.

Here are a few of our favorite ways to put that extra cooking space to use.

Smoky Turkey Gravy

The juices collected beneath the turkey, along with the roasted onions, carrots, and celery, provide a flavorful starting point for homemade gravy.

Carefully pour the drippings into a saucepan or gravy separator, removing excess fat as desired.

Add turkey or chicken stock and bring the mixture to a full boil. Strain out the vegetables, then thicken the gravy using a roux or cornstarch slurry.

Season to taste.

That little bit of hardwood smoke from the turkey drippings adds something special to a Thanksgiving classic.

Wood-Fired Stuffing or Dressing

Stuffing doesn’t have to come from inside the turkey to be delicious.

Prepare your favorite recipe in a baking dish and cook it separately, either in your kitchen oven or on the pellet grill.

At approximately 350°F, a prepared casserole can develop a golden top and pick up some subtle wood-fired flavor.

Cooking time depends on the recipe and thickness of the dish. Make sure the center reaches 165°F before serving.

For a traditional combination, try sausage, celery, onions, sage, and toasted bread.

Roasted Fall Vegetables

Brussels sprouts, carrots, sweet potatoes, squash, and onions are all excellent candidates for the pellet grill.

Toss them with olive oil, salt, pepper, and your favorite herbs, then roast at approximately 375–400°F until tender and lightly browned.

The higher heat brings out their natural sweetness while Griller’s Gold pellets add a subtle wood-fired finish.

Wood-Fired Desserts

There’s no reason to stop using the pellet grill once the main course is finished.

Apple crisp, peach cobbler, and other baked fruit desserts work wonderfully in a pellet grill.

Use a grill-safe baking dish and follow your recipe’s recommended baking temperature and doneness cues, allowing for differences between grills and conventional ovens.

A little hardwood flavor pairs especially well with cinnamon, apples, brown sugar, and buttery crumble toppings.

And with the kitchen oven already working overtime on Thanksgiving, that extra cooking space comes in handy.

Make Thanksgiving a Little More Memorable

Every family has its Thanksgiving traditions.

Maybe it’s the same stuffing recipe that’s been passed down for generations. Maybe it’s watching football while everyone makes their way into the kitchen. Or maybe it’s sneaking the first piece of turkey skin before the bird reaches the table.

Smoking your turkey doesn’t mean changing those traditions. It’s simply another way to make the meal your own.

With a pellet grill, a little patience, and Griller’s Gold, you can put a flavorful twist on the centerpiece of Thanksgiving dinner.

And who knows? That smoked turkey might become a tradition of its own right alongside rooting against the Cowboys on Thanksgiving.

Real Hardwood. Real Smoke. All Year Long.

Find Griller’s Gold at Menards, Fleet Farm, and other participating retailers.
Find Griller’s Gold Near You

Happy Thanksgiving from Griller’s Gold!

The Ultimate Tailgate: Wood-Fired Flavor for Gameday

The Ultimate Tailgate: Wood-Fired Flavor for Gameday

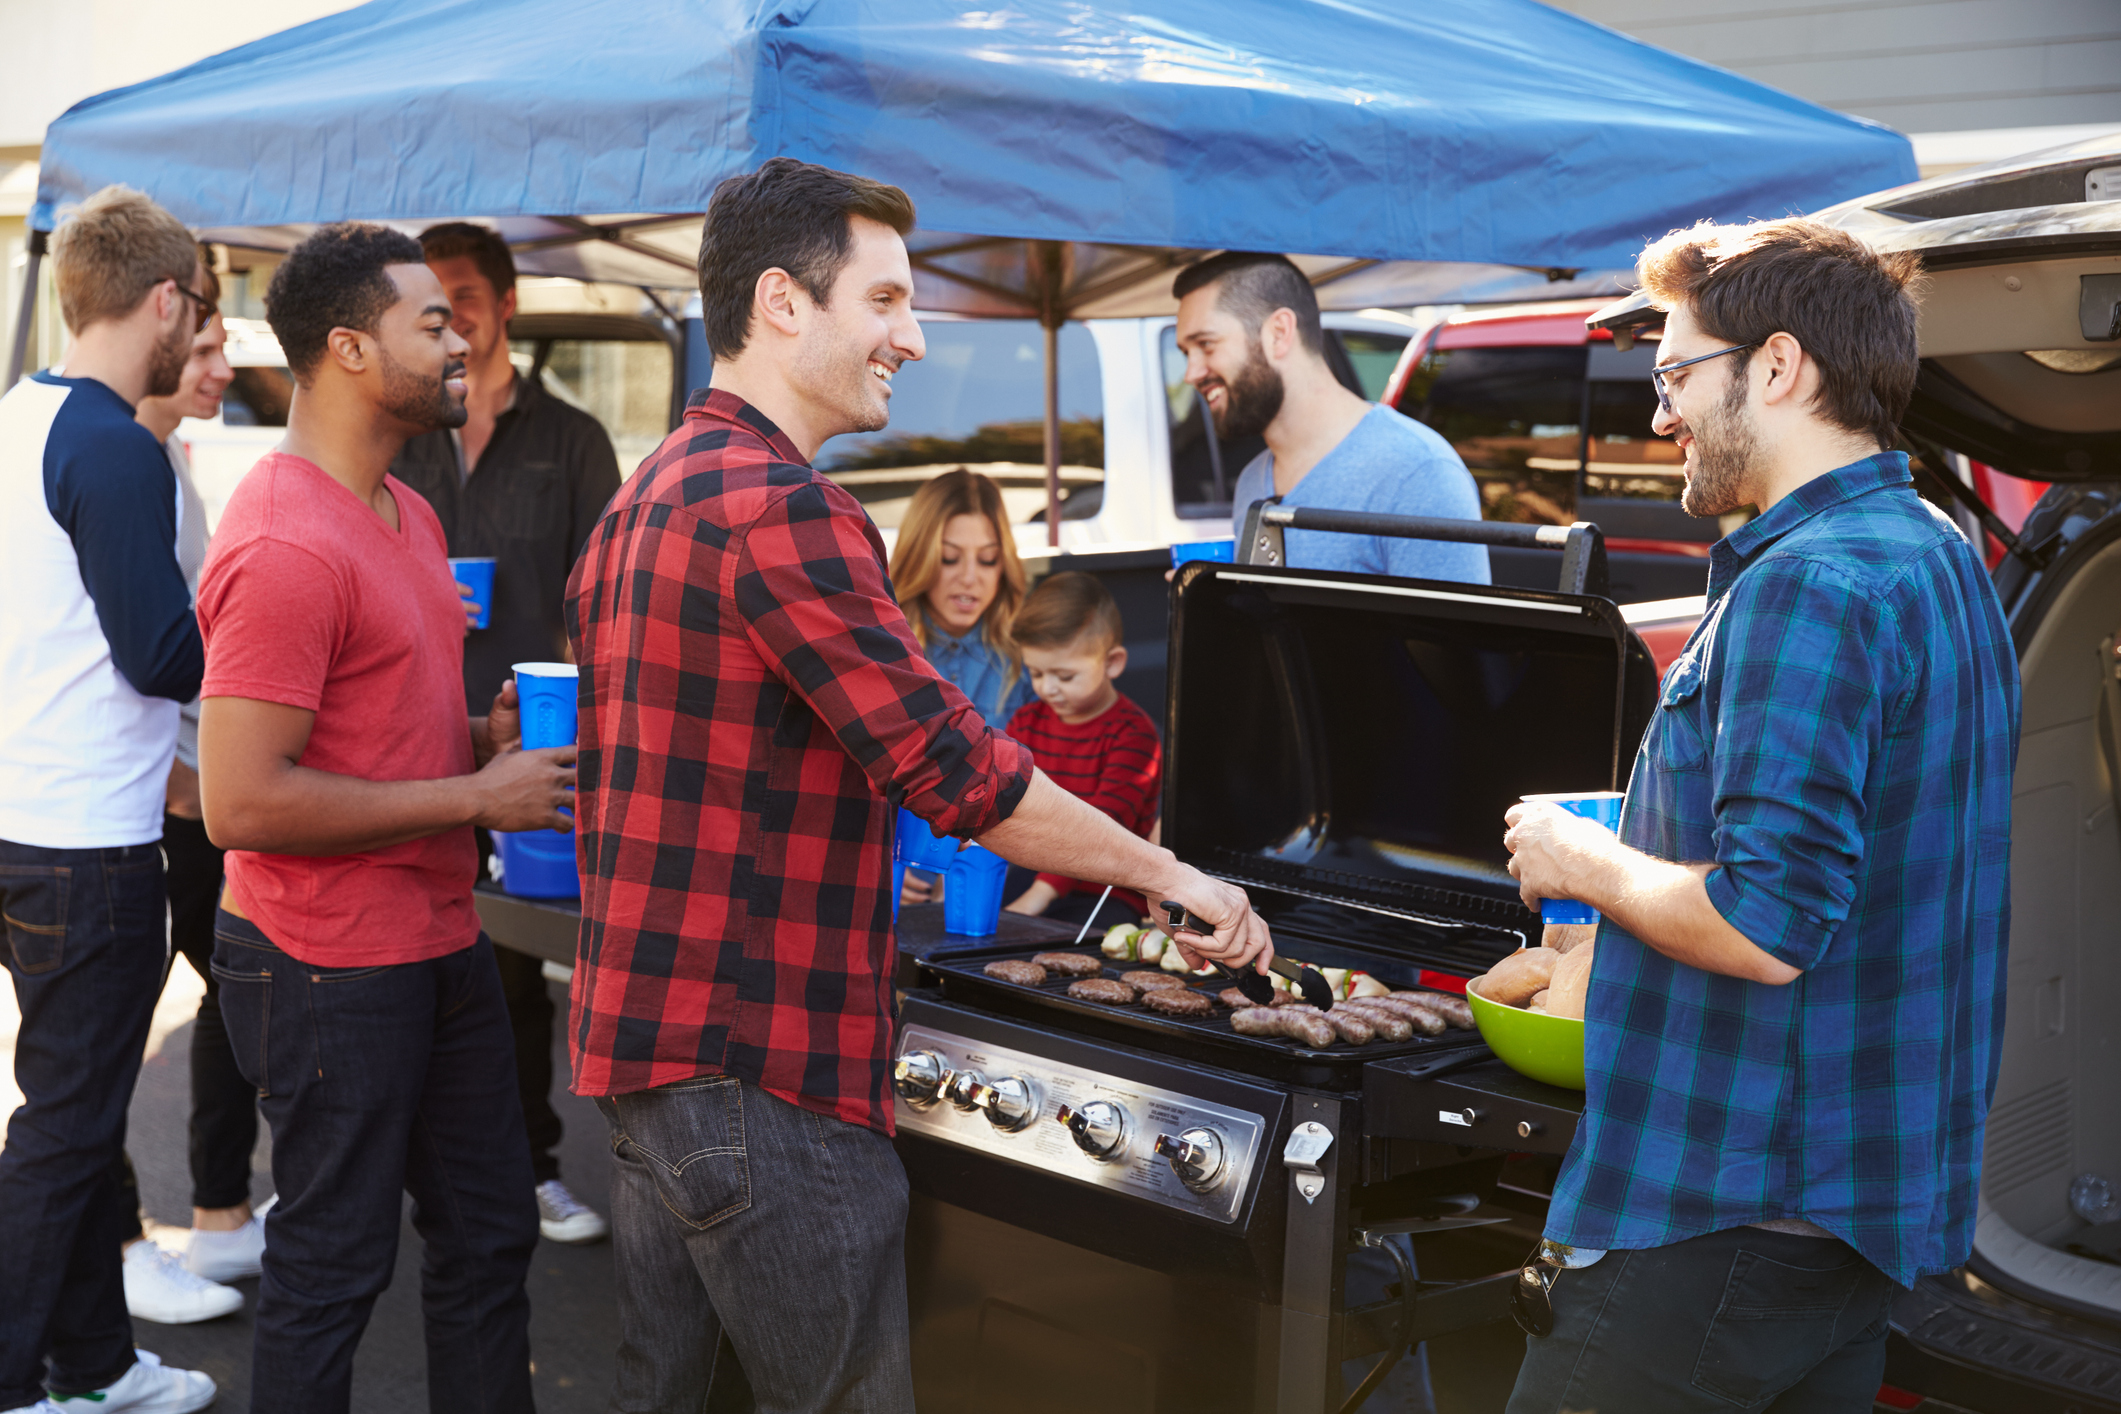
Fall weekends in the Midwest mean cooler weather, team colors, parking lots full of fans, and the unmistakable smell of something cooking on the grill.

Burgers and brats are tailgate classics for a reason. But if you’re looking to bring something a little different to the next game, your pellet grill can help you build a spread worth talking about.

The secret? Do the heavy lifting at home with Griller’s Gold, then spend less time cooking and more time enjoying game day.

From smoky appetizers to impressive main courses, here are six ideas to take your tailgate beyond the basics.

Start with a Game Plan 

The best tailgates don’t have to be complicated. A little preparation makes all the difference.

Choose two or three appetizers, one main dish, and a few easy sides. Prepare what you can the day before, pack your equipment, and make sure you’ve got enough food for a crowd.

If you’re cooking ahead, fully cook everything to a safe internal temperature, cool it promptly, and transport it cold at 40°F or below. Reheat prepared leftovers to 165°F before serving. Never partially cook meat at home with plans to finish it at the stadium.

A portable pellet grill is great if you’ve got one. Otherwise, asmall gas or charcoal grill can handle reheating. Use indirect heat when possible to avoid burning the outside before the center is hot.

And don’t forget a meat thermometer. It’s one of the most useful tools you’ll bring.

Appetizers Worth Showing Up Early For

Tailgate Wings

Few foods belong at a football game more than chicken wings.

Season your wings with your favorite BBQ rub, then cook them on your pellet grill at around 400–425°F until the skin is crisp and the meat reaches at least 165°F internally.

Griller’s Gold Pitmaster Blend brings together hickory, cherry, and maple for a balanced smoke that works beautifully with chicken.

For a make-ahead batch, cool and refrigerate the fully cooked wings promptly. Keep them chilled during transport and reheat to 165°F at the tailgate.

Wait until they’re hot before tossing them in your favorite sauce.

Buffalo, garlic parmesan, sweet heat, or classic BBQ: any flavor wins on game day.

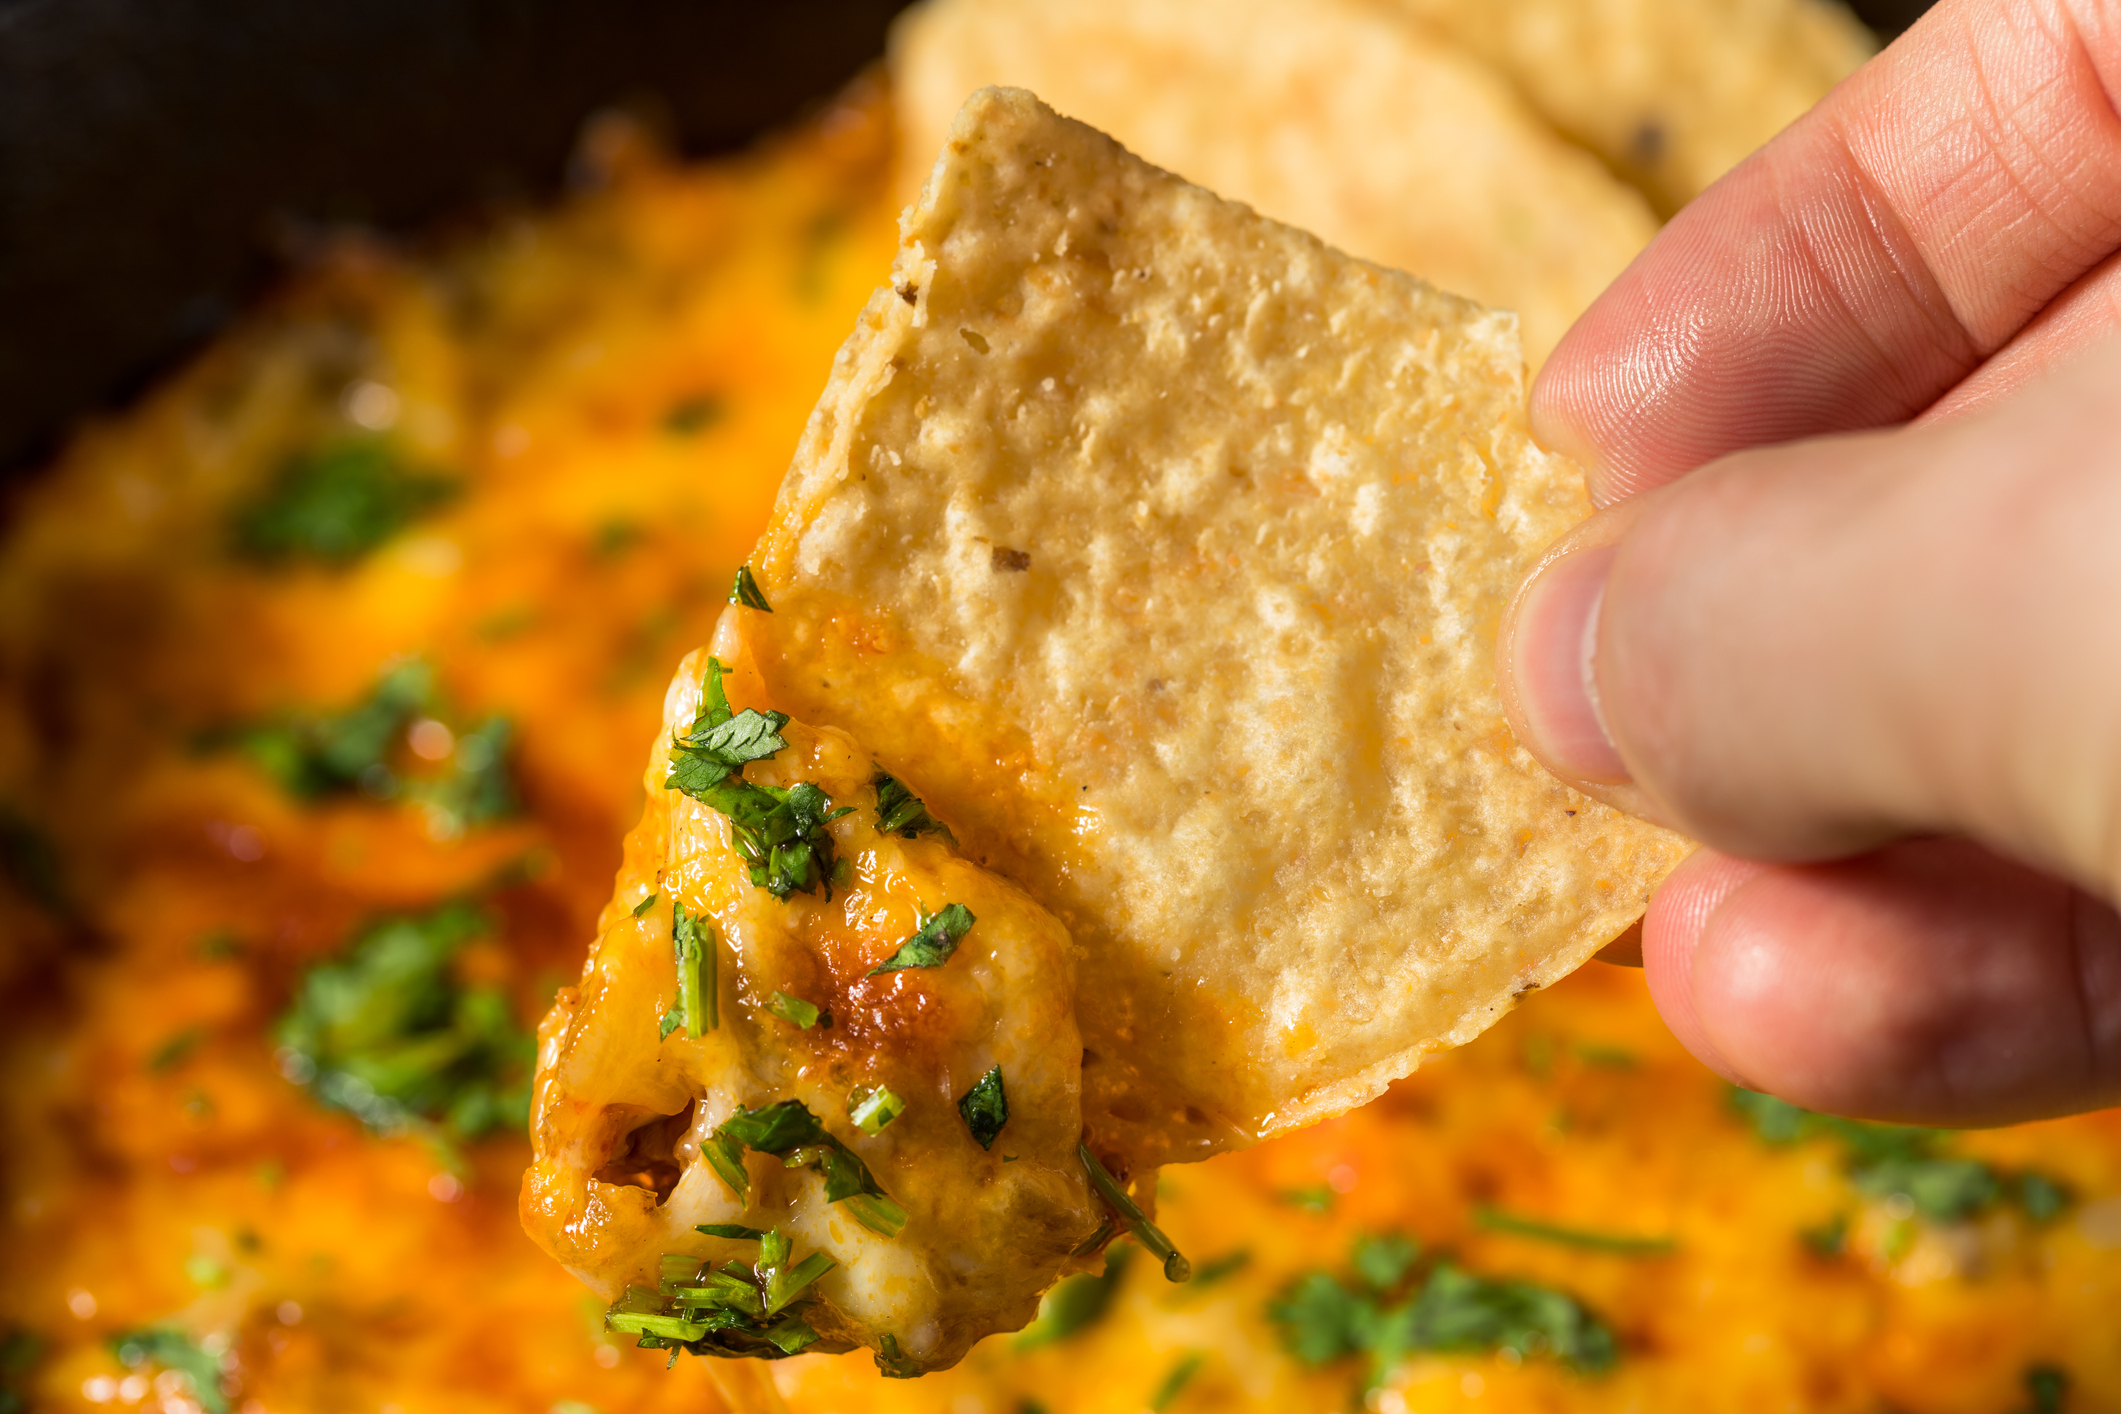
Smoked Queso 

Chips and dip are fine but smoked queso is better.

Start with a grill-safe skillet and combine your favorite melting cheeses, diced tomatoes and green chiles, jalapeños, and cooked chorizo or ground beef.

Place it on your pellet grill at approximately 225–250°F, stirring occasionally until everything is melted and the flavors come together.

For this one, Griller’s Gold Competition Blend is an excellent choice. Maple, hickory, and cherry add savory wood-fired flavor without overpowering the cheese.

If making it ahead, refrigerate promptly in shallow containers. Reheat thoroughly to 165°F at the tailgate, stirring frequently to keep the cheese smooth.

Serve with sturdy tortilla chips.

You’ll want to make a second batch. 

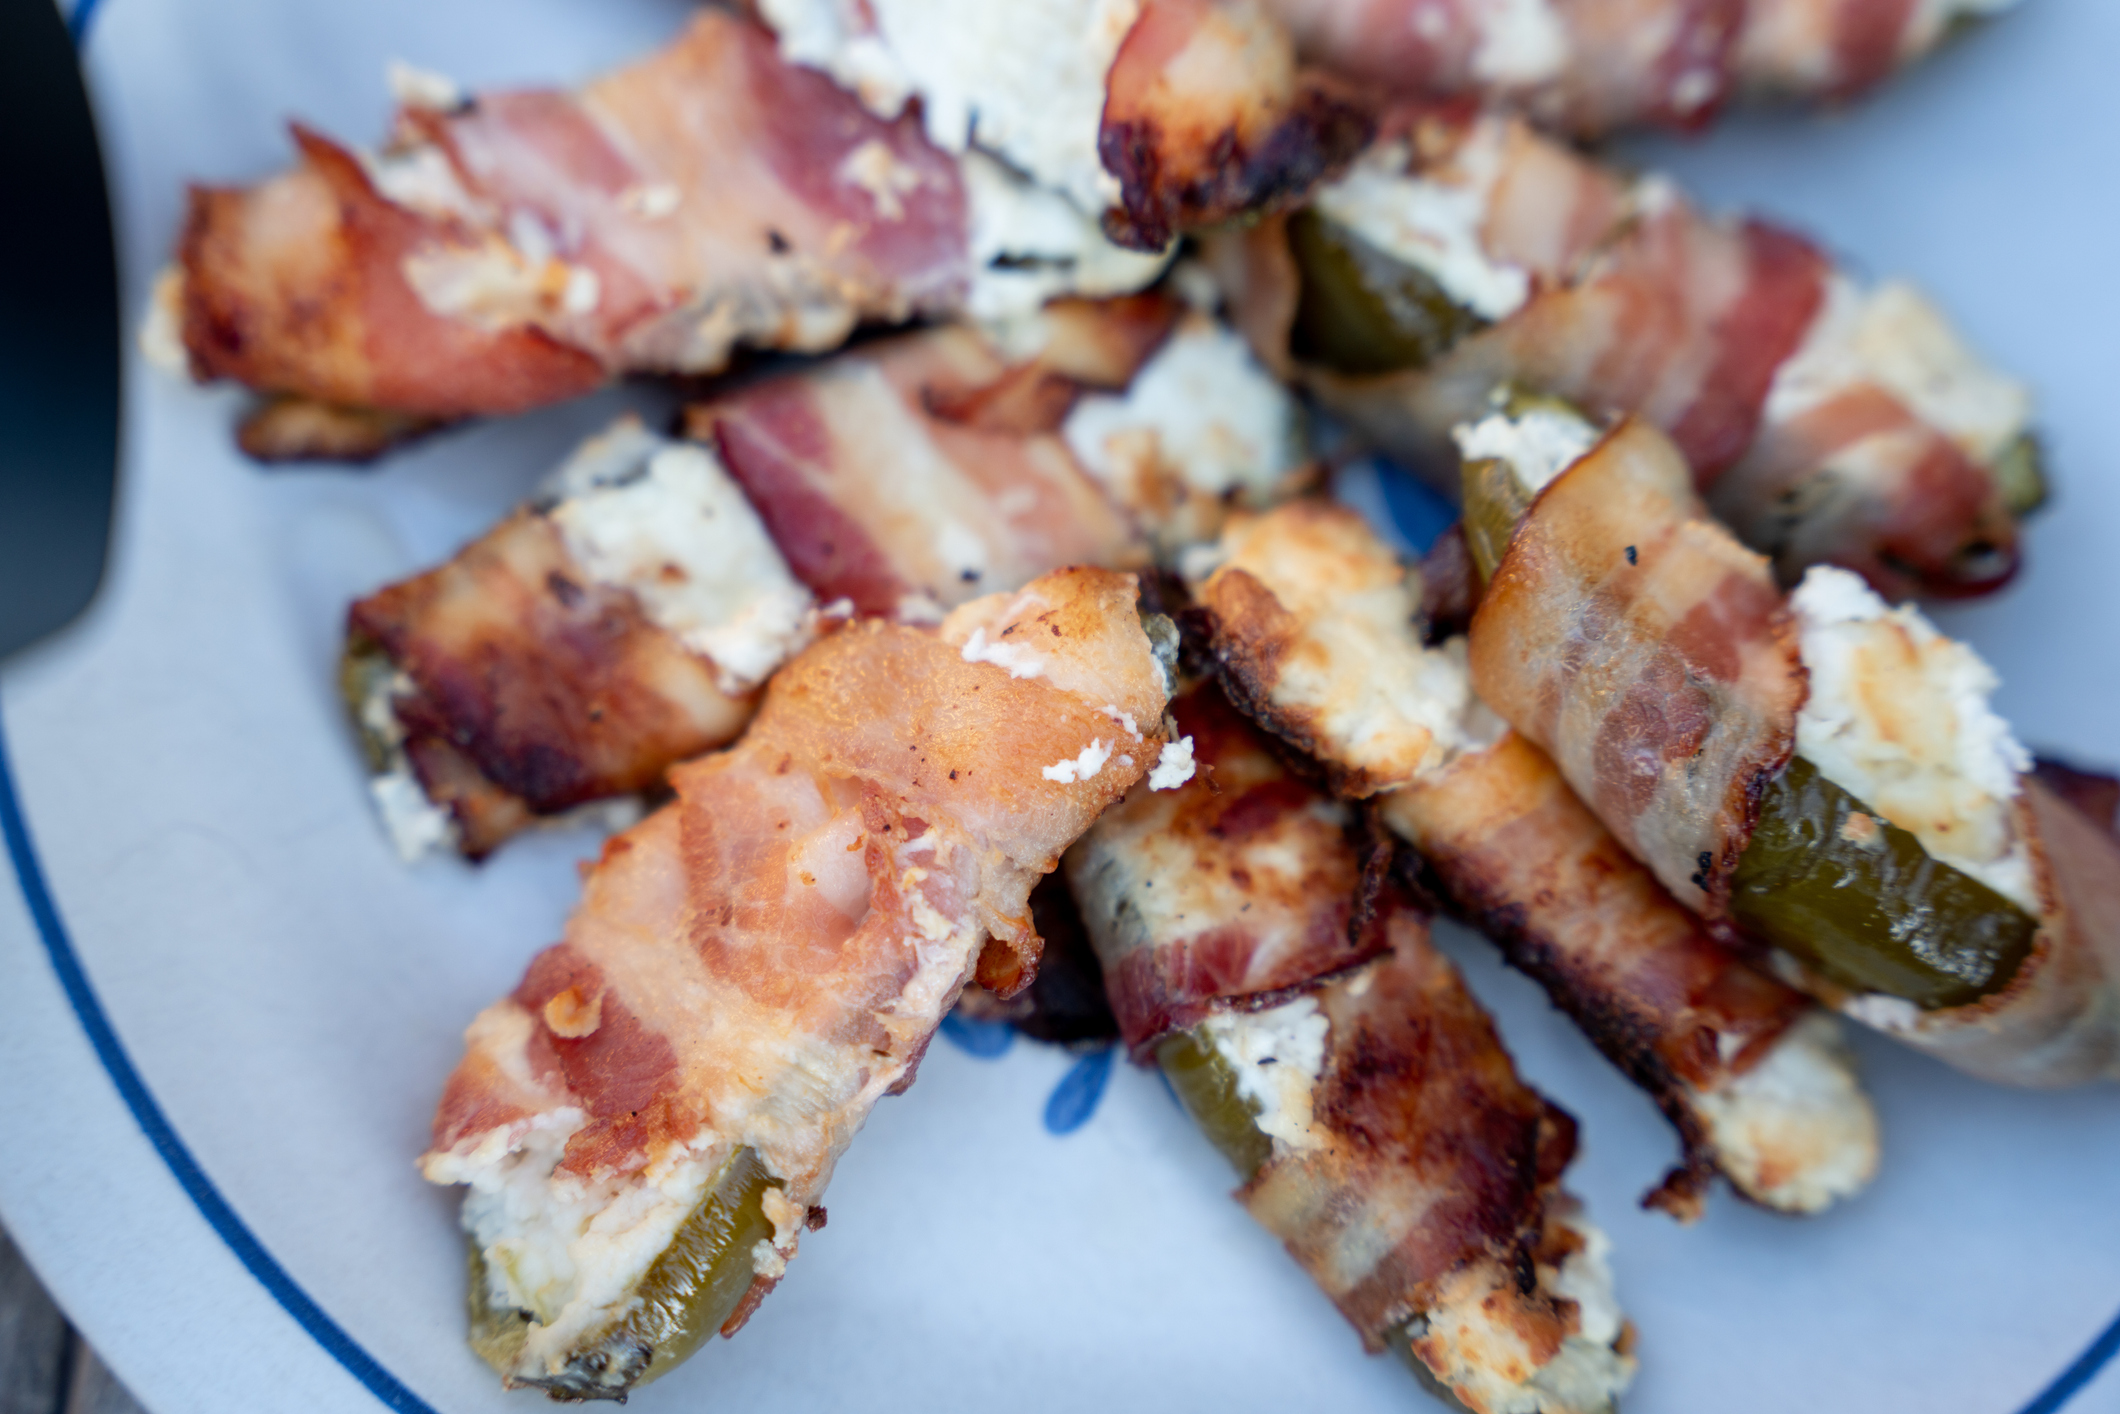
Bacon-Wrapped Jalapeño Poppers

Creamy, smoky, a little spicy, and wrapped in bacon. What’s not to like?

Slice fresh jalapeños in half lengthwise, remove the seeds, and fill them with a mixture of cream cheese, shredded cheddar, and your favorite seasonings.

Wrap each pepper in bacon and cook on your pellet grill until the bacon is thoroughly cooked and crisp.

For a milder smoke profile, try Griller’s Gold Fruitwood Blend, featuring maple, cherry, and apple.

These are easy to prepare ahead, refrigerate, and reheat thoroughly to 165°F at the tailgate.

Just don’t be surprised when they’re gone before kickoff. 

Three Main Courses That Bring the Crowd Over

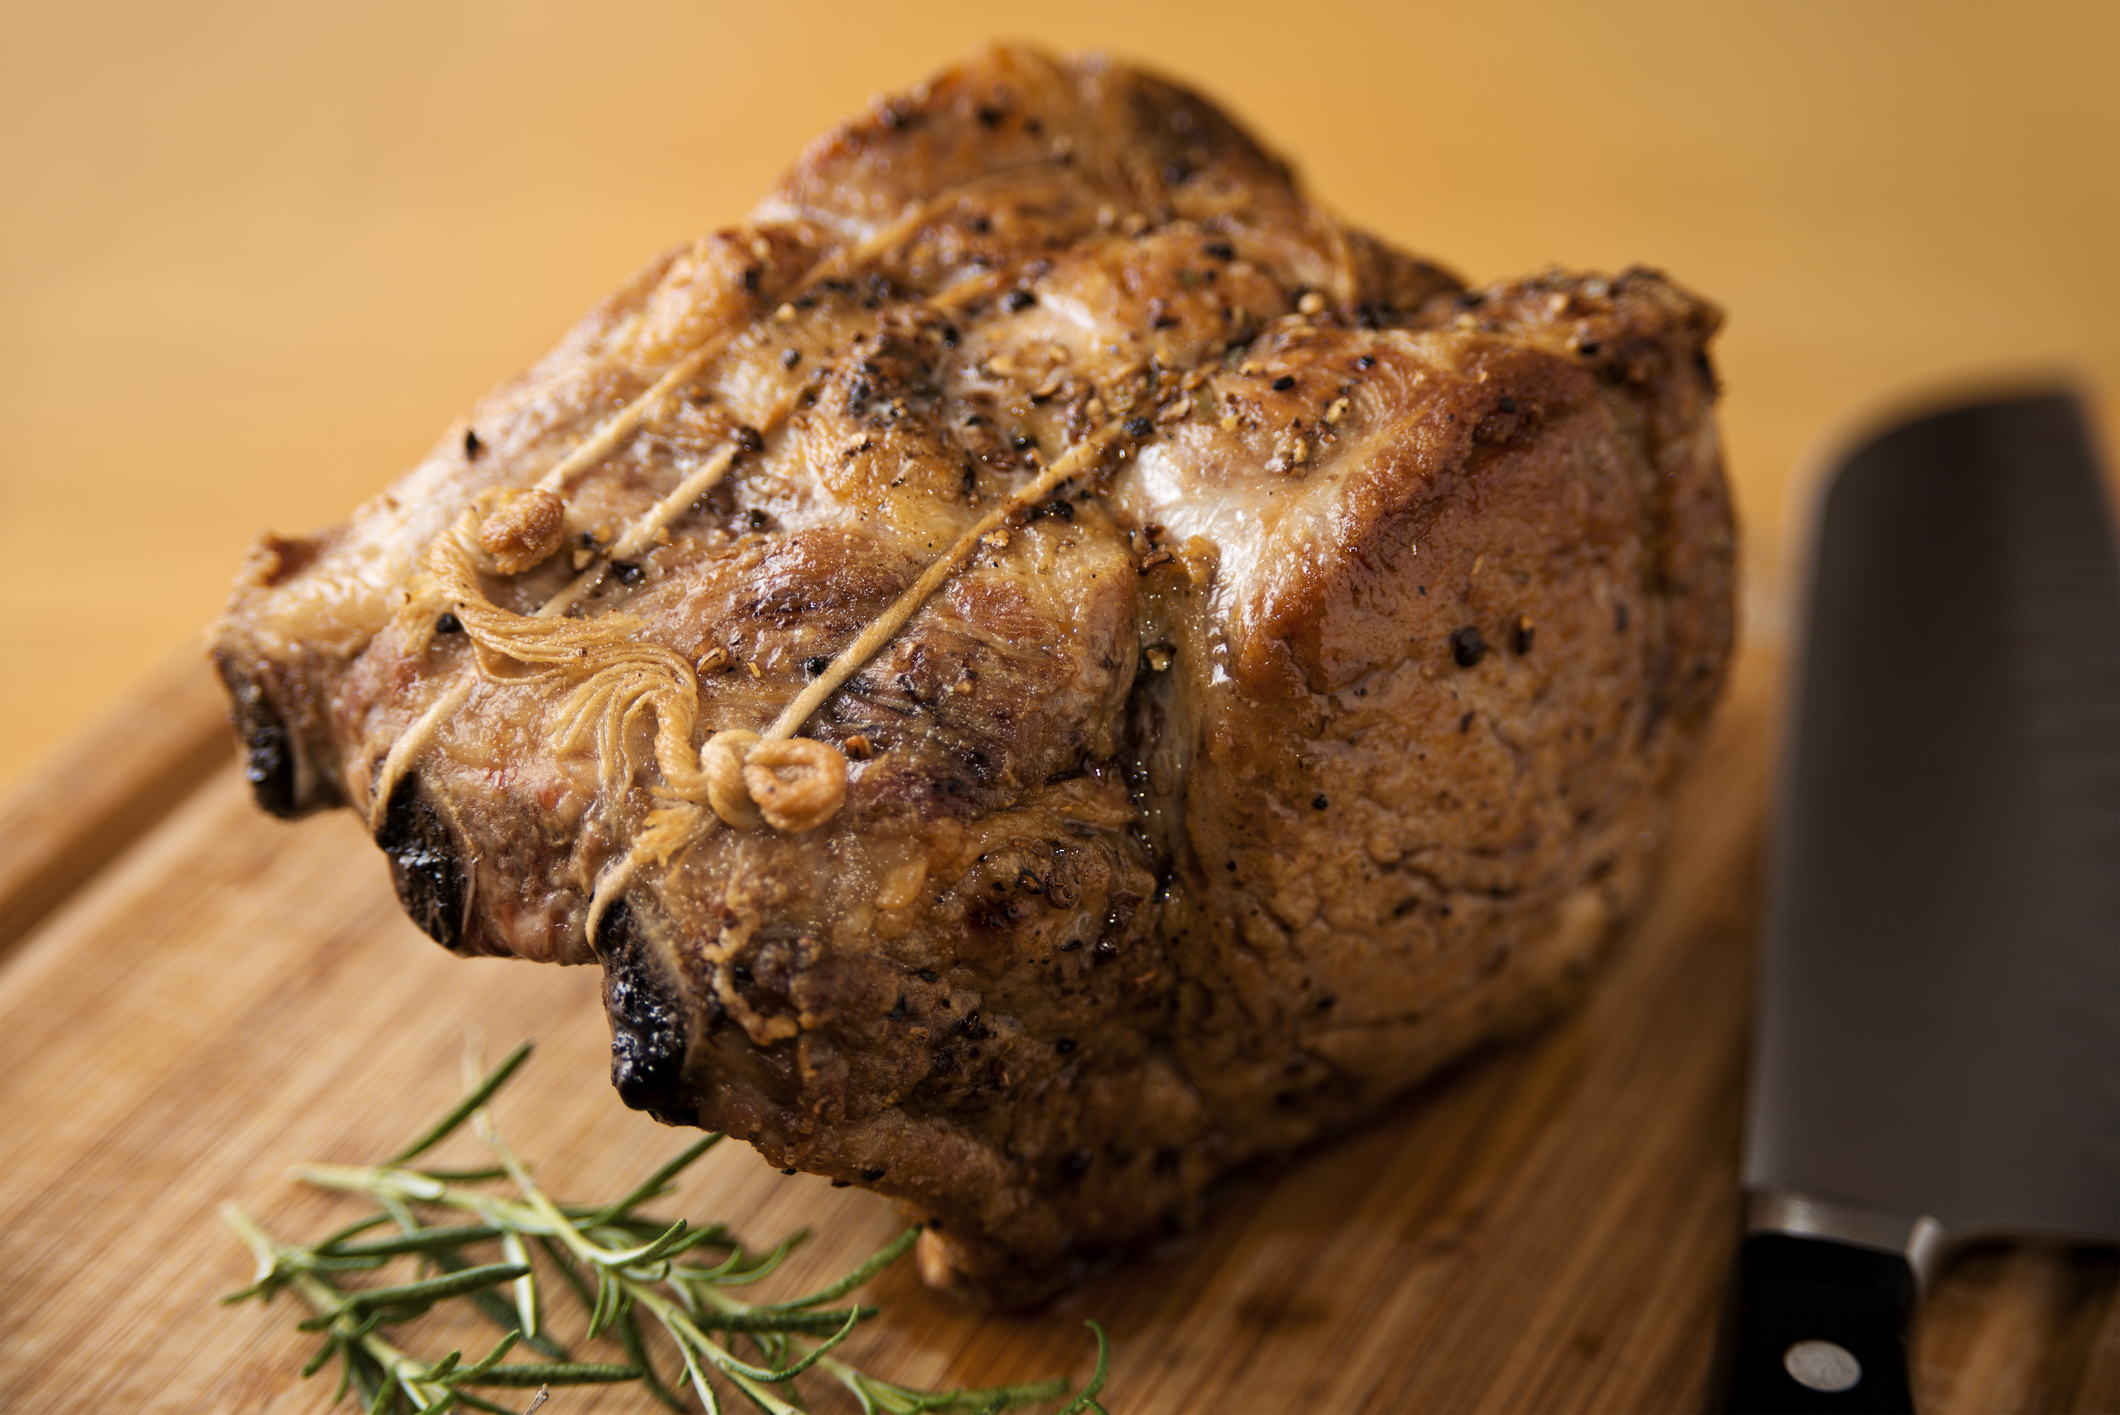
Smoked Rack of Pork

Want something more impressive than another tray of burgers? Try a rack of pork.

A rack of pork is a bone-in pork loin roast that can be sliced into individual chops, giving everyone their own delicious pork chop on a stick.

Ask your butcher to remove the chine bone to make carving easier. Season with salt, pepper, garlic powder, onion powder, and paprika.

Cook on your pellet grill around 250°F, using Griller’s Gold Fruitwood Blend or Cherry, until the thickest part reaches at least 145°F. Allow the roast to rest for at least three minutes.

Serve it fresh at home, or refrigerate promptly and reheat to 165°F at the tailgate.

Slice between the bones, add your favorite BBQ sauce if desired, and hand out the chops.

No bun necsessary. 

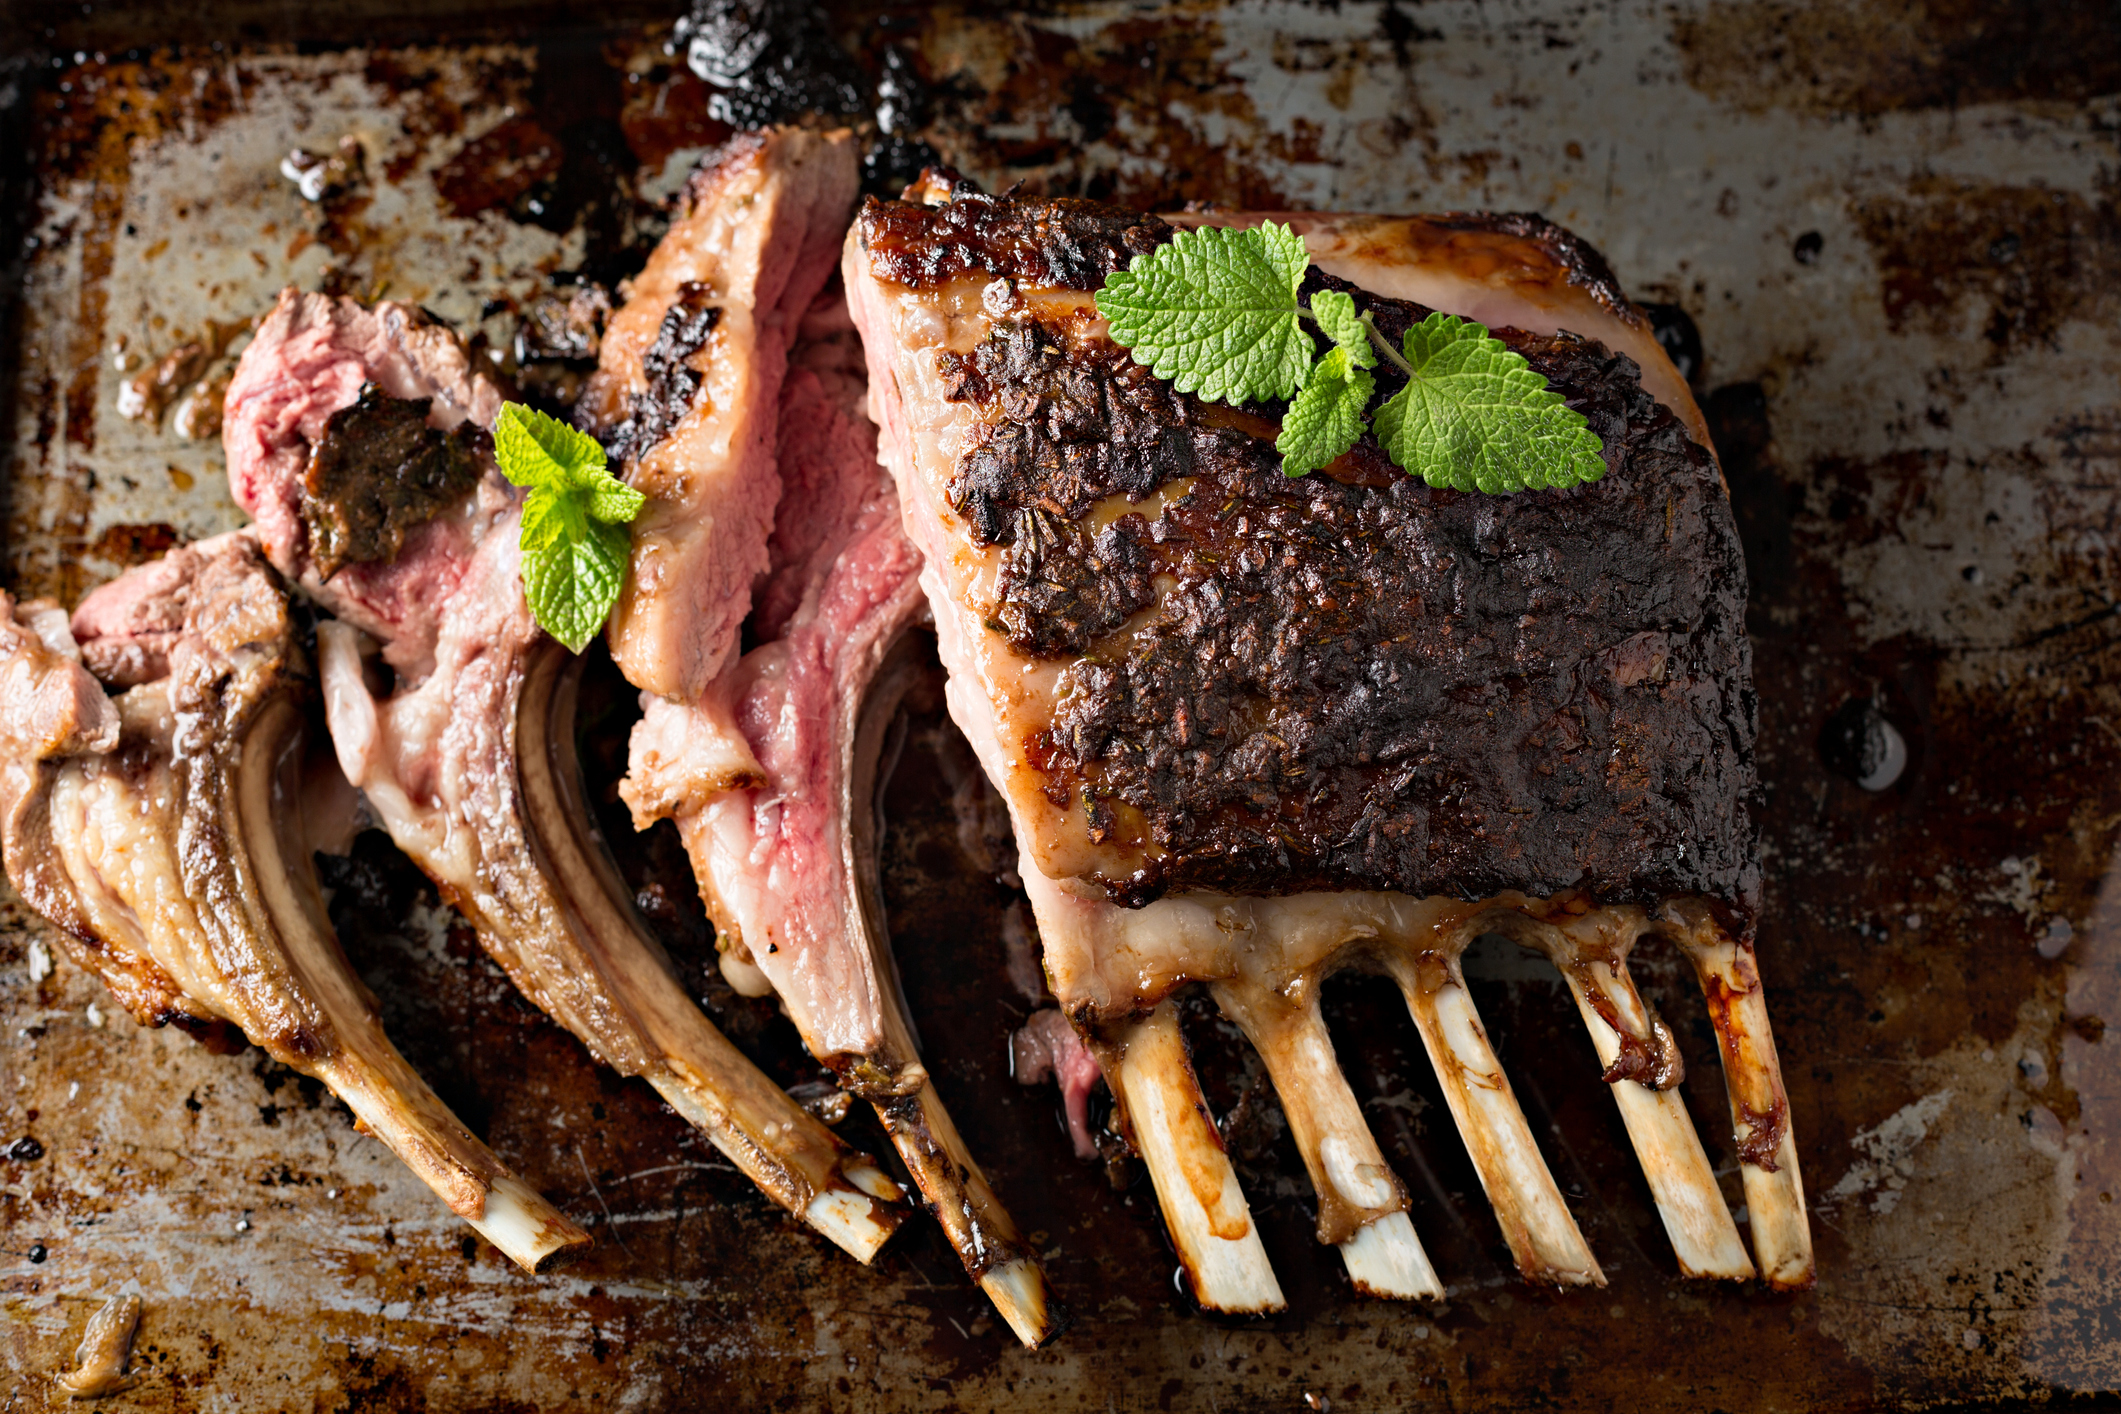
Rack of Lamb

If you’re looking to bring something unexpected to game day, lamb chops make an excellent choice.

Season a rack of lamb with salt, pepper, garlic, and oregano. Add a little fresh lemon juice before serving.

Griller’s Gold Competition Blend pairs nicely with lamb, bringing a balance of savory smoke and mild sweetness.

For the best texture, cook this dish fresh on a portable pellet grill rather than partially cooking it ahead. Grill until the thickest part reaches at least 145°F and allow it to rest for three minutes.

Slice into individual chops and serve with lemon wedges.

They’re small enough to eat by hand, but impressive enough to make your neighbors wonder what else you’ve got cooking. 

Beef Tenderloin Kebabs

Tenderloin isn’t your everyday tailgate fare and that’s exactly why it makes an impression.

Cut beef tenderloin into generous cubes and thread onto skewers with thick pieces of sweet onion. Season simply with salt, pepper, and garlic powder.

If you’re bringing a portable pellet grill, try Griller’s Gold Competition Blend to give the beef a subtle hardwood smoke flavor.

This is another dish best prepared in advance but cooked fresh at the tailgate. Keep the uncooked kebabs refrigerated until you’re ready to grill.

Cook over medium-high heat, turning as needed, until the beef reaches at least 145°F internally. Allow it to rest for three minutes before serving.

The combination of tender beef, grilled onion, and a little char is hard to beat.

Sometimes simple seasoning and great ingredients are all you need.

Don’t Forget the Rest of the Spread

The main event matters, but a great tailgate needs a supporting cast.

Coleslaw, potato salad, pasta salad, pretzels, and crunchy snacks all work well. Just remember to keep perishable sides chilled until serving.

For drinks, bring plenty of water, soft drinks, and whatever else your crew enjoys.

A few other things worth remembering:

  • Keep cold foods cold: Use plenty of ice or frozen packs and keep your food cooler at 40°F or below.
  • Keep hot foods hot: Once prepared, maintain hot food at 140°F or above if it won’t be served immediately.
  • Separate raw and cooked foods: Bring clean utensils and serving trays.
  • Watch the clock: Don’t leave perishable food unrefrigerated for more than two hours, or one hour when outdoor temperatures exceed 90°F.
  • Pack extra pellets: If you’re bringing a portable pellet grill, nobody wants to run out of fuel before halftime.

A little planning keeps the cooking easy and lets you focus on the game.

Real Hardwood. Real Smoke. All Season Long.

Great tailgating isn’t about having the biggest grill or the most complicated menu.

It’s about showing up with good food, sharing it with friends, and making the most of a fall weekend.

Whether you’re smoking wings the night before or firing up a portable pellet grill outside the stadium, Griller’s Gold delivers the natural hardwood flavor that makes your food worth remembering.

The football season might change with the weather, but there’s no reason to put the grill away.

Real Hardwood. Real Smoke. All Year Long.

Find Griller’s Gold at Menards, Fleet Farm, and other participating retailers.
Find Griller’s Gold Near You


Pin It on Pinterest