How to Smoke Brisket on a Pellet Grill
Brisket has a reputation.
It’s the holy grail of barbecue. When it’s good, there’s nothing quite like it: a dark, flavorful bark, tender slices, and rich beef flavor that makes you wonder why you ever ordered anything else.
When it’s bad? Well, nobody wants to spend an entire Saturday smoking a piece of beef drier than Lincoln Riley’s infamous brisket.
Here’s the good news: You can make outstanding brisket at home with a pellet grill.
You don’t need a commercial smoker, years of competition experience, or an elaborate collection of secret ingredients. What you do need is good meat, quality hardwood pellets, patience, and a little understanding of what’s happening inside your grill.
From Chicago to Kansas City to Austin and yes, even Los Angeles, great barbecue starts with getting the fundamentals right.
Let’s get smoking.
Choosing the Right Brisket
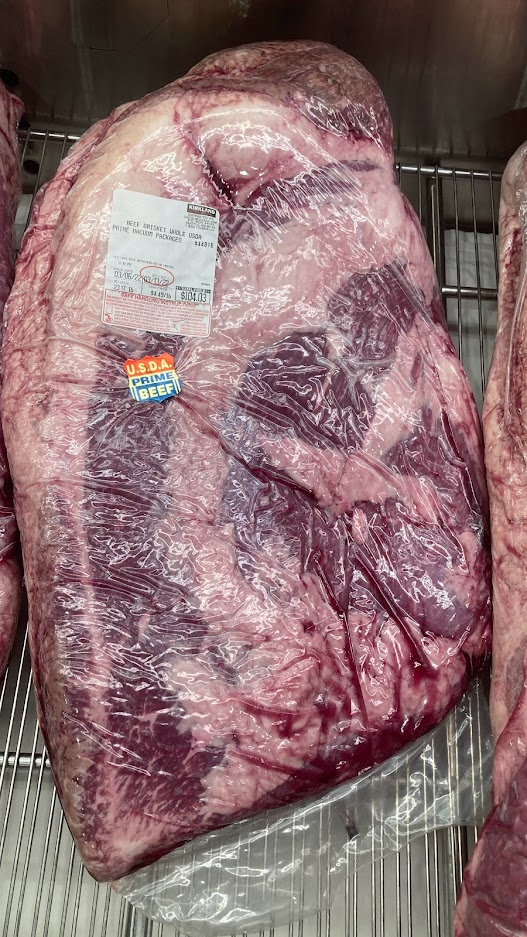
First things first: buy the right cut.
Brisket comes from the chest of the cow, where the muscles do a lot of work. That makes the meat naturally tough, with plenty of connective tissue that needs time and heat to break down.
That’s why brisket responds so well to low-and-slow cooking.
When shopping, you’ll generally find three options:
- Whole-packer brisket: Includes both the flat and point muscles. This is our preferred choice for smoking.
- Brisket flat: The leaner portion, which can be delicious but is less forgiving if overcooked.
- Brisket point: The fattier portion, known for rich flavor and particularly good burnt ends.
For your first serious brisket cook, look for a whole packer weighing approximately 12–16 pounds before trimming.
If your budget allows, USDA Prime is a great option because its additional marbling can help keep the meat juicy. But don’t feel like you need the most expensive brisket at the meat counter. A well-selected USDA Choice brisket can still produce excellent barbecue.
Look for a brisket that’s reasonably uniform in thickness through the flat, with good marbling and some flexibility when you pick it up.
Remember, a whole packer will lose weight during trimming and cooking, so plan accordingly.
Preparing and Trimming Your Brisket
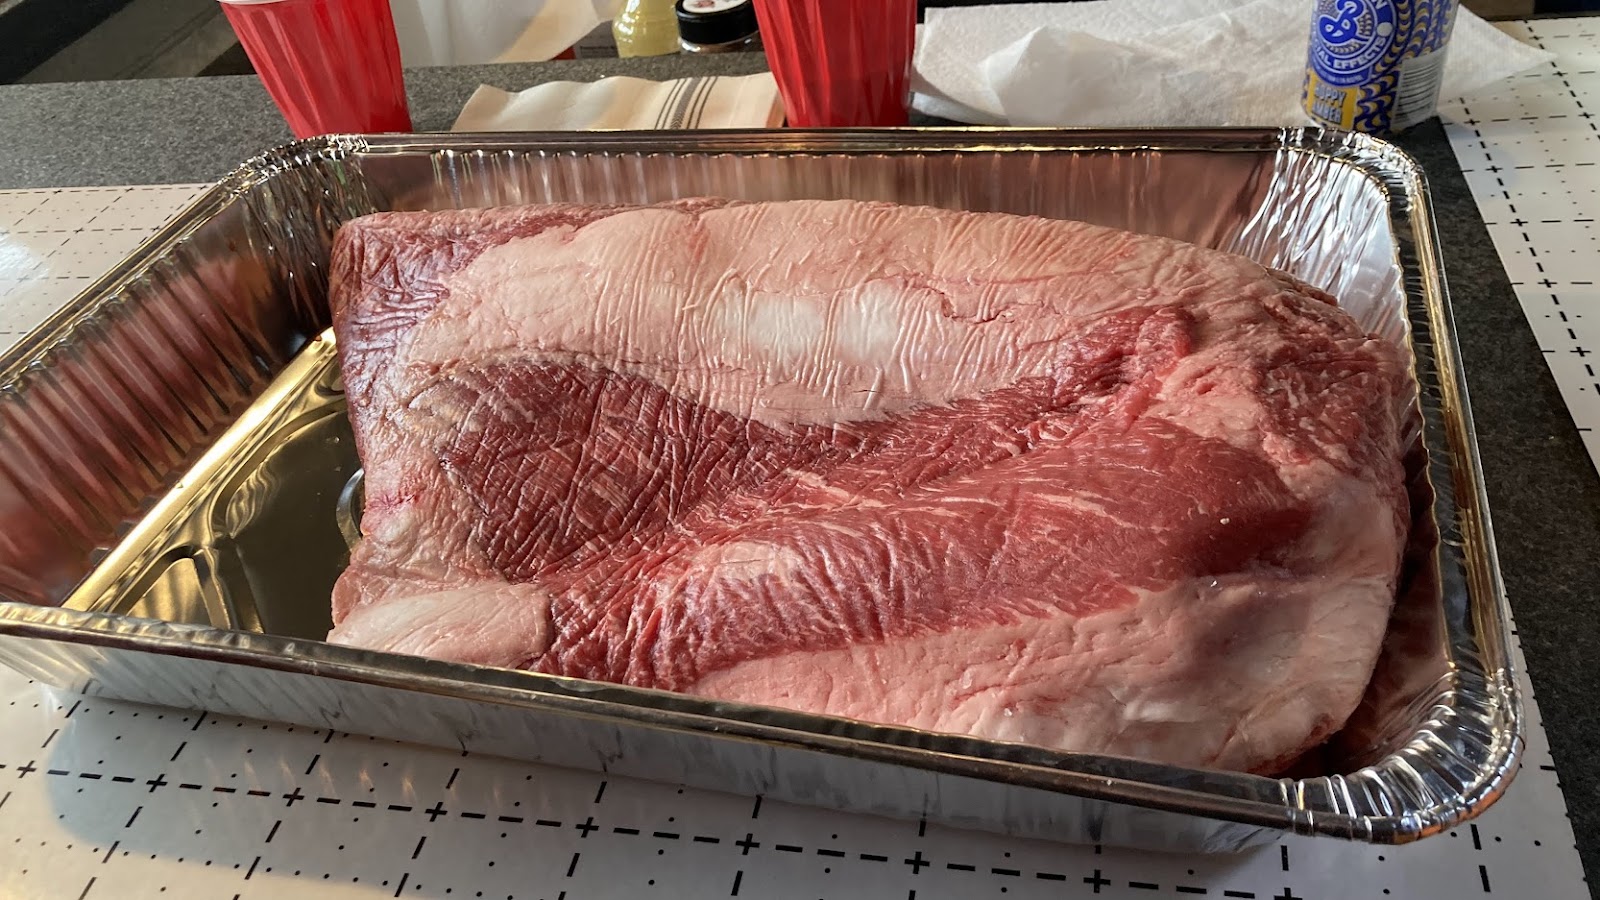
Before seasoning, give the brisket a little attention with a sharp knife.
Most whole briskets come with more exterior fat than you’ll want on the finished barbecue. Your goal isn’t to remove all the fat. It’s to create a relatively even surface that cooks consistently.
Here’s what to focus on:
- Trim the fat cap to approximately ¼ inch.
- Remove large, hard deposits of fat, particularly between the flat and point.
- Trim thin, ragged edges that are likely to dry out or burn.
- Remove exposed silverskin and loose pieces of meat.
You don’t need to make it look like a competition brisket. Just clean it up and give yourself a good foundation for seasoning.
One useful trick: Before applying the rub, identify the direction of the meat grain in the flat. Cut a small corner off perpendicular to the grain.
Once the brisket develops a dark bark, that little corner can help you remember which direction to slice.
And don’t throw away all those trimmings. Clean, usable beef trimmings can be saved and ground for burgers, while excess fat can be rendered into beef tallow.
Seasoning: Keep It Simple
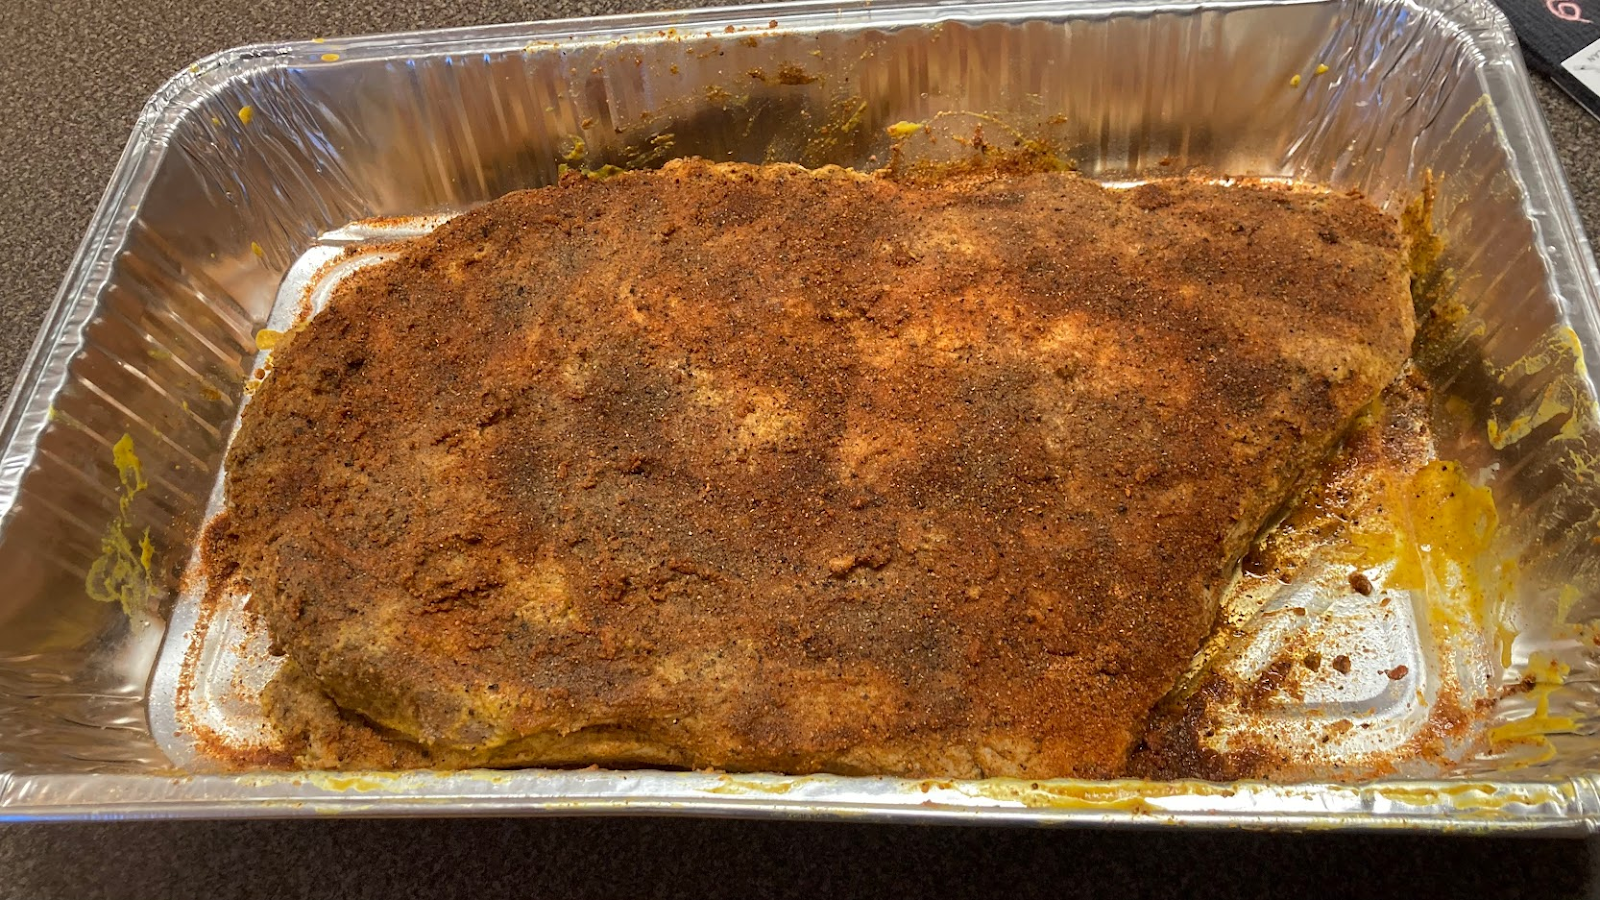
Brisket doesn’t need a complicated rub.
In fact, some of the best brisket you’ll ever eat is seasoned with little more than salt and coarse black pepper.
For a classic approach, start with:
- Kosher salt
- Coarse-ground black pepper
- Granulated garlic, if desired
Season the brisket evenly on all sides. A large cut of meat can handle generous seasoning, but adjust the salt to your preference and the size of the brisket.
If you want to help the seasoning adhere, use a thin coating of yellow mustard or a mixture of mustard and Worcestershire sauce.
Don’t worry. Your finished brisket won’t taste like mustard.
You can also experiment with paprika, onion powder, and a touch of dry mustard if you prefer a more complex barbecue rub.
But our advice for beginners is simple: start with salt, pepper, and garlic. Let the beef and hardwood smoke do the talking.
Choosing the Right Griller’s Gold Pellets
Brisket is a big, flavorful cut of beef, so it’s a perfect opportunity to bring out a more robust smoke profile.
Our first choice is Griller’s Gold Smokeshack Blend.
Smokeshack combines oak, hickory, and mesquite for a bold, savory smoke that’s right at home with traditional Texas-style brisket.
If you prefer a slightly more balanced profile, Griller’s Gold Pitmaster Blend combines hickory, cherry, and maple for rich smoke with a touch of sweetness.
Both work beautifully with beef.
Whatever blend you choose, fill your hopper before starting. A whole brisket is a long cook, and you don’t want to run out of pellets halfway through the afternoon.
Smoking Your Brisket: Low and Slow
Now for the fun part.
There are plenty of opinions about the perfect way to smoke a brisket. Some people wrap, some don’t. Some swear by fat-cap-up cooking; others insist on fat-cap-down.
We’re going to use a straightforward approach that works well on many pellet grills.
Step 1: Fire Up the Grill
Preheat your pellet grill to 225°F, following the manufacturer’s instructions.
Once the grill is at temperature, place your seasoned brisket on the cooking grates.
On many pellet grills, heat rises from beneath the cooking surface. In that case, positioning the fat cap toward the heat can help protect the meat. Learn where your particular grill runs hottest and adjust accordingly.
Insert an oven-safe temperature probe into the thickest part of the flat, avoiding large pockets of fat.
Then close the lid and leave it alone.
One of the best things about pellet grilling is the ability to maintain a steady temperature without constantly tending a fire.
Let the Griller’s Gold pellets do their work.
Step 2: Build the Bark
Let the brisket smoke at 225°F for approximately 3–4 hours before increasing the grill temperature to 250°F. This gives the meat time to develop hardwood smoke flavor and begin forming that dark, flavorful crust known as the bark—one of the things that makes great brisket so special.
The exact timing will vary depending on the size of your brisket and your grill, so don’t worry about watching the clock too closely. A whole brisket can easily take 12–18 hours or more from start to finish, so plan ahead and give yourself plenty of time.
You’ll see plenty of pitmasters spraying their briskets with water, apple cider vinegar, or beef broth during this stage.
It’s optional.
A light spritz can help manage areas that are drying too quickly, but opening the lid every 20 minutes isn’t necessary. Every brisket and grill behaves a little differently.
Our suggestion? Get comfortable with the basic cook before experimenting with extra steps.
Step 3: Don’t Panic About the Stall
At some point, you’ll probably notice something frustrating: your brisket’s internal temperature stops rising.
Maybe it sits around 160°F. Maybe closer to 170°F. And it seems determined to stay there no matter how much you stare at the thermometer.
Congratulations. You’ve reached the stall.
As moisture evaporates from the surface of the meat, it cools the brisket and slows the temperature increase.
It’s a normal part of barbecue, not a sign that something has gone wrong.
You have two choices: wait it out or wrap the brisket to help move things along.
For this method, we’re wrapping.
Step 4: Wrap the Brisket
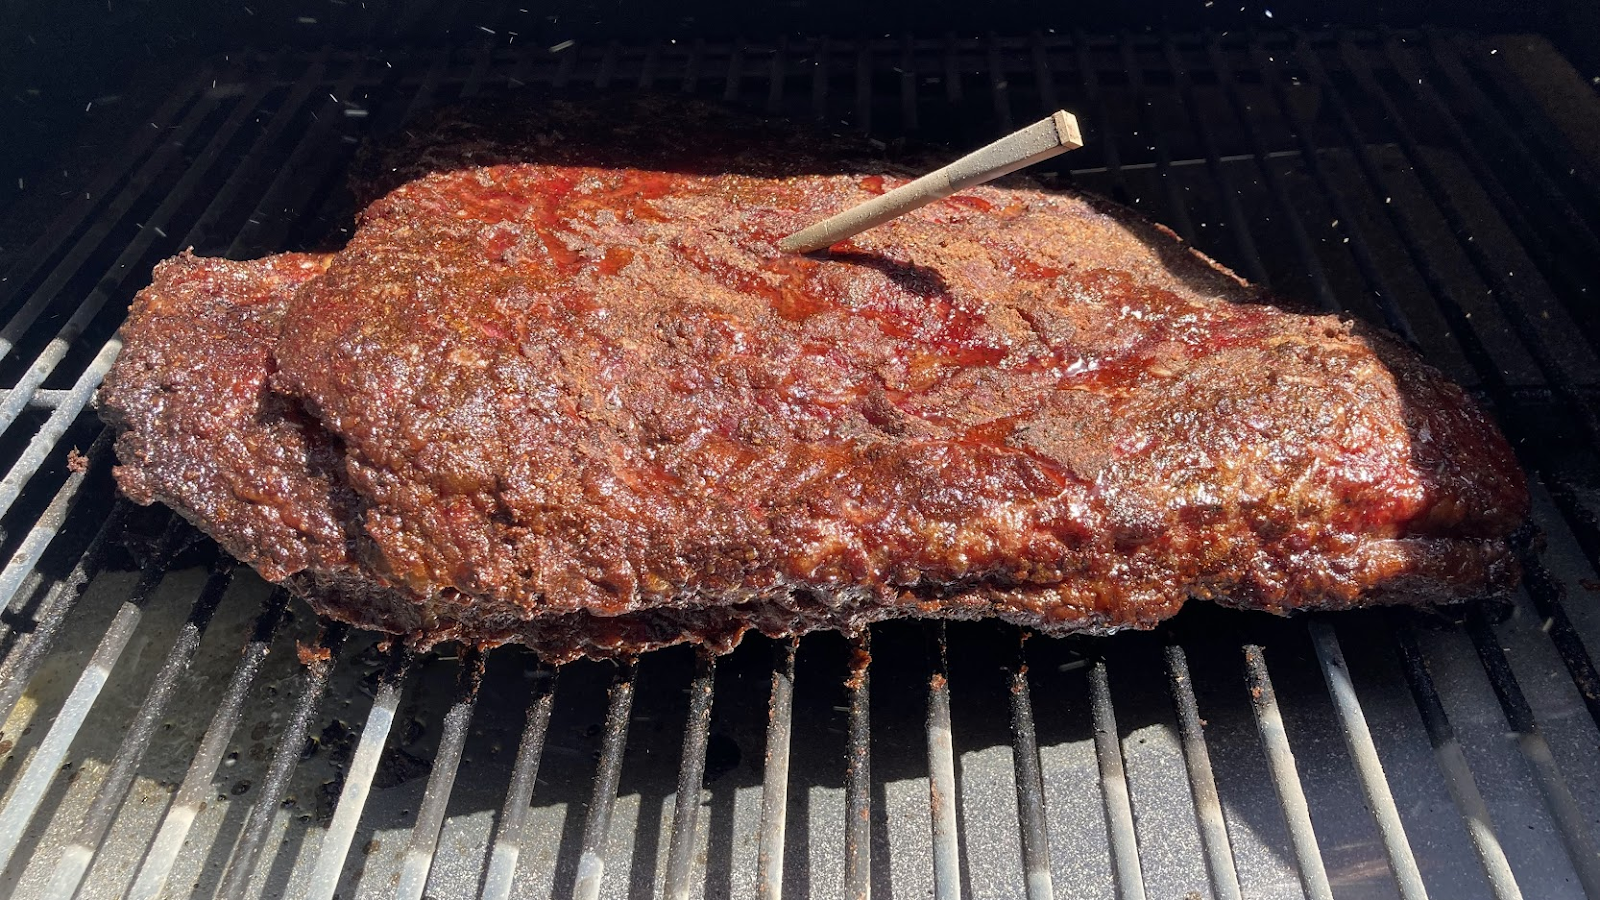
When the brisket reaches roughly 160–175°F internally and the bark has developed to your liking, prepare to wrap it.
You can use either:
Unwaxed, food-grade butcher paper: Allows some moisture to escape and generally preserves a firmer bark.
Heavy-duty aluminum foil: Holds more moisture and can help move the brisket through the stall faster, though it may soften the bark.
Either approach works.
Wrap the brisket snugly, taking care not to leave large air pockets. Reinsert your temperature probe and return the meat to the grill.
Increase the grill temperature to approximately 275°F.
At this point, most of the initial smoke flavor has already developed. The focus now is getting the brisket tender.
And here’s where patience becomes especially important.
How Do You Know When Brisket Is Done?
This is where a lot of beginners get tripped up.
You’ll frequently hear that brisket is done at 203°F.
That’s a useful reference point, but it isn’t a magic number.
For barbecue texture, many briskets become tender somewhere around 200–205°F, although the exact finishing temperature varies.
Start checking tenderness as the brisket approaches that range.
Insert an instant-read thermometer or probe into several areas of the flat.
What you’re looking for is very little resistance. The probe should slide into the meat almost like it’s going into softened butter.
If the brisket still feels tight, give it more time.
And remember, the temperature required for tender barbecue brisket is much higher than the USDA minimum safe cooking temperature for beef roasts. We’re cooking beyond that minimum to break down connective tissue and develop the texture people expect from brisket.
Trust the tenderness, not just the number.
Resting Your Brisket
You’ve spent hours smoking a beautiful brisket.
Don’t rush the last step.
When the meat is tender, remove it from the grill and allow it to rest before slicing.
For a brisket you’ll serve shortly, approximately 30–60 minutes of resting can help the juices redistribute and make slicing easier.
For longer waits, use a properly controlled hot-holding setup and monitor the meat’s internal temperature to ensure it remains at or above 140°F.
An insulated cooler can help retain heat, but it doesn’t guarantee a safe holding temperature for a fixed number of hours. If you’re using one, check the actual temperature rather than relying on the clock.
If you won’t be serving the brisket soon and cannot maintain safe hot-holding temperatures, divide it into smaller portions and refrigerate promptly.
A little planning here makes a big difference, especially when you’re cooking for a crowd.
Slicing Brisket the Right Way
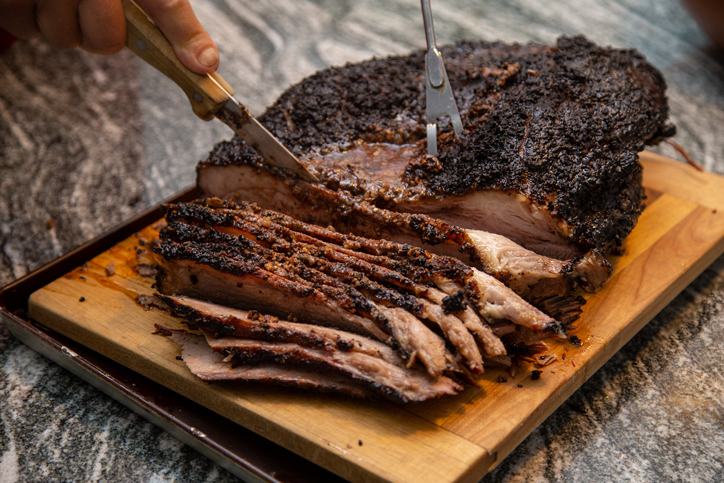 There’s one more skill worth learning: slicing.
Brisket has long muscle fibers, and cutting across them is essential for tender slices.
Remember that little corner you trimmed before cooking?
This is where it comes in handy.
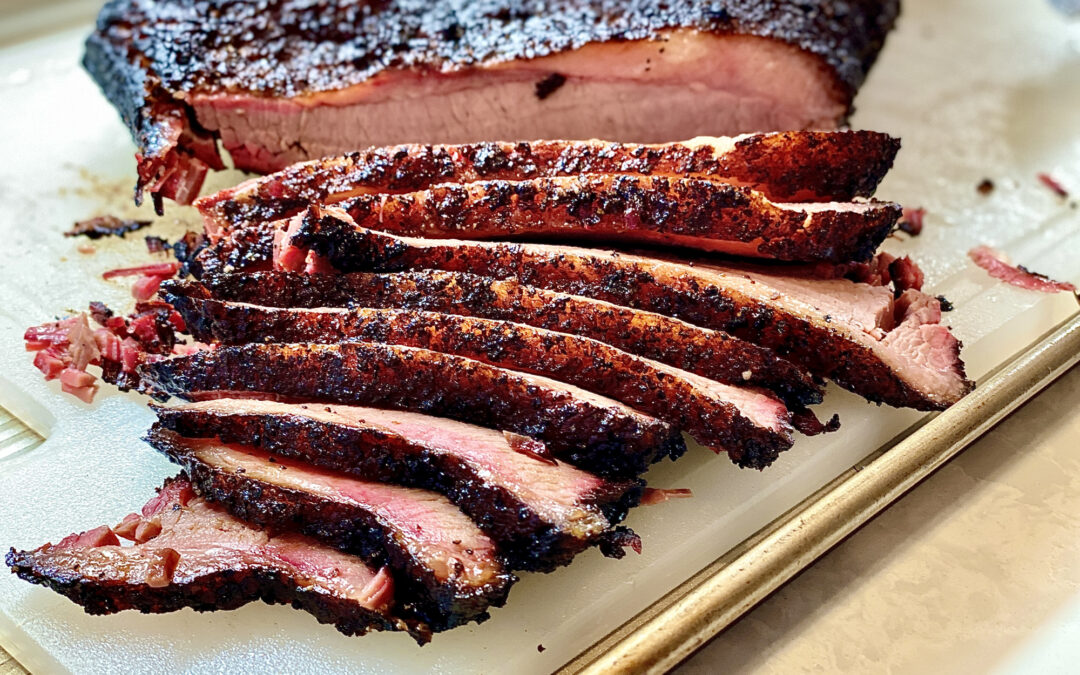
Start slicing the flat against the grain, generally aiming for slices about the thickness of a pencil.
As you move toward the point, the grain changes direction. You may find it easier to separate the two muscles at that stage and slice each against its own grain.
The fattier point can handle slightly thicker slices.
Use a sharp slicing knife and avoid sawing aggressively through the meat.
If you’ve cooked it properly, the slices should hold together when lifted but pull apart easily with a gentle tug.
And if a few pieces fall apart?
That’s what sandwiches are for.
Serving Your Wood-Fired Brisket
Good brisket doesn’t need much help.
Serve it with your favorite barbecue sauce on the side, or go Texas-style and let the beef speak for itself.
A few classic accompaniments:
- White bread or toasted buns
- Pickles and sliced onions
- Coleslaw
- Smoked baked beans
- Mac and cheese
And don’t forget the juices collected during wrapping. You can separate excess fat and spoon a little of that flavorful liquid over the sliced brisket.
For leftovers, refrigerate promptly and reheat thoroughly to 165°F before serving.
Leftover brisket is excellent in sandwiches, chili, tacos, and even breakfast hash.
Not that we expect there to be much left.
Great Brisket Takes Practice. That’s Half the Fun.
Your first brisket might not be perfect.
Maybe the bark gets a little darker than you planned. Maybe you underestimate how long the stall will last. Maybe dinner happens an hour later than expected.
That’s barbecue.
Every cook teaches you something about your grill, your technique, and the kind of smoke flavor you enjoy.
With quality beef, a little patience, and Griller’s Gold hardwood pellets, you’ve got everything you need to make the kind of brisket people will ask you to cook again.
And the next time somebody mentions their favorite barbecue joint, you might just have a reason to say:
“Yeah, but you should try mine.”
Real Hardwood. Real Smoke. All Year Long.
Find Griller’s Gold at Menards, Fleet Farm, and other participating retailers.
Smoke on, friends!