If you’re anything like us, you love the sizzle of the weekend grill—cold drink in hand, Grillers Gold pellets firing up flavor like a boss. But here’s the real BBQ power move: Grill once, eat twice (or three times).
Think of it as the meal prep plan your grill would approve of.
By grilling big batches of protein-packed favorites like smoky chicken thighs and whole smoked turkey breasts, you’ll be setting yourself up for weekday lunchbox wins. We’re talking sandwiches, wraps, quesadillas, and bento-style boxes that your kids won’t trade away.
Let’s dig into the recipes, the lunchbox transformations, and our favorite Grillers Gold pellet pairings to keep the flavor going strong—even on Tuesday.
Recipe #1: Pellet-Grilled Chicken Thighs
Why It Rocks:
Chicken thighs stay juicy, even when reheated, and they take on pellet smoke like a dream. They’re affordable, cook quickly, and can star in a dozen different meals.
Cook for ~40–50 minutes or until internal temp hits 175°F.
Finish skin side down for 3–5 minutes for a crispy char.
Leftover Lunchbox Ideas:
BBQ Chicken Wraps – Shred chicken, toss with a drizzle of BBQ sauce, and roll into a tortilla with shredded cheese and spinach.
Chicken Fried Rice Bento – Dice chicken, toss with rice, peas, carrots, and a splash of soy sauce for a cold or warm rice box.
Mini Chicken Sliders – Shredded chicken + cheese on Hawaiian rolls = major lunchroom envy.
🔥 Reheating Tip: Reheat in foil with a splash of chicken broth or water in a toaster oven or skillet to avoid drying out.
Recipe #2: Whole Smoked Turkey Breast
Why It Rocks:
Leaner than thighs but full of smoky flavor when done right, turkey breast slices beautifully for sandwiches and salads. Smoked low and slow, it’s the “deli meat” upgrade you didn’t know you needed.
Smoke until internal temp hits 160°F (about 2.5–3 hours).
Rest under foil 15–20 minutes before slicing.
Leftover Lunchbox Ideas:
Turkey & Cheese Roll-Ups – Roll slices with cheddar or mozzarella and serve with crackers and fruit.
Turkey Ranch Wraps – Spread a tortilla with ranch, add turkey, lettuce, and shredded carrot.
Grilled Turkey Quesadilla – Add turkey and cheese between tortillas, toast in a skillet, and slice into wedges.
🔥 Reheating Tip: For hot lunches, wrap slices in foil with a dab of butter or broth. Warm in a low oven (300°F) or thermos prep with hot water to pre-heat the container.
Bonus: Pellet-Grilled Sweet Potatoes for the Win
OK, we said no veggie skewers (we did that in the last blog – you can check that recipe HERE), but we can’t leave out this batch-cooked BBQ side dish that doubles as a lunchbox hero.
Grill It Up:
Slice sweet potatoes into thick coins.
Toss in oil, salt, cinnamon or chili powder.
Grill over medium heat (350°F) for 6–8 minutes per side until tender.
Sweet Potato & Chicken Bowl – Layer with leftover chicken and rice.
Lunchbox Nachos – Top sweet potatoes with shredded turkey, cheese, and a drizzle of hot sauce or ranch.
Tips for Reheating Grilled Food Like a Pro
The goal? Keep the smoky flavor without drying things out. Here’s how:
💡Reheat Like This:
Add Moisture: Wrap leftovers in foil with a splash of broth, BBQ sauce, or even water.
Avoid Microwaving: If you must, add a wet paper towel to keep it steamy.
Use Toaster Ovens or Skillets: These preserve texture and crisp things up.
Thermos Prep: For soups, rice bowls, or sliced proteins, pour boiling water into the thermos first to pre-heat.
Grill Once, Win the Week
Grilling big over the weekend isn’t just smart—it’s sanity-saving. With a few flavorful proteins and a little lunchbox creativity, you’ll sail through the week with meals that make your kids (and you) the envy of the cafeteria or office breakroom.
And hey, when you grill with Grillers Gold premium BBQ pellets, you’re not just cooking. You’re layering in flavor that lasts—from Saturday’s dinner to Wednesday’s leftovers.
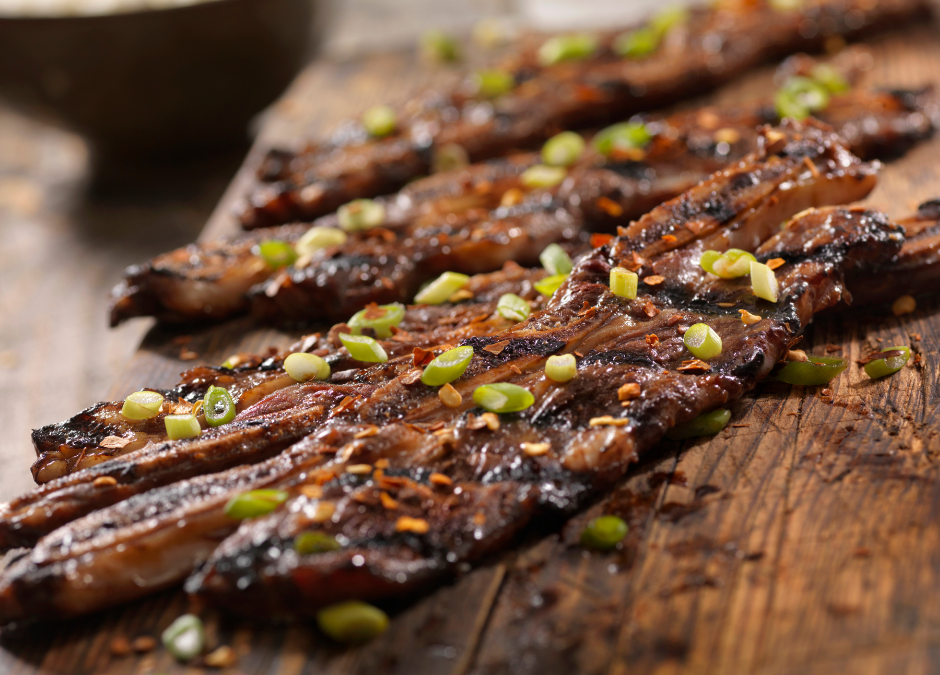
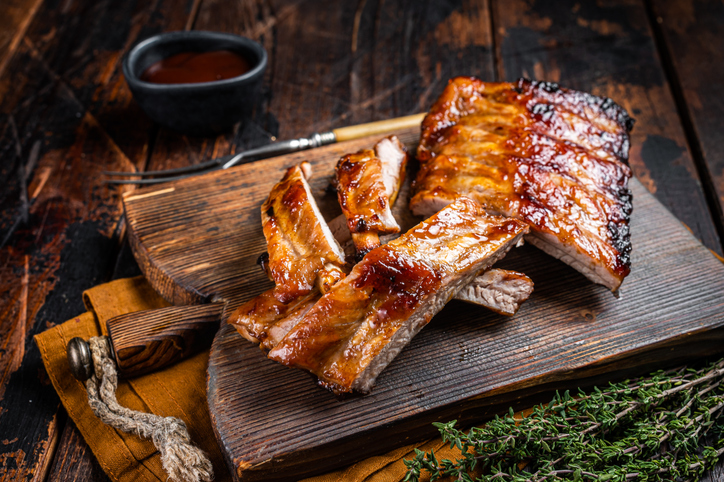
Not just any ribs—Korean-style short ribs that are juicy, caramelized, and packed with flavor.
If you’re looking to step up your grilling game, these sweet and spicy ribs are the way to do it. And with Grillers Gold Fruitwood Pellets adding that perfect kiss of smoke, you’re about to hit legendary status with your grill.
Why Korean BBQ? Because It’s Awesome
Korean BBQ isn’t just about food—it’s an experience.
It’s about grilling right at the table, sizzling meat, and bold flavors that make you want to keep going back for more.
The magic of Galbi (Korean-style short ribs) lies in the marinade—soy sauce, brown sugar, garlic, ginger, and that signature kick of gochujang. Let them soak up all that goodness overnight, and you’ll be rewarded with ribs that are sweet, savory, spicy, and absolutely addictive.
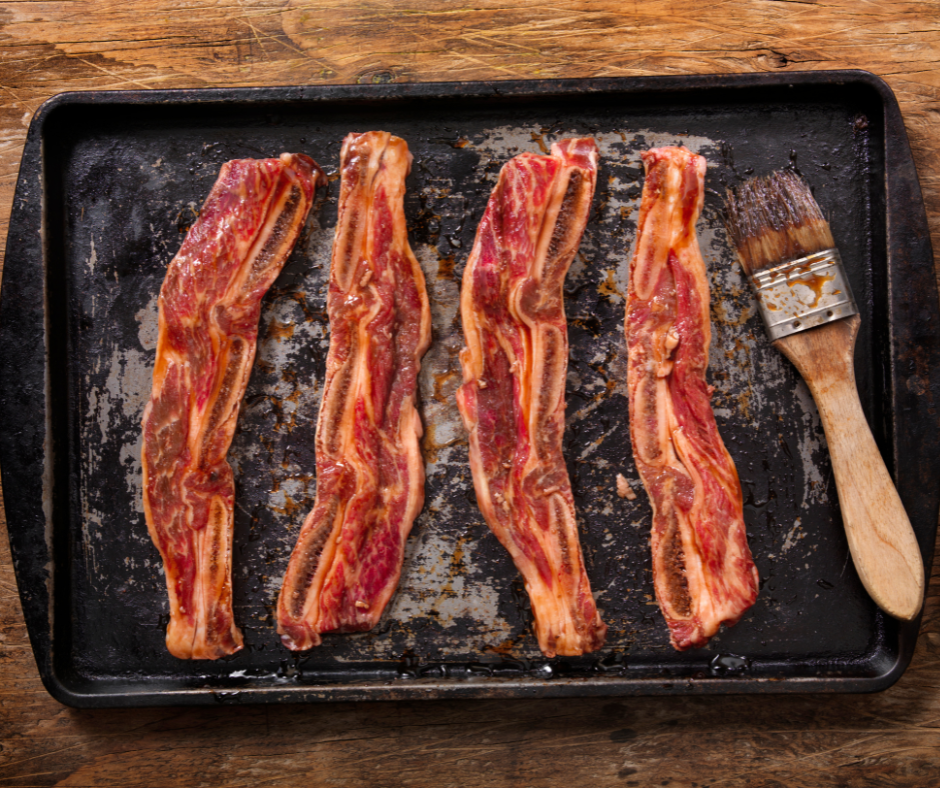
What is Flanken-Style, Cut Across the Bone?
When shopping for short ribs, you’ll see two common cuts: English-style and flanken-style.
For Korean BBQ, you want flanken-style, which means the ribs are cut across the bone into thin strips, typically about 1/4 to 1/2 inch thick. This cut exposes small cross-sections of bone within the meat, allowing the marinade to penetrate deeply while making the ribs perfect for fast grilling over high heat.
If you don’t see them labeled as flanken-style at your butcher or grocery store, ask for Korean short ribs or LA-style ribs—most butchers will know exactly what you need.
The Recipe: Sweet & Spicy Korean-Style Ribs
What You’ll Need:
2 lbs beef short ribs (flanken-style, cut across the bone)
1/2 cup soy sauce
1/4 cup brown sugar
3 tbsp honey
4 cloves garlic, minced
1 tbsp fresh ginger, grated
2 tbsp sesame oil
2 tbsp rice vinegar
1 tbsp gochujang (Korean chili paste) or sriracha
1 tbsp toasted sesame seeds
2 green onions, finely sliced
1/2 tsp black pepper
1 Asian pear, grated (trust us, this is a game-changer for tenderness)
What to Do:
Marinate for Maximum Flavor – Whisk together everything except the ribs in a big bowl. Toss in the short ribs, make sure they’re fully coated, then cover and refrigerate for at least 6 hours (overnight is even better).
Fire Up the Grill – Load your pellet grill with Grillers Gold Fruitwood Pellets and preheat to 400°F. That sweet fruitwood smoke takes the marinade to another level.
Sear to Perfection – Shake off any excess marinade and slap those ribs on the grill. Cook for 3-4 minutes per side until they’re beautifully caramelized and just slightly charred.
Rest & Garnish – Let them sit for a few minutes before digging in. Sprinkle with extra sesame seeds and green onions for that finishing touch.
The Secret Sauce: Pellet Grilling Like a Pro
Pellet grilling gives you total control, consistent heat, and incredible wood-fired flavor. Here’s why it’s the best choice for these ribs:
Sear It Right – Steady high heat ensures you get that crave-worthy caramelization without burning the sugars in the marinade.
Flavor That Pops – Fruitwood pellets bring a subtle, natural sweetness that perfectly balances the umami and spice.
Juicy & Tender, Every Time – Short ribs cook fast, so precision is key. With pellet grilling, you get that ideal char on the outside while keeping the inside perfectly juicy.
Ready to Grill? Let’s Go!
These ribs are more than just a meal—they’re an experience. Fire up the grill, grab a cold drink, and get ready to impress your friends and family. When you make them, don’t forget to tag us with #GrillersGold so we can see your masterpiece!
“Summertime and the livin’ is easy”, goes the song. So should making great food to serve at summertime celebrations. Here at Griller’s Gold, one of our summertime faves are pork baby back ribs. Now, many grillers and barbecuers are afraid of them – and there are a thousand techniques out there including the “3-2-1” method, preboiling them (NO NO NO!!!), fast cooking (it works, but not as good), etc. So our topic today is how to make GREAT ribs with an easy to make method.
The great thing is that a pellet-fueled grill makes this super easy. The grills are thermostatically controlled for even temps, and they self-feed fuel so there’s no fire maintenance. Speaking of fuel, Griller’s Gold Premium Hardwood pellets give great flavor to ribs. We’ve used pretty much every pellet we make in making ribs, and they all work great, but that said, for pork baby backs, we love either Hickory or Fruitwood Blend. So let’s do this!
This recipe delivers ribs that are tender, not chewy, with a nice clean “tug” of the meat coming off the bone. They are not “fall off the bone” ribs – those usually only happen when you braise ribs in a sauce after smoking.
What to Buy
Pork Baby Back ribs – these are the rib sections from the back of the hog nearest the spine and have a lot of meat on them – much more meaty than St. Louis cut ribs. We like to buy the minimally-processed ribs – often you’ll find them with a notation on the package of “contains up to 10% of a solution of …” which is that they are injected with a brining solution. We find those to be too salty tasting for our taste. Great sources for minimally processed ribs are at Costco and Sam’s of course – and they come in 3 packs. Figure a half-slab of ribs per person, so a 3 pack should serve 12.
Prepping Your Ribs
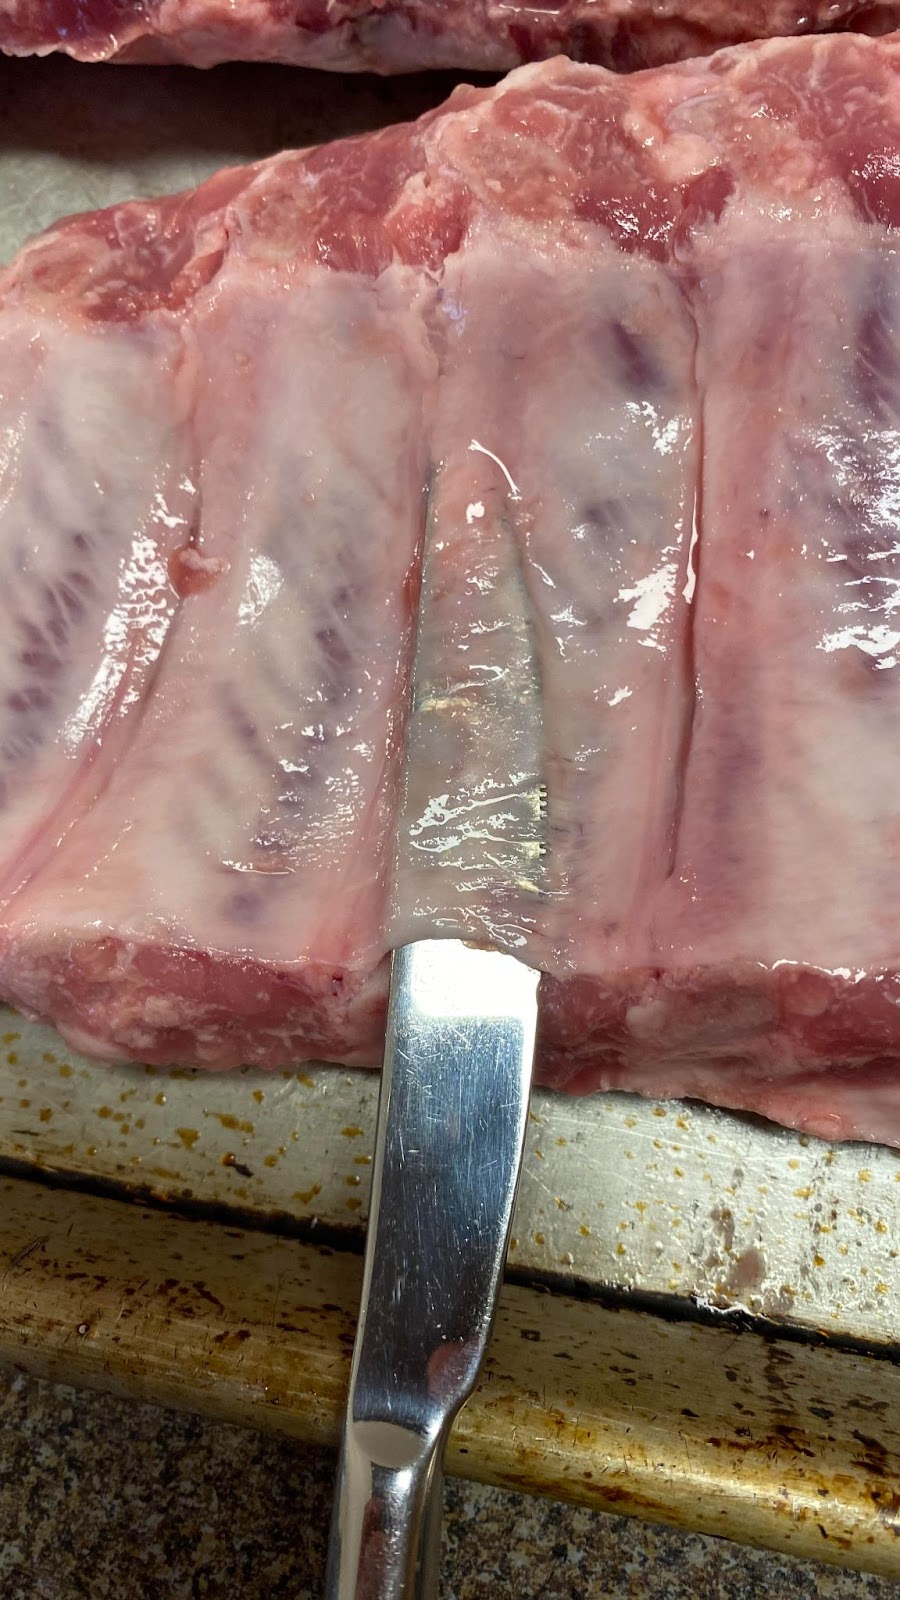
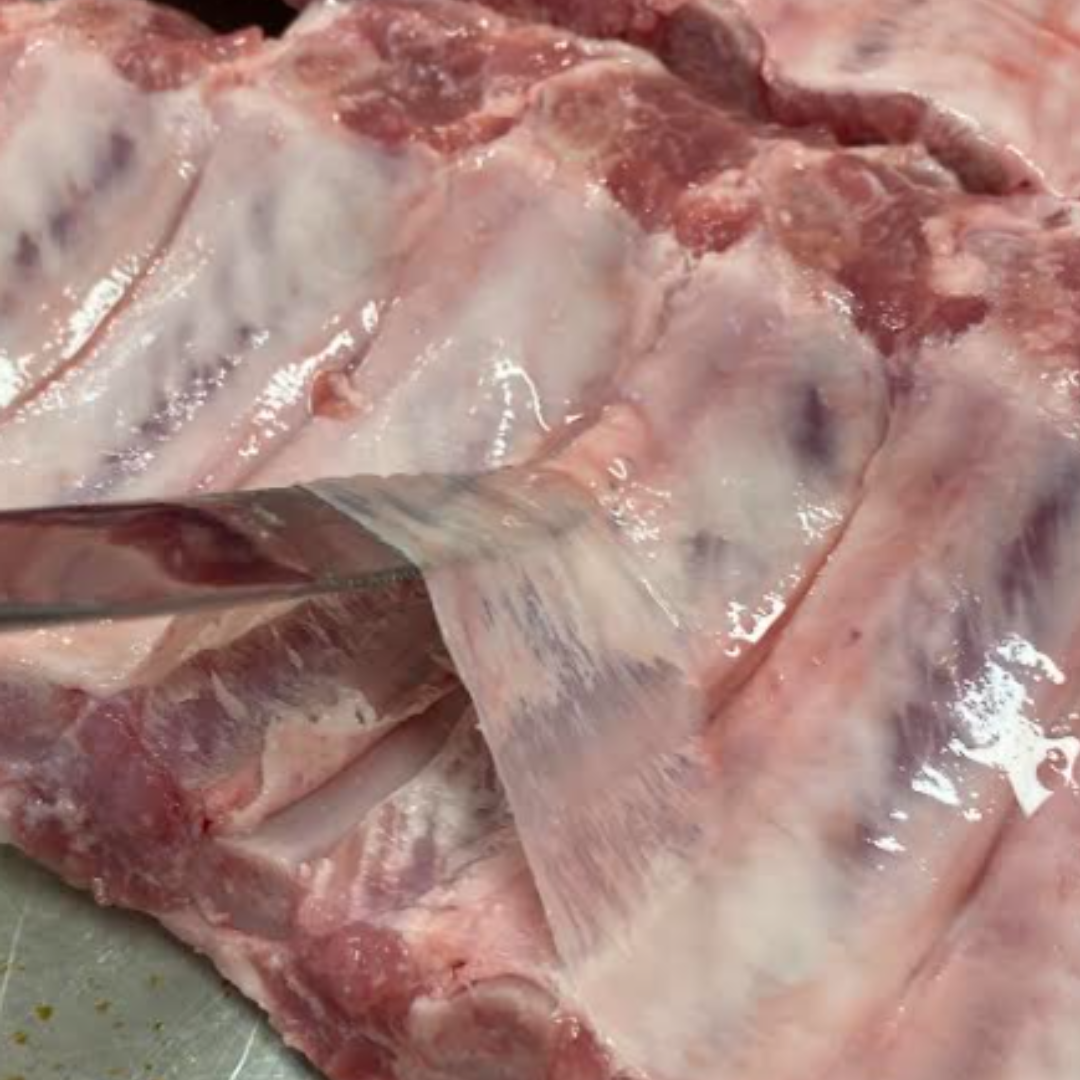
Generally speaking, ribs straight out of the package will have a membrane on the underside. That needs to get removed as it gets chewy as it cooks. Costco ribs frequently have had it removed. You can tell if it was already removed or not by how the underside of the ribs look – if they have a shiny/glossy coating – that’s the membrane.
Now some people think this is a very difficult thing to do, but they just haven’t found the right technique yet.
Here’s what to do: 1) Get a butter knife – up, a non-sharp butter knife is ideal for this technique.
2) Work from the side of the ribs away from the backbone. In the photo below one end of the ribs is sharply cut off at a near 90 degree angle while the other side sort of slants away. Start at the sharp cut off end.
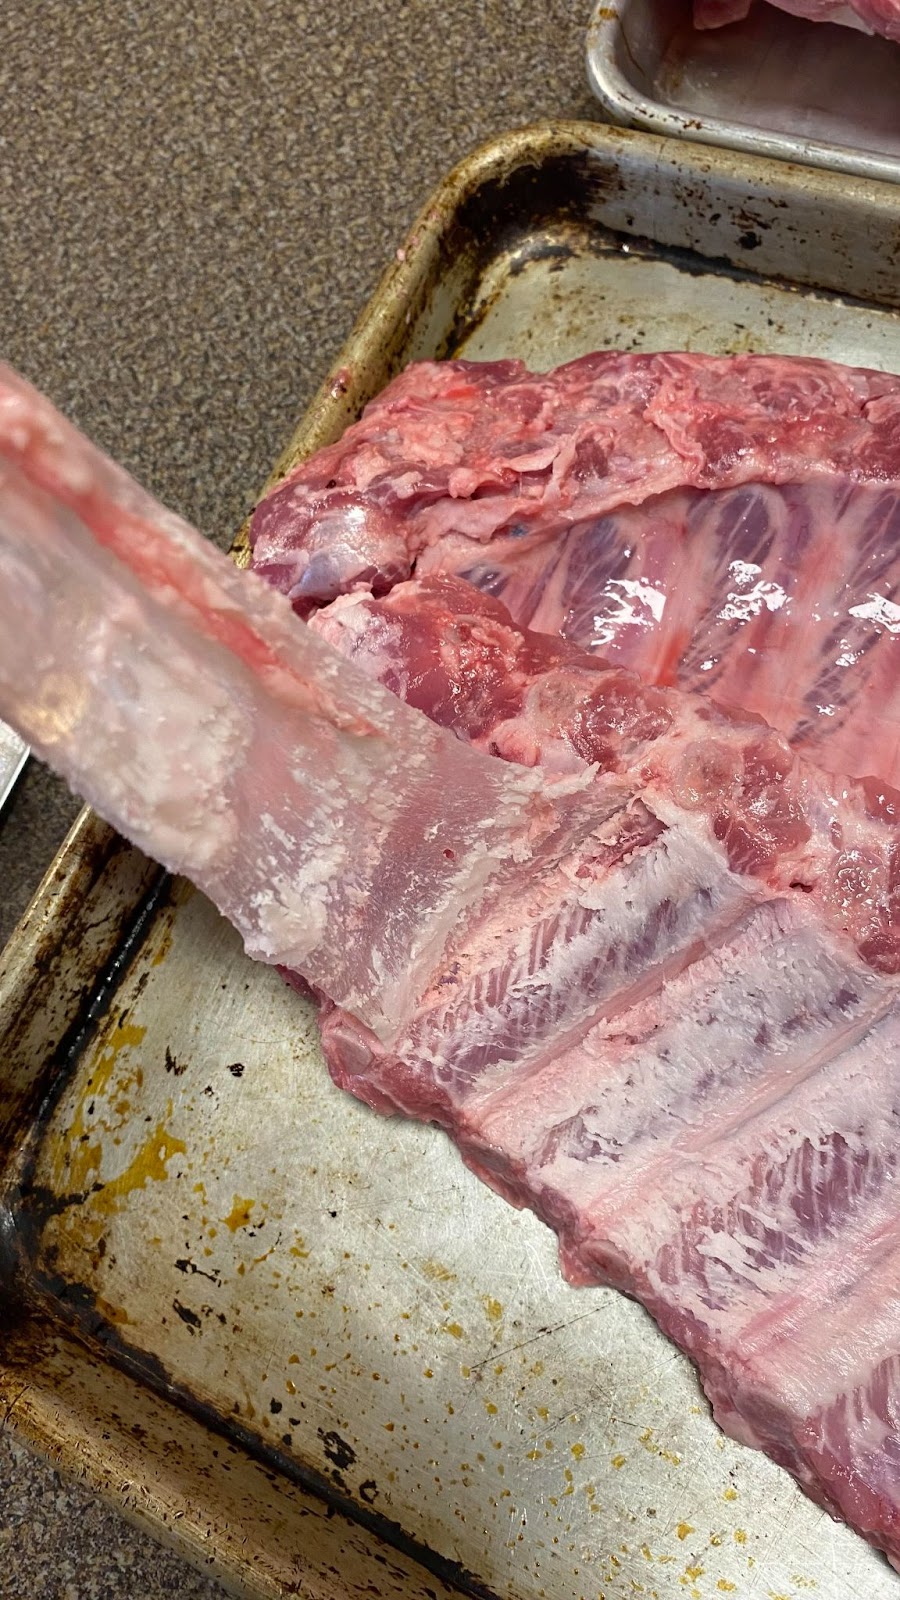
3) At the rib that’s closest to the middle of the slab, slip the butter knife under the membrane – it’s sort of a scraping action where you’re scraping the membrane up off the bone. Once the knife is inserted about half the length of the bone, lever it upwards, levering the membrane up – you can hear it tearing away. With a clean (not greasy/slimy) hand, get your thumb under the membrane and start pulling upwards – it will start peeling away. Work to one end and pull the membrane completely off, and then work the other direction to finish. Most of the time it will come off in one piece and the first time you do that you’ll feel like you pulled Excaliber from the stone!
4) From there, clean the ribs up a bit – if there are little bits of meat hanging off anywhere, just cut those off as they typically will burn and become dry and hard anyway.
Seasoning Your Ribs
Ok, we’re going to share a secret with you here. Our head blogger developed this rub recipe about 30 years ago and we’re here to say that even with all the commercial rubs out there, this works the best. And it’s simple to make. For enough Rub for 3 slabs of ribs:
2 T (tablespoons) EACH of kosher salt, sugar, ground pepper, paprika, garlic powder and onion powder
1 T chili powder 2 t (teaspoons) dry mustard powder (we like the Colman’s brand)
1 t ground cumin
½ t ground ginger
Mix up well and put it into an empty shaker container. By the way, we use so much of this that we make it in quantities where the tablespoons above turn into cups!
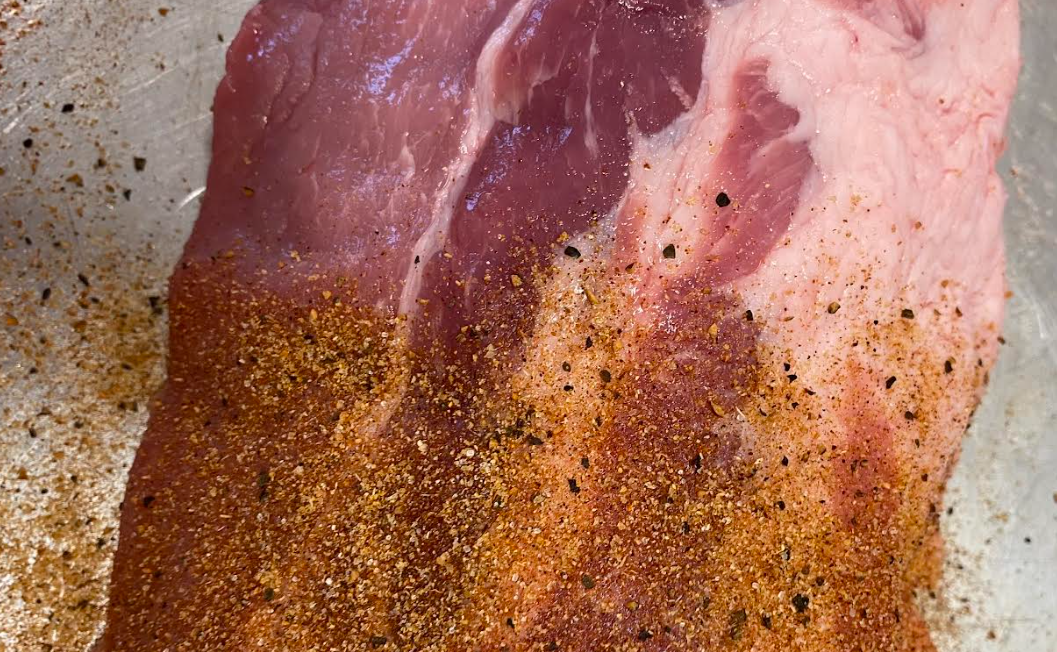
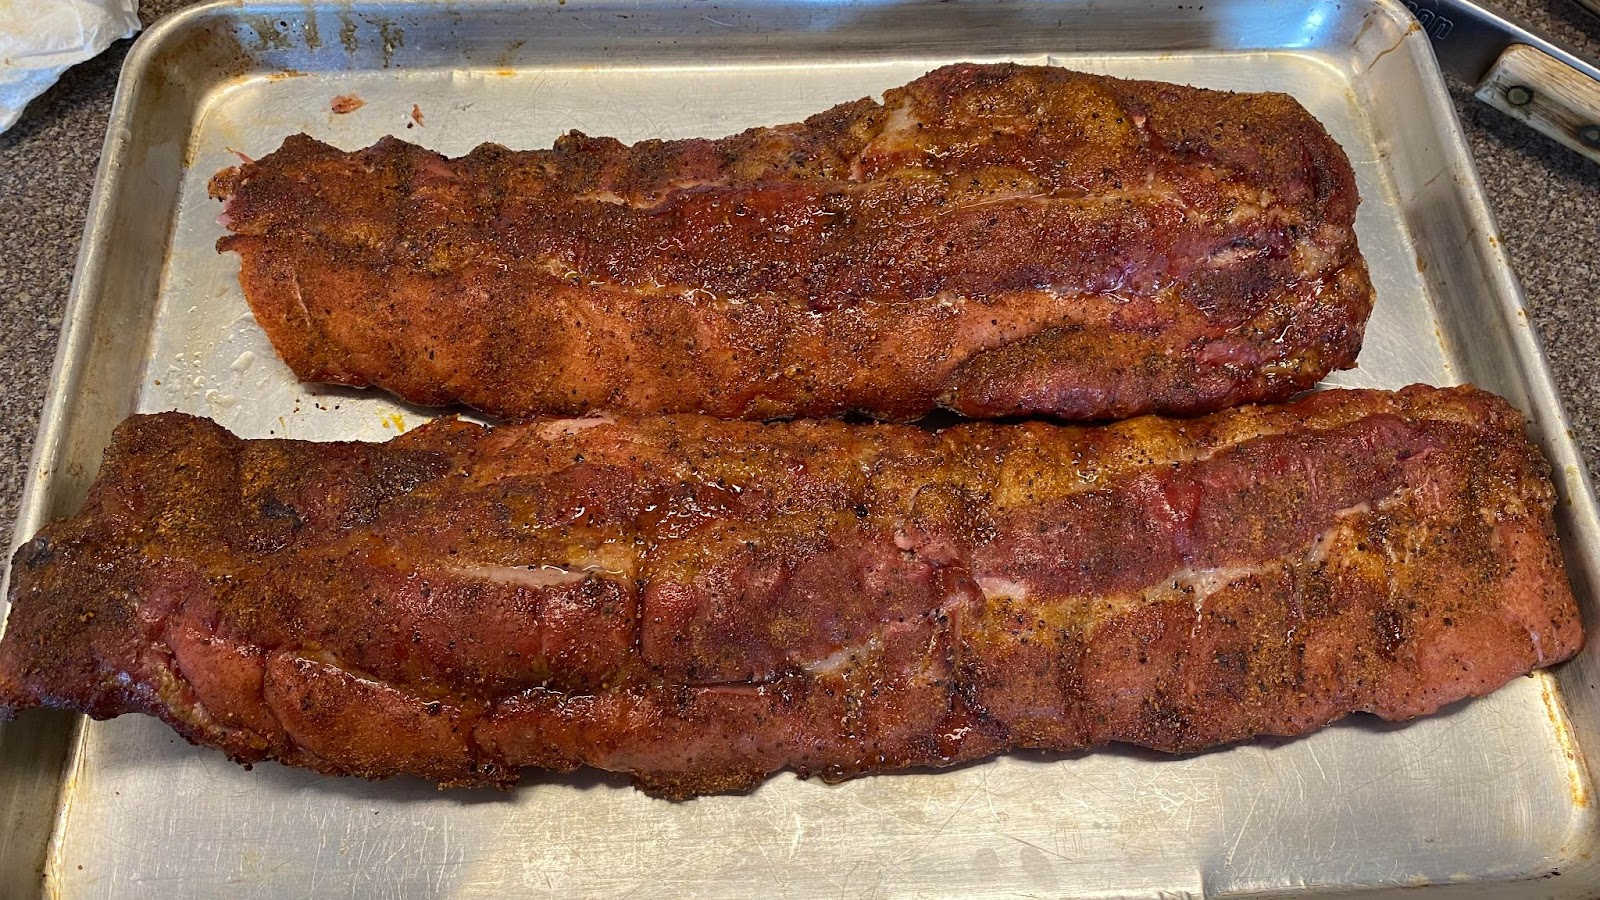
Generously shake the rub over the meaty side of the ribs, you don’t want to sprinkle it, you want to cover it! See the photo below to see how much you need to apply. Flip the ribs over and and give a good shake on the bone side but you don’t need as much on that side.
That’s it, let’s cook!
Grill Prep for Your Baby Back Ribs
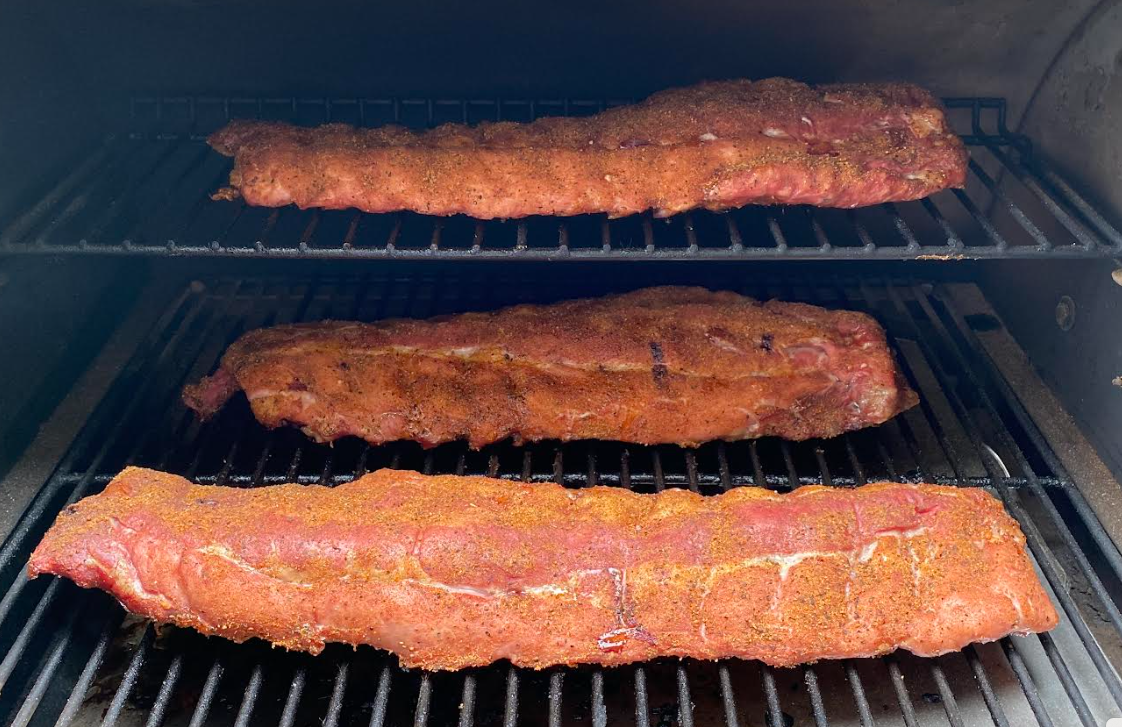
Load your pellet grill’s hopper with Griller’s Gold pellets and fire it up to deliver 225F temp (the reason we say “deliver” is that some grills run a little higher, some a little cooler. It pays to know how your grill behaves). We like to let ours preheat for a solid 20 minutes, even though it comes “to temp” in 10 – it helps to get all that metal heated up evenly.
And go put them on the grill – meaty side up, bone side down. Leave some room around them to let the air and smoke circulate. On the pellet grill we use the most (which is pretty small, truthfully), 3 slabs fit perfectly – 2 on the main grate, 1 on the upper. Close the lid, set a timer for 3 ½ hours and GO AWAY. Seriously, leave it alone. If you’re lookin’ they are NOT cookin’. You don’t need to baste, spritz, etc. They will cook just fine without your fussing.
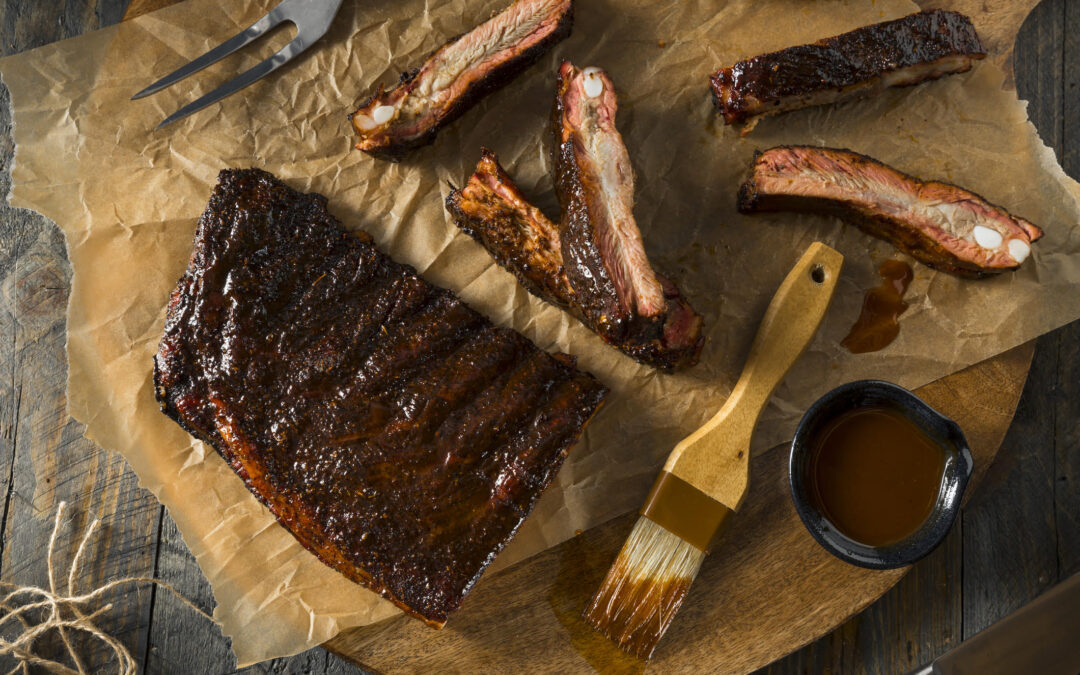
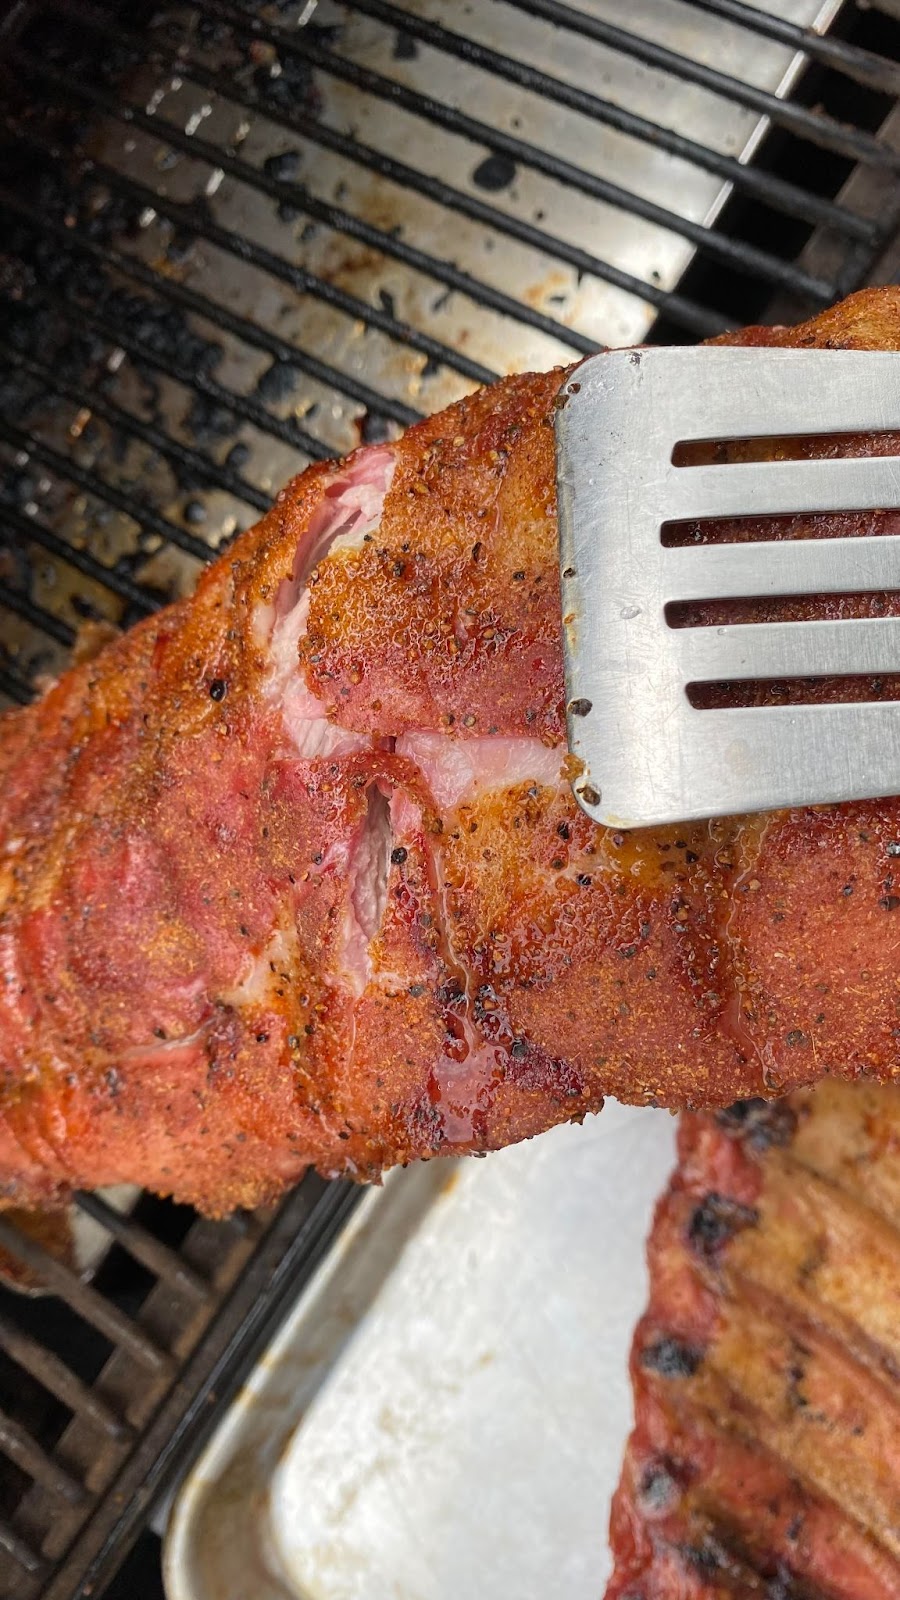
At 3 ½ hours, come back to do the “crack test”. This is where you lift a slab up with a pair of tongs in the middle. If the ribs are done, you’ll see the bark crack and slab start to split in half. When you see that split or crack, they are done on the grill – see the picture below.
Please note, not all slabs will get done at the same time – but that’s ok because you’re going to rest these! If you have a slab that’s not quite cracking at the same time as the others, give it more time on the grill, usually an extra half hour will do the trick.
Resting Your Ribs
Here’s where this recipe becomes great for summer fun. We like to make these starting pretty early in the morning so that they are done late morning – say on at 7:30 and off around 11:00 AM. They can go in the resting cooler for several hours until you’re ready to remove them, sauce them up and serve them! Now this said, if you are having these for lunch, you can do without the rest, but your ribs will be more tender and tasty if you can build in some rest time.
Serving Your Baby Back Ribs
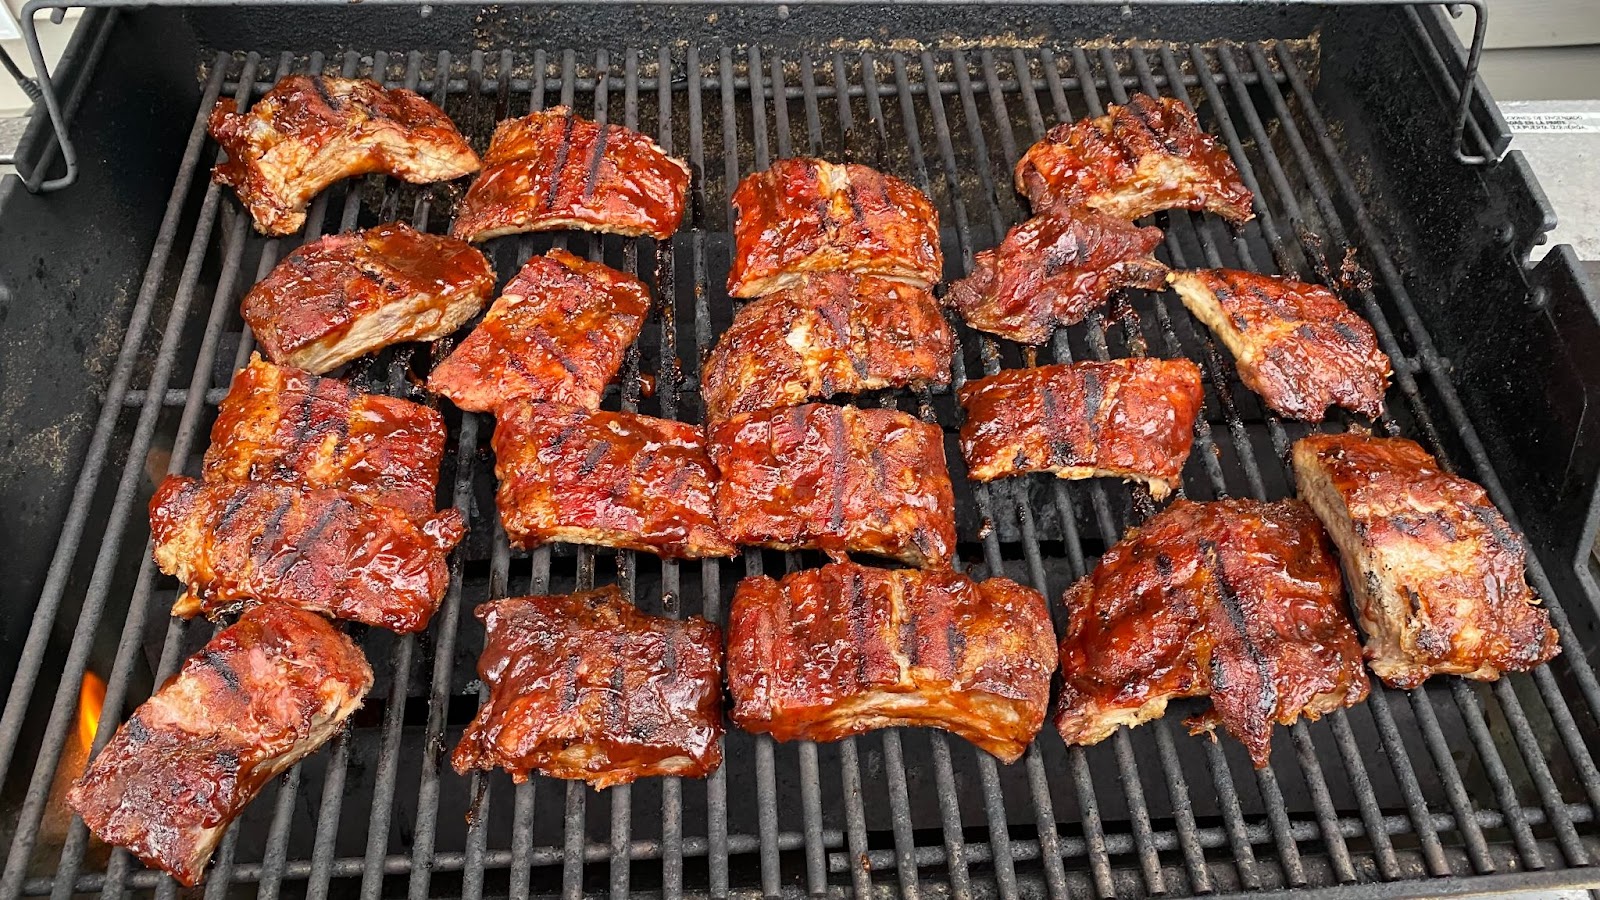
We like to cut the ribs at this point into serving pieces – generally 2 ribs per piece. Then make a double layer of heavy duty foil, pile the rib pieces in and close it up like a packet. For 3 slabs it requires two packet. Nestle the packets in the bottom of a picnic cooler. Then fold up an old bath towel and put it on top for some extra insulation, and close up the cooler. Let rest at least an hour and up to 6 hours.
When you’re about 20 minutes from dinner, relight your pellet grill to 400F. Or, if you have one, a gas grill is fine for this step – run it at medium heat. Before you head to the grill, generously brush your favorite barbecue sauce over the meaty sides of the ribs. Head out to the grill, put the rib pieces sauce side down and close the grill. Set a timer for 3 minutes (time is important here as you don’t want to burn the ribs). At 3 minutes, give them a flip to the bone side down and heat for another 3 minutes. Then take them off and serve!
We love our ribs with cole slaw, baked beans, au gratin potatoes, mac and cheese, corn bread, and more for sides.
That’s it! Ribs can be so easy to make and so easy to get spectacular results just by keeping things simple!
Right now is the time of year when everyone’s taxes roll around – and whether you’re lucky enough to get a refund, or have to pay, it certainly makes you think twice about expenditures. And let’s face it, groceries have gotten more expensive this year.
So in this edition of the Griller’s Gold Blog, let’s have a look at some ways to have a great meal cooked on your pellet grill fueled with those amazing Griller’s Gold Premium Wood Pellets!
Let’s do this!
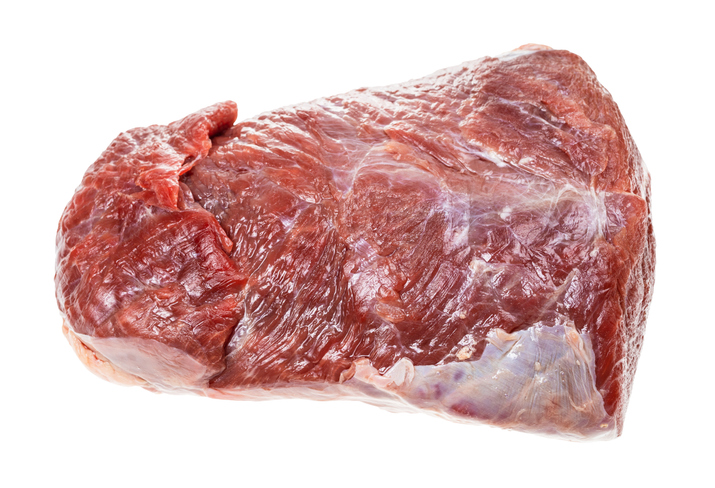
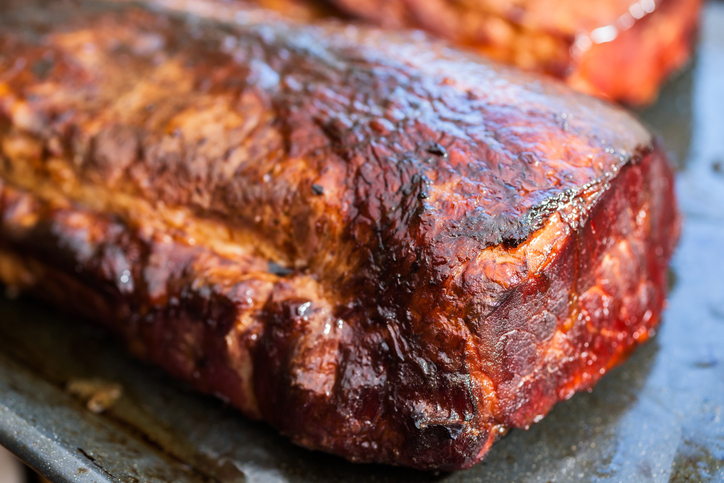
Budget Cut – Chuck Eye Roast (the Beefy Secret!)
A chuck eye roast is a roast cut from the center of the chuck. The chuck is the primal cut that encompasses the shoulder part of beef cattle, so it is a working muscle.
Chuck is typically what you use to make beef stew or pot roast. It likes a long, slow cooking method for maximum tenderness. BUT! The chuck eye, by the way it’s cut, can actually be grilled like a steak to medium rare.
Chuck eye roasts are kind of oval in cross section and square to cylindrical in shape and are between 2 and 4 inches thick. A direct cousin of the Chuck Eye is a Delmonico Steak – which is a steak cut from the chuck eye.
The thing we like about a chuck eye is you can see a clear grain direction in the meat (in this photo it is running from the lower left to the upper right) therefore, when carving it, it is easy to spot the grain and make cross-grain slices, which enhances the tenderness of your finished meat.
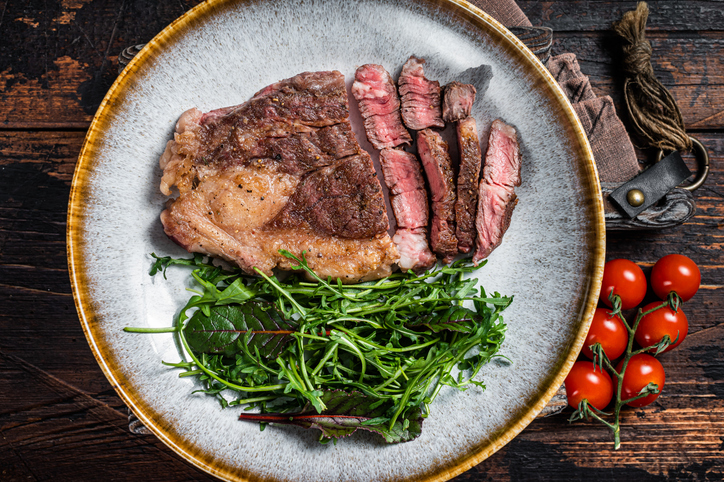
We love doing a Chuck Eye roast on our pellet grill using the reverse sear method.
Here’s how…
Reverse Sear Method for Chuck Eye Roast
Buy:
Chuck Eye Roast (2-4 lbs) – plan on ½ lb precooked weight per person. When we spot them at the grocery store, we usually buy two – one for now, one for the freezer!
Prep:
Go over the outside the roast and trim off any silver skin or obvious gristle. Because it is a working muscle, there will be some connective tissue that cuts through the roast – don’t worry about that, we’ll deal with it when it’s done and carved.
Seasoning:
We like to do at least a 2 hour kosher or sea salt “dry brine” on it prior to cooking. Give it a generous sprinkling of salt all over at least 2 hours prior to cooking (but if you have time, 6 hours or even overnight does wonders!), then immediately before cooking, we coat it with a generous hit of freshly ground black pepper, granulated garlic, granulated onion and paprika. If you want a pop of spice, a nice shake of chili powder also adds to the flavor.
Grill Prep:
Make sure your grill is clean as you’re going to need to fire up to hot temperature later to sear. Load up with your favorite Griller’s Gold Premium Wood Pellet – the stronger flavors are great with this – Cherry, Hickory, Smokeshack or Competition Blend work great, as does Charcoal, although that has a more subtle flavor. Preheat to 250 for the “low and slow” part of the cook.
Cooking:
Once the grill is stable at 250 (most pellet grills take about 15 minutes for this), put the meat on, insert a probe in the thickest part and close it up!
Set a timer for 20 minutes for turning. Turn the meat every 20 minutes until the internal temp hits 125F for medium rare. If you like it more done, adjust accordingly.
Rest:
Take the meat off the grill, wrap it in a double layer of heavy duty foil, then nestle it in some folded towels. We like to put it in a picnic cooler as well. Let it rest for 1 hour. About 15 minutes before the rest ends, fire your grill to it’s highest temperature (ours goes to 550F) and let preheat.
Sear:
Unwrap the meat and bring it to the grill. Sear it on the grill for about 8 minutes, turning every 2 minutes, so each side will be against the grill for two 2-minute cycles, then bring it in.
Serve:
Slice it across the grain (you remember that, right?) in ¼” or so slices and enjoy.
We love this with the usual steakhouse sides of garlic mashed potatoes, a good veggie like sauteed spinach or roasted asparagus, and a bottle of big red wine – Merlot, Cabernet, or if you got a nice tax refund, how about a French Bordeaux? Gotta live a little right?
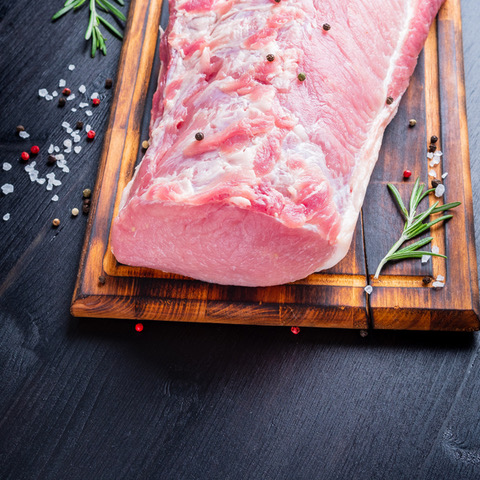
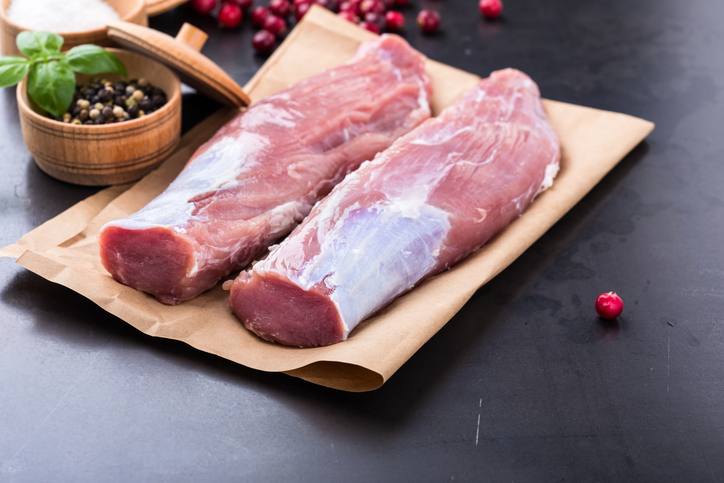
Budget Cut – Pork Loin Roast:
Thankfully due to the abundance of pork production in the US, pork prices have stayed pretty low, so our favorite thing to do is a whole pork loin roast on the grill. These massive cylinders of meat are great for serving a crowd, and the nice thing is, it responds beautifully to the Reverse Sear method we just described. We’ll note the differences as we go here.
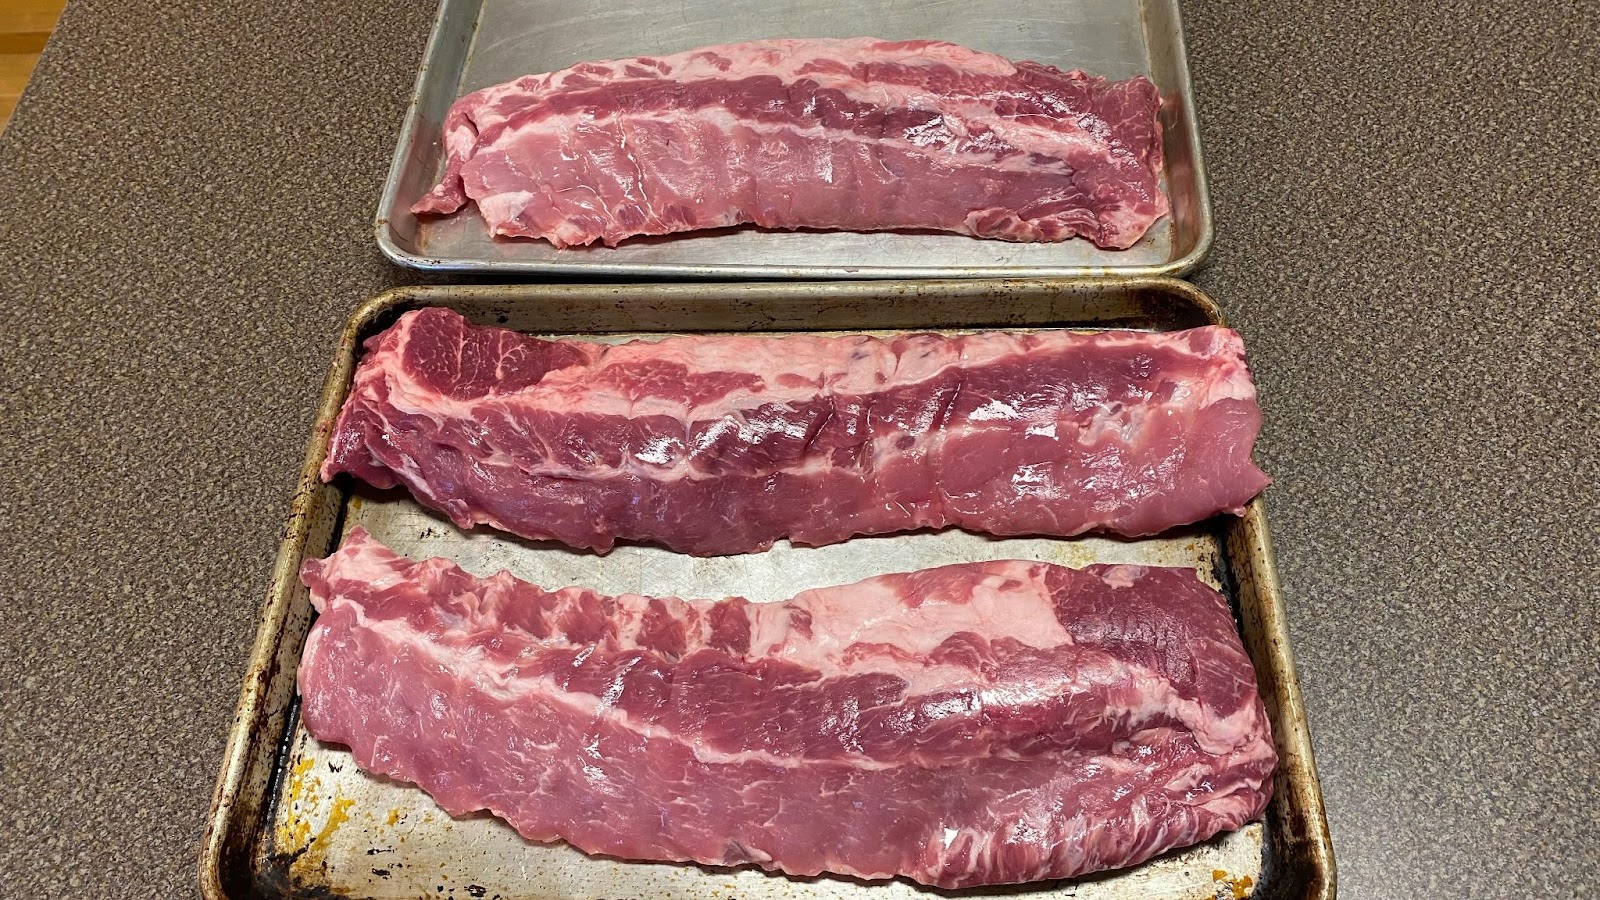
A whole pork tenderloin is usually a 5 to 6 pound piece of meat, about 18” to 24” long. It is about 4 or 5 inches in thickness and is oval shaped in cross section. The price on these varies between as low as $0.99 a pound to about $4.00 a pound.
The cut is comprised of several muscles, so the texture and flavor varies end to end. In fact, you can buy one of these and butcher up into a good amount of “freezer food” with roasts, pork chops, etc. We love buying these for that reason.
In the picture here, the lower right end is the “sirloin” end and the upper left end is the rib end. The rib end meat is a bit fattier. In the middle is the “center cut” which is where typical pork loin roasts are cut from, and the sirloin end is usually sliced into thin “breakfast” pork chops. But put away that knife, because we’re cooking this bad boy whole today!
Reverse Sear Method for Whole Pork Loin Roast
Buy:
You’re buying a whole pork loin roast – these are most easily found at Sam’s Club, Costco and other large big box retailers and they are in cryovac packaging. Try to avoid buying ones that say “up to 12% solution of pork broth, salt and …” – those are pre-brined and while they cook up nice, they can be a bit salty and that limits your seasoning creativity a bit.
Prep:
Take it out of the package. That’s it. No need to trim these. They will occasionally have a fat cap on one side, and that’s fine – leave that for flavor.
Season:
Just like for the chuck eye roast, first dry brine it with a generous hit of kosher or sea salt for a couple of hours. But DON’T do that if you bought one with the solution injected in it. After the dry brine, we like to mix up a rub of equal parts sugar, fresh ground pepper, granulated garlic and onion, paprika, and then ½ part chili powder and ¼ part dry mustard powder. For a large roast, use 2T for the whole parts in your mix, which means a ½ part becomes 1T and a ¼ part becomes 1/2T. Rub it generously all over the meat.
Grilling, Resting and Searing:
Follow the instructions for the Chuck Eye roast – it’s the same with one exception – go low and slow until it hits 140F internal. Pork is best between 145 and 150F when finished.
We love to cut this into thin slices if we’re doing sandwiches, or in thick pork chop like slices if we’re serving as a plated dinner.
Some additional great “Budget Cuts”
For chicken, we love chicken thighs and for some reason those are always inexpensive! We also love turkey – whole turkeys are always a great value year round – usually priced between $3 and $4 a pound.
That’s a wrap!
You see! You CAN eat like a king without spending a fortune. Wishing you a happy spring time! Thanks again for reading the Griller’s Gold Blog!
It looks like summer is finally arriving after a cold spring here in the upper Midwest where the Griller’s Gold blog team resides. Time for lazy days spent on a boat, picnics under a big shady tree in a park, outdoor music festivals, long hikes and much more.
This is also time to have some great ideas for tasty things that are a) portable and b) safe to eat with minimal refrigeration. And of course prepared on your pellet grill using Griller’s Gold Premium Hardwood pellets!
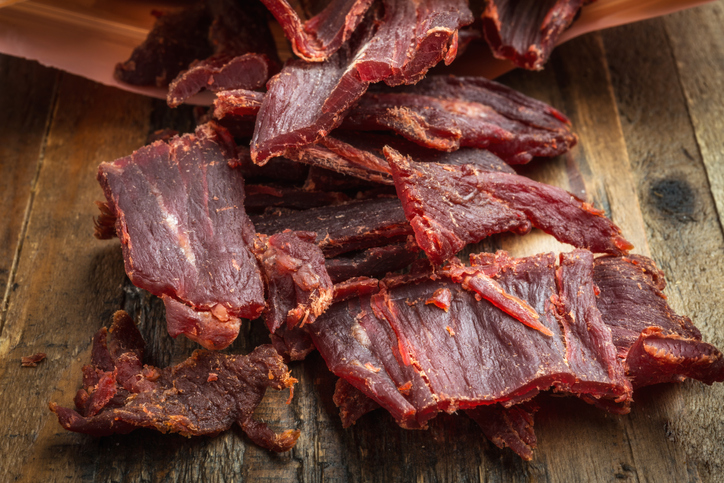
The star of that summer show is Pellet Grill Jerky. We really don’t know a single person who isn’t vegan that doesn’t love a good strip of jerky. The fun part is that this recipe is repeatable across a lot of other meats – not just beef.
To accompany the Jerky recipe we also have recipes for smoked cheese crackers, smoked caramel corn and smoky nuts – all great to munch on a summer day accompanied by a great cocktail. And speaking of great cocktails, we have a couple to share with you too!
Let’s get to it!
Pellet Grill smoked Beef Jerky
(Stewart Campbell)
Making your own homemade beef jerky will ruin you forever from buying the commercial stuff. For starters, the amount of jerky you can make for about $20 total will be at least 3X what that $20 would buy in the commercial brands. And it is so easy!
Also the trick to having your jerky be more safe out of the refrigerator is to use some curing powder in the marinade. This powder, available online is what is used to cure bacon and other meats. This recipe is for beef flank steak but you can also substitute game meat (venison is off the chart!), turkey or pork.
Ingredients:
2-3 lbs of beef flank steak
Marinade:
½ tsp Pink Curing Powder #2 (“Prague Powder”) (You can also use Morton’s InstaCure, follow the box instructions on how much to use)
1 cup Pineapple Juice (we used Jumex branded Pineapple Nectar)
½ cup Worcestershire sauce
½ cup Low Sodium Soy Sauce
½ cup dark brown sugar OR ¼ cup Agave Syrup
4 cloves of garlic, mashed or pressed (or 1 tsp granulated garlic)
1 inch piece of fresh ginger, grated (OR ½ tsp powdered ginger)
2 tsp coarse ground black pepper
2 tsp hot sauce (we use Frank’s Original sauce)
Chill the beef well – or even put it in the freezer for about 45 minutes – you want it very cold and firm for good slicing. Cut the piece of flank steak in half AGAINST the grain, then turn it ¼ turn and make ⅛” thick slices WITH the grain. Cutting with the grain is key to having those nice chewy pieces of jerky.
Mix up your marinade. Put the meat into a 1 gallon zip closure freezer bag and then dump in the marinade. Press as much air out of the bag as possible, then put the bag into a shallow container and place in the fridge. (This is to contain any leakage, this marinade will make a sticky mess out of your fridge if it leaks. Ask us how we know!) Let the meat marinate at least overnight, or up to 24 hours.
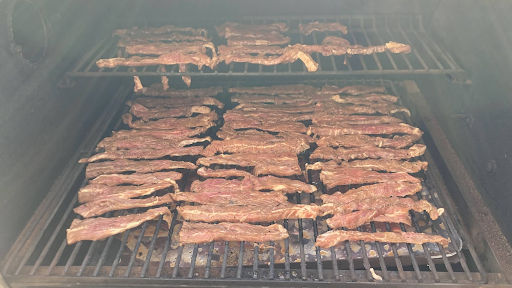
On cook day, fire up your pellet grill to its lowest setting with your favorite Griller’s Gold pellets. For this recipe we like Smokeshack Blend or Hickory. Our pellet grill will run at 165F and if yours has a “super smoke” or extra smoke setting, use that.
Give it at least 15 minutes to warm up to temp.
Then simply lay the meat strips over the grill, leaving a bit of air gap between them to allow the warm air and smoke to circulate. Close the grill up and set a timer for 5 hours and go do something else!
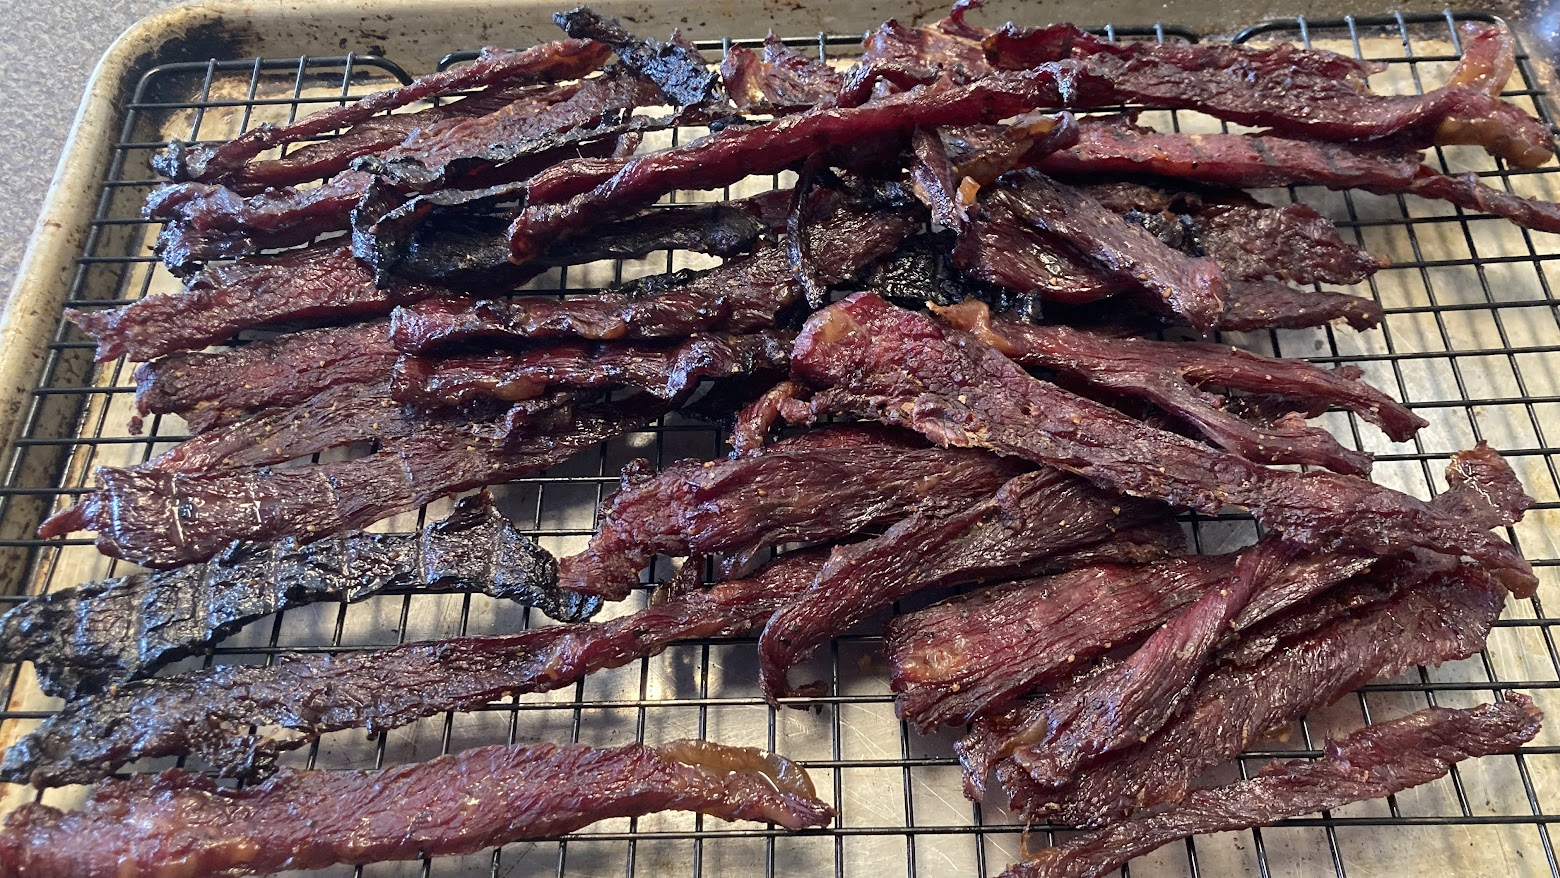
After 5 hours the meat will have smoked, dried and shrunk into amazing jerky strips. Try one warm off the grill – it should be chewy, not juicy. If it needs more time, (if it is juicy for example, or not firm) then let it go 1 more hour.
Remove the jerky to a cooling rack over a baking sheet and let cool at room temp. Store in a sealed bag or container in the fridge. It also keeps great longer term in the freezer in a well sealed container with the air pressed out. On an outdoor day, it’s safe that this is out of the fridge as it’s both cured and smoked.
(Stewart Campbell)
Super easy! There are a lot of variations of recipes out there – just search for “Pellet Grill Jerky” recipes, or combine your own ingredients to make it yours!
Smoked Cheese Crackers
These are so decadently tasty they ought to be illegal. And ridiculously easy to make!
Ingredients:
1 regular sized box cheese crackers like Cheez-Its
Melt the butter, then mix in the rest of the sauce ingredients. Put the crackers in a large mixing bowl, dump the sauce over them and gently toss to coat well all over.
Spread the crackers out on a cooling rack placed over a large cookie sheet and put that on the grate of your pellet grill. Let smoke for 1 hour, then boost the heat to 300F and bake about 30-40 minutes until the crackers start to darken a bit.
Remove from the grill and let cool to room temp. Store in a zip lock bag or sealed container, although they won’t last very long!
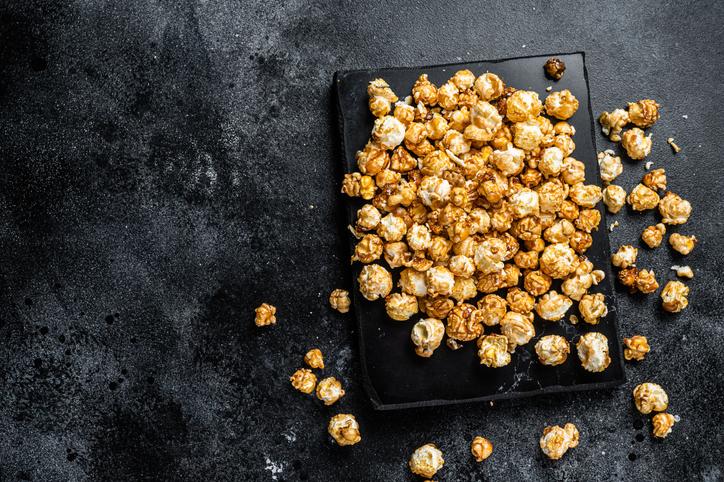
Smoked Caramel Corn
As much as the Griller’s Gold Blog Team is all about fresh ingredients and making from scratch, well, this one is so easy to do with a commercially made caramel corn, that it feels like cheating. The trick is you want just enough heat so that the coating softens and absorbs smoke, without burning. 200F seems to be that magic temp.
The ingredient is a big bag or container of caramel corn, and if you want to mix it up a bit, using the caramel corn/cheese corn mix, this is also outstanding in this recipe.
Preheat the pellet grill (using Griller’s Gold pellets of course) to 200F, spread the corn out over a large rimmed baking sheet and put it into the grill. Let bake/smoke for 1 hour, tossing every 15 minutes. Remove and let cool, store in a zip top bag or sealed container.
Smoked Cajun Seasoned Nuts
This takes that container of mixed nuts and kicks them to the next level, and then just for fun, kicks them even further with a pop of sweet heat from Cajun seasoning and some honey.
Ingredients:
3 cups mixed nuts of your choice, or a single kind of nut, whatever you prefer
3 T butter
2 T honey
1 ½ tsp Tony Cachere’s Cajun Seasoning
Preheat your pellet grill to 165F with Griller’s Gold pellets – for this recipe, try Applewood or Hickory.
Spread the nuts on a rimmed baking dish and smoke them for 1 hour at 165F. Remove from the grill and increase the grill heat to 350F.
Meanwhile melt the butter, and mix in the honey and Cajun seasoning. Dump the nuts into a bowl and toss well with the melted butter/honey/seasoning.
Line your rimmed baking sheet with parchment paper and spread the nuts out evenly over the pan. Bake in the pellet grill at 350F for 30 minutes, stirring the nuts after 15 minutes to bake the coating onto the nuts and caramelize the sugar in the honey.
Store in a sealed container (but have a handful hot from the smoker, they are amazing!).
smoked Cocktail Recipes
What’s the point of snacks without drinks? Here’s a couple of our summer faves, starting with our favorite Margarita recipe:
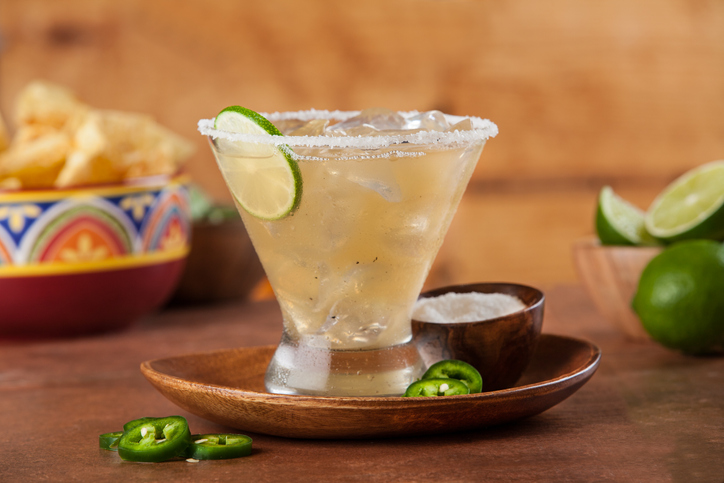
Never Fail “Toppest Shelf” Margarita
This is for a margarita that is more like a martini than the oversized monsters you see in Mexican restaurants. Note, there is no mix in this – it’s all individual and fresh ingredients because that makes the best drink!
Those mixes are loaded with things like high fructose corn syrup and citric acid. Bleah. Also critical to this using super premium tequila and top shelf orange liqueur. Nothing that comes in a plastic handle bottle, please!
For two fantastic Margaritas:
4 ounces very premium tequila, we like Resposado grade from Don Julio, Milagro, Casa Migas, Cabo Wabo, or Hornitos.
1 ½ ounces Cointreau, which is a very premium orange liqueur
Juice of 2 limes
1 ½ ounces of Agave Syrup
Salt or Tajin Seasoning for rimming glasses
Ice
Rim a pair of chilled glasses (either martini or rocks glass) with sea salt or Tajin seasoning (if desired)
Put all the liquid ingredients in a cocktail shaker or large pint glass and stir well. Fill the shaker or glass with ice and either shake (better) or stir vigorously to cool and slightly dilute the drink.
Either strain into a martini glass (dividing, you’re making two here!) or divide the drink and ice from the shaker evenly into two rocks glasses.
Perfect Ice Cold Summer Mint Julep:
This cocktail is most often associated with the Kentucky Derby but we just love it all summer long as it is frosty cold and tastes so fresh.
For two:
4 ounces premium Kentucky bourbon of your choice. We love to use Woodford’s Reserve for our Juleps, but really any good bourbon works.
1 ½ ounces simple syrup (You can buy this premade but why do that when it’s super simple to make. Recipe: https://tinyurl.com/4bmbp45e )
6 mint leaves, torn, for muddling. 6 more mint leaves on stems for garnish (3 per stem)
Crushed ice (at least 2 cups)
In two rocks glasses (although the tradition is a copper cup), add 1 ounce of bourbon to each plus a splash of simple syrup and 3 torn mint leaves. Muddle the mint with the bourbon and simple syrup.
Add the remaining bourbon and simple syrup to each drink and stir, then fill with crushed ice. Add a short straw and garnish with 3 whole mint leaves on a stem. Sip slow and enjoy!
So that’s it for this time.
Have a great start to your summer and we will see you again soon in this space!
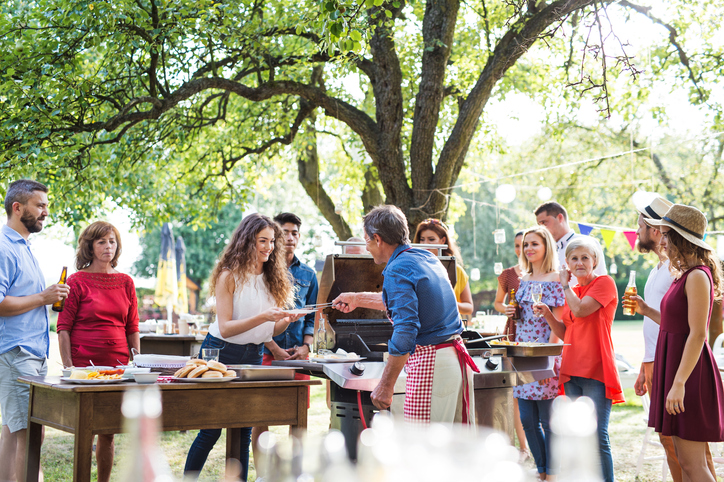
Spring is springing and summer’s not far behind. This season brings warm, enjoyable weather perfect for gathering with friends and enjoying lots of treats off your grill fueled with Griller’s Gold Natural Hardwood pellets!
So here’s the situation: Your friends have gathered for an impromptu get-together in your backyard (or deck, patio, garage, etc…) and you want to whip up some tasty barbecue for them, but you don’t have hours to do it.
Set up your grill for HOT AND FAST grilling and smoking:
While “HOT AND FAST” seems like the antithesis of classic low and slow grilling, the results you can get with it are amazing and delicious – but … also different than what you get with low and slow.
To set up your grill for HOT AND FAST, simply fire up your pellet grill (making sure your hopper is loaded with your favorite Griller’s Gold flavor) and turn up the heat. We like to go at 400 degrees for HOT AND FAST barbecue!
Now this all said, smoke production at hot temps is much lower on most grills than it is at low and slow temperatures. If you are looking for that good smoky flavor as well, there are a couple of easy solutions:
Smoke Tube: These are stainless steel perforated tubes that you fill with Griller’s Gold pellets and light one end with a propane torch. That starts the pellets smoldering and will fill your grill with great smoke flavor when you place it on the grill. Here’s one that works great: https://a.co/d/9xCEIwv
“Cigar”: This is kind of a “DIY smoke tube” that works on the same concept. Take two pieces of heavy-duty foil about the size of a sheet of standard paper, stack them up and roll them into a tube, crimping one end closed. Fill it full of your favorite Griller’s Gold pellets, leaving one end open, then using a sharp stick or skewer, poke holes all over it. Light the pellets through the open end and place it on the grill!
Placement: In either case, place it AWAY from your temperature sensor – you don’t want the extra heat to cause your grill to run cool.
hints for Running HOt:
Since you’re going to be running hot, it helps to have a clean grill. If it’s been a while since you cleaned your grill’s heat plate, give that a scrape or change the foil covering on it. You don’t want a grease fire.
Also, make sure you have your supply of Griller’s Gold pellets at the ready – rolling hot and fast for a few hours will use a surprising amount of pellets. You don’t want to run out.
Choosing What to Cook – Hot & Fast
So, what to cook? Here are four ideas on how to deliver that wonderful BBQ flavor in just a couple of hours for your impromptu crowd.
HOT AND FAST Baby Back Ribs:
Baby Backs are perfect for this as they cook quicker than St. Louis Cut ribs (or spare ribs) and respond just fine to the high heat.
We like to cut the slabs into 3 rib pieces right from the start – that helps them cook more quickly. Season with your favorite rib rub, put them on, and turn them every 30 minutes until they are at least 165 degrees in the thick meaty part. Then sauce them up and leave them on for 10 minutes more.
Note, due to the hot heat, these will be more “toothsome” and not “fall off the bone” like low and slows can be. But they WILL be very tasty. These ideally cook between 90 minutes to 2 hours with the thinner pieces getting done first.
HOT AND FAST Country Style Ribs:
So let’s make sure we point out the misnomer of country-style ribs. These are actually pork shoulder or Boston Butt pork roasts cut into 2” thick and wide strips. They aren’t “ribs” any more than boneless wings were ever flapped by a chicken! That doesn’t mean they aren’t tasty!
For technique and seasoning – the same as Baby Backs – season with your favorite rub, cook to between 165 and 180 degrees (which should take 90 minutes to 2 hours max) then sauce up, leave for 10 extra minutes, and serve hot off the grill!
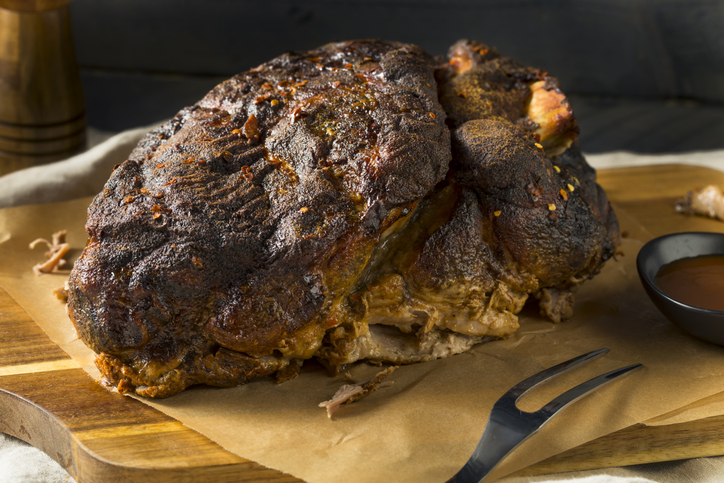
HOT AND FAST Butterflied Pork Shoulder or Boston Butt:
So when you hear Boston Butt and pork shoulder, you think of classic, low and slow cooked, pulled pork, right?
To make this hot & fast, take that roast, remove the bone, and then butterfly it by slicing it down the long way into two big pieces about 2” thick.
Season these up as you would ribs with your favorite rub and throw them on the grill. In about 2 hours, you should be at around 165 degrees.
Take it off and slice it fairly thin across the grain and you’ll have absolutely delicious, juicy slices of delicious pork with a wonderful barbecue flavor. This is especially good when you’re running a smoke tube.
This is also fantastic for making Cuban sandwiches. Sliced pork combined with slice ham, Swiss cheese, yellow mustard, and pickles on a French baguette, smashed down on a panini press! Fantastic!
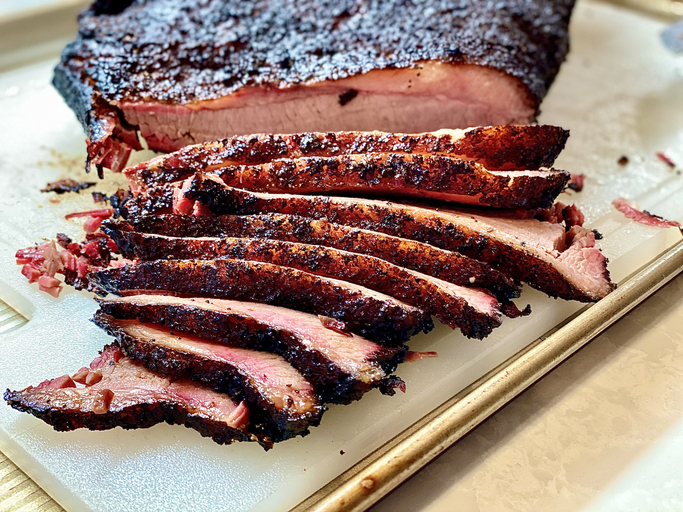
HOT AND FAST Beef Chuck Roast:
Beef Chuck Roasts are one of the most versatile things you can cook on your pellet grill. Go low and slow and they are the “budget priced brisket” – giving a brisket-like flavor for a fraction of the price. But cooked hot and fast, then sliced thin across the grain and kissed with smoke flavor, you’ll think you’re dining at a fine Texas steakhouse.
Texas Style Chuck Roasts
We like to do our HOT AND FAST chuck roasts Texas style. We season them up with “SPG”. This is a blend of good kosher salt, granulated garlic, and coarsely ground black pepper. You can mix this up yourself (2 parts salt, 1 part each garlic and pepper) or it’s easily found in barbecue stores pre-mixed. Normally, the GG Barbecue Crew is all about the homemade rubs. But because we find we use it all the time on things like burgers, steaks, fish, and even potato wedges on the grill, we have started buying premixed SPG.
After seasoning, put it on the grill, turning it every 10 minutes like a big, thick steak. We find that medium rare to medium (130-145 degrees) works best for the doneness of chuck. Too low and it’s tough, too high and it’s dry.
Once it’s hit desired doneness, let it rest under foil on the platter for at least 15 minutes and then carve. Then separate the various muscles, trim off and discard any gristle or silver skin. Then slice the meat into nice slices across the grain.
Served with sauce or not, this is a sublime way to get your beef on in a pretty short time!
One of the best parts of summer is doing impromptu things. Impromptu grilling and barbecue doesn’t mean you’re limited to burgers, dogs, brats, and chicken breasts. You can make great authentic barbecue in a very short time!