
Let’s face it – there’s nothing better than fresh, hot pizza. There, we said it, change our minds! Oh, you agree!
Well then, let’s talk about making fresh, hot, wood-oven style pizza on your pellet grill fueled with Griller’s Gold Premium Hardwood pellets!
We’re going to break up this post into two parts – part 1 is simple. How to get a great wood-oven flavored pizza from your pellet grill using Griller’s Gold pellets for fuel.
This is easy! You can buy frozen pizzas, take and bake pizzas, etc., and just baking them in your pellet grill will add a kick of flavor to them that you won’t find in pizzas baked in your oven.
Part 2 however, is kicking it to the next level. Fresh homemade dough, fresh homemade sauce, and super fresh ingredients. All adding up to completely next-level pizza that will have your friends and neighbors begging you to make it over and over again. You’ll be a pizza rock star!
Part 1: Baking Pizza in a Pellet Grill
The scenario is you want pizza, it’s a gorgeous evening and you want to serve it hot off your pellet grill. Buzz out to your local grocery and buy either a fresh “take and bake” non-frozen pizza – most groceries have these including national chains like Walmart, Target and Aldi. OR you can also buy a frozen pizza, the brand being your choice.
Take & Bake Pizzas
It is as simple as this: most take and bake and frozen pizzas are designed to be cooked directly on your oven’s rack, aka the main grate on your pellet grill. Then cooked at a temperature that is easily attained by your grill – the most common being 425F.
So simply preheat your pellet grill, using your favorite Griller’s Gold pellet choice – Competition Blend is a good choice here – to the temperature noted in your pizza’s instructions. Let’s assume 425F though.
Give it a good 20 minutes of preheat time to make sure it’s truly up to temp. Then just slide that pizza onto the grate, close the lid, and set a timer for the recommended time on the package. To remove it, it helps to have a pizza peel (large spatula like thing for getting pizzas out of an oven) or a rimless baking sheet. Worst case scenario, use your barbecue tongs to grab it and slide it onto a tray for serving. Your pizza will have that “kissed by smoke” flavor that a good wood-oven pizza has and you’ll be very happy!
Notes for Great Grilled Pizza:
First, for great pizza results, oven or grill, buy yourself a pizza stone. A pizza stone is a large piece of stone-like material that absorbs and concentrates heat and absorbs moisture. A pizza baked on a stone will have a nice crunch to the bottom crust and a great flavor that you just can’t get otherwise. These are pretty inexpensive on Amazon – here’s an example: https://a.co/d/g6Aawyi
Second, if you want a smokier flavor for your pizza, use a smoke tube filled with Griller’s Gold pellets. We’ve covered those numerous times before – check out our December 2022 gift guide for examples.
Which leads us to part 2 and why you’re really here – to make amazing craft pizza on your backyard wood burning pizza oven, aka your pellet grill burning Griller’s Gold pellets!
Part 2: Making Craft Pizza
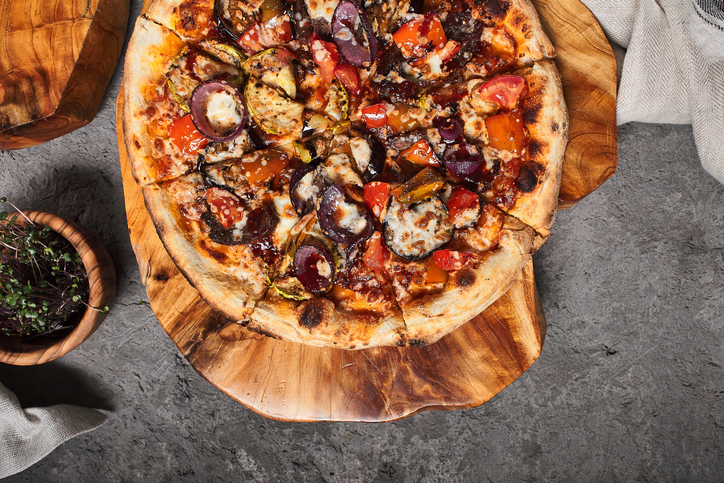
Craft pizza is made with delicious homemade crust, tasty tomato sauce that’s super easy to make, fresh cheeses and lots of love! All baked on your pellet grill with Griller’s Gold fuel, giving it that “kissed by wood smoke” flavor.
First of all there are TONS and we mean TONS of resources online for making great pizzas. One of our faves to follow on YouTube is Vito Iacopelli – he is an Italian-born chef making incredible artisan pizzas. His techniques and recipes are a bit complicated, so in the interest of making this easy for you we have our own versions. But check his channel out here: https://www.youtube.com/@vitoiacopelli
Here’s an easy-to-follow recipe for making great pizza dough. The key/trick to outstanding pizza dough is to let it ferment overnight in the refrigerator. Letting dough rise overnight in the fridge gives it a flavor and texture that just doesn’t come out in a short process. So, making great homemade pizza does take a touch of planning.
Special gear – here’s where a pizza stone and a proper pizza peel are a must. This really won’t work without those two pieces of equipment. Also, to get the pizza to slide off the peel and onto the stone, the peel needs to be floured.
We have found that the best for doing this is not regular flour but semolina flour. Its granular texture makes it work like little ball bearings for sliding the pizza off the peel and onto the stone.
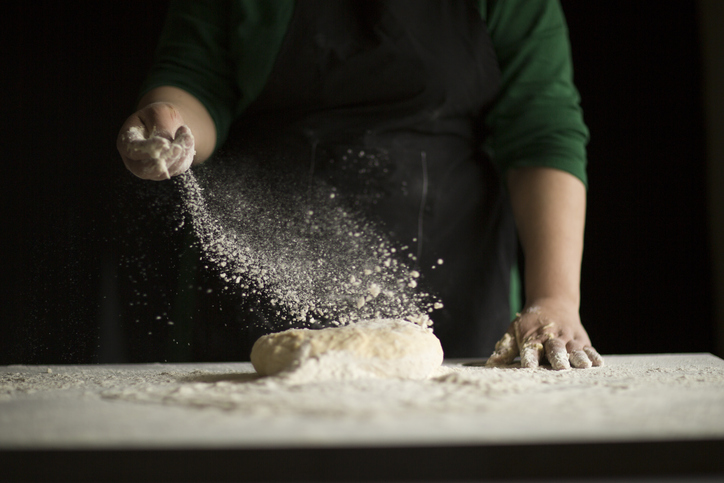
Making the Pizza Dough
Ingredients:
- 1 pound or 453 grams of flour (or if using cups, about 3 ½ cups)
- 1 ⅓ cups of water at 100F temperature plus 2 tablespoons of water at 100F (or if by weight, 320 grams of water plus 10 grams of water)
- 1 ¾ tsp kosher or sea salt. If using iodized table salt, cut to 1 ¼ tsp
- 1 packet instant yeast or 2 tsp if using bulk yeast
- ½ tsp sugar
Pizza Dough Steps Day 1:
- The night before you want pizza, measure out the flour into a large mixing bowl and stir the salt into it.
- Measure out the 1 ⅓ cups of water, and put the 2 tablespoons of water in a separate small dish.
- Add the yeast and sugar to the 2 tablespoons of water and stir well.
- Let rest 5 minutes (this activates the yeast) then stir the yeast mixture into the larger container of water and mix that well with the flour to form the dough.
- Let the dough sit in your mixing bowl 10 minutes then stir again, and turn out onto a surface sprinkled generously with flour.
- Fold the flour in half, pressing flat, turn ¼ turn and repeat.
- Repeat that 15 more times – if the dough is sticking to your hands, flour them.
- Then put the dough back in your mixing bowl and cover with plastic wrap.
- Let rise 2 hours.
- Then wet your hand and reach into the bowl, grab the side of the dough and stretch it up and fold it over the dough. Do this 4 or 5 more times, turning the bowl ¼ turn each time.
- Let rise 1 more hour covered, then repeat the stretch and fold, then cover again with plastic wrap and put in the fridge until tomorrow.
Pizza Dough Steps Day 2:
- 2 hours before you’re ready to make pizza, turn your dough gently out onto a floured surface and shape it into a rough oval.
- Using a scraper or a sharp knife divide the dough into two more-or-less equal portions.
- On each, gather the edges of the dough up to the top center forming a ball.
- Set the ball on a floured part of your surface and repeat with the other, then let the dough balls rest for at least 20 minutes, covered lightly with a sheet of plastic wrap.
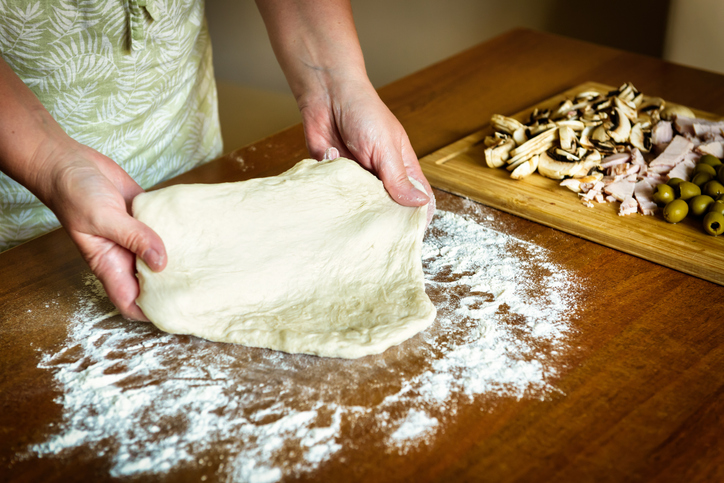
To Form a Pizza Crust:
Put a dough ball in the middle of your floured work surface and using your finger tips, press down on it to flatten it – repeat all over – the dough will have little craters all over it.
Then pick up the flattened disc, and holding it about 1” from the edge, start shuffling it in a circle like you’re turning a steering wheel, keeping the bottom edge in contact with your surface.
After a few times around, lay the dough back on your floured surface, and using your hands, press any thickness out of the center of the dough, trying to flatten it to an even round of between 8 and 10 inches in diameter, leaving a thicker edge section. You can also lay it over the back of your fists and use them to stretch it.
Generously sprinkle flour or semolina over your pizza peel. Brush the top surface of your pizza crust with olive oil then gently pick it up and lay it on your floured pizza peel. Now you’re ready to build your pizza.
To bake your pizza, fire your pellet grill up to it’s hottest temperature using Griller’s Gold pellets – ours goes to 500F. Give it at least 30 minutes to preheat. Make sure your pizza stone is in there for the entire preheat.
To “launch” a pizza into the oven (look up YouTube videos on this!), first give your peel a “shake” back and forth to make sure the pizza will slide – this is why flouring the peel is so important. If it won’t slide, gently lift sections of the dough with a wide spatula and toss flour under it until you can slide it.
Then, open your grill, set the end of the peel about an inch from the far edge of the stone and holding the peel at about a 10 degree angle, give it a few back and forth shakes to get it sliding down the peel. As soon as the pizza touches the stone, gently start pulling the peel out back towards you. The pizza will slide off the peel and onto the stone.
This does take practice!
Building Pizzas
Fresh Tomato Sauce
Ingredients:
- 1 22 ounce can whole roma tomatoes, ideally imported San Marzano tomatoes from Italy
- 2T extra virgin olive oil
- ¾ tsp salt
Dump the can of tomatoes into a mixing bowl, then using your hand, squeeze each tomato, breaking them up into chunks. If you don’t like chunky tomatoes, run the canned tomatoes through a blender or food processor to puree. But chunky is better!
Pizza Recipe Ideas
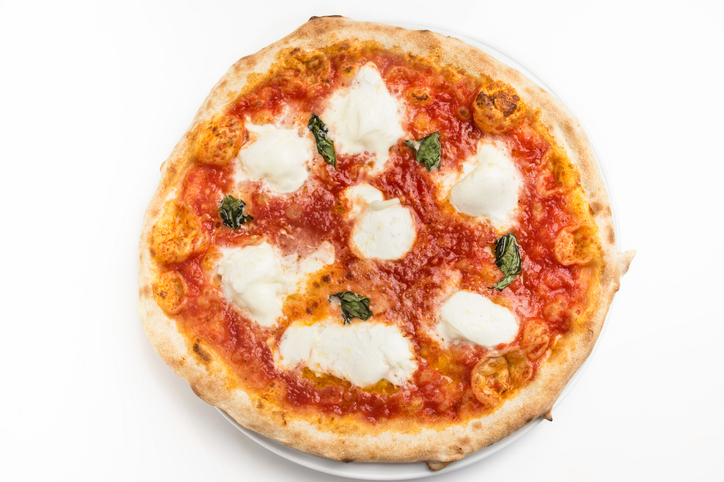
Margarita Pizza:
For the freshest, most authentic tasting Italian pizza, make a Margarita Pizza. For this, use fresh mozzarella (this is the stuff in large balls packed in liquid) sliced about ⅛” thick.
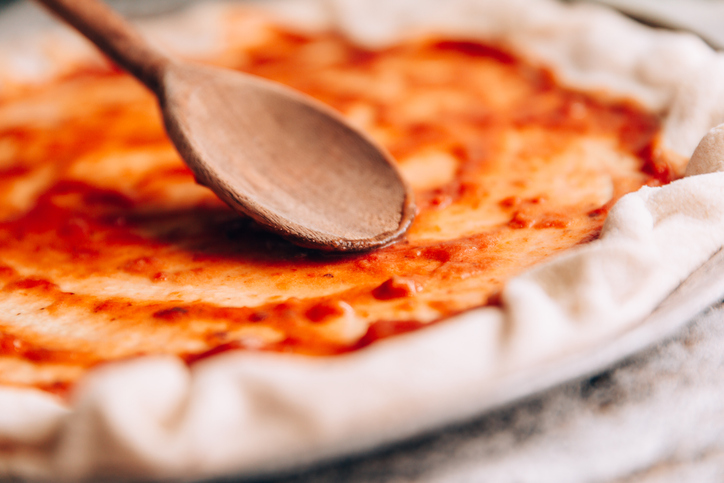
Spoon the sauce over your crust – you don’t want a LOT of sauce – be gentle with it. Then scatter the mozzarella slices over the sauce and finally, tear up some fresh basil leaves into big pieces and scatter over the top of the pizza.
Bake according to the instructions above until the crust is golden and the cheese gets little dots of browning on it, about 12-14 minutes.
Traditional “Meat Lover” pizza:
Brown crumbled Italian sausage in a hot pan then drain the grease. After forming your crust and brushing with olive oil, spread sauce over the pizza in a thin layer. Then scatter the Italian sausage over it.
Using either slices of fresh mozzarella or shredded commercial mozzarella cheese, add a layer of cheese to the pizza. If you like extra meat,, scatter slices of pepperoni over the top of the cheese. Bake until the pepperoni curls, the cheese is dotted with brown spots and the crust is golden – about 12-14 minutes.
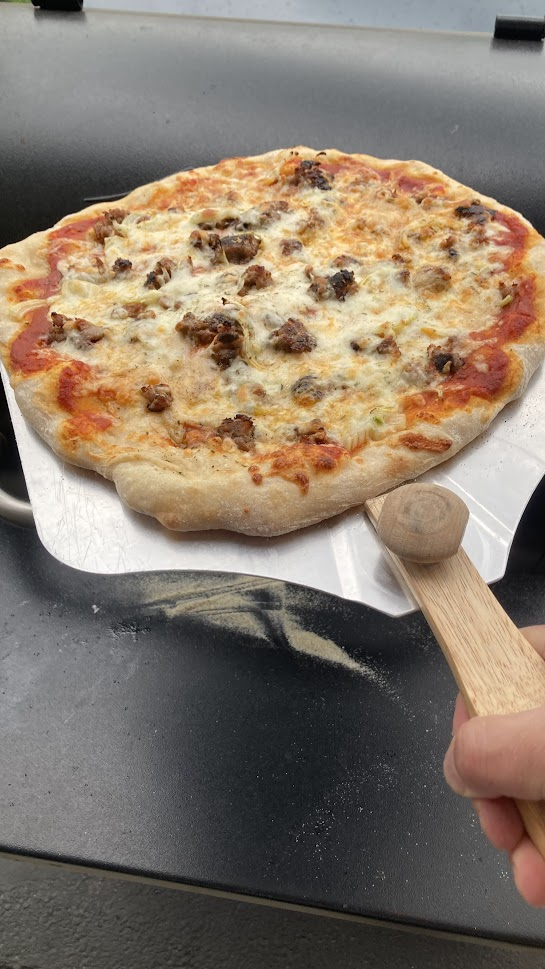
(Stew Campbell)
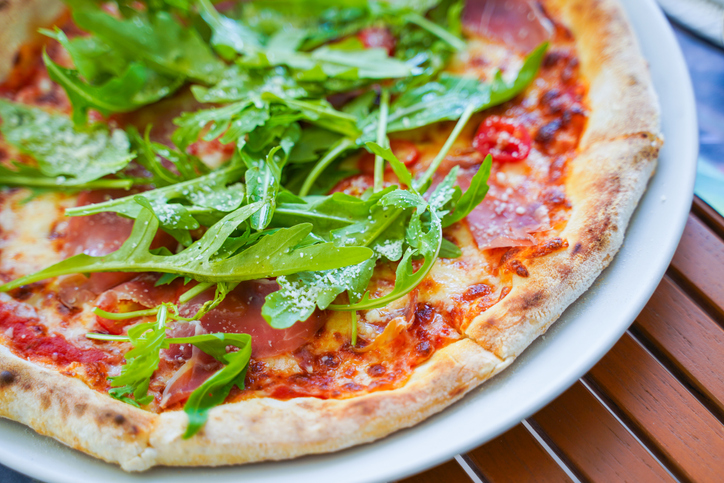
Salad Slice pizza:
The salad slice is a NYC Little Italy thing at lunch time. I guess having a crisp arugula salad on top of your pizza makes it seem healthier!
For the pizza, build a classic Margarita pizza above, omitting the basil leaves. For the salad, make a quick lemon vinaigrette by whisking together the juice of a fresh lemon with ½ cup of extra virgin olive oil and one clove of garlic, smashed or pressed.
Add salt and pepper to taste, then stir in 1T of grated parmesan cheese. The salad is just fresh arugula tossed with the dressing – this dressing is “a little goes a long way”. When the pizza is fresh from the oven, top with the dressed arugula salad. Then cut it into wedges, garnish with shaved parmesan and serve.
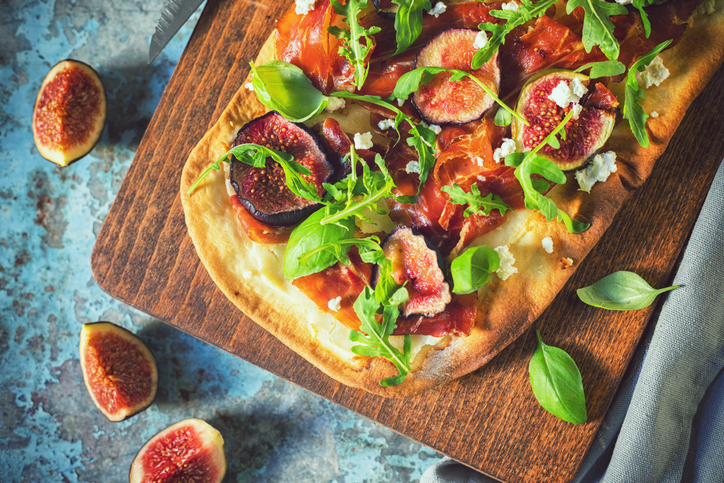
Fig/Goat Cheese/Prosciutto Pizza:
Now this one is extra tasty. Make your crust but don’t brush with olive oil.
Take some fig jam and stir it with a bit of water just to make it more spreadable. Then spread it out over the top of your pizza crust. Lay slices of prosciutto over the fig jam, then dot generously with chunks of goat cheese. Garnish with slices of figs.
Bake as usual. After it comes out, garnish with torn basil leaves and a drizzle of balsamic vinegar glaze. AMAZINGLY GOOD!
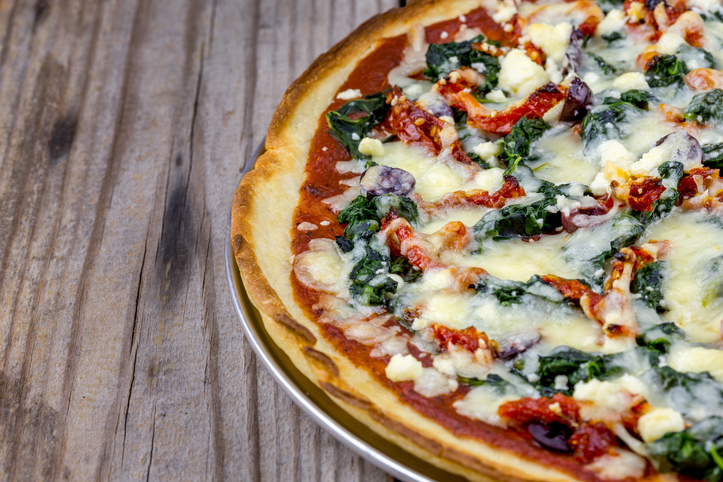
Spinach/Blue Cheese/Pine Nut/Sun Dried Tomato with Red Onion:
Rough dice a half of a red onion.
Prepare your crust and brush well with olive oil.
Scatter the red onion over the crust, then blue cheese crumbles, slices or strips of sun dried tomatoes (buy the oil packed for best results) and finally, pine nuts or chopped walnuts. Bake until the cheese melts and browns and the crust is golden.
Scatter some fresh basil strips over the pizza for a nice garnish after baking. Super appetizer pizza!
And that’s it! You’re a craft pizza expert!
Until next time!!