Anyone who has cooked a decent amount of time may know the basic technique of searing a cut of meat, fish, or poultry. The way to seal the outside, color it, and give it flavor – then cook it until done.
It’s a simple technique – and probably the way we all first learned to do the two-zone grilling. Cold meat on hot fire, a couple minutes on each side to “seal it” and brown it, and then move it to a cooler part of the grill to slow down the cooking and allow control of the heat to perfection.
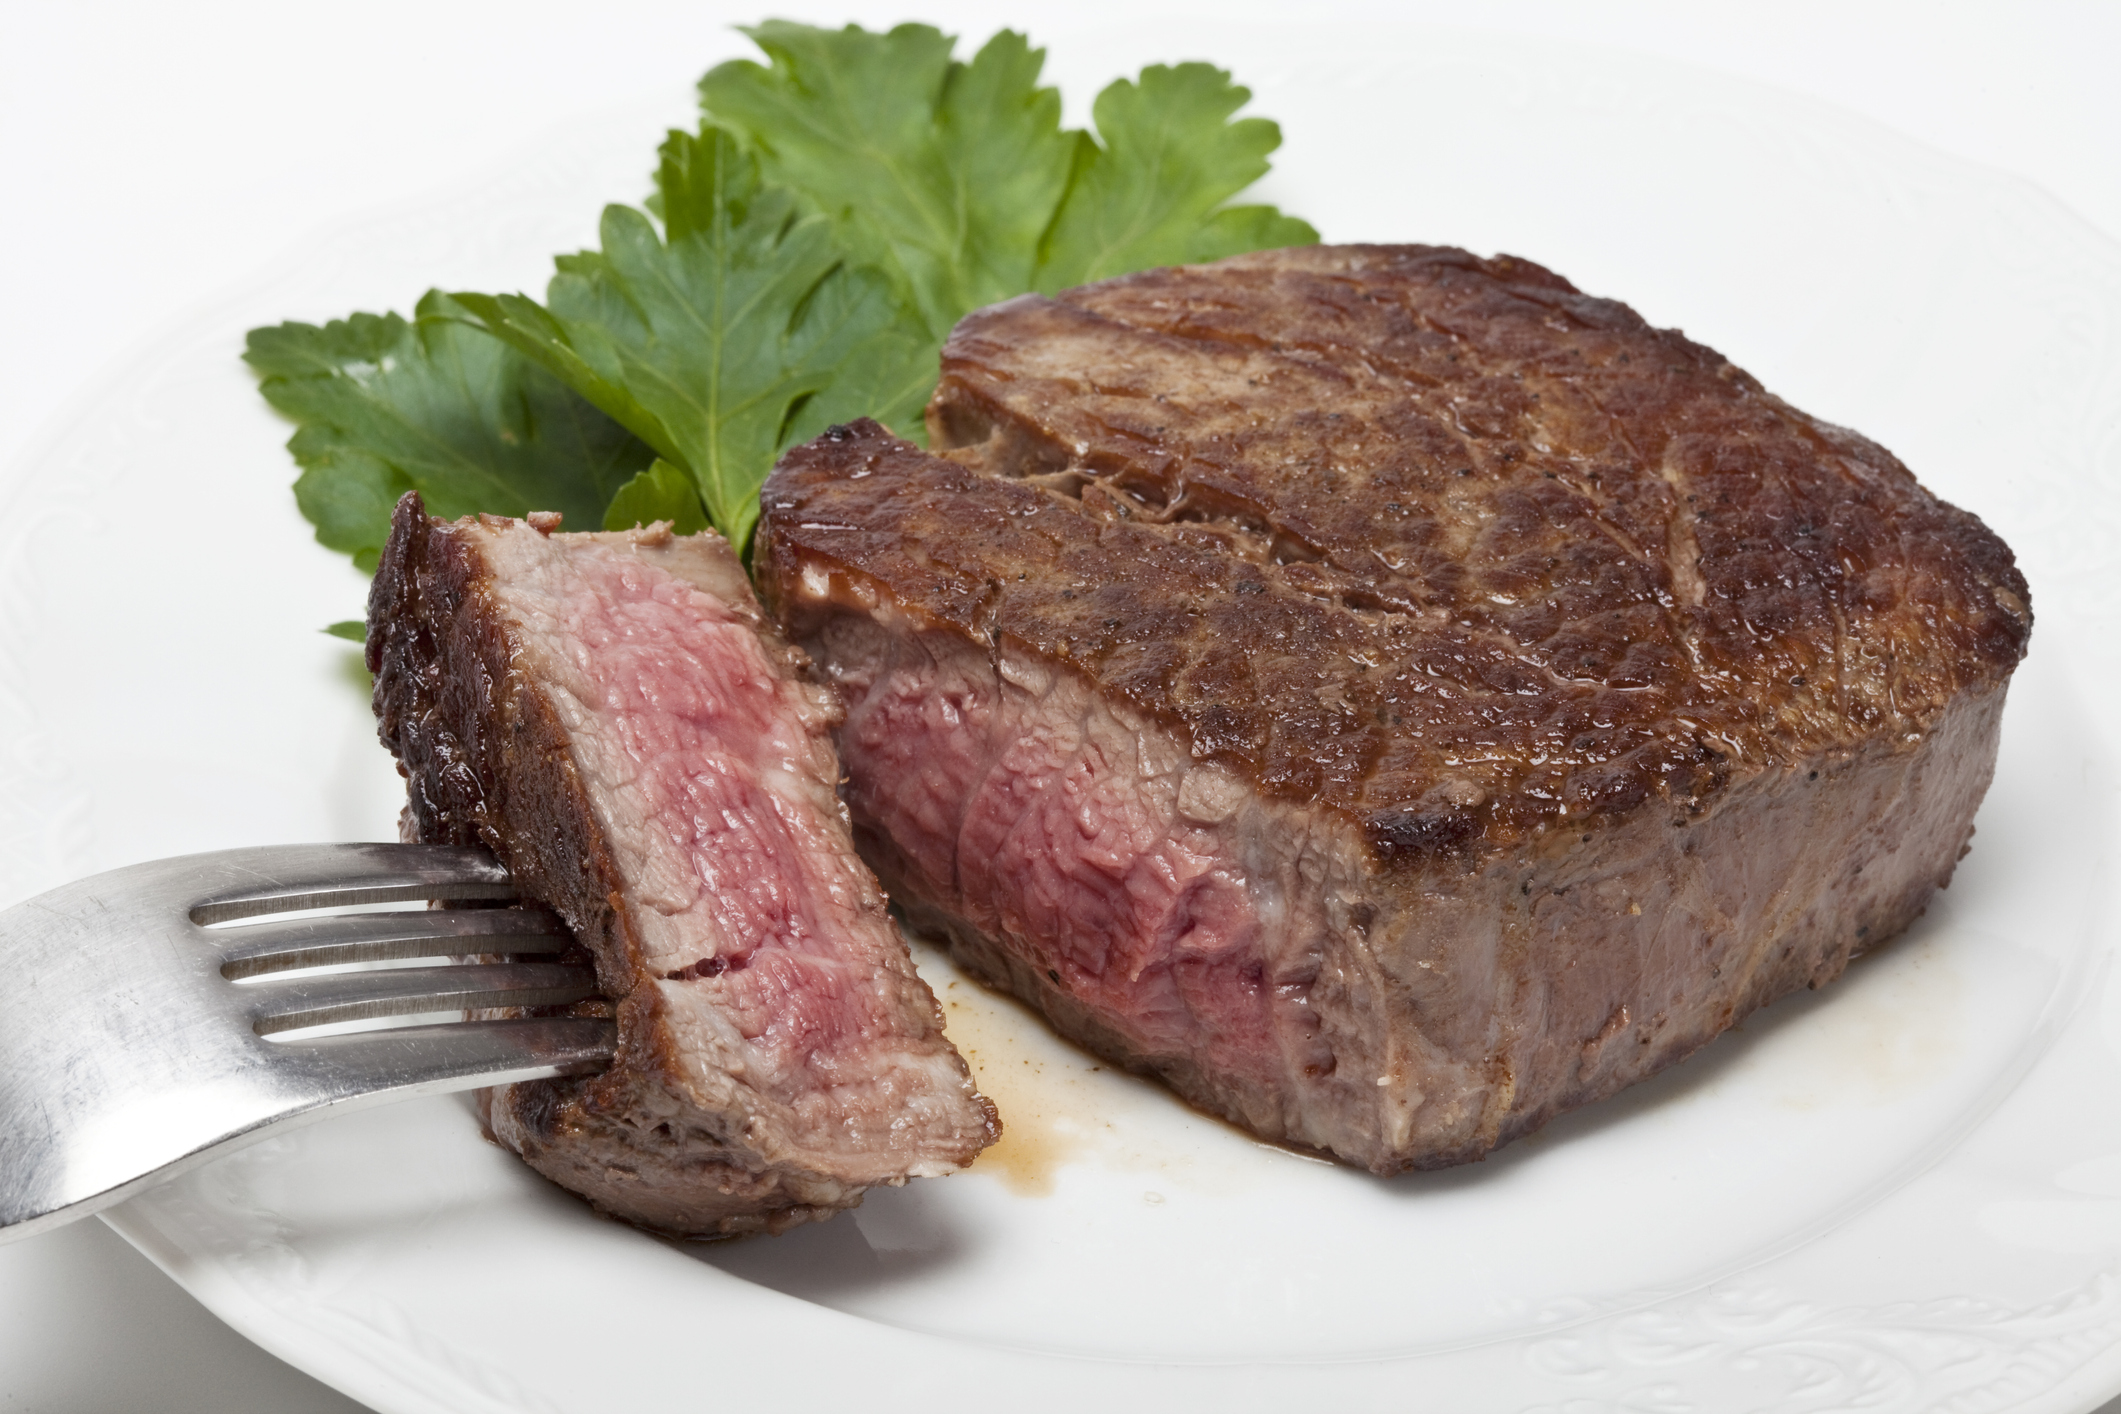
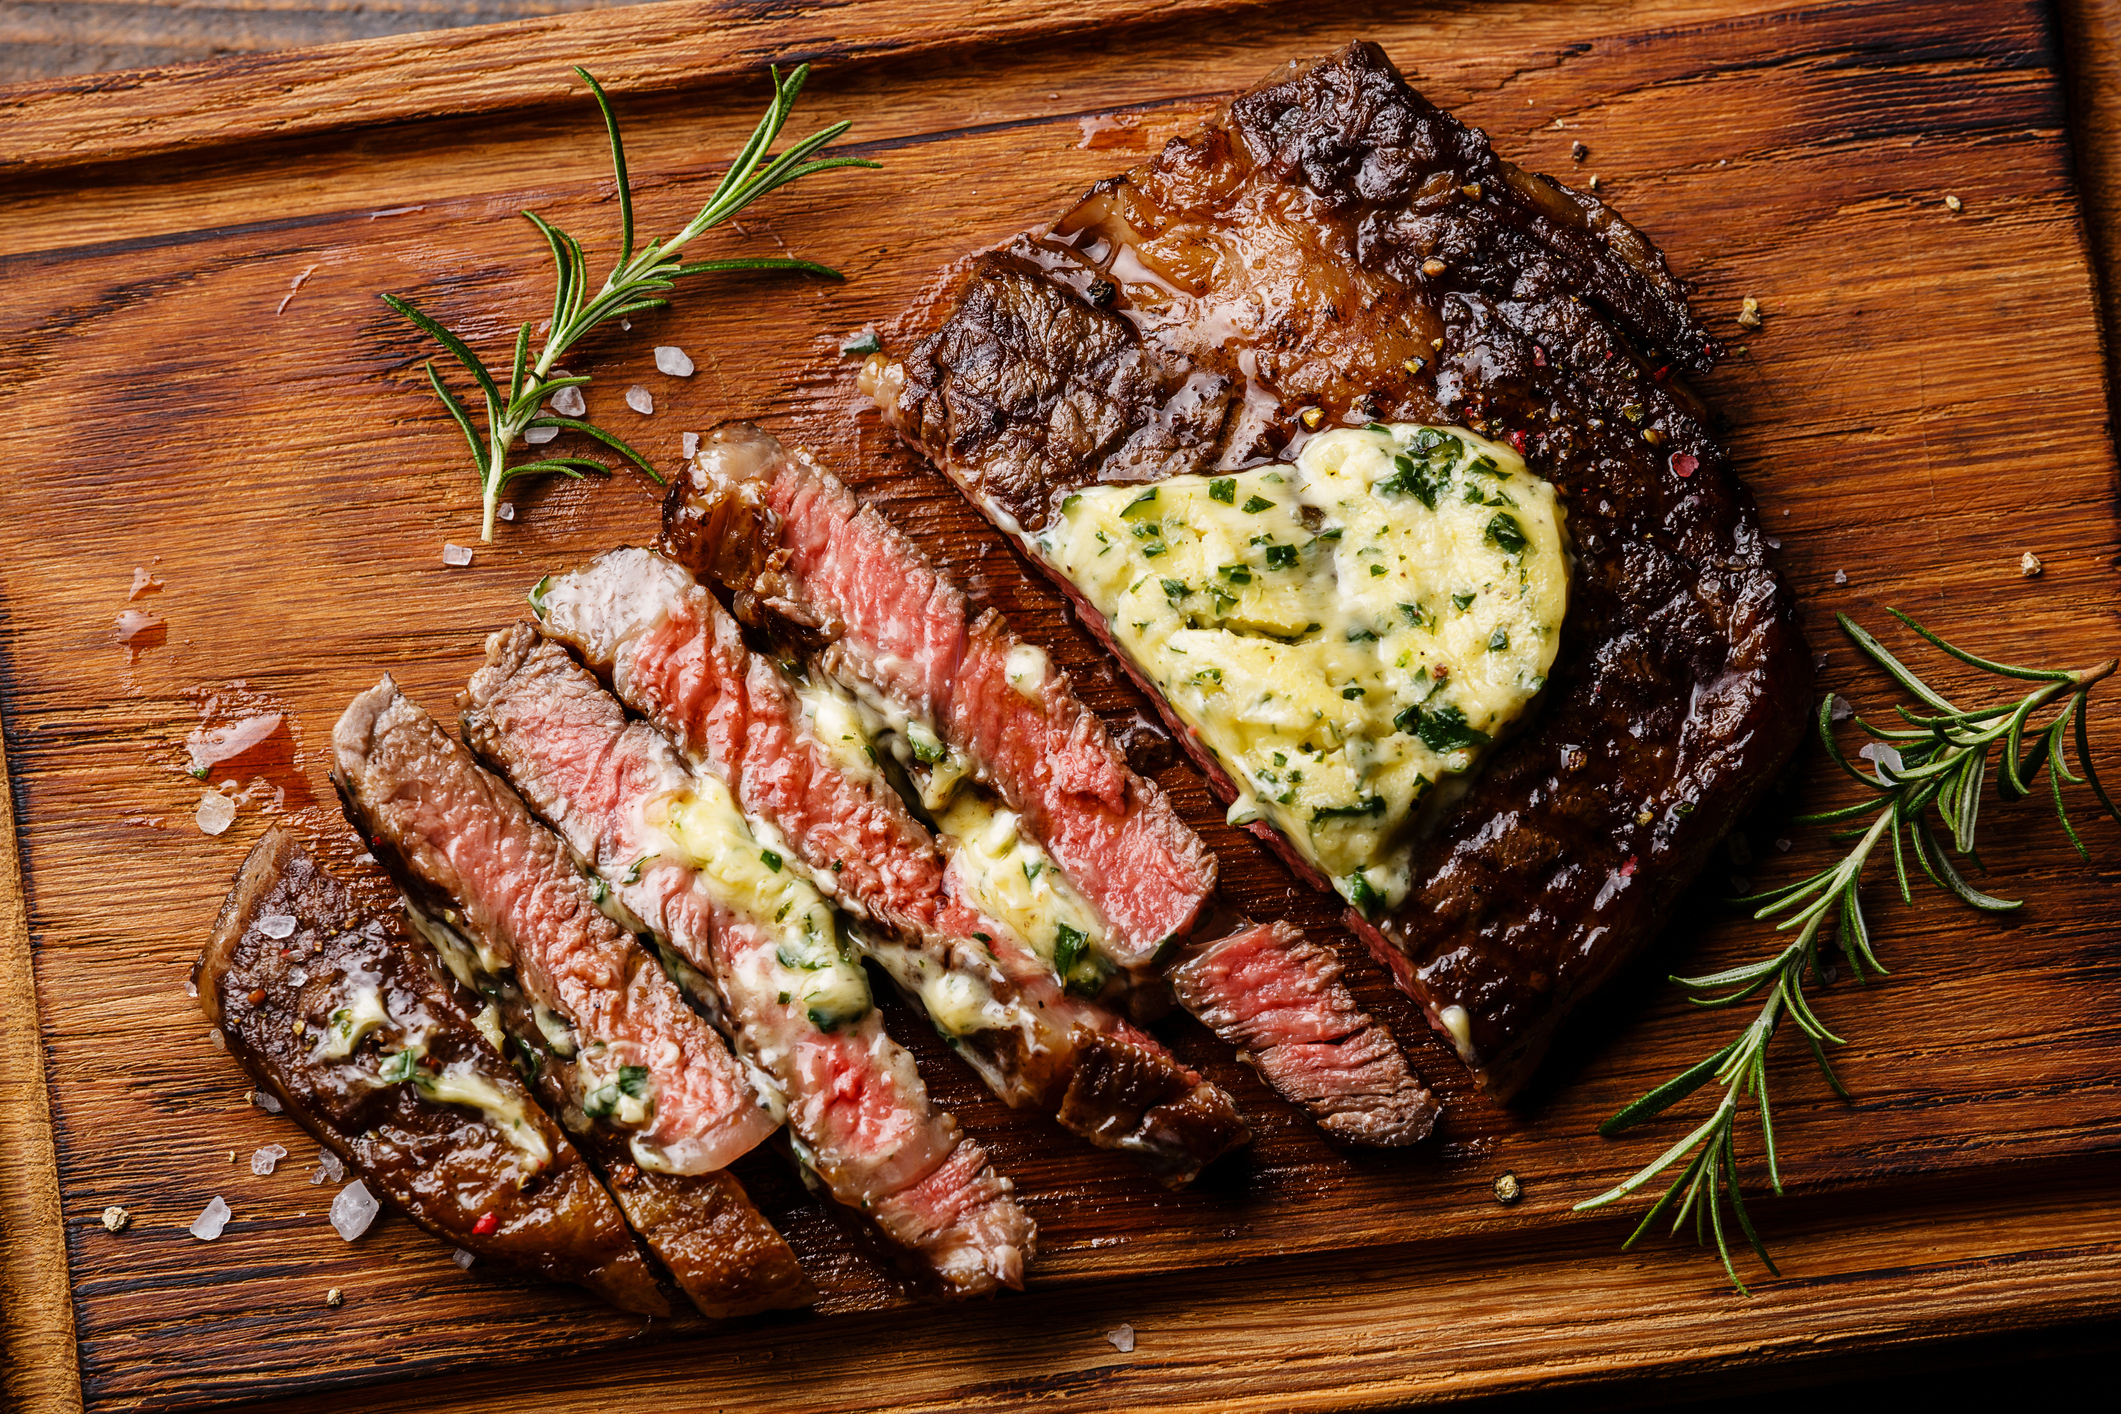
The problem with the sear-first method, is that you wind up with meat that has a nice pleasing crust on the outside, but when you slice it open, you’ve got a pretty deep overcooked “gray zone” and the only part of your cut of meat that’s perfectly done is the deep center, like shown below.
If you like your steaks medium-well to well done, that’s probably not something you care about. But if you like it from rare to medium, don’t you wish there were a better way?
There is a better way
The better way is “reverse sear” and it’s a simple concept when you break it down. All you’re doing is reversing the process – you cook slowly over indirect/more gentle heat, then when the meat is ALMOST done, you crank the heat up or move your meat over the direct heat source, give it a fast sear, and boom, you’re done!
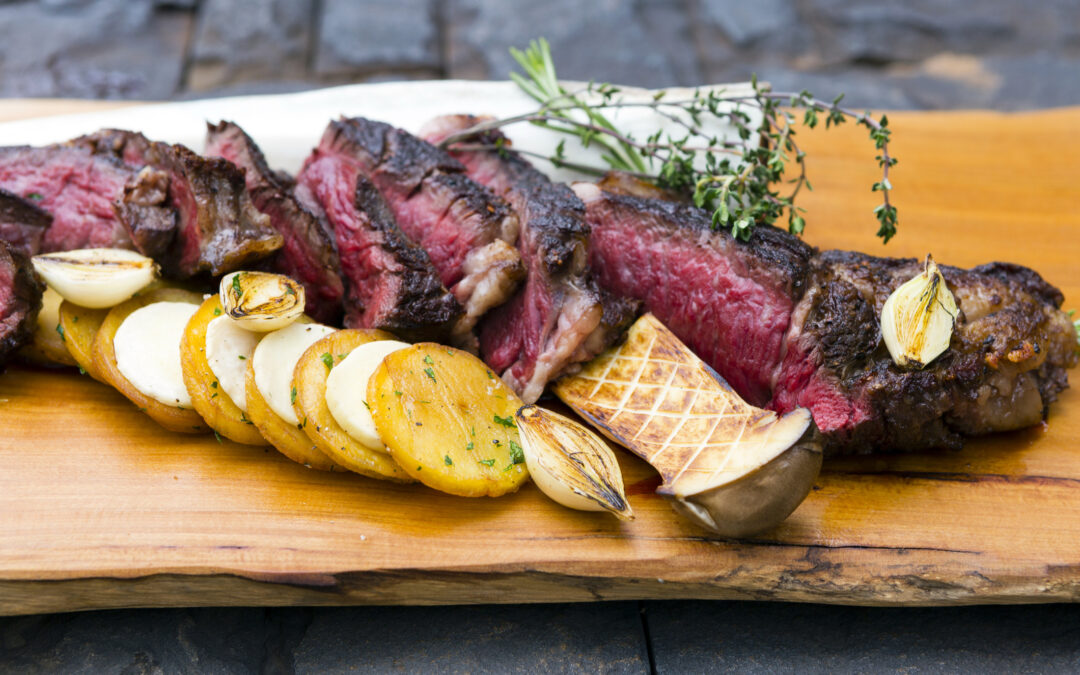
The result is nothing less than spectacular – you still get your crust, but your “perfect zone” is basically edge-to-edge. It looks like this:
Doesn’t that look AMAZING?
First, You may ask…
So the first question people may ask is if searing overcooks the meat, should we skip that step?”
Oh, no, no, no, NO!
Some cooking science here – that searing and the pleasing browning on the outside is called the Maillard reaction, and yeah, that’s a fancy French term. The science is pretty simple – it’s the caramelization reaction of proteins with carbohydrates. Toasting bread is actually a Maillard reaction and of course, is delicious.
So yeah, we’re going to sear it. But only when it’s just about ready to serve.
There’s also one great advantage of reverse searing, and that’s timing. If you’re like us, you like being a guest at your own dinner parties – rather than being tied to the grill. With reverse searing, you can “pause” the action because you only sear right when you’re about to serve! You can hold the meat up to an hour prior to serving as long as you have it covered up.
Expert Tip:
One key thing about reverse searing – you’ll need to be able to measure the temperature of your meat.
Remote probe barbecue thermometers are ideal for this, as are the “onboard” probes that some grills come with (just know how accurate yours is before you trust that $75 prime cowboy ribeye to it!). And of course, instant reading thermometers work great for this. If you’re a “by touch” barbecuer, this may not be the technique for you. Learn more about bluetooth thermometers here.
So, how do I reverse sear, and what should I reverse sear?
Well, as luck would have it, chances are if you’re reading this blog, you own a pellet grill, and pellet grills are tailor-made to make it easy to reverse sear because they have thermostatic control. And, as luck would also have it, pellet grills, especially when fired up with Griller’s Gold 100% premium BBQ pellets also give your food a delicious wood-fired grill flavor. You’ve got the perfect combo for reverse sear glory!
What to Reverse Sear:
Reverse sear works best with thicker cuts of meat – think 1 ½” or more in thickness. And honestly, the thicker the better.
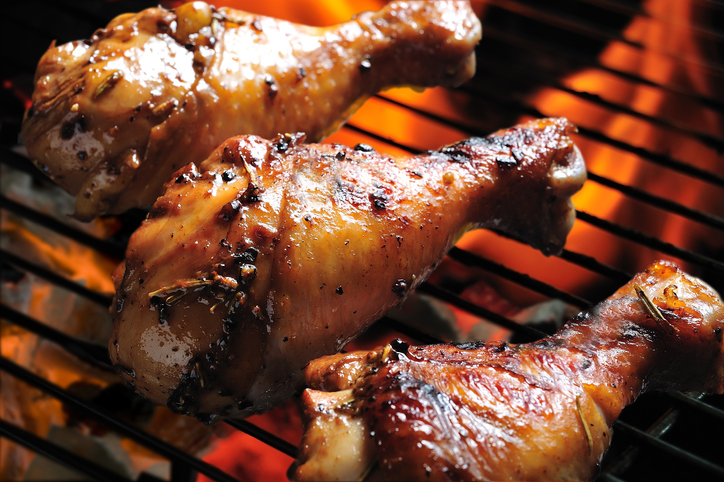
In terms of which meats, we’ve found that this works best with pork, beef, and lamb, as well as game meats like venison, elk, and exotic meat like ostrich. Because you need to thoroughly cook poultry, this is not a recommended technique for chicken, turkey, and the like. Also, fish don’t do great with this technique either.
Using a pellet grill, performing this technique couldn’t be easier.
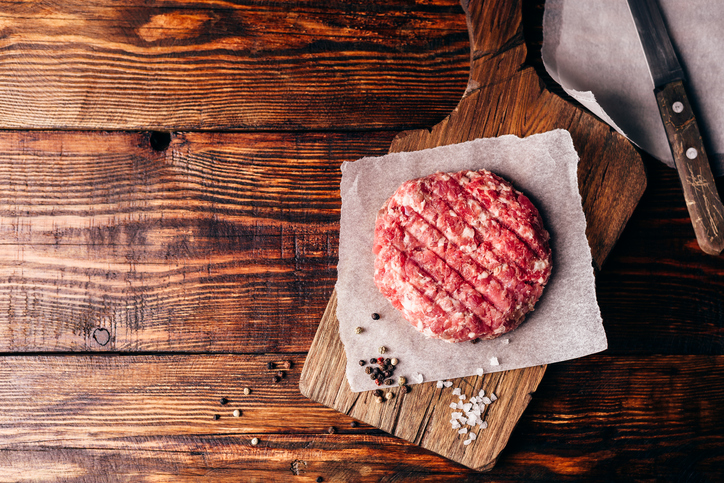
Start with your nice, thick piece of meat – a pork loin roast, a 2 ½” thick ribeye steak, thick New York strips, Picanha, lamb racks, leg of lamb, etc. You’ll season it and whatnot (see below for Reverse Seared Ultimate Ribeye Steaks). Fire up your pellet grill with your favorite Griller’s Gold pellets (we love Smokeshack Blend for cuts of meat like this!) and let it preheat at least 15-20 minutes at 250 degrees.
Put your meat on the grill, and close the lid. For the best, most even results, you’ll need to periodically turn the meat, since the heat from pellet grills radiates upwards – how often will depend on how thick your meat is.
We like to turn big chops, steaks, and lamb racks about every 10 minutes. For 3” or thicker pork loins or things like legs of lamb or smaller beef roasts, we turn them about every 15 minutes. And for something like a prime rib, if it’s bone-in, we don’t turn it, and if it is boneless, we turn every 15 minutes or so.
You’re cooking until your meat is just short – 5 to 10 degrees – of the ideal doneness temperature.
Here’s a quick temperature chart as a guideline.
Doneness Level
Final Internal Temp
Reverse Sear Temp
Very Rare
120F
113F
Rare
125F
118F
Medium Rare
130-140F
123F-132F
Medium
141-150F
132F-142F
Pork
145F
135F
How long does this take?
The answer is “well, it depends!” and it does – on the thickness of your meat, whether it’s cold and windy outside, etc.
Some rules of thumb though – we find 2 ½” thick ribeyes take about 40 minutes to reach about 120 degrees (we like our steaks on the rare side of medium-rare), a 3-4” thick pork loin will take more than an hour to get to 138, and lamb racks (which we like just short of medium) take about 45 minutes to get to 130F. But again, you have to cook by temperature here, not by time, and not by feel.
When your meat hits the desired temp, take it off, put it on a pre-warmed platter (doesn’t have to be hot, but shouldn’t be ice cold either), put foil over the meat, and then we like to cover it with a doubled towel. We want that meat to rest but also to stay cuddly warm while you get ready to sear.
Now…we sear!
Whether you stay on your pellet grill for searing depends on if your pellet grill will hit a good searing temperature (at least 450 degrees) and if you have a good searing surface.
We have found that pellet grills, with their indirect heat nature, do a better searing job if you use something like a cast-iron skillet, a cast iron griddle, or, our favorite searing surface, GrillGrates searing grates. Those will concentrate the grill’s heat and deliver a better, darker crust for your meat.
Many pellet grillers don’t like to crank the heat that high on their pellet grills – if that’s you, then you have a lot of options – preheat a cast-iron skillet in a 450-500F oven and sear it there, fire up your gas grill and sear it there, and if you’re a real purist (and especially if you’re already fired up and cooking other things on it) … nothing beats a good charcoal sear.
Expert Searing Tips:
The searing is easy – with few good hints:
Only start searing when you’re within 15 minutes of wanting to sit down to dinner. We like to have everything ready to serve, then we start searing. We want to serve hot off the sear.
When using a grate like GrillGrates, your standard pellet grill’s grates, or the grates on a gas grill, keep turning the meat every 2 minutes and each time you do, turn it ¼ turn as you flip it. That will get you those nice cross-hatched grill marks.
If you’re using a cast iron skillet, whether on your pellet grill or inside the oven, again turn frequently but also don’t be afraid to press down on your meat a bit to ensure the surface really flattens against that hot metal.
If you’re using the “cast iron in the oven” method, return the pan to the oven in between turns.
Generally speaking it will take a pellet grill about 15 minutes or so to go from 250 to 450 or 500 degrees. If you’re in a hurry, do this in the oven with the cast iron skillet – and just have it preheated and ready to go.
Fats and oils – if you’re doing a cast iron reverse sear, dip thickly folded up pad of paper towel (or a cotton kitchen towel) in some cooking oil, and give the surface of the pan a fast wipe – you want a bit of oil but not so much that it will catch fire. There WILL be smoke, so be sure to have your vent fan running if you have one.
When is it done?
Well, of course, you can check the temp, which is what we do. But a good rule of thumb is pretty simple – between 5 and 8 minutes total time – you’re looking for a nice dark surface and beautiful appearance.
And because your meat is already rested, you’re ready to serve right off the grill or out of the pan.
As promised, here’s our recipe for ultimate reverse-seared Ribeye Steaks:
Buy: Bone-in or Boneless Ribeye steaks, at least 2” thick, 2 ½ inches is best. Buy the best you can afford – choice or prime grade works great for this.
Trim: Trim the edges of any large amounts of hard, white fat. Ribeyes will generally have a pocket of it between the cap and the center meat and that’s fine. That’s flavor!
Seasoning: Our secret method is to “dry brine” the steaks 24 hours before cooking. Take them out of the package, put them on a rack on a large baking sheet, give them a generous coating of coarse-grained kosher or sea salt and then put them in the fridge unwrapped overnight.
Take them out about 1 hour prior to cooking and let them rest on the counter (but make sure the dog won’t get them! Ask us how we know!). Then just before cooking, we like to rub them with a tablespoon or so of Worcestershire sauce per steak, then sprinkle on a generous hit of freshly ground pepper and a shake of granulated garlic powder.
Cook using the reverse sear method outlined above.
Compound Butter: While the steaks cook, prepare a compound butter using a stick of softened butter, 2 cloves of fresh garlic – minced or pressed, 1 ½ t fresh thyme leaves (or ½ tsp dried), and ½ tsp freshly ground pepper. Mix up well and set aside.
Sear using one of the sear methods above.
As it comes off the grill or out of the pan, top each steak with a generous spoonful of the compound butter and let it melt over it.
Then slice across the short dimension of the steak in ¼ inch thick slices and serve! For sides consider creamed spinach, roasted mushrooms, and gratin potatoes for an ultimate steakhouse feast!
And that’s it! Now you’re ready to be a pro reverse sear chef!
One of our favorite things to do in the summer is to head to the local farm stands and load up on all the wonderful fresh produce that’s farm fresh and just loaded with flavor as compared to the same items found in the supermarket.
Of course, you’re thinking “Hey – wait a minute? Isn’t this blog about grilling?” Well, yes friends it is, and we’re going to show you what you can do with the combination of your grill, farm stand produce and of course … Griller’s Gold Premium Hardwood Pellets.
Prep Your Grill
Whether a rural farm stand or an urban weekend farmer’s market, right now you can find great produce packed with nutrients, flavor, texture and color to make your tables and plates bright and fresh. For all of these recipes, we’re recommending a medium heat in your grill – for an electronically –controlled pellet grill, 350 is the right number.
If cooking on charcoal, set your grill up for indirect cooking – coals only on one side of the grill. For a gas grill – set two burners on medium and shut off one to give you a cooler zone to work with. On gas and charcoal grills, use a smoke tube filled with Griller’s Gold pellets to give everything that good wood-cooked flavor.
Now let’s have some fun!
What Vegetables Should You Buy?
So many vegetables are fantastic when kissed with the grill. In every case, you’re looking for bright colors, clean shapes, and lack of insect damage. Don’t hesitate to ask the people manning the stand for advice on picking the best of what they have to offer.
We buy onions, sweet corn, peppers of all colors and types, romaine lettuce, green beans, squash, beets, portabella mushrooms, asparagus, broccoli, cauliflower, kale, escarole, arugula, carrots and of course, tomatoes. Any and all of these do great with as little cooking as a quick marking of grill marks from a hot grill, all the way to cooked down to soft (and generally sweet).
Farm Stand Recipes
Here’s some great farm stand recipes to try. All of these assume that you’re going to wash your produce in advance!
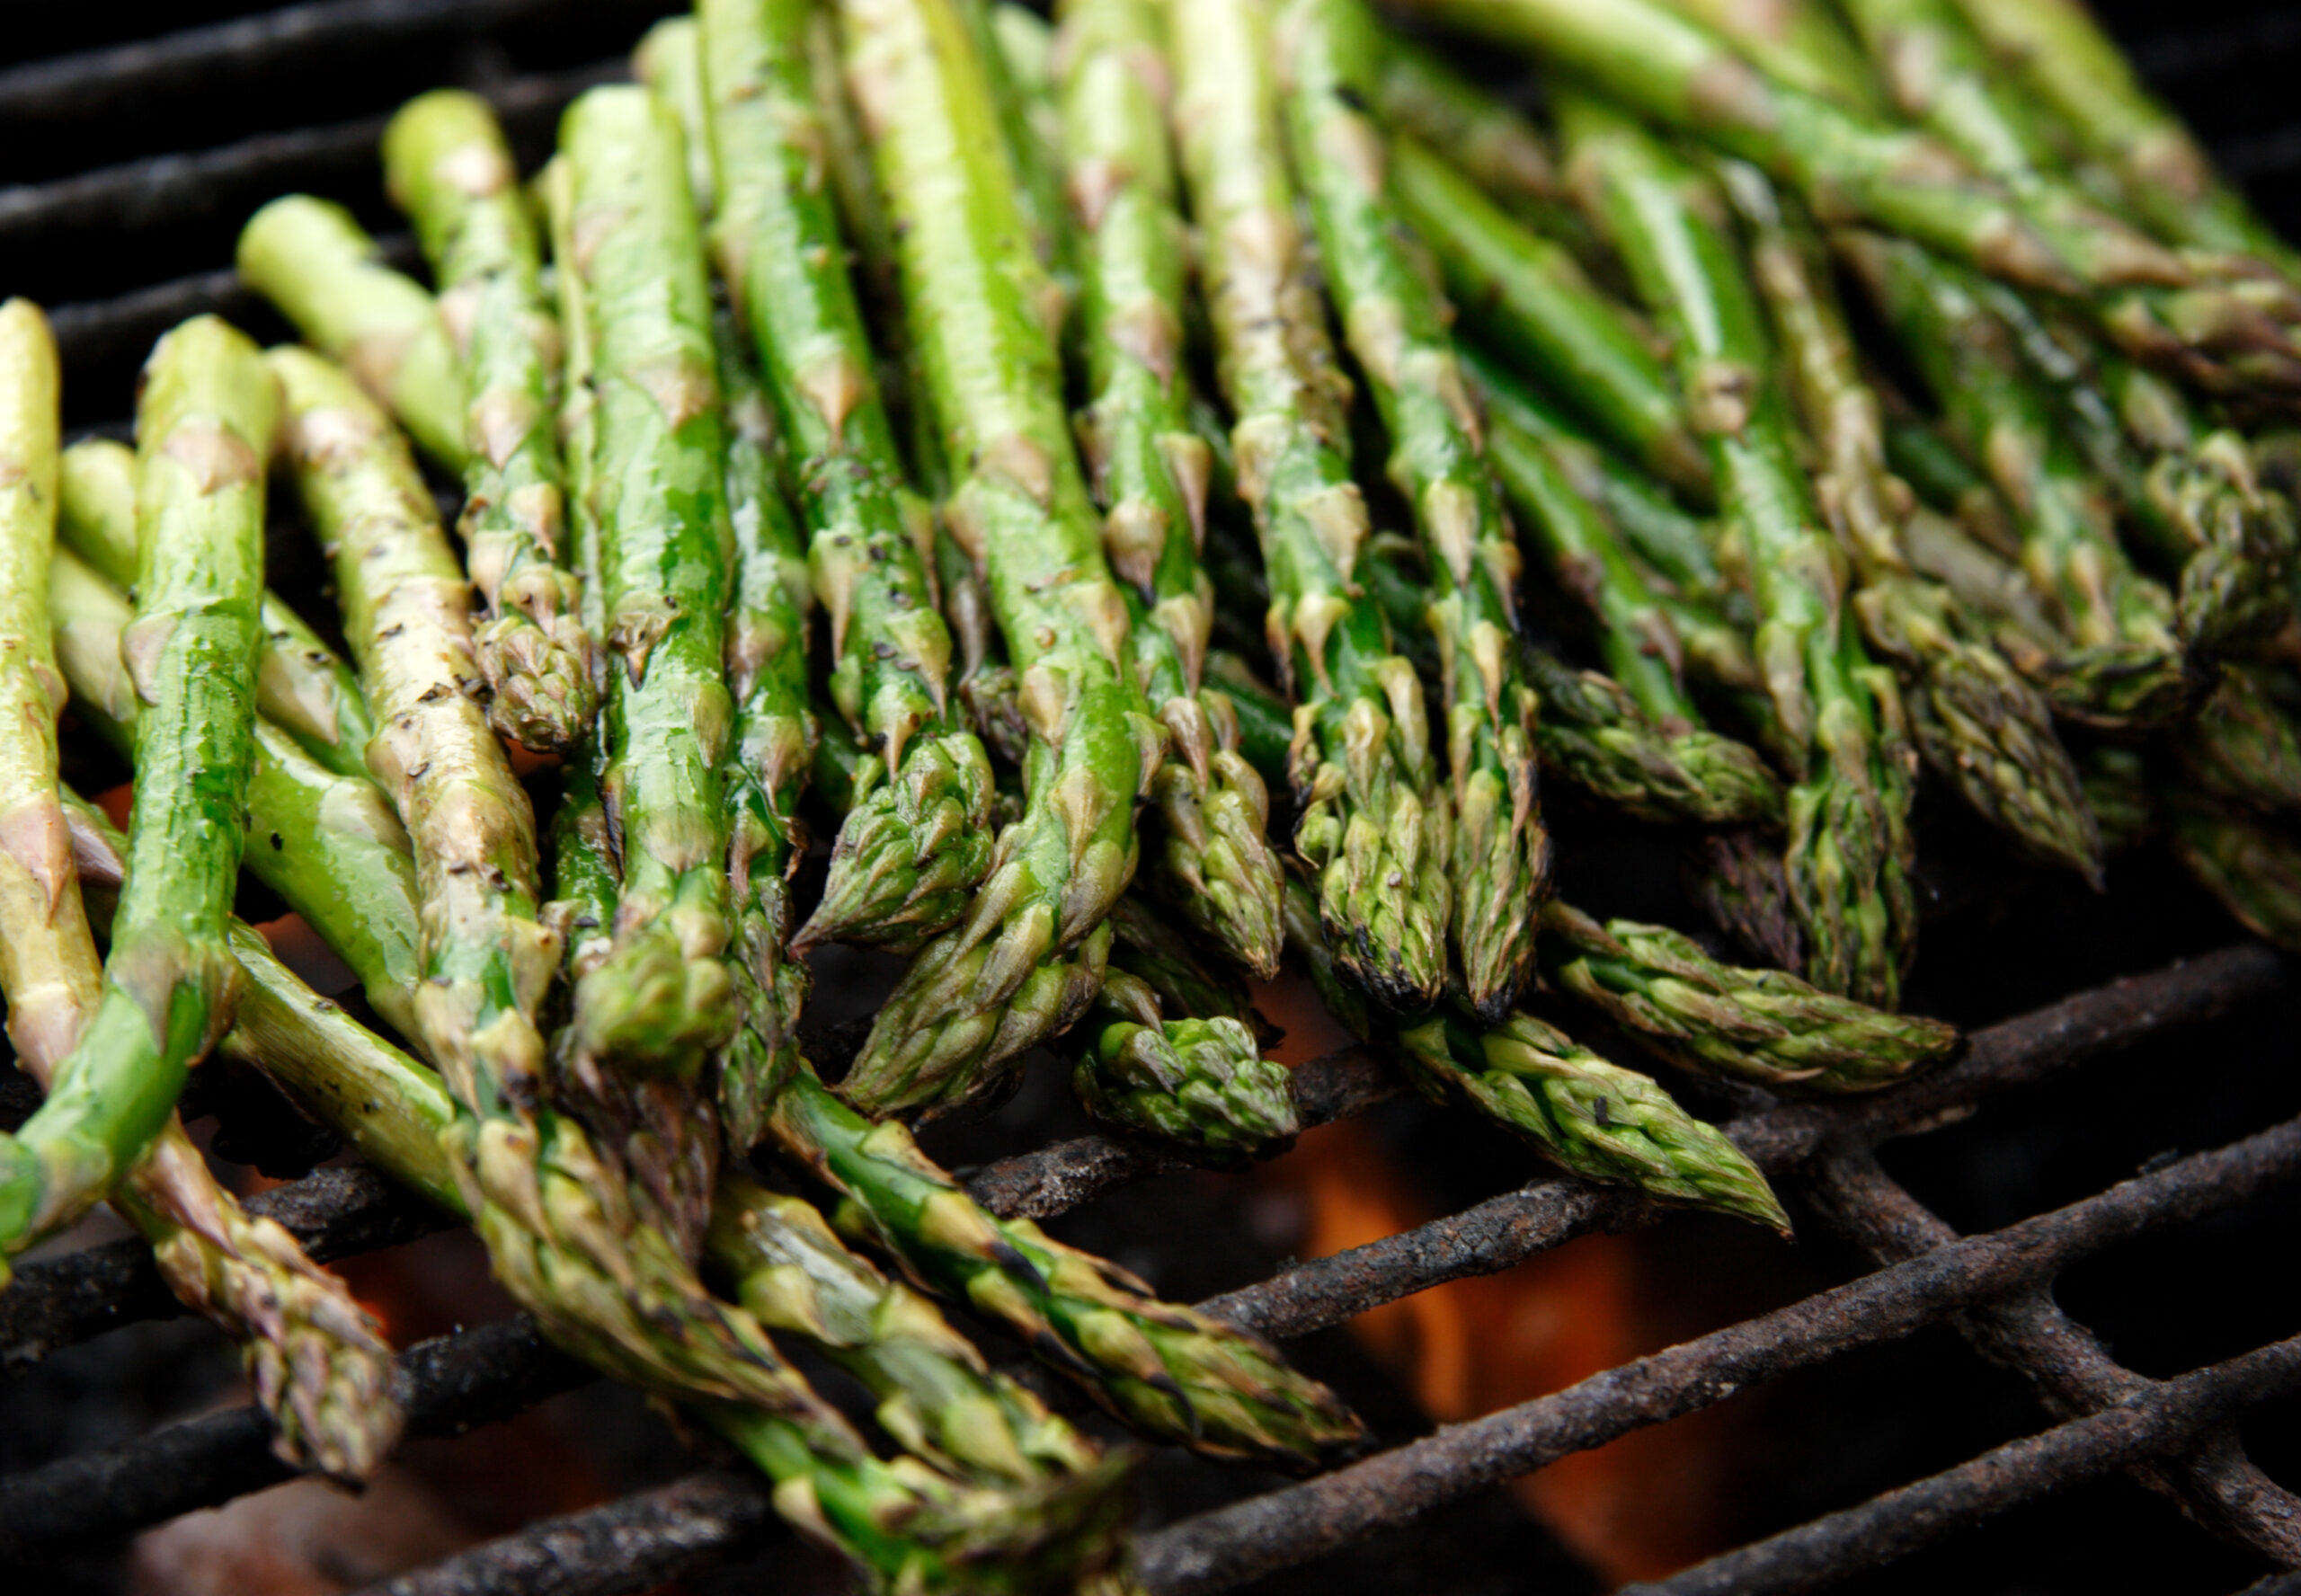
Grilling Asparagus
Nothing is easier to grill than asparagus – the only rule to follow is to set it on the grill perpendicular to the way the grid runs. Bet you can figure out the “why” on that one!
Our favorite way to grill asparagus is to simply snap off the tough ends, then just drizzle with a bit of olive oil, roll it around to spread it evenly, then hit it with a touch of salt and pepper.
Put it on the grill (perpendicular!) and cook for about 8-10 minutes, rolling every 2 or 3 minutes to even out the brown. We like ours a bit crisper, so we go only 5-7 minutes depending on the size of the stalks.
For a nice variation on this theme, just drizzle with your favorite balsamic vinegar while it cooks – the vinegar will caramelize from the grill heat. A super easy method that’s also tasty is to toss it with a store-bought Italian salad dressing prior to grilling.
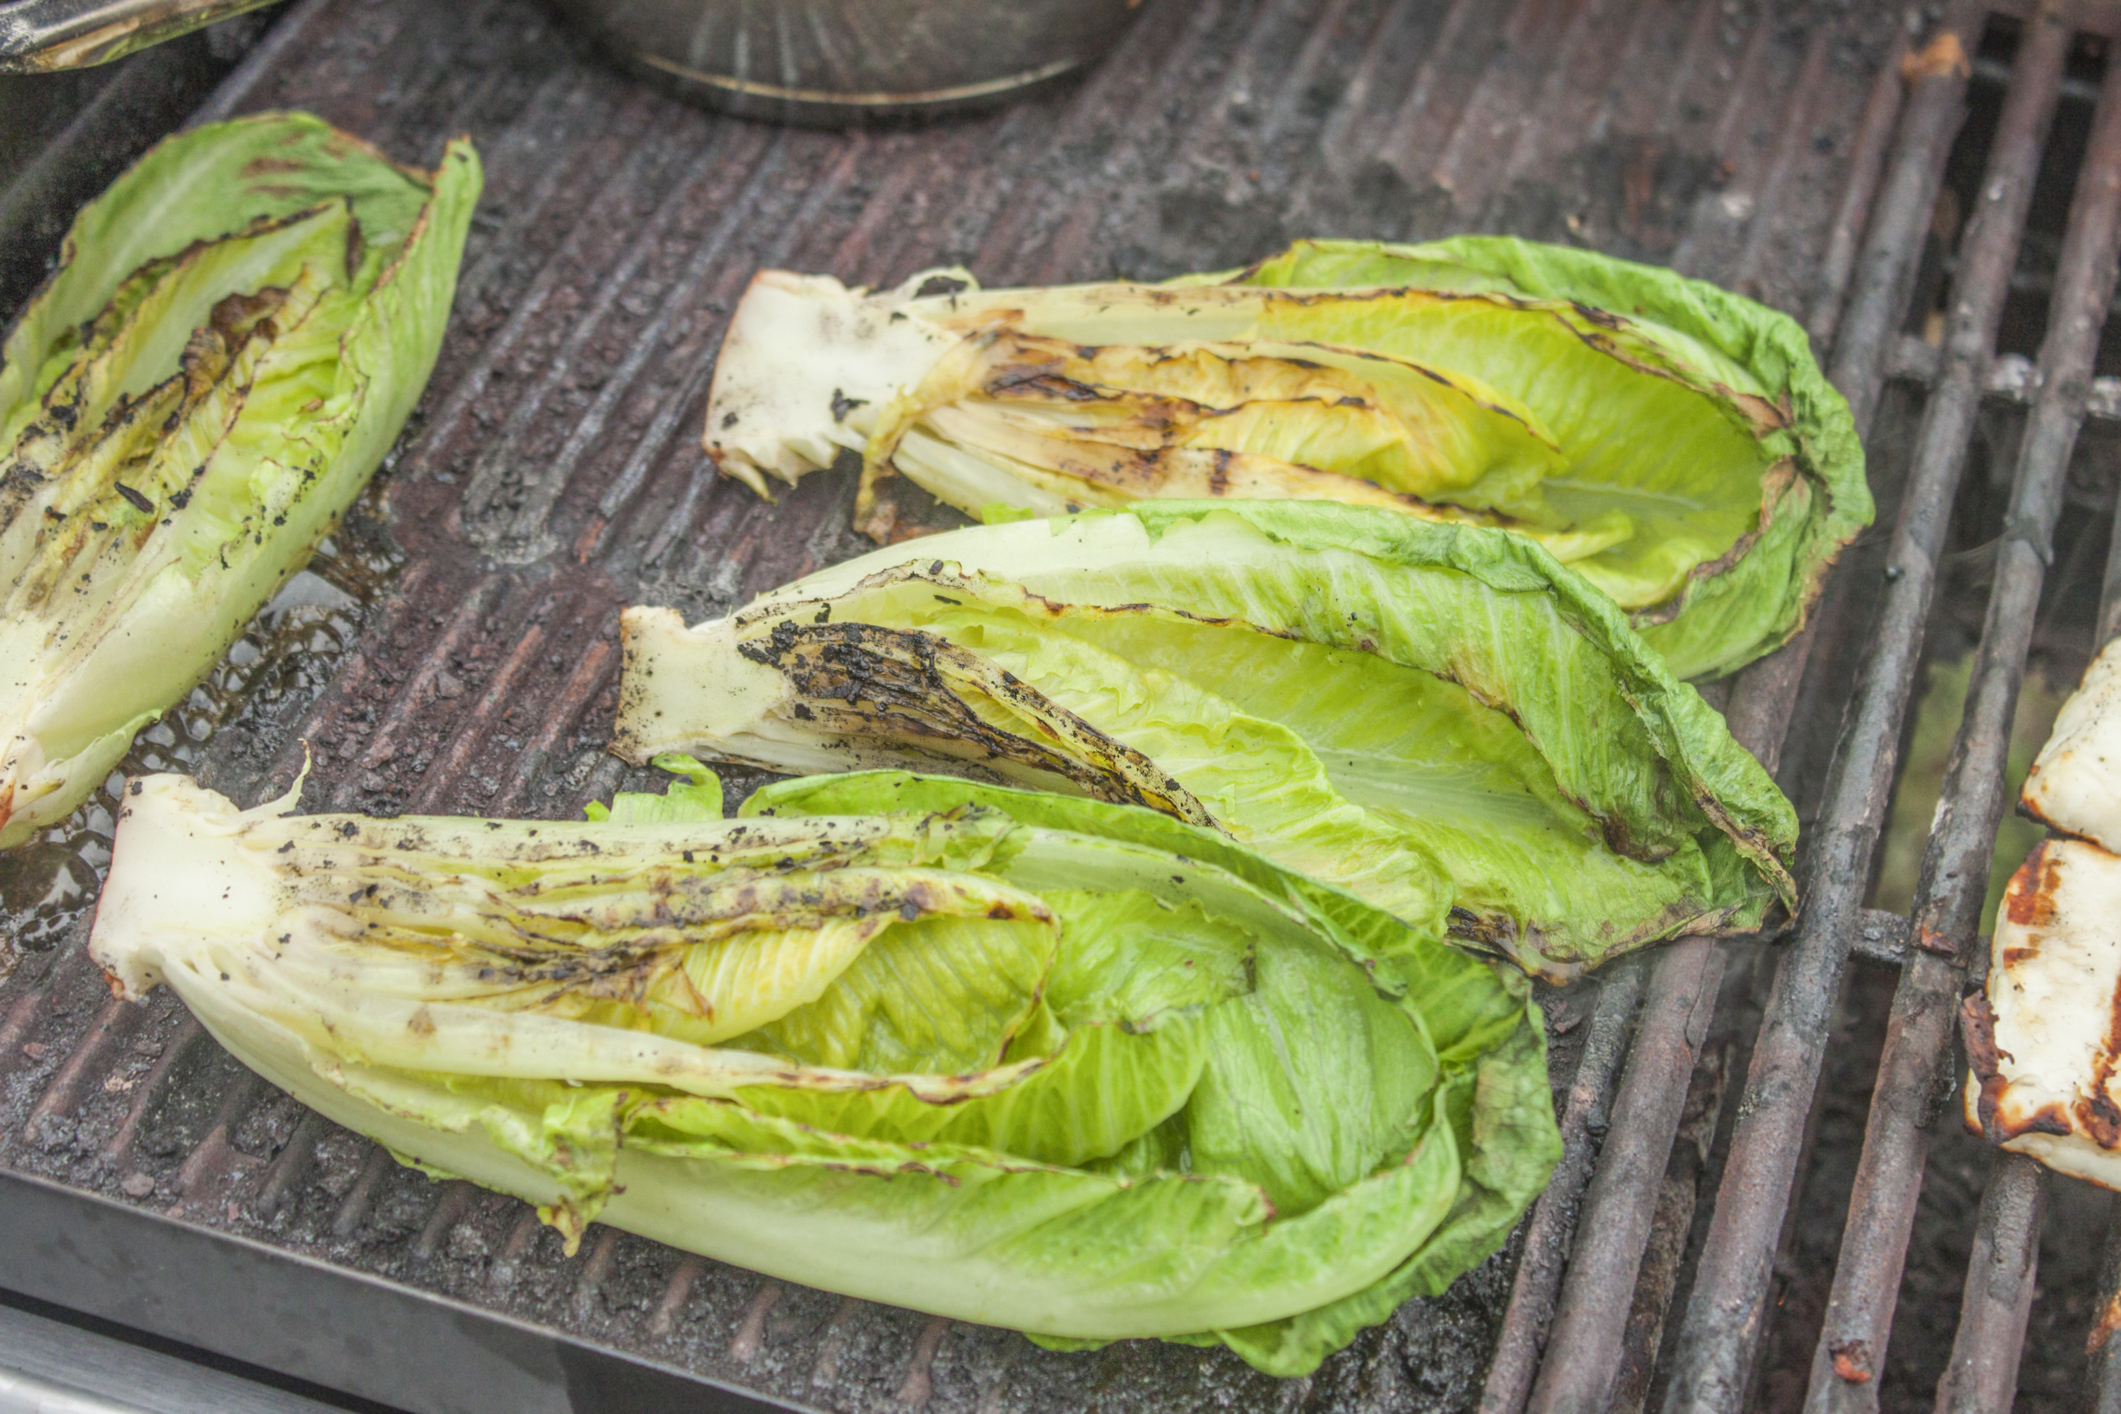
Grilled Caesar Salad
Yup, we said this! Lettuce, especially romaine, when gently/quickly grilled will get a sweet nutty flavor. The method is quite simple.
Buy compact heads of romaine, or if in the store, romaine hearts work great for this. Peel off any floppy/non-crisp leaves on the outside – we usually take off a full layer. (Save for salad or use as garnish if they look ok!) Cutting from the root end, split the heads in half, and then cut the heads in half again leaving a quarter of a romaine head. Holding them by the root end, give them a quick rinse in cold running water and then let them drain root end up in the sink. After they drain a bit, give them a vigorous shake to get out as much water as possible.
The grilling is simple – walk them out to your hot grill and put them on! For all grills, give your grate a quick spray with cooking spray or wipe with a cooking oil soaked paper towel or kitchen towel to keep things from sticking.
On gas and charcoal, you’re cooking with direct heat. Working quickly, put the romaine right on the grate, cut side down at an angle to the grate pattern – gives nice markings. Turn after 1 minute – so if you’re doing say 8 of them, by the time you get the last one on, the first one will need to turn. Turn to the next cut side and repeat with the others, again, 1 minute only, and that’s it.
Serve with a drizzle of your favorite Caesar dressing.
Here’s our quick favorite Caesar recipe: ½ cup of Mayo, 1 tsp lemon juice, 2 tsp worcestershire, ½ tsp red pepper hot sauce (optional) and 1 tsp anchovy paste (optional). Whisk together, then add ¼ cup grated parmesan cheese, ¼ tsp salt and some grinds of fresh pepper. Fantastic! Also delicious with blue cheese dressing, crumbled blue cheese and bacon bits!
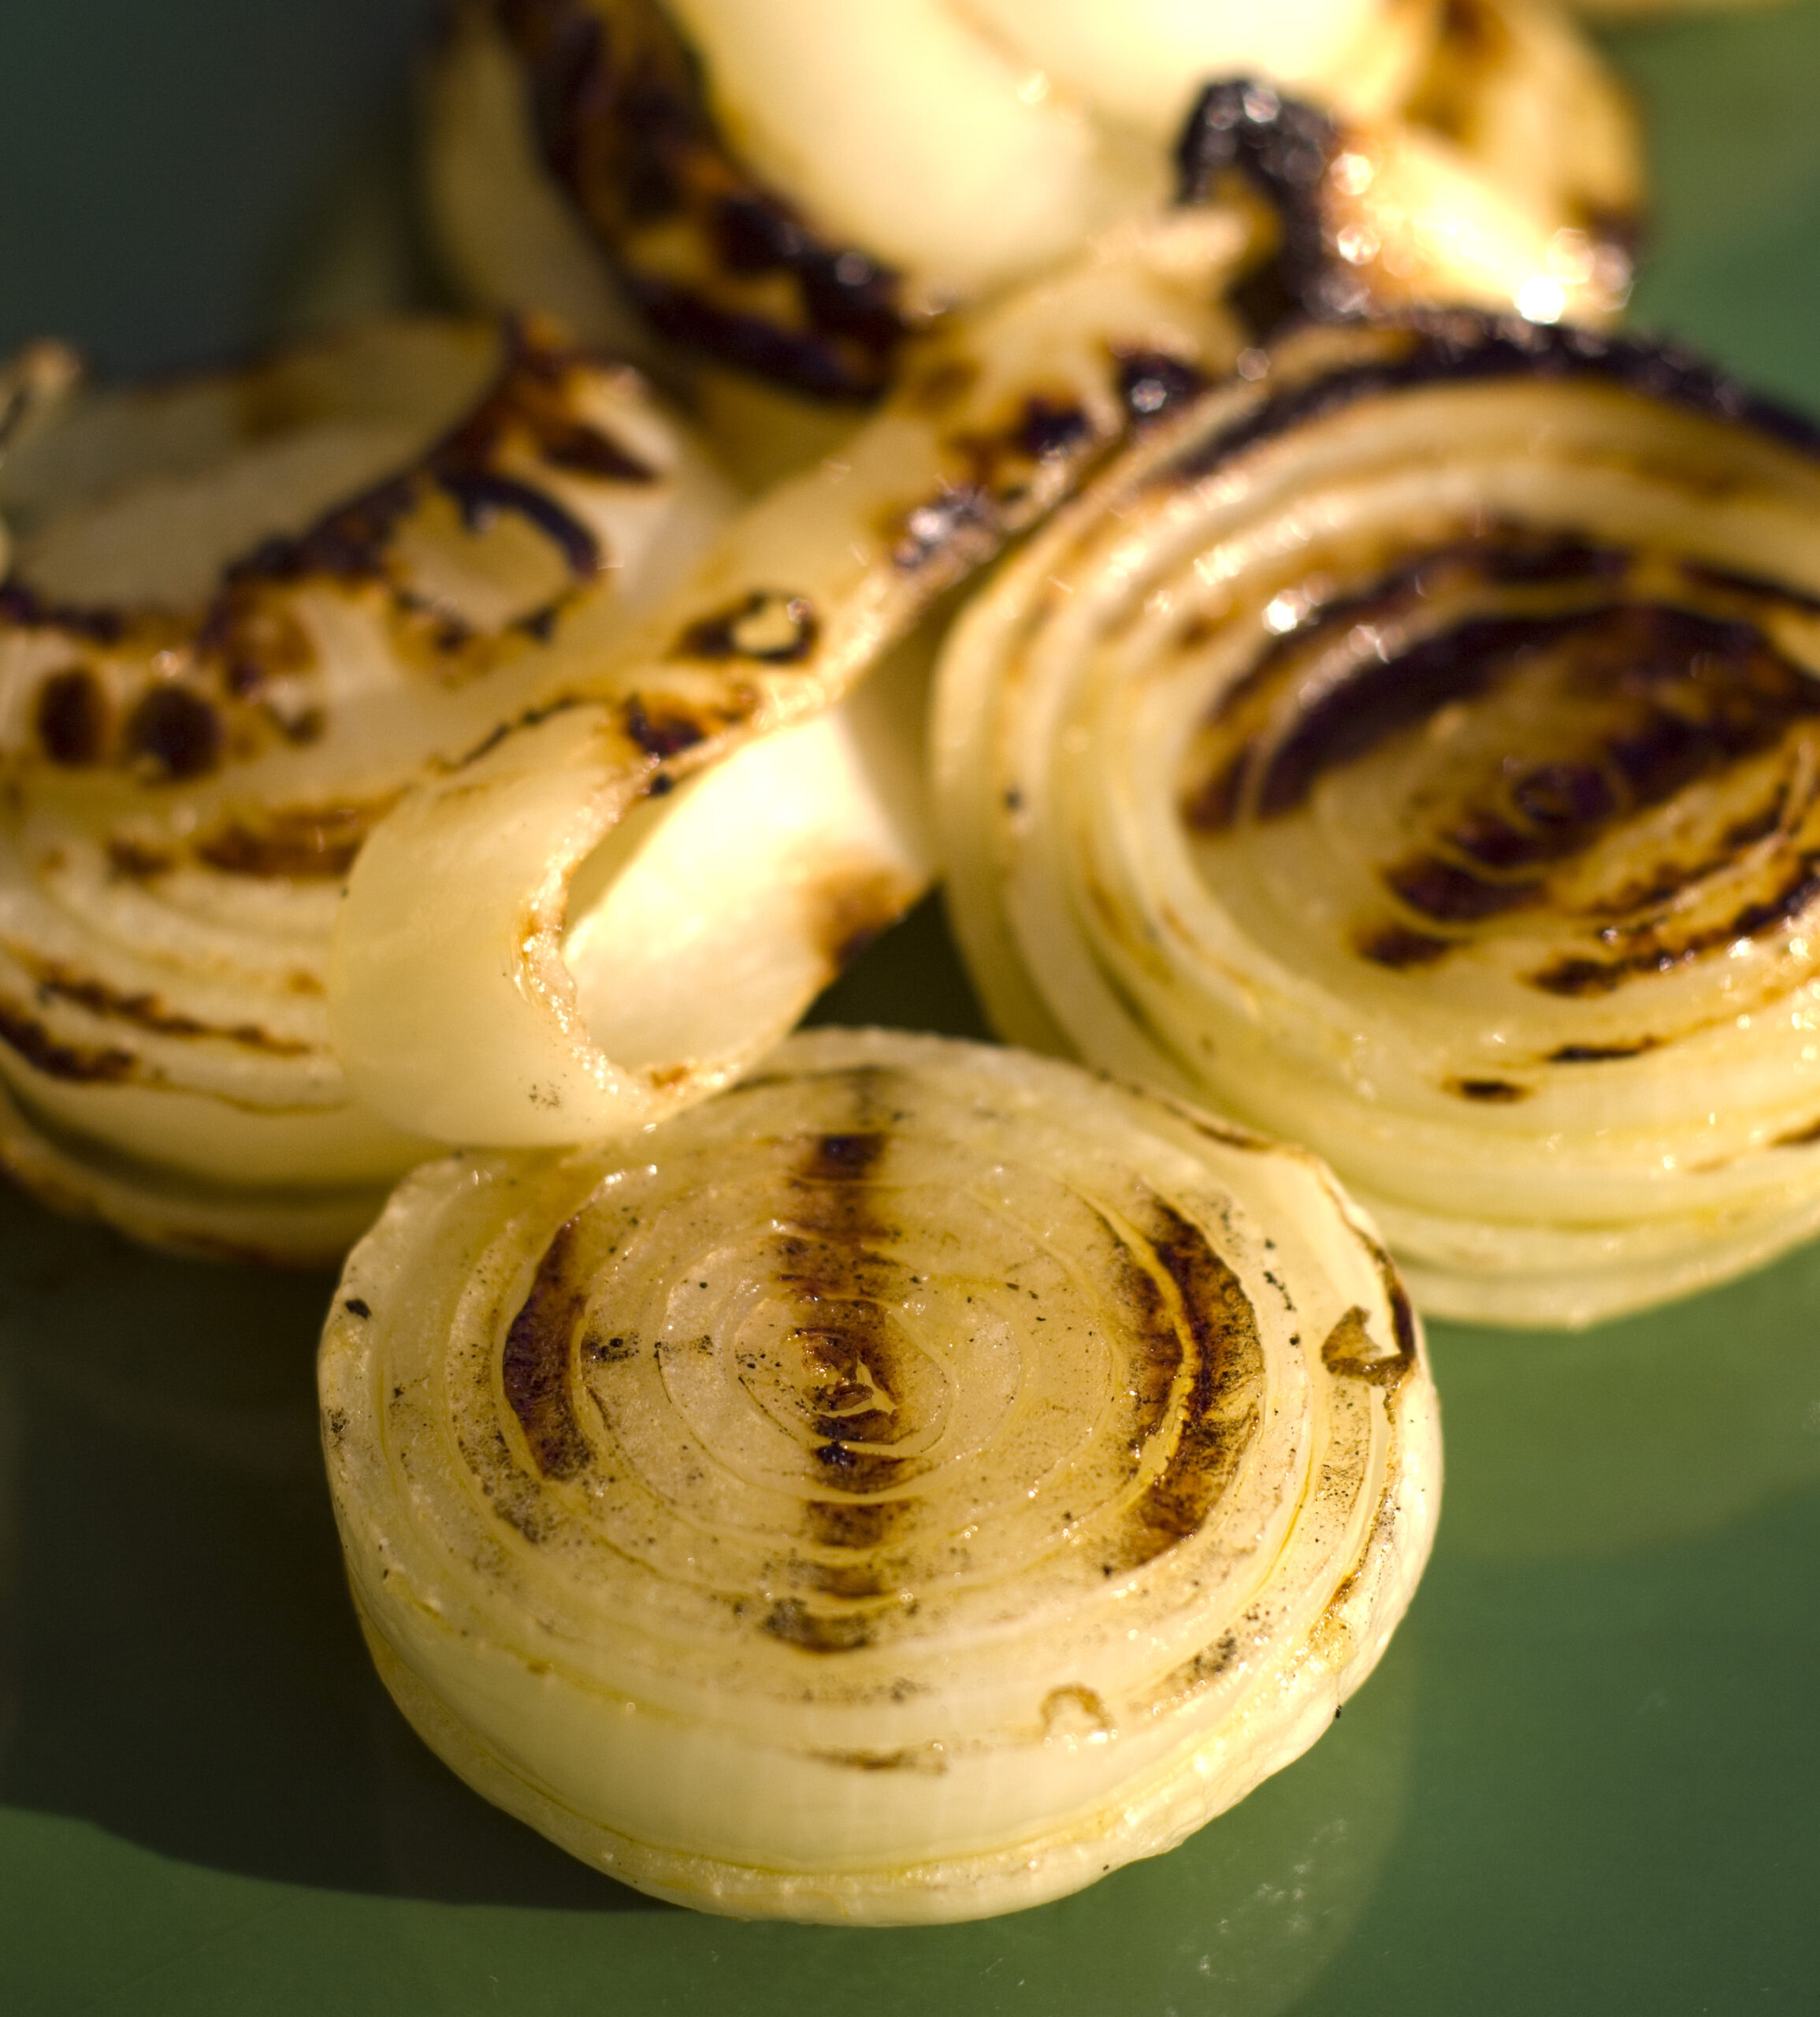
Grilled Onions – A Summer Staple
Grilled onions are a summer staple for us – a big slab on a burger, served as a side to a steak or chop, or even chopped after a gentle grilling and put in a salad, you can’t beat the sweetness that comes out from grilling. These also pick up the flavor beautifully from Griller’s Gold pellets in a wood pellet grill.
Prep: peel the outer skin off the onion and slice into ¼” to ½” thick slices. Brush with olive or cooking oil on both sides and place directly on the grill over direct heat. For just a light marking for having on a salad, cook about 2 minutes per side, then off. Let cool a touch and then cut the rings into quarters and toss with the salad.
For a burger or as a steak side, let cook a bit longer – 3-4 minutes a side – then move onto the indirect heat (on a gas or charcoal grill) and let cook about 4 more minutes. A light sprinkling of salt or seasoned salt will really “pop” the sweetness on these.
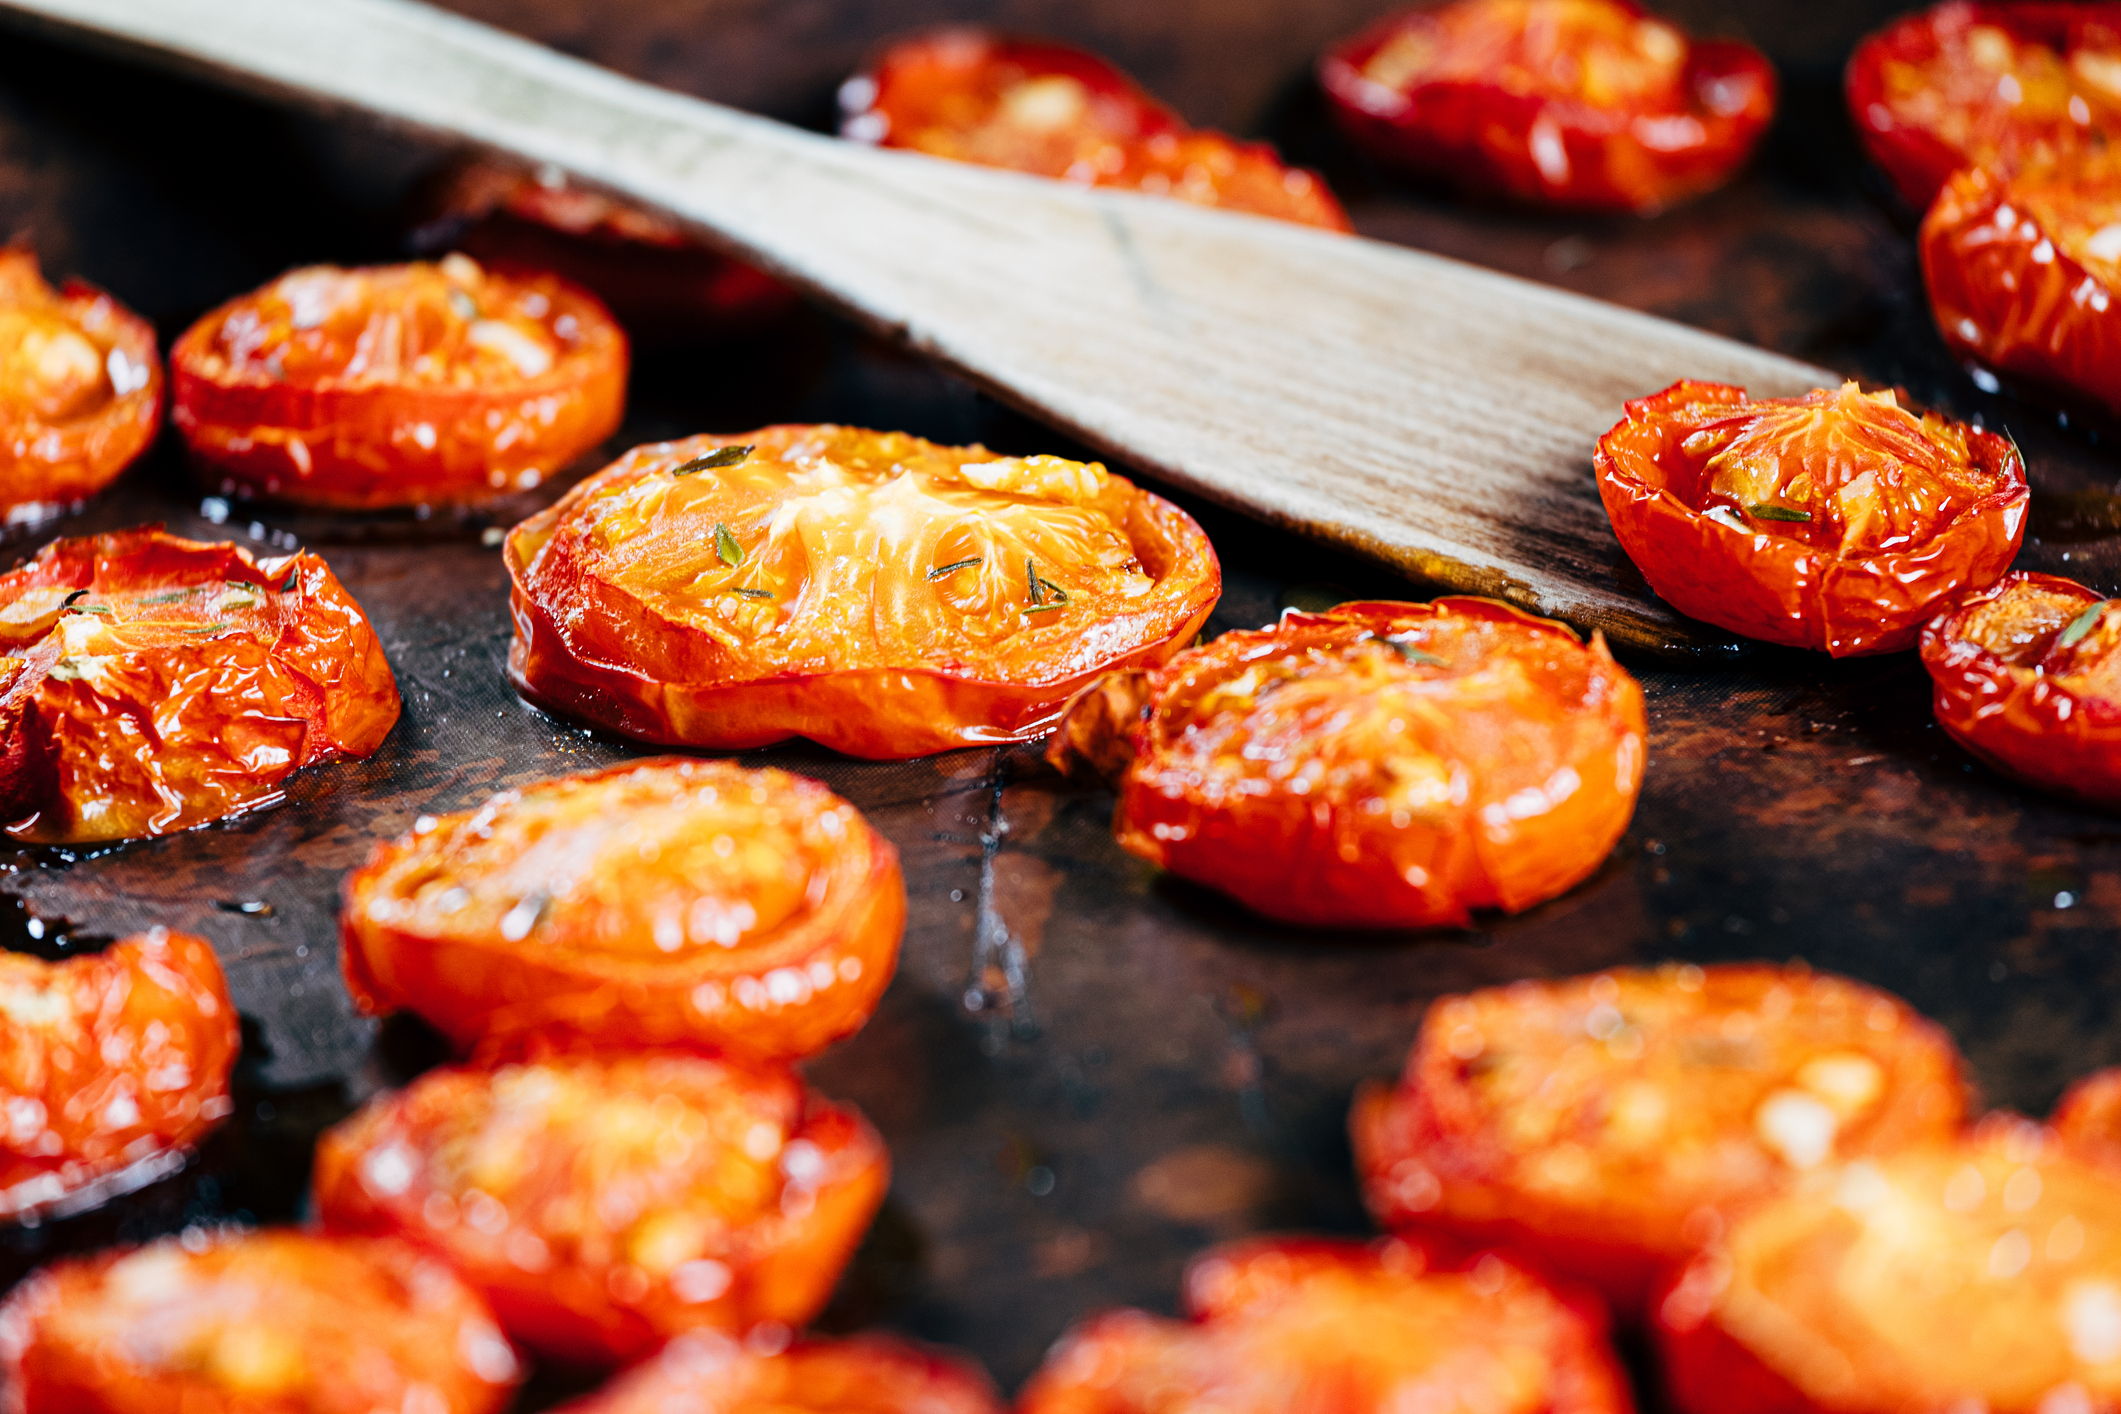
Tomatoes on the Grill
Grilled roasted tomatoes are madly good and could not be easier. Using Griller’s Gold hardwood pellets in a pellet grill will give them a great woodsy flavor. Just about any variety works, but we like doing this with Roma tomatoes.
This is super easy for prep – give the tomatoes a quick wash, then cut in half lengthwise. Drizzle the cut sides with a bit of olive oil and put the tomatoes cut side down on the direct side of a medium heat grill. Leave them cut side down for about 3 minutes to mark and caramelize them then flip them skin side down and roast another 8-10 minutes until soft and hot all the way through. Sprinkle with some coarse kosher salt and a grind of pepper, and for an extra touch top with some snipped basil leaves and thyme. Serve hot off the grill as a side with a steak, chop or fish, OR (and even better), cool and chop and use to make salsa. So good!
Colorful Grilled Peppers – So Good!
Red, green, yellow and orange bell peppers are fantastic when grilled – you can serve them hot as a side dish or let cool and serve as a side, a topping or in a salad.
Again, simple prep – cut the flesh into strips (we like them about an inch wide), put on the grill, turn every 2 minutes until done – over direct heat. We also love cooking the mini multi-colored peppers whole in the same way.
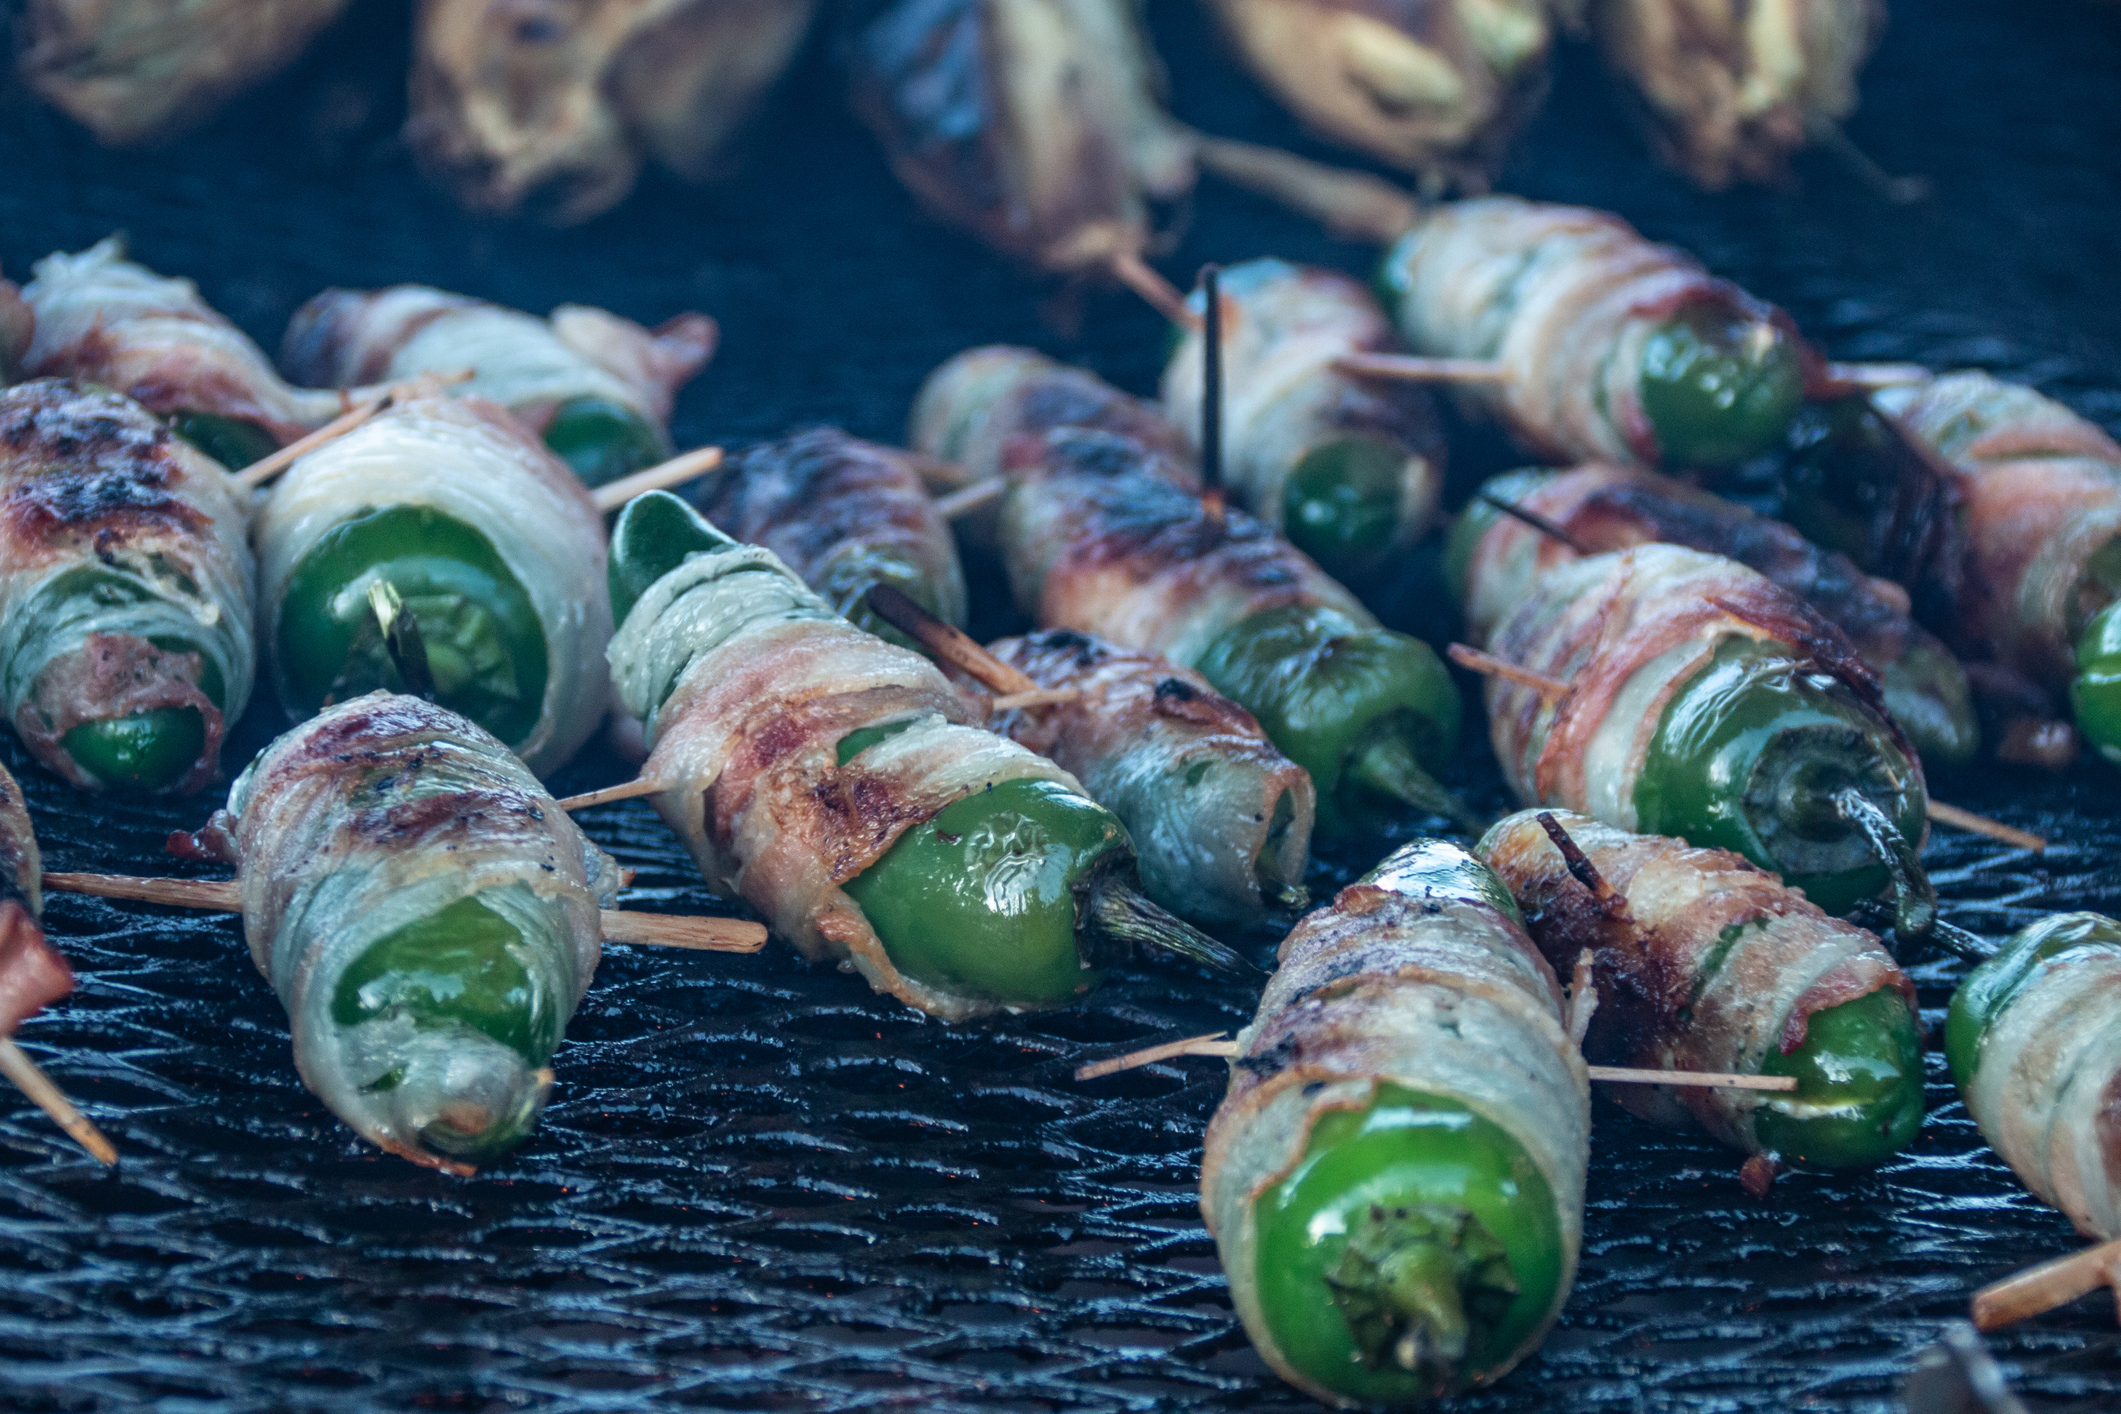
Bacon-wrapped Jalapeno Poppers
Nothing better than fresh farmed jalapenos – fire, flavor, heat! To make delicious poppers, use medium sized jalapenos (about 3” long).
Prep: Put on gloves! Cut the top off, then cut down one side and around the bottom to be able to open up the pepper. Scrape out all the seeds and white ribs – that’s where the majority of the heat is (and if you want to leave a few at “screaming hot”, leave some in!).
Mix up equal amounts of cream cheese and shredded mild cheddar, then put a dollop in each pepper and close it around the cheese. Wrap each pepper with a strip of bacon, and secure with a toothpick. As you do this, cover the open end with the end of the bacon – this keeps the cheese in. Cook over direct heat turning frequently until the bacon is cooked and the pepper is tender.
Kaboom!
Mixed Grilled Veggies
A super easy way to enjoy the grilled veggie flavor is to cut up a bunch of different veggies and put them in a big bowl, toss with some oil and a bit of balsamic, then dump into either a big roasting pan (foil disposable is fine unless you have one you’re ok with putting on the grill) a specially-designed grilling basket, or a big cast iron skillet.
For this we like a mix of bell peppers, green beans, mushrooms, zucchini and onions – good additions are asparagus, broccoli and cauliflower.
Preheat the pan on the grill for a few minutes before adding the veggies. Cook them over direct heat, tossing them about every 4 or 5 minutes until they are your desired doneness. Broccoli and Cauliflower are also great this way on their own – cut up a mix of one, the other or both, toss with a couple of tablespoons of olive oil then roast. Finish with a gentle sprinkle of your favorite seasoned salt – a smoked salt is especially tasty with this.
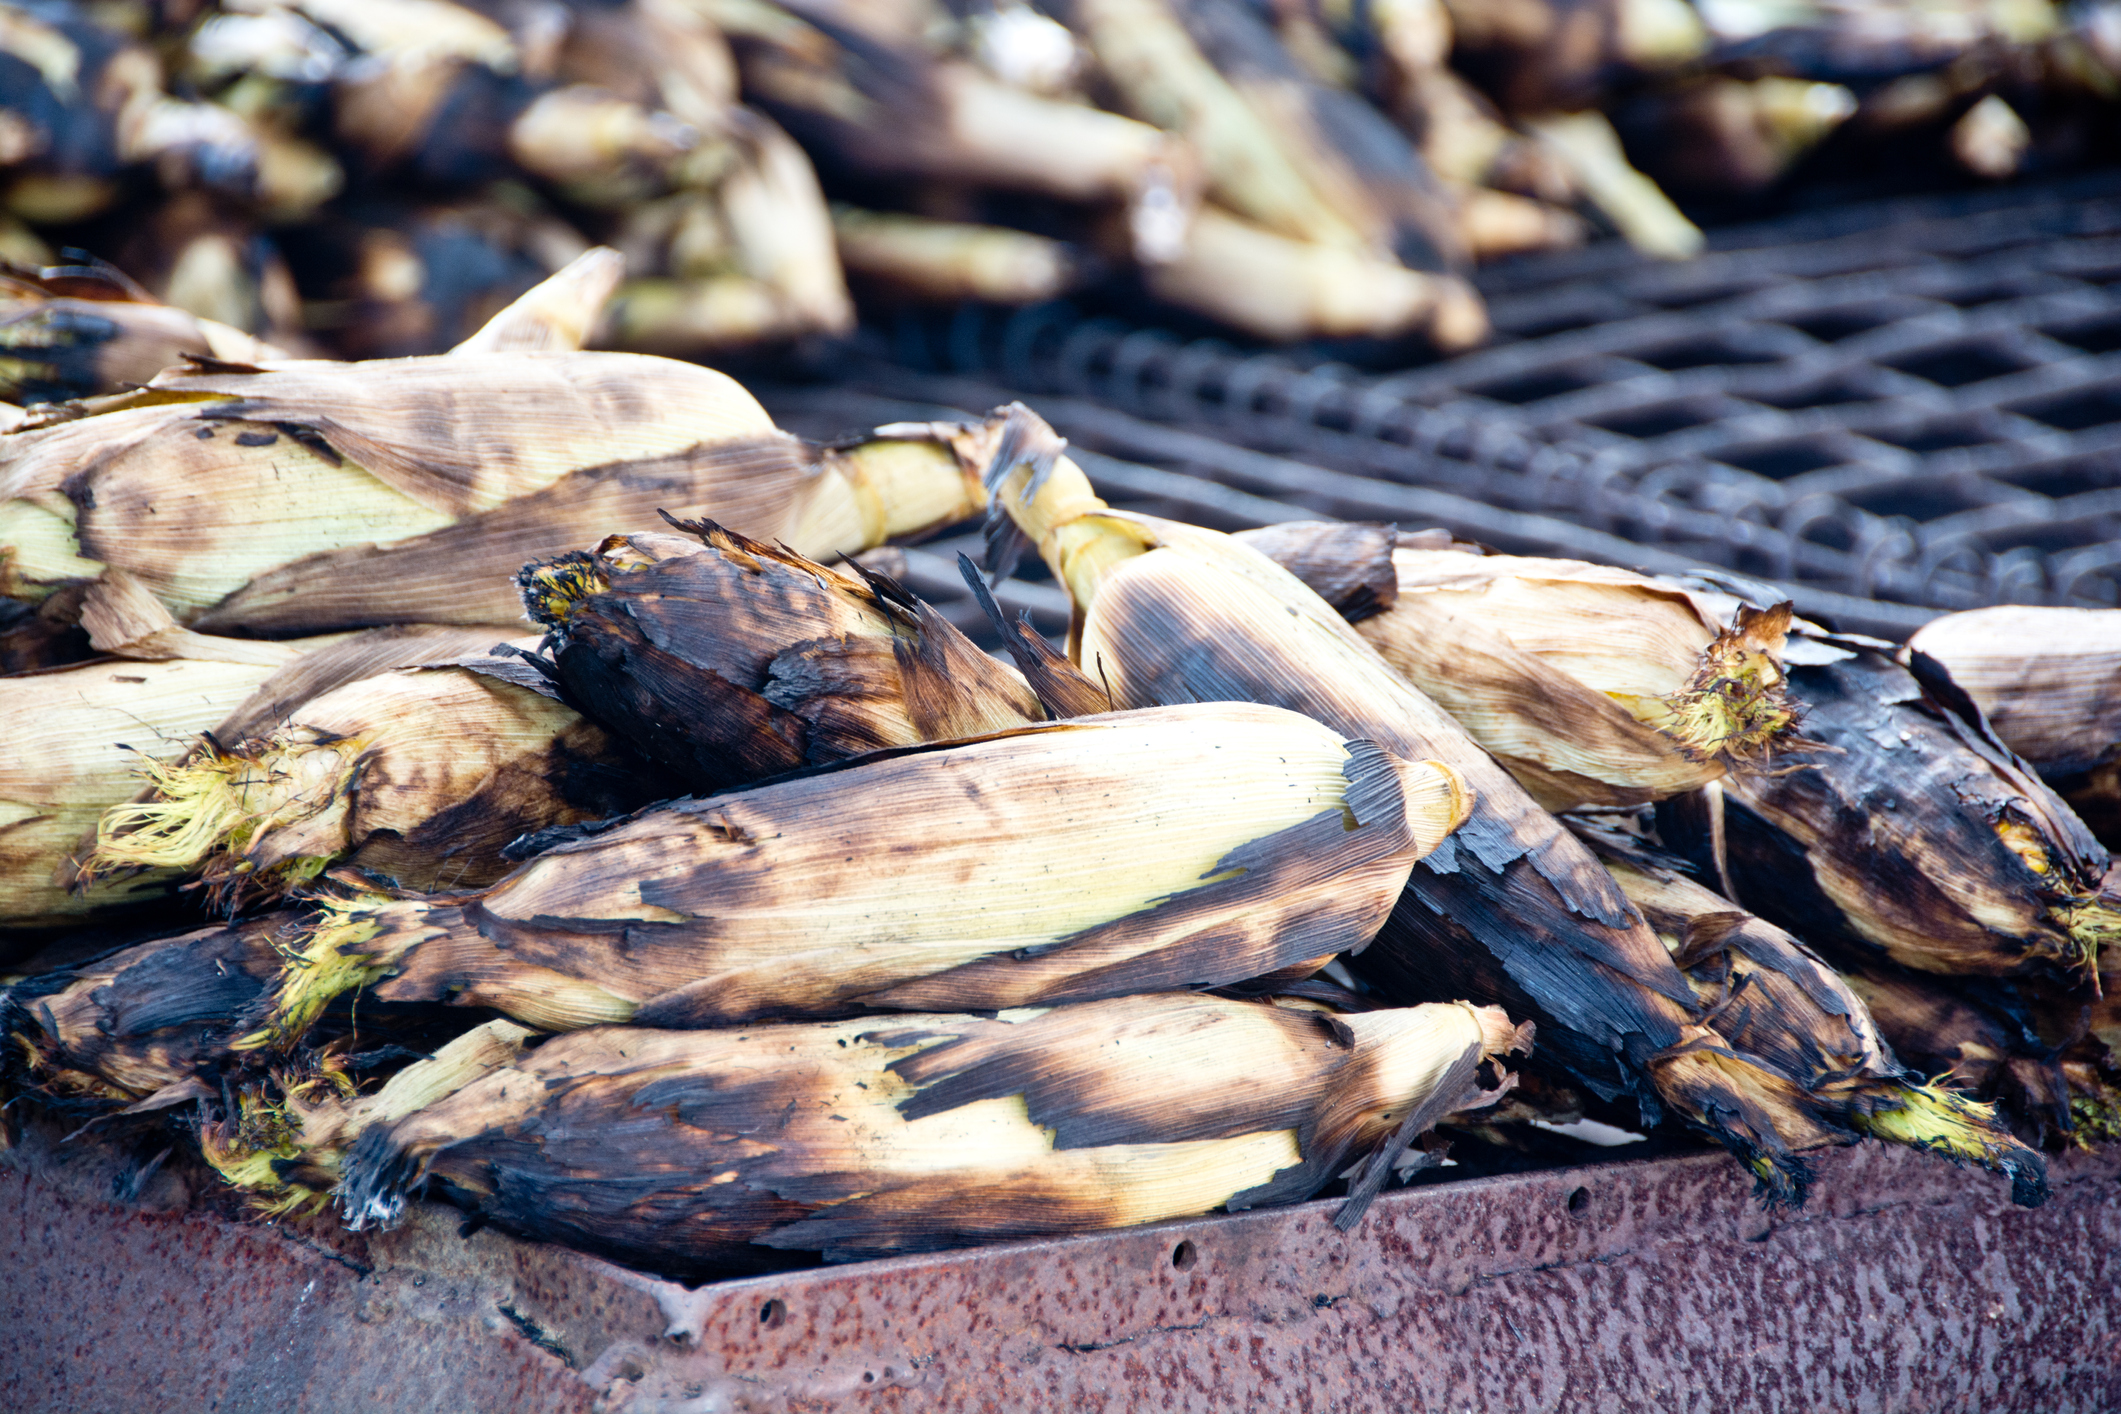
And finally … Sweet Corn
There is nothing better than an ear of freshly picked sweet corn roasted on the grill. For the best results, get corn that was picked the same day or worst case, within a day. Holding and refrigeration are the enemies of sweet corn – the sugars rapidly turn to starches. It’s that milky sweetness and snap of the kernels that you want and that comes from freshness. Be sure to ask the purveyor when it was picked.
Our favorite way to grill it is to simply pull the husks back just enough to allow pulling out of most of the silk then push the husks back into place. Heat your grill to medium direct heat. Put the corn directly on the grill (using direct heat) and turn the ears ⅓ turn every 3-4 minutes. They are perfect in 9-12 minutes when you’re on medium direct heat. Shuck and enjoy with your favorite toppings – just butter; butter, salt and pepper; butter and Old Bay seasoning; or our fave, Elote style with mayonnaise, Elote seasoning (Try the one at Trader Joe’s!) and a squeeze of lime juice. Fantastic!
These ears of corn are ready to eat, having been freshly roasted on the grill.
Farm Stands are a bounty of amazing goodness in the summer and are natural companions to your grill. Head out, get some of the earth’s bounty, fire up that grill and enjoy!
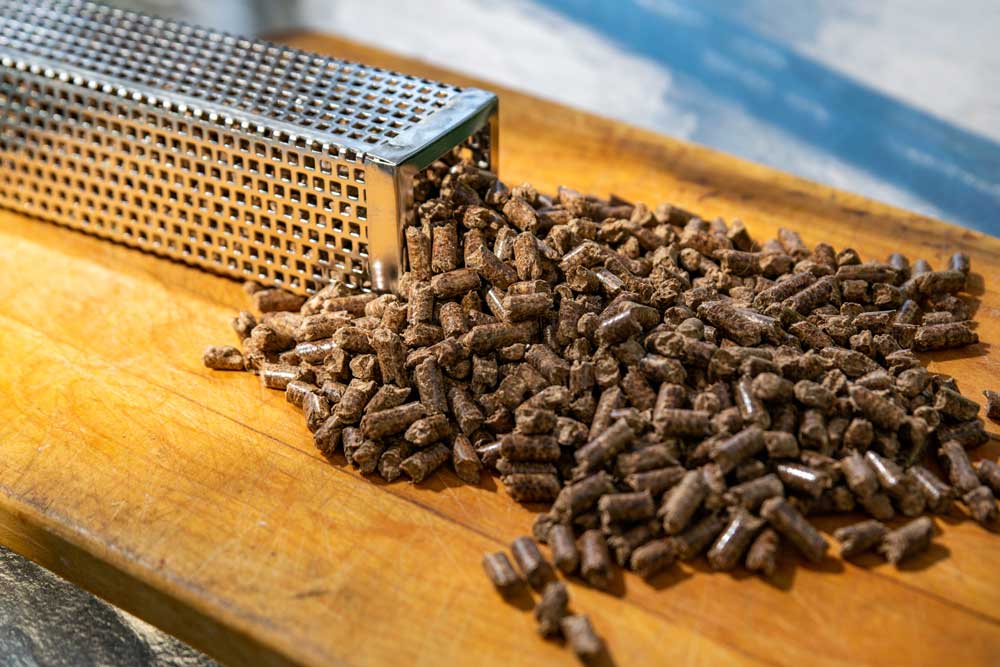
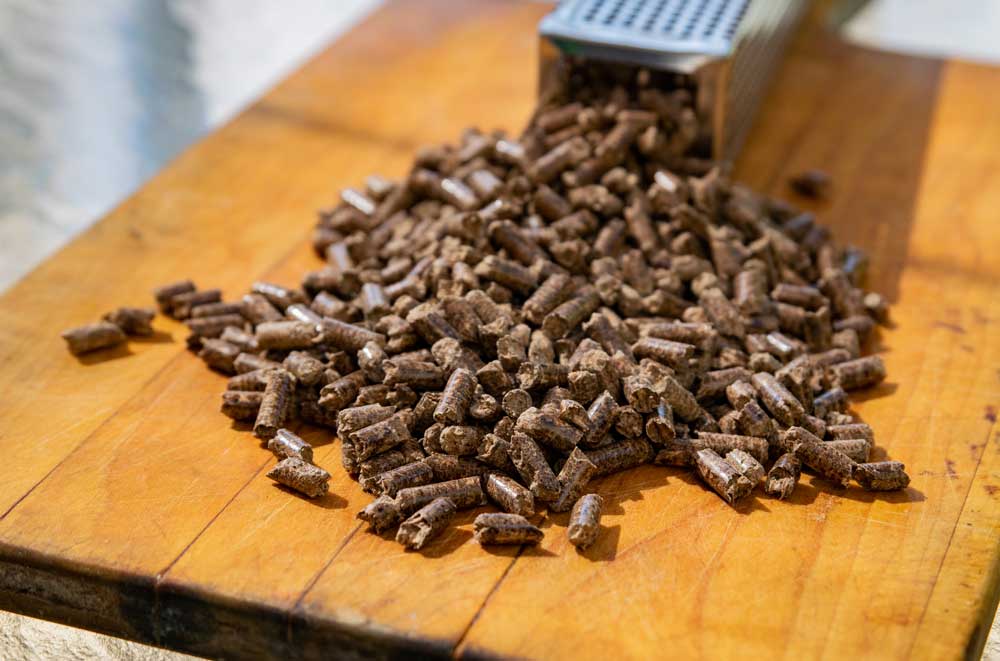
So you want to know how to grill with that smoker box or tube that you’re thinking of buying? For curious cooks who want to check out wood pellet grilling without the full wood pellet grill, smoker tubes and boxes are great gear. They’re affordable, too.
Unlike wood pellet grills, which have plenty of working parts that require instruction, and thus include user manuals, smoker boxes often just arrive at your doorstep. They’re metal. They’re perforated. Now what?
Actually, using these shiny objects is pretty simple. Here are answers to the fundamental questions.
WHY use a smoker box or tube?
For flavor, not heat. When wood pellets are burned in a smoker box on a conventional grill, they don’t change cooking time or affect method, but they absolutely deliver delicious smoky taste. You don’t even need a recipe; just try grilling chicken with the usual timing and get a uniquely good flavor.
HOW do I grill with a smoker tube?
It’s really easy. Fill the tube or box with pellets. Place it under the grill grate, on top of the ‘lava’ or metal that surrounds the gas flame inside your gas grill.* Light the grill, and go.
*Because of the warmup time charcoal requires, plus the fact that it generates flavors that compete with wood smoke, gas grills are the recommended usage for smoker boxes and tubes.
WHEN do I want this gear?
Whenever you think smoke flavor would enhance your grilled food, that’s the time. Also, when you’re just checking out wood pellets as you consider making the leap to a wood pellet grill. Finally, when you want to give a pretty awesome gift to a food fan in your world, consider going to Amazon and ordering this great smoker tube and a bag of Griller’s Gold** as a Smoker Starter Set.
**In Competition Blend and four other great flavors
Enjoy the natural wood smoke flavor that’s so easy to achieve. Get fired up!
We admire the prodigious knowledge of Meathead Goldwyn at AmazingRibs.com and we love to share what we learn from him. What does he have to say about a scientific approach to best techniques for grilling and smoking meat? To understand the science of grilling, you’d do well to read this piece. It includes much discussion about meat’s composition, especially muscle, fat and connective tissue—and myoglobin content which is what brings the reddish color to meat juice and differentiates ‘dark’ from ‘white’ meat. (More on myoglobin in a minute.)
Temperature and cooking time all matter. The constituent elements of meat factor into optimal cooking time. Goldwyn says “Because different cuts of meat vary significantly in tenderness, fat content, and collagen content, some must be cooked hot and fast to be at their best, some must be cooked low and slow, and some must be cooked with a combination on both to reach their optimum.”
Can you tell if meat is done just by looking?
That’s a ‘no,’ according to Meathead
“You cannot tell if meat is safe or cooked to the proper temp by looking at it. Sometimes vegetables in the grill can produce gases that alter meat color. When you cut into meat to look at it, it can change in a few minutes after it has been exposed to oxygen. Compounds in marinades and brines can impact color. There is only one way to tell if meat is at its optimum quality and safety: With a thermometer, preferably a digital.”
Smoked meat—Meathead and other BBQ experts note—often develops a ‘smoke ring’, a bright pink color just under the surface all the way around the piece. Meathead realizes that some people might think the pink color means the meat is raw, but “nothing could be further from the truth.“
In a related article, Goldwyn cites research showing that “the smoke ring is an interaction between … myoglobin with the gases nitric oxide (NO) and carbon monoxide (CO). NO and CO are made by the combination of carbon and nitrogen with oxygen during the combustion of wood or charcoal… Like many proteins, myoglobin changes color permanently when it breaks down after exposure to heat. In beef the meat goes from purple to red to pink to gray at very specific temperatures, and that is what defines rare, medium rare, well done, etc. Once myoglobin breaks down, at about 170°F in beef and 100°F in tuna, the game is over, it cannot return to pink.”
“While meat is starting to cook, if NO or CO land on the surface and dissolve into the meat, they “fix” the color pink while the rest of the meat heats up and goes to gray. But NO and CO cannot diffuse very far beyond the surface before the meat beneath it heats up, dooming the myoglobin in the interior to a colorless fate. As a result, the pink forms a thin layer, the smoke ring, which usually only goes about 1/8″ deep, although, under some circumstances, it can go up to 1/2″ deep.” Goldwyn says that the locking of the myoglobin color starts almost immediately with a good, stable, clean fire.
Yes, you read that right. Heat, not smoke, creates the smoke ring. Isn’t education grand?
For a pellet fire, Goldwyn recommends putting a slab of ribs on at 225°F. “After 30 minutes, move it indoors and finish cooking. There will be a fine looking smoke ring. After just 30 minutes exposed to NO and CO!”
Be sure to read the Griller’s Gold post about best cuts of meat for grilling and slow cooking. You’ll find a little historical note about why low-cost meats have been BBQ favorites since the cooking technique’s beginnings.
And check out a full history class on grilling at Back to School 1 also on this blog.
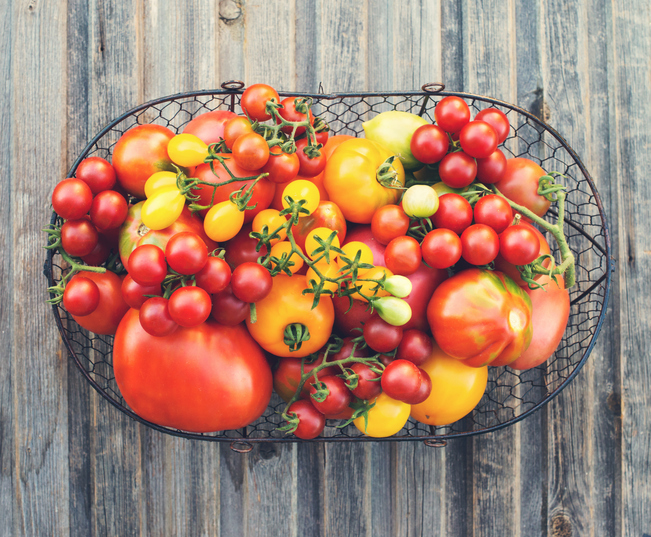
Right now, at the height of summer, we dream of picking tomatoes that are still warm from the sun, slicing them, putting them on a plate with their juices flowing and enjoying them straight up. They’re that good. Of course, make just a little more effort and your tomatoes are the basis of wonderful side dishes for your next BBQ.
But not all that long ago, tomatoes were thought to be poisonous and foul. Thanks to Modern Farmer magazine for their fine and fascinating history of the tomato in America. Here are some excerpts.
While grown and used throughout pre-Civil War America, tomatoes weren’t widely embraced. Tomatoes—Lycopersicon esculentum—are in the Solanaceae family, which includes deadly nightshades and other poisonous plants; part of the tomato taboo was guilt by association.
Wrote Working Farmer editor James Mapes, of Newark, New Jersey, the tomato was ‘long grown in our gardens as an ornamental plant, under the name of Love Apple, before being used at all as a culinary vegetable. About 1827 or ’28, we occasionally heard of its being eaten in French or Spanish families, but seldom if ever by others.’
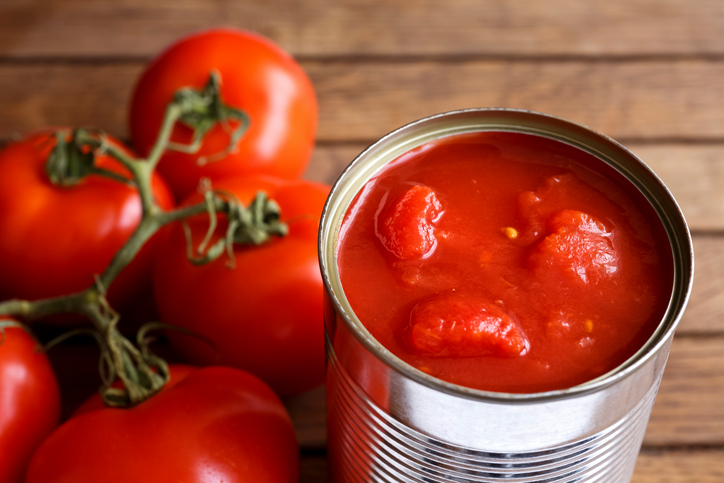
The Civil War was a tomato game-changer. Canneries boomed, filling contracts to feed the Union army. Tomatoes, which grew quickly and held up well during the canning process, rose to the occasion. After the war, demand for canned products grew, with more tomatoes being canned than any other vegetable.
Alexander Livingston, who had a serious green thumb from an early age, began a seed company in 1850. ’There was not in the United States at the time an acre of tomatoes from which a bushel of uniformly smooth tomatoes could be gathered,’ Livingston said of the tomato scene in the 1860s. Livingston introduced his initial groundbreaking hybrid tomato, the Paragon, in 1870. He called it ‘the first perfectly and uniformly smooth tomato ever introduced to the American Public.’ The twenty-odd varieties of Livingston’s tomatoes still available in seed form today are considered heirlooms.”
Summer side recipes
Let’s nod to history with two of today’s classic tomato-centric dishes, one from the American South and another with Italian heritage.
Fried green tomatoes should start with green fruit because red ripe tomatoes will start mushy and get even more so as you cook them. This recipe combines flour, breadcrumbs and cornmeal to make the breading good and crunchy.
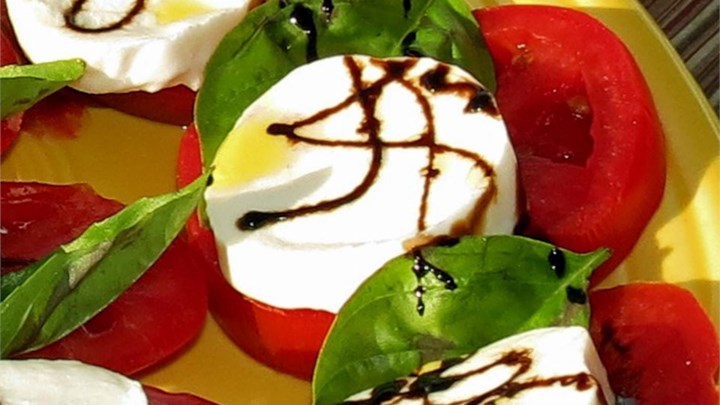
This Caprese salad takes the pure and basic ingredients of ripe tomatoes, just-picked basil, and fresh mozzarella, and elevates with the sweetness of honey and a balsamic reduction.
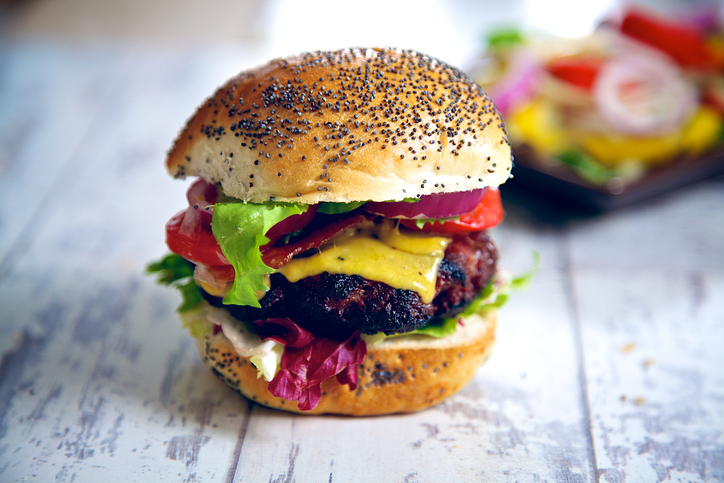
Get a new take on that griller’s favorite, the burger. Look at what’s popular in the burger world right now, and learn how to cook the perfect burger on your wood pellet grill.
Layer the smoked flavors
When you’re using a wood pellet grill, great smoky flavor is a sure thing. So make the most of it. You can build on that base of smoked flavor with chipotle sauce, smoked cheese and other savory notes.
Chipotle BBQ sauce
There’s a choice of options on the market, because spicy smoked chipotle pepper flavor is so hot.
Many mainstream grocery BBQ sauce brands include a chipotle version in their lineup.
And if you just know that grilling is your superpower, you can make your own from scratch and take all the credit; check out this well-reviewed chipotle sauce recipe.
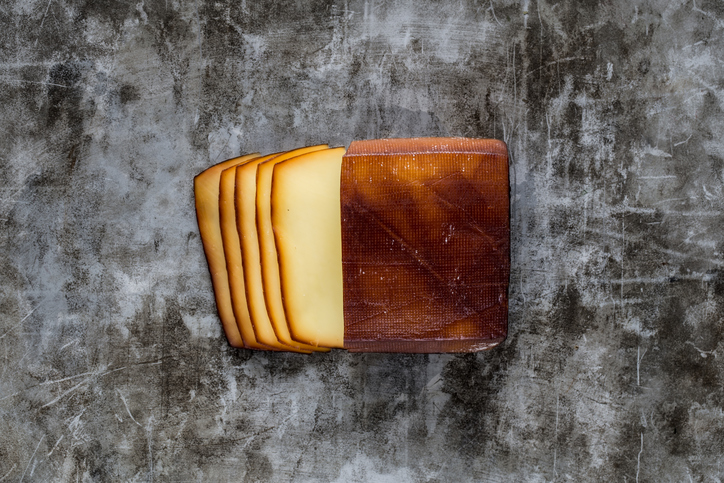
Smoked cheese
You won’t go wrong opting for the classic smoked Gouda, which you can order sliced at many grocery store deli counters. Or enjoy a trio of innovative flavors in this Smokey Cheese Gift Pack. Extra bonus: these tasty cheeses are shipped by Wisconsinmade.com, so they come from the home state of Griller’s Gold.
First off, remember that wood pellet grills use indirect heat. And a sear or crust requires direct exposure to high temperatures. Your wood pellet grill instructions probably tell you to cook your burgers at a relatively low temperature setting for what might seem like a surprisingly long time, then pull the patties, turn up the temps, and wait to hit the high heat to sear for a few final minutes. Look around on the wood pellet BBQ forums, and you’ll find a lot of comments about how cooking for a good crispy char is an elusive goal.
But don’t despair! You can add some texture and crispy crunch by rubbing ingredients on the outside of your burger and letting the indirect heat do its cooking thing. You can create a crust on your burger with something as simple as crushed peppercorns. Black peppercorns are fine but multi-colored mixes add more interesting flavor notes. Go all gourmet on your burgers with rainbow whole peppercorns that you buy in bulk – because you’ll want to use them a lot!