Anyone who has cooked a decent amount of time may know the basic technique of searing a cut of meat, fish, or poultry. The way to seal the outside, color it, and give it flavor – then cook it until done.
It’s a simple technique – and probably the way we all first learned to do the two-zone grilling. Cold meat on hot fire, a couple minutes on each side to “seal it” and brown it, and then move it to a cooler part of the grill to slow down the cooking and allow control of the heat to perfection.
The problem with the sear-first method, is that you wind up with meat that has a nice pleasing crust on the outside, but when you slice it open, you’ve got a pretty deep overcooked “gray zone” and the only part of your cut of meat that’s perfectly done is the deep center, like shown below.
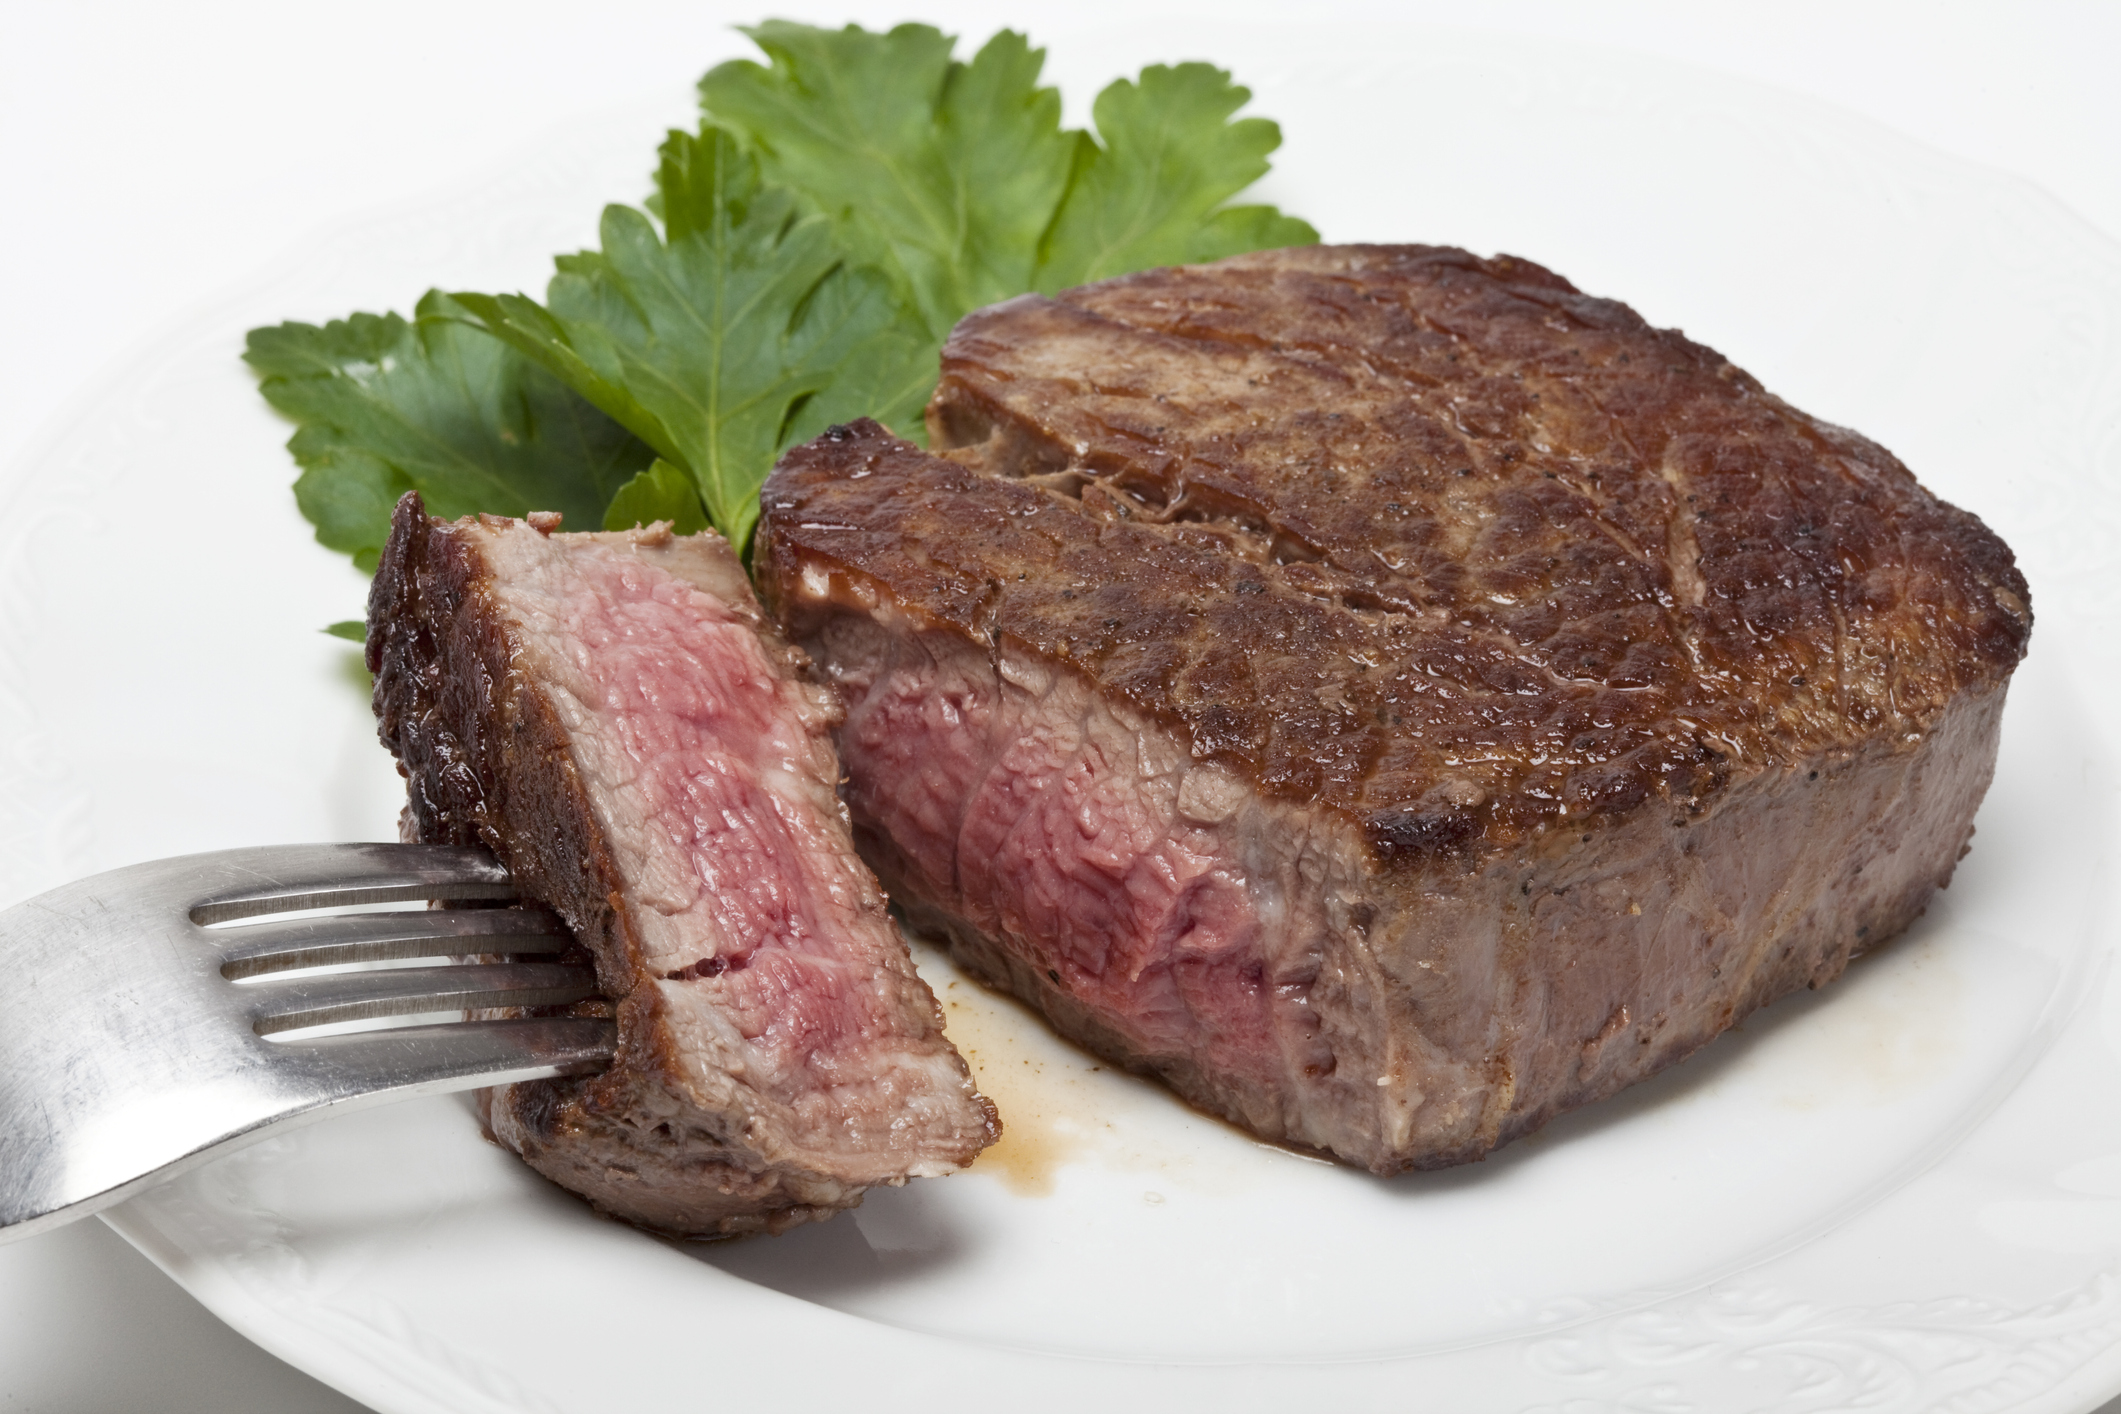
If you like your steaks medium-well to well done, that’s probably not something you care about. But if you like it from rare to medium, don’t you wish there were a better way?
There is a better way
The better way is “reverse sear” and it’s a simple concept when you break it down. All you’re doing is reversing the process – you cook slowly over indirect/more gentle heat, then when the meat is ALMOST done, you crank the heat up or move your meat over the direct heat source, give it a fast sear, and boom, you’re done!
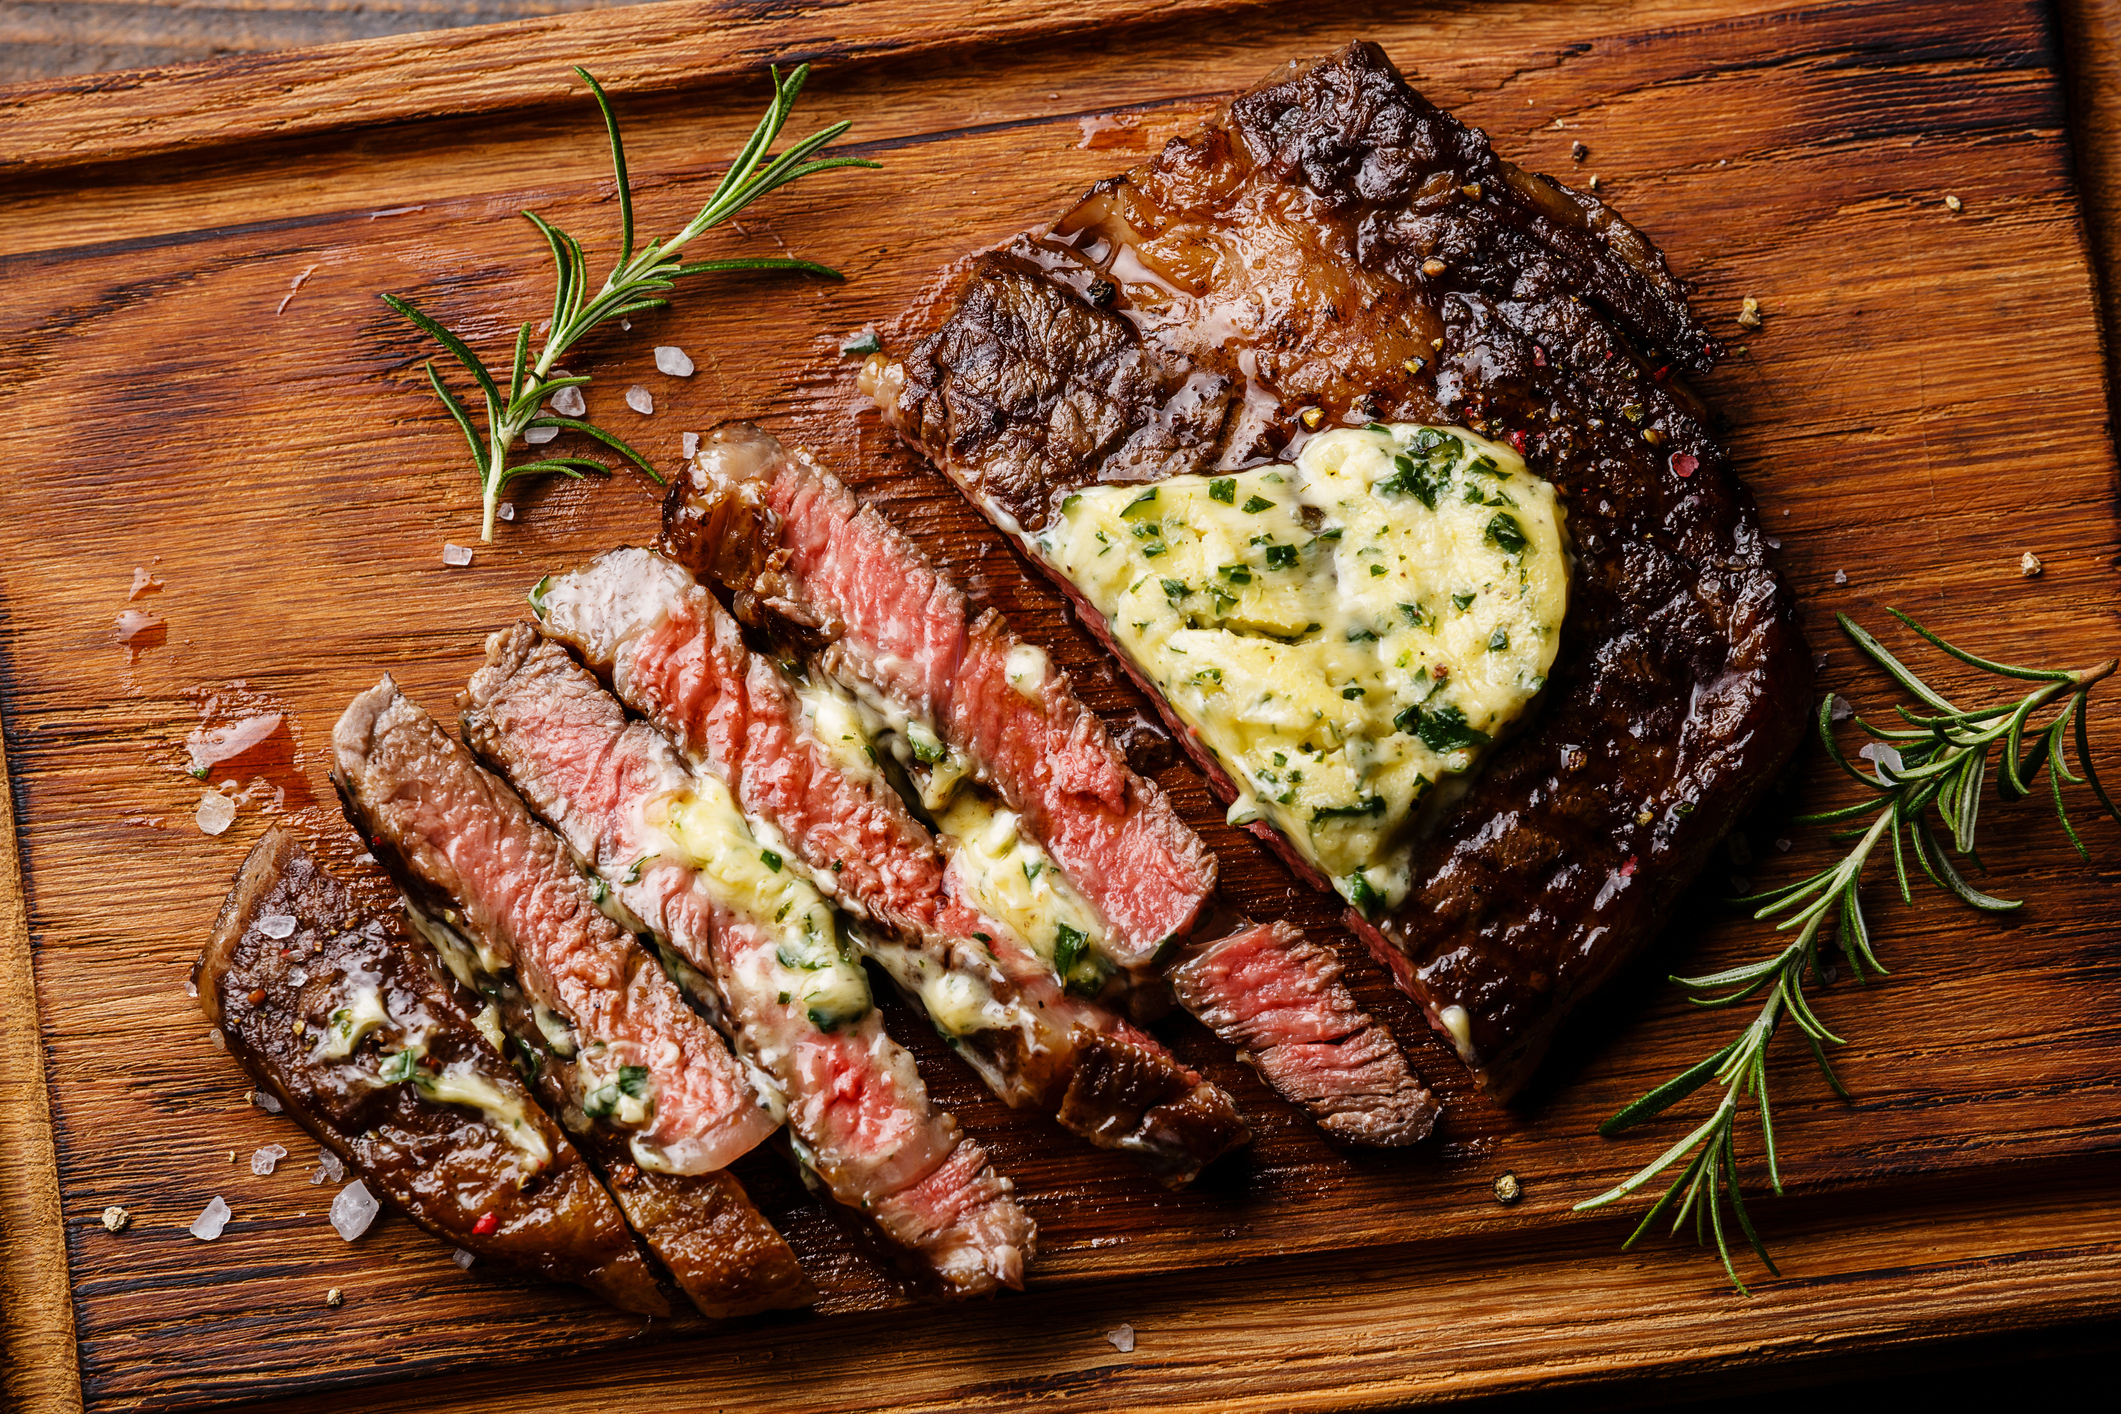
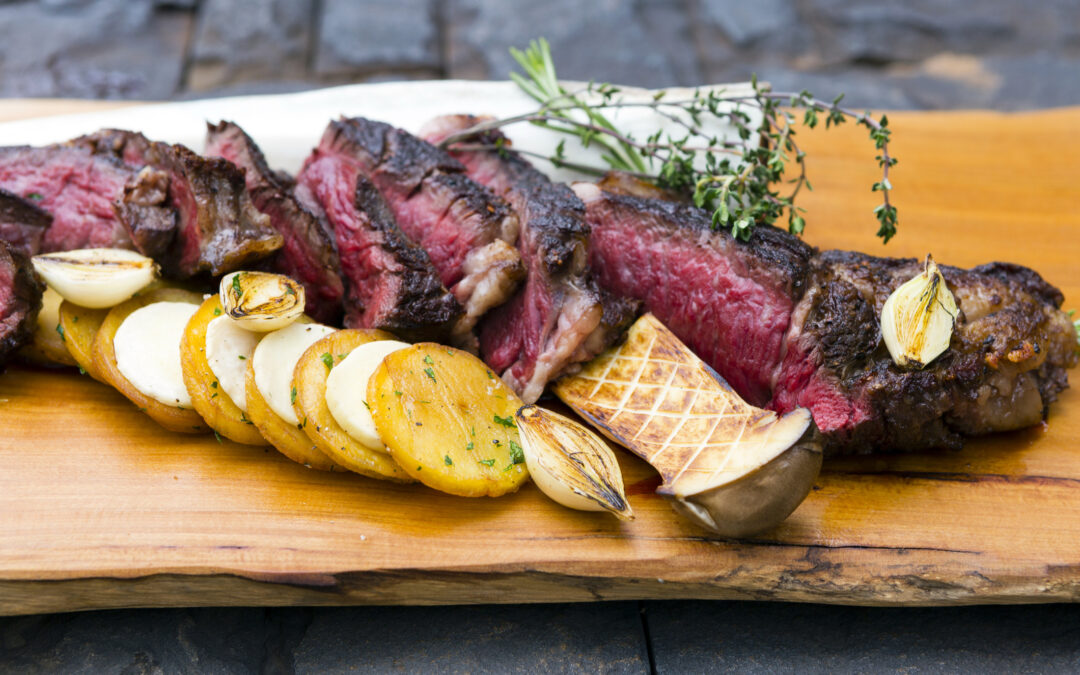
The result is nothing less than spectacular – you still get your crust, but your “perfect zone” is basically edge-to-edge. It looks like this:
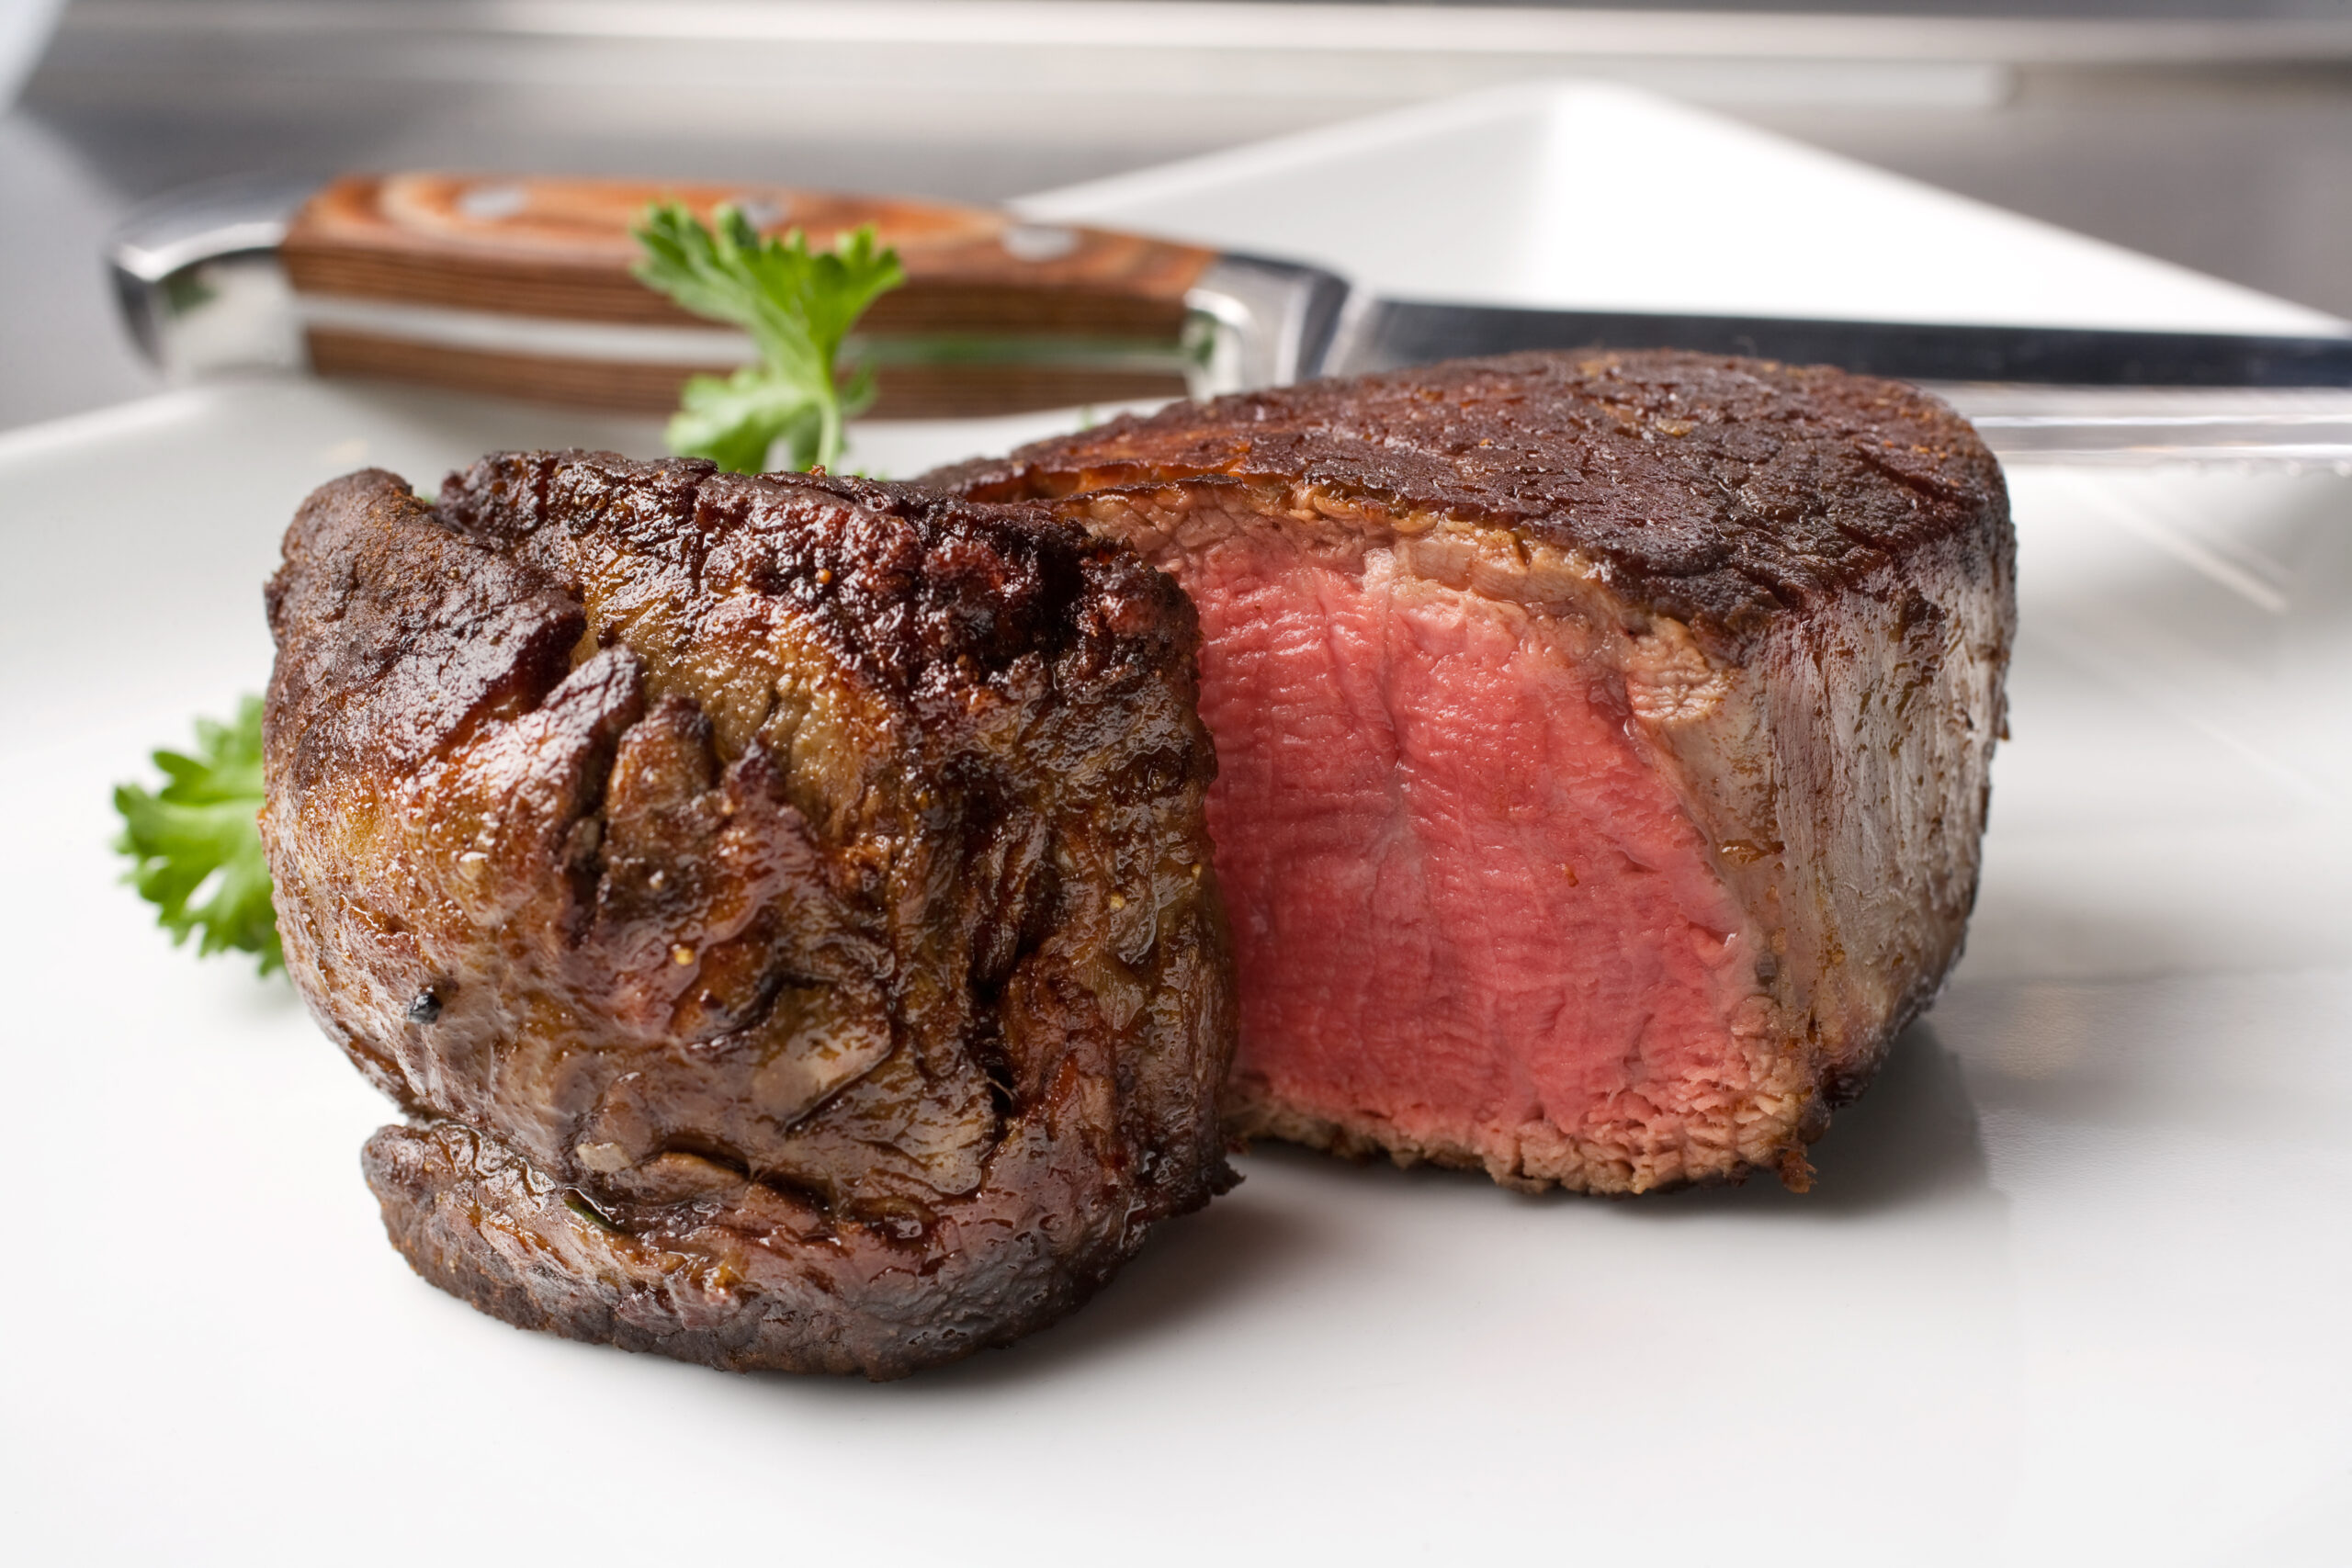
Doesn’t that look AMAZING?
First, You may ask…
So the first question people may ask is if searing overcooks the meat, should we skip that step?”
Oh, no, no, no, NO!
Some cooking science here – that searing and the pleasing browning on the outside is called the Maillard reaction, and yeah, that’s a fancy French term. The science is pretty simple – it’s the caramelization reaction of proteins with carbohydrates. Toasting bread is actually a Maillard reaction and of course, is delicious.
So yeah, we’re going to sear it. But only when it’s just about ready to serve.
There’s also one great advantage of reverse searing, and that’s timing. If you’re like us, you like being a guest at your own dinner parties – rather than being tied to the grill. With reverse searing, you can “pause” the action because you only sear right when you’re about to serve! You can hold the meat up to an hour prior to serving as long as you have it covered up.
Expert Tip:
One key thing about reverse searing – you’ll need to be able to measure the temperature of your meat.
Remote probe barbecue thermometers are ideal for this, as are the “onboard” probes that some grills come with (just know how accurate yours is before you trust that $75 prime cowboy ribeye to it!). And of course, instant reading thermometers work great for this. If you’re a “by touch” barbecuer, this may not be the technique for you. Learn more about bluetooth thermometers here.
So, how do I reverse sear, and what should I reverse sear?
Well, as luck would have it, chances are if you’re reading this blog, you own a pellet grill, and pellet grills are tailor-made to make it easy to reverse sear because they have thermostatic control. And, as luck would also have it, pellet grills, especially when fired up with Griller’s Gold 100% premium BBQ pellets also give your food a delicious wood-fired grill flavor. You’ve got the perfect combo for reverse sear glory!
What to Reverse Sear:
Reverse sear works best with thicker cuts of meat – think 1 ½” or more in thickness. And honestly, the thicker the better.
In terms of which meats, we’ve found that this works best with pork, beef, and lamb, as well as game meats like venison, elk, and exotic meat like ostrich. Because you need to thoroughly cook poultry, this is not a recommended technique for chicken, turkey, and the like. Also, fish don’t do great with this technique either.
Using a pellet grill, performing this technique couldn’t be easier.
Start with your nice, thick piece of meat – a pork loin roast, a 2 ½” thick ribeye steak, thick New York strips, Picanha, lamb racks, leg of lamb, etc. You’ll season it and whatnot (see below for Reverse Seared Ultimate Ribeye Steaks). Fire up your pellet grill with your favorite Griller’s Gold pellets (we love Smokeshack Blend for cuts of meat like this!) and let it preheat at least 15-20 minutes at 250 degrees.
Put your meat on the grill, and close the lid. For the best, most even results, you’ll need to periodically turn the meat, since the heat from pellet grills radiates upwards – how often will depend on how thick your meat is.
We like to turn big chops, steaks, and lamb racks about every 10 minutes. For 3” or thicker pork loins or things like legs of lamb or smaller beef roasts, we turn them about every 15 minutes. And for something like a prime rib, if it’s bone-in, we don’t turn it, and if it is boneless, we turn every 15 minutes or so.
You’re cooking until your meat is just short – 5 to 10 degrees – of the ideal doneness temperature.
Here’s a quick temperature chart as a guideline.
| Doneness Level | Final Internal Temp | Reverse Sear Temp |
| Very Rare | 120F | 113F |
| Rare | 125F | 118F |
| Medium Rare | 130-140F | 123F-132F |
| Medium | 141-150F | 132F-142F |
| Pork | 145F | 135F |
How long does this take?
The answer is “well, it depends!” and it does – on the thickness of your meat, whether it’s cold and windy outside, etc.
Some rules of thumb though – we find 2 ½” thick ribeyes take about 40 minutes to reach about 120 degrees (we like our steaks on the rare side of medium-rare), a 3-4” thick pork loin will take more than an hour to get to 138, and lamb racks (which we like just short of medium) take about 45 minutes to get to 130F. But again, you have to cook by temperature here, not by time, and not by feel.
When your meat hits the desired temp, take it off, put it on a pre-warmed platter (doesn’t have to be hot, but shouldn’t be ice cold either), put foil over the meat, and then we like to cover it with a doubled towel. We want that meat to rest but also to stay cuddly warm while you get ready to sear.
Now…we sear!
Whether you stay on your pellet grill for searing depends on if your pellet grill will hit a good searing temperature (at least 450 degrees) and if you have a good searing surface.
We have found that pellet grills, with their indirect heat nature, do a better searing job if you use something like a cast-iron skillet, a cast iron griddle, or, our favorite searing surface, GrillGrates searing grates. Those will concentrate the grill’s heat and deliver a better, darker crust for your meat.
Many pellet grillers don’t like to crank the heat that high on their pellet grills – if that’s you, then you have a lot of options – preheat a cast-iron skillet in a 450-500F oven and sear it there, fire up your gas grill and sear it there, and if you’re a real purist (and especially if you’re already fired up and cooking other things on it) … nothing beats a good charcoal sear.

Expert Searing Tips:
The searing is easy – with few good hints:
- Only start searing when you’re within 15 minutes of wanting to sit down to dinner. We like to have everything ready to serve, then we start searing. We want to serve hot off the sear.
- When using a grate like GrillGrates, your standard pellet grill’s grates, or the grates on a gas grill, keep turning the meat every 2 minutes and each time you do, turn it ¼ turn as you flip it. That will get you those nice cross-hatched grill marks.
- If you’re using a cast iron skillet, whether on your pellet grill or inside the oven, again turn frequently but also don’t be afraid to press down on your meat a bit to ensure the surface really flattens against that hot metal.
- If you’re using the “cast iron in the oven” method, return the pan to the oven in between turns.
- Generally speaking it will take a pellet grill about 15 minutes or so to go from 250 to 450 or 500 degrees. If you’re in a hurry, do this in the oven with the cast iron skillet – and just have it preheated and ready to go.
- Fats and oils – if you’re doing a cast iron reverse sear, dip thickly folded up pad of paper towel (or a cotton kitchen towel) in some cooking oil, and give the surface of the pan a fast wipe – you want a bit of oil but not so much that it will catch fire. There WILL be smoke, so be sure to have your vent fan running if you have one.
When is it done?
Well, of course, you can check the temp, which is what we do. But a good rule of thumb is pretty simple – between 5 and 8 minutes total time – you’re looking for a nice dark surface and beautiful appearance.
And because your meat is already rested, you’re ready to serve right off the grill or out of the pan.
As promised, here’s our recipe for ultimate reverse-seared Ribeye Steaks:
Buy: Bone-in or Boneless Ribeye steaks, at least 2” thick, 2 ½ inches is best. Buy the best you can afford – choice or prime grade works great for this.
Trim: Trim the edges of any large amounts of hard, white fat. Ribeyes will generally have a pocket of it between the cap and the center meat and that’s fine. That’s flavor!
Seasoning: Our secret method is to “dry brine” the steaks 24 hours before cooking. Take them out of the package, put them on a rack on a large baking sheet, give them a generous coating of coarse-grained kosher or sea salt and then put them in the fridge unwrapped overnight.
Take them out about 1 hour prior to cooking and let them rest on the counter (but make sure the dog won’t get them! Ask us how we know!). Then just before cooking, we like to rub them with a tablespoon or so of Worcestershire sauce per steak, then sprinkle on a generous hit of freshly ground pepper and a shake of granulated garlic powder.
Fuel and Preheat: Griller’s Gold pellets of your choice (although Smokeshack and Competition Blends are ideal for beef! Learn more about pellet flavor pairings.), preheat to 250 for at least 15 minutes.
Cook using the reverse sear method outlined above.
Compound Butter: While the steaks cook, prepare a compound butter using a stick of softened butter, 2 cloves of fresh garlic – minced or pressed, 1 ½ t fresh thyme leaves (or ½ tsp dried), and ½ tsp freshly ground pepper. Mix up well and set aside.
Sear using one of the sear methods above.
As it comes off the grill or out of the pan, top each steak with a generous spoonful of the compound butter and let it melt over it.
Then slice across the short dimension of the steak in ¼ inch thick slices and serve! For sides consider creamed spinach, roasted mushrooms, and gratin potatoes for an ultimate steakhouse feast!
And that’s it! Now you’re ready to be a pro reverse sear chef!
Grill on!