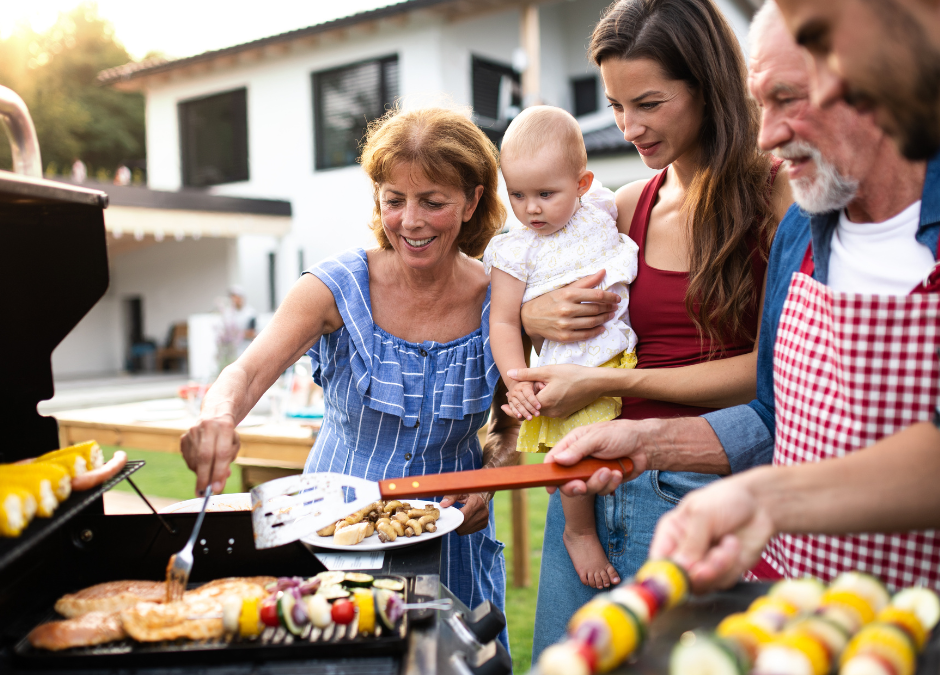
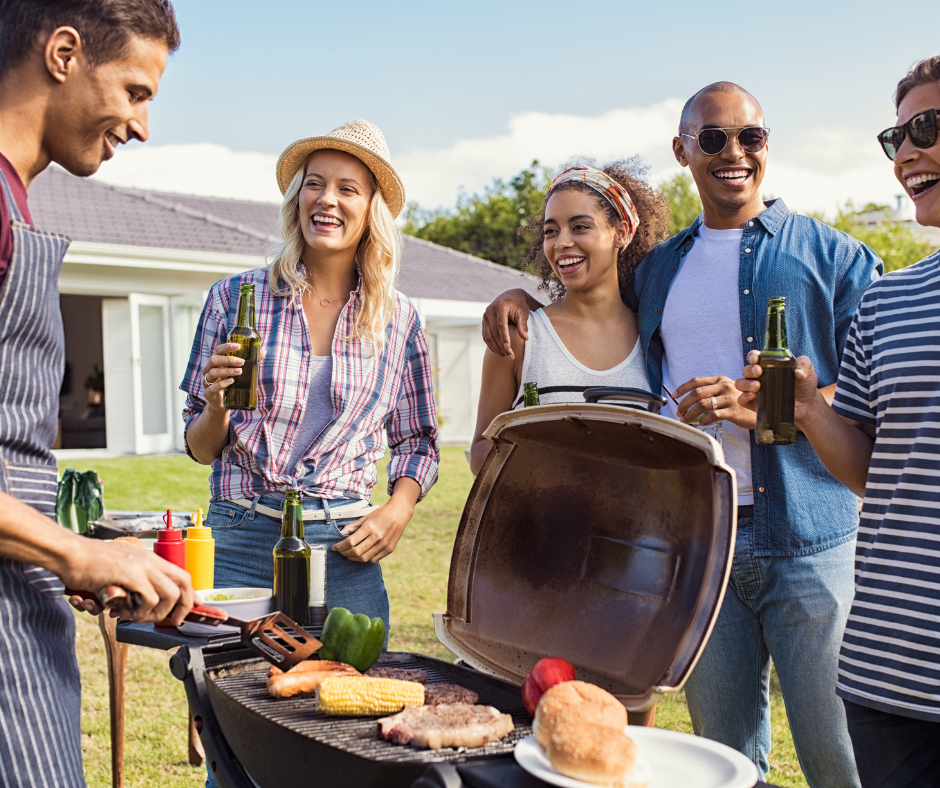
If summer had a smell, it’d probably be smoke rolling off a grill, fresh-cut grass, and somebody’s famous barbecue recipe cooking in the backyard.
You know the scene.
Someone’s uncle is standing next to the smoker acting like he’s working a second job.
Kids are running through sprinklers.
A cooler is packed with ice.
The neighbor wandered over “just to say hi” and somehow ended up staying for dinner.
And somebody’s already asking when the ribs will be done.
That’s America.
For 250 years, we’ve found reasons to gather around food. Birthdays. Graduations. Memorial Day. Fourth of July. Labor Day. Family reunions. Or simply because the weather is too nice to stay inside.
The menu may change depending on where you live, but the tradition remains the same:
Good food.
Good people.
A little smoke in the air.
As America celebrates 250 years, we thought we’d honor one of our favorite traditions the best way we know how—by firing up the grill and taking a delicious road trip through some of the flavors that have shaped backyard cookouts from coast to coast.
Pull up a chair.
Let’s eat.
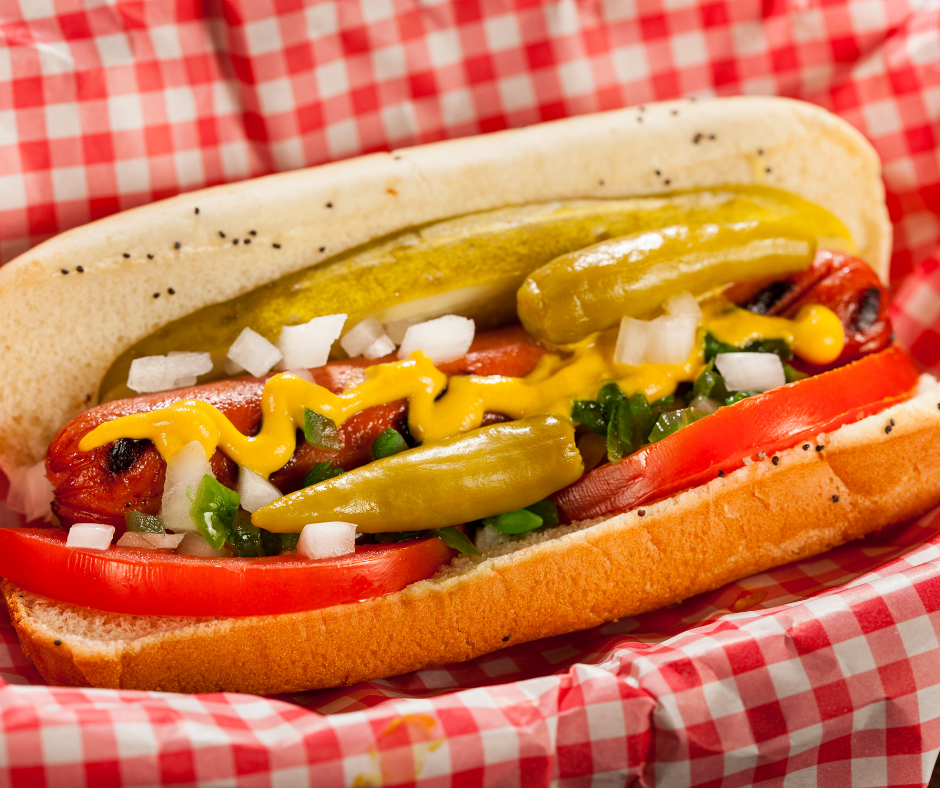
First Stop: Chicago, Illinois – The Mighty Char Dog
Since we’re proudly based in the Midwest, let’s start close to home.
Now, if you’ve ever handed a Chicagoan a hot dog covered in ketchup, you already know how that story ends.
A proper Chicago-style dog is loaded with mustard, relish, onions, tomatoes, sport peppers, a pickle spear, and a sprinkle of celery salt. It’s messy, colorful, and somehow manages to taste like summer itself.
But here’s the real secret:
It’s not about the hot dog.
It’s about the people standing around the grill debating hot dog toppings like it’s a matter of national importance.
Every family has that debate.
And every family thinks they’re right.
Pellet Pairing
Competition Blend delivers just enough smoke to complement the beef without overpowering all those classic toppings.
Griller’s Tip
Toast the buns for 30 seconds before serving. It’s a small detail that makes a surprisingly big difference.
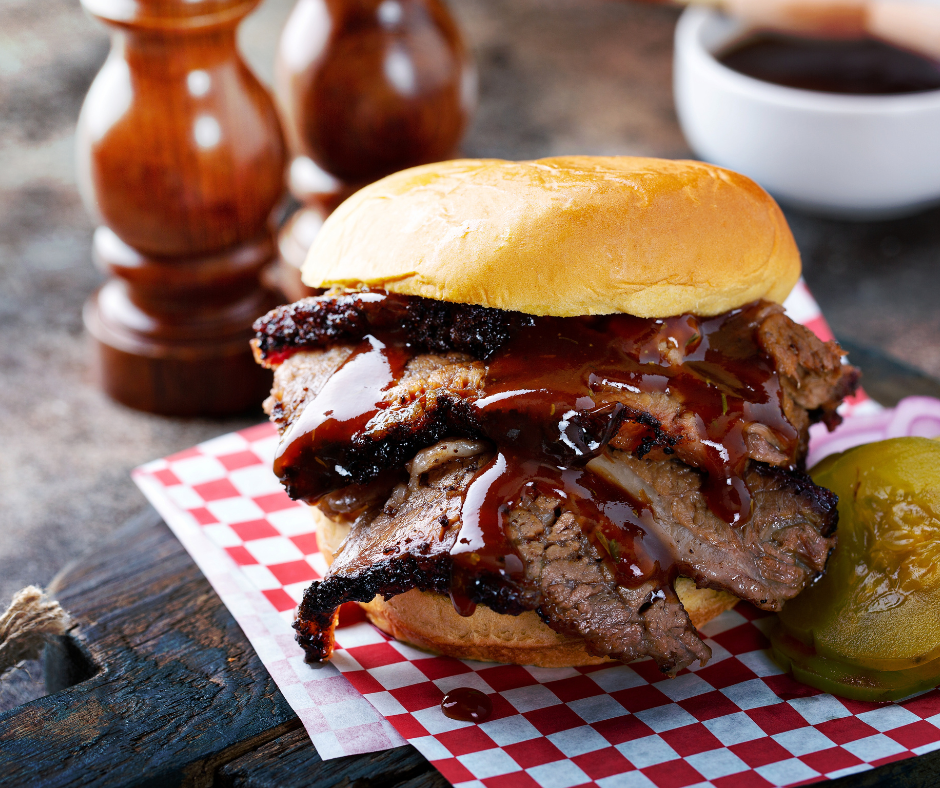
Next Stop: Texas – Where Brisket Is Practically a Religion
Let’s be honest.
Every backyard cookout has that one person who suddenly becomes a barbecue expert the moment a brisket appears.
They’ll inspect the bark.
They’ll ask how long it smoked.
They’ll nod thoughtfully after every bite like they’re judging a competition.
And honestly?
That’s part of the fun.
Brisket has a way of bringing people together. Maybe it’s because everyone knows the amount of patience it takes. Maybe it’s because after ten or twelve hours of smoking, anticipation has reached an all-time high.
Whatever the reason, a beautifully smoked brisket tends to attract a crowd faster than just about anything else.
Pellet Pairing
Hickory remains a classic choice for beef, bringing that bold smoke profile brisket lovers crave.
Griller’s Tip
Don’t rush the rest. The best briskets spend nearly as much time resting as they do making people hungry. Need a recipe? Check out our Brisket Blog.
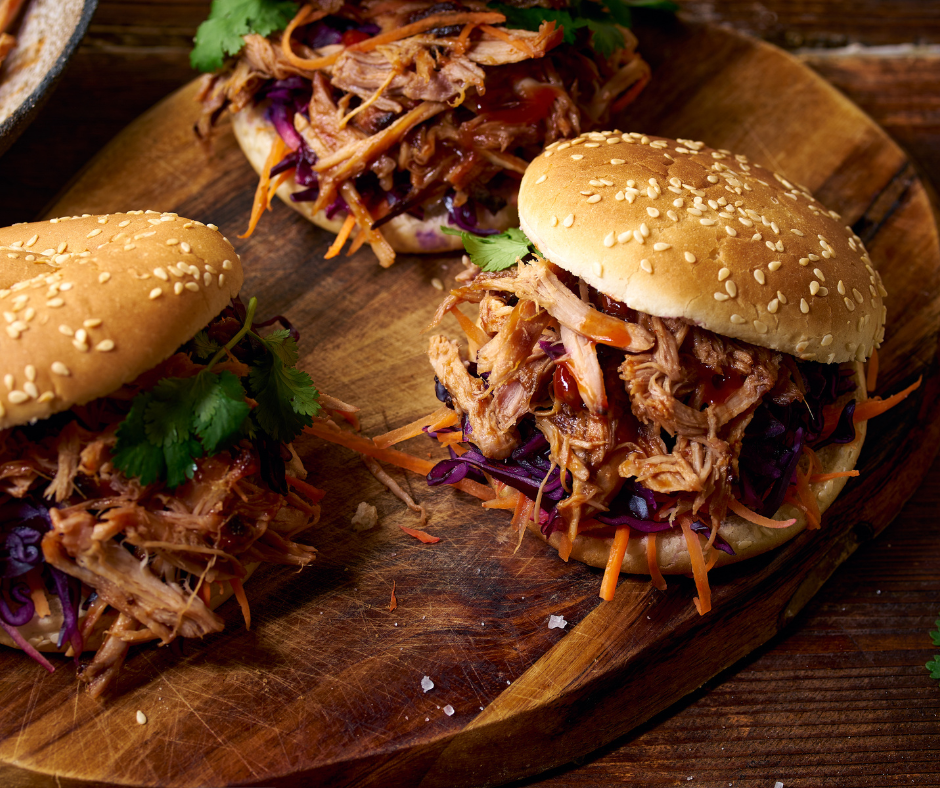
Swinging Through the Carolinas – Pulled Pork Done Right
If brisket is the king of Texas, pulled pork wears the crown in the Carolinas.
The beauty of pulled pork is that it’s never trying too hard.
It’s humble.
It’s approachable.
It’s the kind of meal that can feed a crowd without breaking the bank.
Pile it on a bun.
Top it with slaw.
Add a little vinegar sauce.
Watch people come back for seconds.
Then thirds.
The best part?
Someone always asks if they can take leftovers home.
That’s usually the highest compliment a pitmaster can receive.
Pellet Pairing
Pitmaster Blend provides a balanced smoke profile that pairs beautifully with pork.
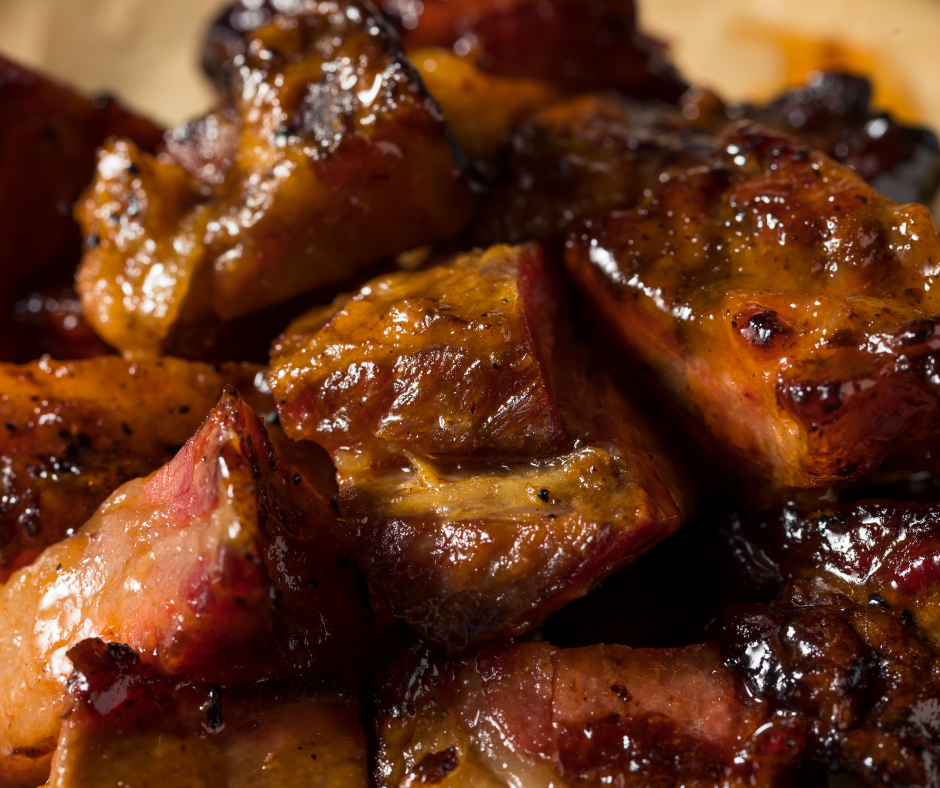
Kansas City – Sauce on Your Face Is Part of the Experience
Kansas City barbecue isn’t shy.
Big flavor.
Big smoke.
Big sauce.
And we’re here for all of it.
Burnt ends might be one of America’s greatest barbecue inventions. Those smoky, caramelized bites have ended friendships when the last piece disappears from the serving tray.
Okay, maybe not friendships.
But definitely some heated discussions.
Griller’s Tip
Make extra burnt ends.
Then make extra of those.
Trust us.
If you haven’t made them yet…check out our latest Burnt Ends Blog.
The Midwest Cookout Hall of Fame
While barbecue regions often get all the attention, the Midwest deserves some love.
After all, where else can you find a picnic table loaded with:
Burgers
Brats
Corn on the cob
Pasta salad
Potato salad
Baked beans
Watermelon
Three desserts nobody needed but everybody wanted
Midwestern cookouts operate on one simple principle:
Nobody leaves hungry.
And if they do, someone is probably chasing them to the car with leftovers.
The Real Secret Ingredient
As much as we love talking about rubs, sauces, pellets, smokers, and recipes, none of those things are what make a backyard grill out special.
It’s the stories.
It’s teaching your kids how to flip burgers.
It’s your dad standing at the grill wearing the same apron he’s had for twenty years.
It’s the family recipe card covered in stains because it’s been used a hundred times.
It’s the friend who always arrives empty-handed but somehow leaves with three containers of leftovers.
It’s laughing around a picnic table long after the food is gone.
That’s the stuff people remember.
Not the internal temperature.
Not the cooking time.
The moments.
Building Your Own All-American Grill Out
Want to create an unforgettable backyard celebration this summer?
Keep it simple.
Choose:
One signature protein
Two crowd-favorite sides
One dessert
Then focus on spending time with your guests.
Because nobody ever said:
“Remember that amazing spreadsheet they made for the cookout?”
But people absolutely remember:
“Remember when Grandpa accidentally smoked the hot dogs for three hours?”
Those are the stories that become family legends.
A Toast to 250 Years of Backyard Memories
America has changed a lot over the last 250 years.
But some things remain timeless.
Friends gathered around a grill.
Families sharing recipes.
Neighbors pulling up a chair.
Smoke drifting through the backyard.
And the simple joy of feeding the people you love.
So this summer, fire up the grill.
Invite the neighbors.
Call the family.
Stay outside a little longer.
Tell a few stories.
And celebrate one of America’s greatest traditions the way it was always meant to be celebrated:
Around good food and good company.
Happy grilling, friends.
Griller’s Final Tip
Two hundred and fifty years from now, nobody is going to remember what was trending online this weekend.
But they might remember Grandpa’s ribs.
They might remember the fireworks.
They might remember laughing around a picnic table long after sunset.
It gets lowered into a pot. Covered in water. Simmered into submission.
Listen… we can do better.
Corned beef is just a brined brisket. And brisket was born for smoke. This St. Patrick’s Day, we’re skipping the boil and letting the pellet grill do what it does best: low, slow, hardwood magic.
The result?
Juicy slices. Bold bark. Pastrami-style flavor. And absolutely zero sadness in a pot.
Let’s fire it up.
Why Smoke Corned Beef Instead of Boiling It?
When you smoke corned beef on a pellet grill:
You build real bark
You deepen the spice flavor
You balance the saltiness with wood smoke
You create deli-style pastrami vibes
You instantly upgrade your St. Patrick’s Day menu
Boiling pulls flavor out. Smoke builds flavor in.
We know which side we’re on.
What You’ll Need
3–5 lb corned beef brisket (flat cut works great)
Spice packet (included with brisket)
2 tbsp coarse black pepper
1 tbsp coriander
1 tsp garlic powder
1 tsp mustard seed (optional)
Yellow or Dijon mustard (binder)
Best Griller’s Gold Pellets for Corned Beef
Since there are so many options of pellets in the Griller’s Gold lineup, here’s how to choose:
Adds beautiful color and mild sweetness. Works well mixed with Hickory or Competition Blend.
🔥 Griller’s Tip: For authentic pastrami flavor, pair Hickory or Smokeshack with a heavy cracked black pepper and coriander crust.
Step 1: Rinse & Soak
Corned beef comes packed in brine. Translation: salty.
Rinse thoroughly under cold water.
Then soak in fresh cold water for 1–2 hours, changing the water once. This pulls out excess salt and prevents your finished brisket from tasting like the Atlantic Ocean.
Pat completely dry before seasoning.
Step 2: Build That Pastrami-Style Crust
Brush lightly with mustard (this helps the rub stick — you won’t taste it).
Mix together:
Spice packet
Black pepper
Coriander
Garlic powder
Mustard seed
Press generously onto the brisket.
Don’t go light here. The crust is where the magic happens.
Step 3: Smoke Low and Slow
Preheat your pellet grill to 225°F.
Place corned beef directly on the grates, fat side up.
Smoke until internal temperature reaches 165–170°F (Usually about 3–4 hours.)
At this point, you’ll hit “the stall” — completely normal.
Wrap It
Wrap in butcher paper (or foil if needed) and continue cooking until internal temp reaches 200–203°F.
This is where it becomes tender and sliceable.
Total cook time: 6–8 hours depending on size.
Optional: True Pastrami Finish
If you want full deli-style authenticity:
After wrapping, place the brisket in a covered pan with a splash of water or beef broth and finish cooking covered.
This adds that classic pastrami tenderness.
Step 4: Rest Like You Mean It
Rest at least 1 hour before slicing.
Slice against the grain.
Thin for sandwiches. Thick for plates. Either way, admire that bark.
What to Serve With Smoked Corned Beef
We’re not doing limp cabbage.
Instead try:
Grilled cabbage steaks with olive oil and cracked pepper
Smoked baby potatoes with butter and herbs
Pellet-grilled carrots with honey glaze
Toasted rye bread + Swiss for Reubens
Stone-ground or stout mustard
This is backyard Irish done right.
Leftover Game Plan (You’re Welcome)
Smoked corned beef might be the best leftover meat of the year.
Next-day ideas:
Reuben sandwiches
Corned beef hash on the griddle
Breakfast skillet with eggs
Smoked brisket tacos
Grill once. Win twice.
FAQ: Smoked Corned Beef on a Pellet Grill
Do I have to soak corned beef before smoking?
Yes. It reduces excess salt and balances flavor.
What internal temperature should corned beef reach?
200–203°F for tender slicing.
What’s the best pellet flavor for corned beef?
Hickory, Competition Blend, or Smokeshack are ideal for beef cuts.
Is smoked corned beef the same as pastrami?
Very close. Pastrami is smoked and often steamed. Traditional corned beef is boiled — but we don’t do that here.
Final Word: This Is the Year You Stop Boiling It
St. Patrick’s Day deserves better than a pot on the stove.
A Date-Night Dinner That’s Big on Flavor, Not Stress
Valentine’s Day doesn’t need reservations, prix fixe menus, or a packed dining room buzzing louder than the conversation you actually want to have.
This year’s trend? At-home indulgence. Fewer dishes. Bigger flavor. Intentional time together.
Enter: Smoked Surf & Turf.
It’s everything a date-night meal should be—rich, celebratory, and just a little impressive—without turning your kitchen into a stress zone. With the smoker doing the heavy lifting, you’re free to slow down, pour a drink, and enjoy the night instead of racing the clock.
That’s romance, Grillers Gold style.
Why Surf & Turf Works for Valentine’s Day
Surf & turf has always been the gold standard of celebration food. Steak brings comfort and depth. Seafood adds elegance and a touch of indulgence. Together, they feel special—but not fussy.
Smoking this combo elevates it even further:
The flavors are deeper and more layered
The cooking process is calm and predictable
The experience feels intentional instead of rushed
This isn’t about showing off. It’s about setting the tone.
The Hero Recipe: Smoked Surf & Turf for Two
This is your main event—the centerpiece of the evening. One steak. One seafood option. Simple sides. Everything hits the table hot, rested, and ready.
The Turf: Smoked Filet Mignon (or Ribeye)
For Valentine’s Day, lean toward tender, elegant cuts that cook evenly and plate beautifully.
Best cuts for this meal:
Filet mignon (classic, tender, romantic)
Ribeye (rich and indulgent)
New York strip (bold, steakhouse flavor)
Season simply: Salt, cracked pepper, garlic powder. Let the smoke do the talking.
Method:
Preheat smoker to 225°F
Smoke steak until internal temp hits 115–120°F
Pull and rest while you raise the heat or finish on a hot grill or cast iron
Sear quickly to 130–135°F for medium-rare
This reverse-sear approach gives you deep smoke flavor and that perfect crust—no guesswork, no panic. (Want to perfect the reverse-sear? Check out our previous blog.)
The Turf Pellet Pairings: Steak That Feels Steakhouse-Worthy
For smoked steak, you want depth, richness, and just a touch of sweetness to complement the crust.
Top Grillers Gold Picks for Steak:
Pitmaster Blend (Hickory • Cherry • Maple) This is your go-to Valentine’s Day steak pellet. Hickory brings that classic steakhouse backbone, while cherry and maple soften the edges with subtle sweetness and beautiful color. It’s bold, balanced, and forgiving—perfect for filet, ribeye, or New York strip.
Competition Blend (Maple • Hickory • Cherry) Leaning slightly sweeter, this blend shines when you want a polished, upscale finish. It enhances the natural richness of ribeye and adds a hint of caramelized aroma during the sear. Ideal for a refined, restaurant-style plate.
Smokeshack Blend (Oak • Hickory • Mesquite) For those who love a more pronounced smoke presence, Smokeshack brings classic American BBQ character. Oak keeps it grounded, hickory adds depth, and mesquite delivers that bold edge. Best used with restraint for Valentine’s Day—think confident, not overpowering.
The Surf: Smoked Lobster Tails or Jumbo Shrimp
Seafood feels fancy, but it doesn’t need to be complicated. Keep it buttery, bright, and lightly smoked.
Top Valentine picks:
Lobster tails (ultimate date-night flex)
Jumbo shrimp skewers (fast, forgiving, flavorful)
Quick prep:
Split lobster tails or skewer shrimp
Brush with melted butter, garlic, and lemon
Smoke at 225°F until just cooked through
Pro move: Cook the seafood while the steak rests. Everything finishes together without stress.
The Surf Pellet Pairings: Elegant Smoke for Seafood
Seafood benefits from lighter, sweeter smoke that enhances—not dominates—the natural flavors.
Top Grillers Gold Picks for Seafood:
Fruitwood Blend (Maple • Cherry • Apple) This is the star for lobster tails and shrimp. Mild, slightly sweet, and incredibly aromatic, Fruitwood Blend complements buttery seafood without masking its delicacy. It’s romantic smoke—soft, warm, and inviting.
Cherry (Single Wood) Cherry adds gentle sweetness and a gorgeous hue to shrimp or lobster shells. It’s subtle enough for short cooks and pairs beautifully with garlic butter, lemon, and fresh herbs.
Pitmaster Blend (Bridge Option) If you’re smoking steak and seafood back-to-back, Pitmaster Blend acts as a perfect bridge—rich enough for beef, gentle enough for seafood when used at lower temps and shorter cook times.
Keeping the Meal Balanced (Don’t Overdo It)
This isn’t the night for a dozen sides. Pick one or two supporting players and let the main dish shine.
Finish with something easy and indulgent—chocolate, berries, or a shared dessert that doesn’t require another timer.
Romance Without the Stress
Here’s the truth: the most romantic meals aren’t complicated. They’re calm.
Smoking surf & turf lets you:
Cook with confidence
Avoid last-minute scrambling
Actually enjoy the evening
You’re not juggling burners or watching three pans at once. You’re outside, tending the fire, letting time slow down just a bit. That space—that pause—is what makes the night memorable.
Romance isn’t about perfection. It’s about presence.
And nothing says “I planned this” like a smoker quietly doing its thing while you focus on the person across the table.
Final Griller’s Tip
Skip the reservations. Light the smoker. Let the food—and the moment—speak for itself.
This Valentine’s Day, keep it simple, smoky, and unforgettable.
There is something unforgettable about the smell of wood smoke in the quiet early hours of a holiday morning. While the house is still half asleep and the coffee is brewing, the smoker is already at work—slowly building the first meal of the day with real fire and real flavor.
Smoking your holiday breakfast is more than just a cool cooking trick. It clears out your kitchen, turns the pitmaster into the hero of the morning, and creates a tradition your family will remember long after the wrapping paper is gone. From bacon and pancakes to casseroles and cinnamon rolls, your smoker can handle the entire holiday breakfast lineup.
Once you smoke breakfast for the holidays, there is no going back.
Smoked Bacon (The Gateway Food)
Let’s be honest—this is the smell that pulls people out of bed. Smoked bacon on a holiday morning is not just breakfast; it is an announcement that something special is happening. The slow rendering of fat, the gentle wood smoke, and the first sizzling batch hitting the platter immediately sets the tone for the day. Once your family tastes bacon cooked on the smoker, stovetop bacon officially becomes a backup plan.
Pitmaster Blend – Balanced sweet and bold smoke for classic bacon
Competition Blend – Slightly sweeter profile for holiday-style bacon
Hickory – Strong, traditional bacon flavor
Why it works: Bacon absorbs smoke fast, and these blends give you deep flavor without overpowering the pork.
Smoker Temp: 275–300°F Cook Time: 45–60 minutes Tip: Lay bacon flat on racks over sheet pans so the grease can drip while the meat cooks evenly.
Smoked Pancakes or Griddle Cakes
If bacon is the opening act, smoked pancakes are the unexpected headliner. Cooking pancakes on the smoker gives them a subtle wood-fired flavor that pairs beautifully with maple syrup, cinnamon, and vanilla. They stay fluffy inside, lightly crisp on the edges, and soak up whatever toppings your holiday morning calls for—berries, whipped cream, warm butter, or smoked syrup.
Fruitwood Blend – Clean, light sweetness for pancakes and syrup
Competition Blend – Subtle maple-forward smoke for bakery-style flavor
Cherry – Adds color and soft sweetness
Why it works: These blends enhance sweet ingredients without making pancakes taste savory or smoky.
Smoker Temp: 325°F Cook Time: 12–15 minutes per batch Tip: Use cast iron or a flat griddle insert to build a light crust without drying the center.
Breakfast Casseroles (Overnight = Easy Mode)
This is your secret weapon for low-stress holiday hosting. Breakfast casseroles were made for the smoker—especially when you assemble everything the night before. While presents are being opened or guests are arriving, your smoker quietly transforms eggs, cheese, potatoes, and sausage into a golden, bubbling centerpiece. One pan, one cook time, zero kitchen chaos.
Pitmaster Blend – Ideal balance for eggs, sausage, cheese, and potatoes
Fruitwood Blend – Perfect for lighter, ham-based casseroles
Competition Blend – Best for mixed sweet-and-savory breakfast bakes
Why it works: Casseroles contain fat, dairy, and protein—these pellets balance richness without bitterness.
Smoker Temp: 300°F Cook Time: 60–90 minutes, covered Tip: Remove foil for the final 10–15 minutes to brown the top.
Smoked Cinnamon Rolls
Cinnamon rolls already feel like a celebration—smoking them turns that celebration into an event. The smoker caramelizes the outer edges while keeping the center soft and gooey. As the icing melts into every swirl, the light sweetness of fruitwood smoke wraps it all together. These disappear quickly, so always make more than you think you need.
Smoked breakfast sausage is where comfort food meets pitmaster pride. Whether you are cooking links, patties, or a full sausage log to slice and serve, the smoker adds depth that a skillet simply cannot duplicate. The result is juicy, savory, slightly sweet, and perfectly balanced against eggs, pancakes, or breakfast sandwiches.
Griller’s Tip: Holiday breakfast foods absorb smoke quickly. Use a lighter smoke profile than you would for brisket or ribs and let the food shine.
Stress-Free Holiday Smoking Schedule
6:30 AM – Fire the smoker 7:00 AM – Bacon and sausage on 7:30 AM – Breakfast casserole goes in 8:15 AM – Pancakes and cinnamon rolls 9:00 AM – Coffee, presents, and full-smoke happiness
Your kitchen stays clean. Your guests stay impressed.
Pro Pitmaster Tips for Holiday Breakfast Success
Use foil pans for fast cleanup
Cook bacon flat on racks over sheet pans
Rotate pans halfway through to avoid hot spots
Let pastries finish low and slow for soft centers
Always run clean, thin blue smoke
Why Smoked Breakfast Becomes a Tradition
This is not just about food. It’s about kids running outside to check the smoker. Cold mornings, warm coffee, and wood smoke drifting through the yard. This is about slowing down for just a few minutes before the real holiday chaos begins.
Smoking holiday breakfast turns your smoker into the heart of the celebration.
Frequently Asked Questions
Can I smoke breakfast on any pellet smoker? Yes. Any pellet smoker that holds steady temperatures between 250–325°F works perfectly for breakfast foods.
Will my food taste too smoky? Not when using fruitwoods like apple, maple, or cherry. These enhance flavor without overpowering it.
Can I prep everything the night before? Yes. Casseroles, pancake batter, cinnamon rolls, and even bacon can all be prepped ahead for a smooth morning.
What is the best pellet for mixed breakfast menus? Applewood is the safest all-around choice. Maplewood is the best choice for sweeter breakfasts.
Is this just for Christmas? Not at all. This works for Thanksgiving morning, Easter, New Year’s Day, birthdays, and family reunions.
Final Thought from the Grillers Gold Backyard
You already smoke brisket. You already smoke ribs. You already smoke sides and desserts.
Now it is time to own the entire holiday—from sunrise to sundown.
Because nothing says “I showed up for this day” like a smoker rolling before the sun.
The turkey gets all the attention… but you and I both know the truth: the sides and desserts are the real show-stoppers.
And if you’re grilling or smoking your holiday feast with Grillers Gold Premium BBQ Pellets, you’re basically guaranteeing applause, compliments, and maybe even a few marriage proposals.
This year, let’s go beyond the bird and give your guests something they’ll be raving about well into January.
Below are the best pellet-powered holiday sides and desserts — bold flavors, easy techniques, and that perfect touch of smoky magic.
SMOKED + GRILLED HOLIDAY SIDES
1. Maple Bourbon Smoked Sweet Potatoes
Flavor Mood: Sweet + smoky Pellet Pairing:Cherry or Fruitwood
These sweet potatoes pick up gorgeous color and caramelization in the smoker. The maple-bourbon glaze? Chef’s kiss.
Ingredients:
Sweet potatoes, sliced into rounds
3 tbsp butter
2 tbsp maple syrup
1 tbsp bourbon
Pinch cinnamon + salt
Instructions:
Grill at 275°F for 1.5 hours.
Brush with glaze halfway through.
Finish with a sprinkle of flaky salt.
Griller’s Tip: Add a tiny splash of orange juice to the glaze for holiday brightness.
1. Can I make these recipes on a gas grill with a pellet tube? Absolutely — use a pellet tube with your favorite Grillers Gold blend.
2. What’s the best pellet for “general holiday cooking”? Competition Blend is the most versatile for mixed menus.
3. Can I prep these sides ahead of time? Yes — most can be assembled in the morning and grilled later.
4. Do fruits actually taste good smoked? YES. Especially apples, pears, and peaches.
5. My grill gets crowded — how do I time everything? Start with longer smokes (sweet potatoes), end with fast-cooking sides (beans, mushrooms).
6. How do I reheat leftovers without drying them out? Use foil + a splash of broth at 275°F.
Final Thoughts: Make This Holiday One to Remember
This holiday season, let your grill do more than cook the turkey—let it bring the magic.
With the right pellets, the right recipes, and a little smoky creativity, your sides and desserts can become the dishes your guests can’t stop talking about.
Whether you’re serving maple-kissed cornbread, fire-roasted sweet potatoes, or a cast-iron apple crisp bubbling with holiday flavor, these recipes prove one thing: when you cook with Grillers Gold, every bite tastes like celebration.
Fire up the grill, grab your favorite blend, and get ready to wow your crowd all season long.
Who says Halloween belongs only to candy and costumes?
This year, give your party (or trick-or-treat night) a smoky twist. Picture it: a crisp fall evening, the firepit glowing, your grill sizzling away while the neighborhood ghosts and goblins make their rounds. You’ve got a cold drink in hand, a plate of ghoulish grub nearby, and that irresistible wood-fired aroma floating through the air.
Whether you’re throwing a full-on costume bash or just setting out snacks for the candy crowd, these grill-friendly Halloween recipes will make your place the spooky-snack HQ of the block.
Preheat your grill to about 375°F using Competition Blend — the perfect mix for balanced heat and mild smoke.
Wrap the dogs: Cut the dough into thin strips and wind them around each hot dog, leaving space for “faces.”
Brush with egg wash for a golden finish.
Grill indirect for 15–20 minutes, turning halfway until the dough is puffed and golden.
Add eyes with tiny dots of mustard or ketchup.
Serve with: A smoky BBQ mustard dip (mix Dijon + BBQ sauce + a dash of liquid smoke). 🎃 Bonus Tip: Use mini dogs for bite-size “party mummies” — perfect for snacking while handing out candy.
Recipe #2: Monster Smash Burgers
Because every monster deserves a meaty masterpiece.
Ingredients:
1½ lb ground beef (80/20 blend)
1 tsp Worcestershire sauce
Salt and pepper to taste
Cheddar or pepper jack cheese
Pretzel buns (for extra chewiness)
Pickles, onions, lettuce, tomato (optional but encouraged)
Sprinkle cheese in layers — white (mozzarella), orange (Colby), and yellow (cheddar) to mimic candy corn.
Top with another tortilla, butter the outside, and grill for 3–4 minutes per side until melted and golden.
Cut into wedges, serve warm, and watch your guests do a double-take!
Bonus Treat: S’mores on the Grill — with a Dark Side
Don’t let the kids have all the sugar. Upgrade your s’mores by swapping plain chocolate for:
Dark chocolate + sea salt
Peanut butter cups
Caramel squares
Or — for grown-ups — drizzle with bourbon caramel sauce.
Wrap in foil, toss on the grill for 3–5 minutes, and serve with a witchy cocktail (or a cold craft beer).
Pair It with a Potion
Here are a few drink ideas to keep your Halloween cookout hauntingly happy:
Witch’s Brew Punch: Orange soda + pineapple juice + vodka + dry ice for the fog effect.
Black Lager or Porter: The darker the beer, the better for the spooky vibe.
Apple Cider Sangria: Hard cider + white wine + orange slices + cinnamon sticks.
Pellet Pairing Cheat Sheet
Flavor
Pellet
Best For
Vibe
Mild & Sweet
Fruitwood Blend
Pumpkin Poppers, Mummy Dogs
Cozy & kid-friendly
Bold & Smoky
Smokeshack Blend
Bat Wings, Monster Burgers
Deep, intense, full of fall flavor
Classic BBQ
Competition Blend
Almost anything!
Balanced & crowd-pleasing
Subtle Sweet
Competition Blend
Candy Corn Quesadillas, S’mores
Dessert-ready sweetness
Wrap-Up: The Trick to a Great Grilloween
Keep it casual. Keep it smoky. And keep those tongs handy. With the right mix of fun, food, and fire, your Halloween hangout will be the one people talk about until Thanksgiving.
So grab your Grillers Gold pellets, crack open a drink, and let’s make some memories — one mummy dog at a time.