…and then there are foods that make grown adults hover around the grill pretending they’re “just checking on things.”
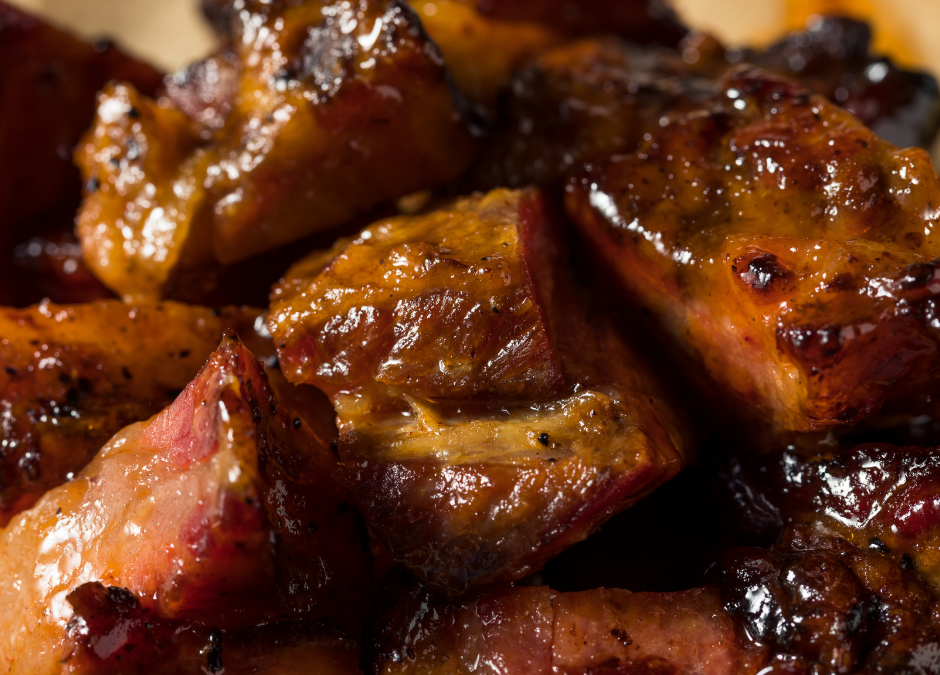
These Hot Honey Pork Belly Burnt Ends? Yeah. It’s that second category.
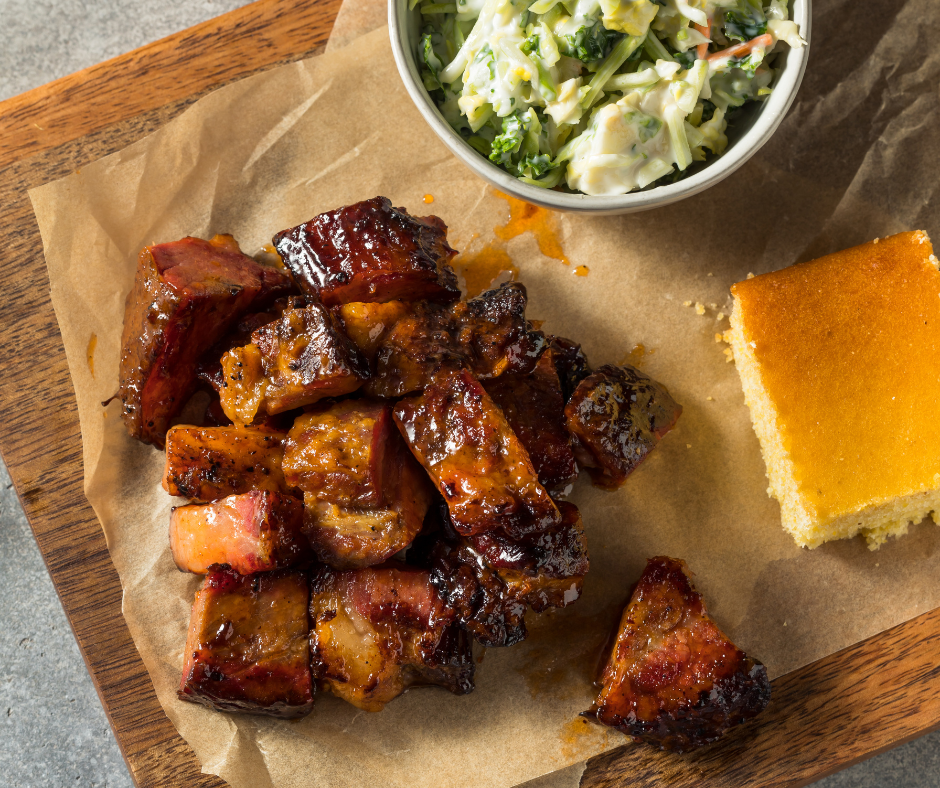
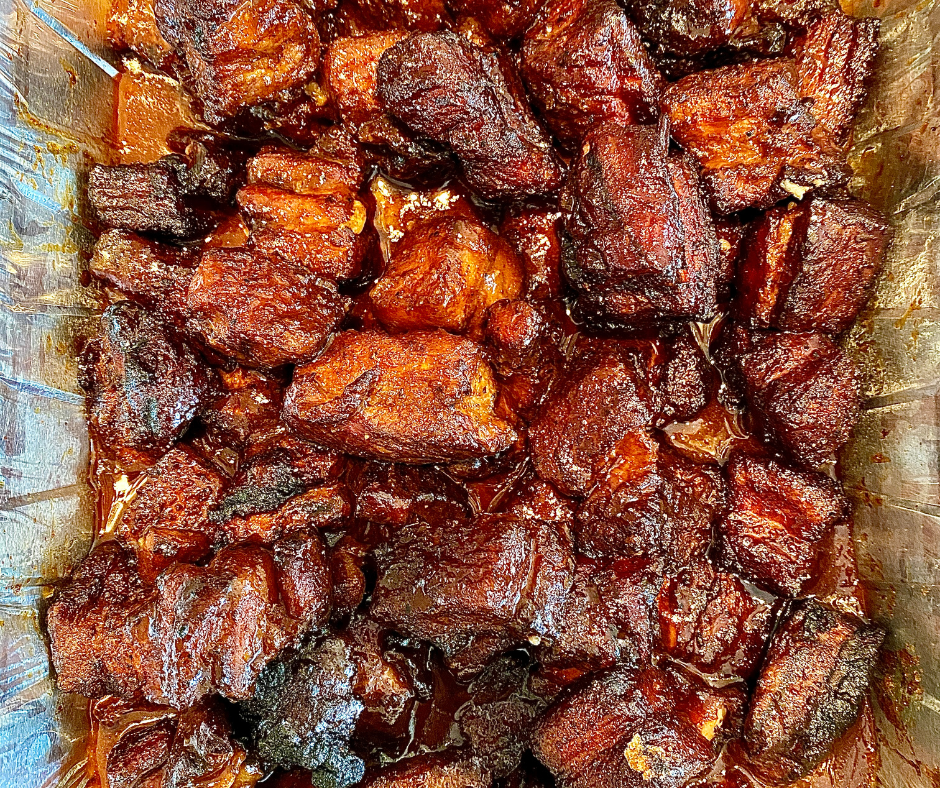
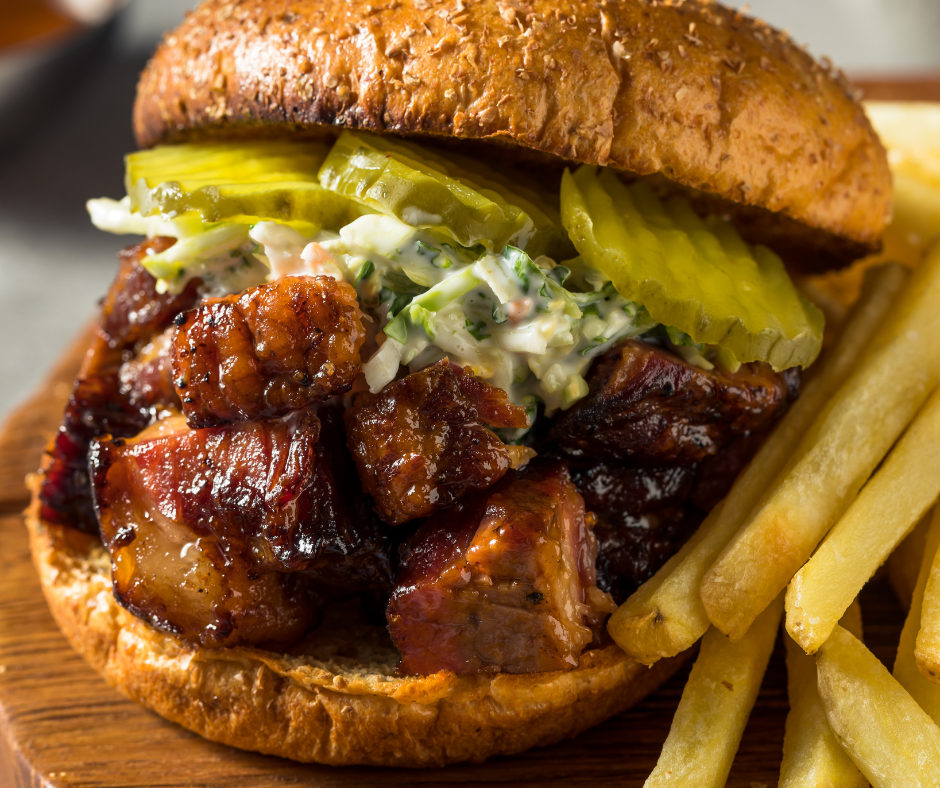
We’re talking crispy edges, buttery pork belly, smoky bark, and a sticky hot honey glaze that somehow disappears off the tray faster than your buddy who swore he was “too full for seconds.”
This is backyard BBQ at its finest:
minimal stress
maximum flex
ridiculously good flavor
and just enough heat to make people go back for another bite
And the best part? You don’t need a competition trailer, a culinary degree, or a smoker named after a battleship to pull this off.
Just a pellet grill, a sharp knife, good company, and a bag of Grillers Gold pellets.
So grab a drink, fire up the smoker, and let’s make the kind of BBQ people talk about on the drive home.
Why Pork Belly Burnt Ends Are Taking Over BBQ
Let’s be honest for a second…
Brisket prices have gotten a little wild.
And while we’ll never disrespect the king of Texas BBQ, pork belly burnt ends have quietly become the people’s champion.
Why? Because they’re:
easier to cook
faster than brisket
insanely flavorful
hard to mess up
and absolutely unreal on a pellet grill
Think of them as smoky little cubes of BBQ candy.
Crispy outside. Melt-in-your-mouth center. Sticky glaze. Sweet heat. Pure chaos in the best way possible.
And when you pair them with the right smoke profile? That’s where the magic happens.
That First Grill of the Season Just Hits Different
You know the moment.
You step outside… it’s finally not freezing… you smell someone else grilling down the street… and suddenly you’re like:
“Yep. It’s time.”
No brisket. No 12-hour commitment. We’re easing back in with simple, fresh, ridiculously good food that reminds you why you love your grill in the first place.
And listen—this matters…
Spring grilling is NOT heavy smoke season.
This is where Grillers Gold Fruitwood Blend absolutely shines. Maple. Cherry. Apple. It’s light, a little sweet, and doesn’t overpower your food.
It lets the food taste like food… just better.
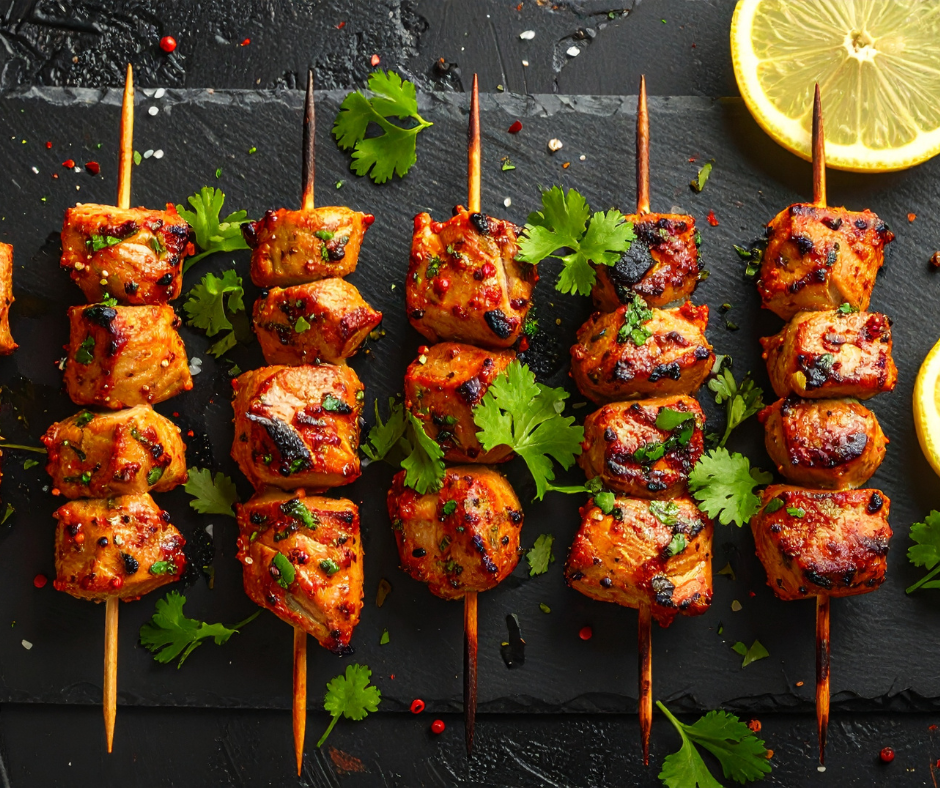
1. Lemon Herb Chicken Skewers
This is your “I just want something easy but still want people to think I know what I’m doing” recipe.
You throw this on the grill and suddenly it smells like you’ve got your life together.
Bright lemon, fresh herbs, a little char… and that subtle fruitwood smoke wrapping around it?
Yeah. This is how you start the season.
Ingredients:
2 lbs chicken (breast or thighs), cubed
3 tbsp olive oil
Juice of 2 lemons
3 cloves garlic, minced
1 tbsp fresh parsley
Salt + pepper
Instructions:
Toss everything together and let it sit for 30–60 minutes (longer if you’ve got time).
Skewer it up.
Grill at 375°F for about 10–12 minutes, turning halfway.
Pellet Pairing: Grillers Gold Fruitwood Blend This is EXACTLY where fruitwood shines—keeps the chicken light, juicy, and not overpowered.
Griller’s Tip: Pull it just before you think it’s done. Let it rest. That’s the difference between good and “why is this so juicy?”
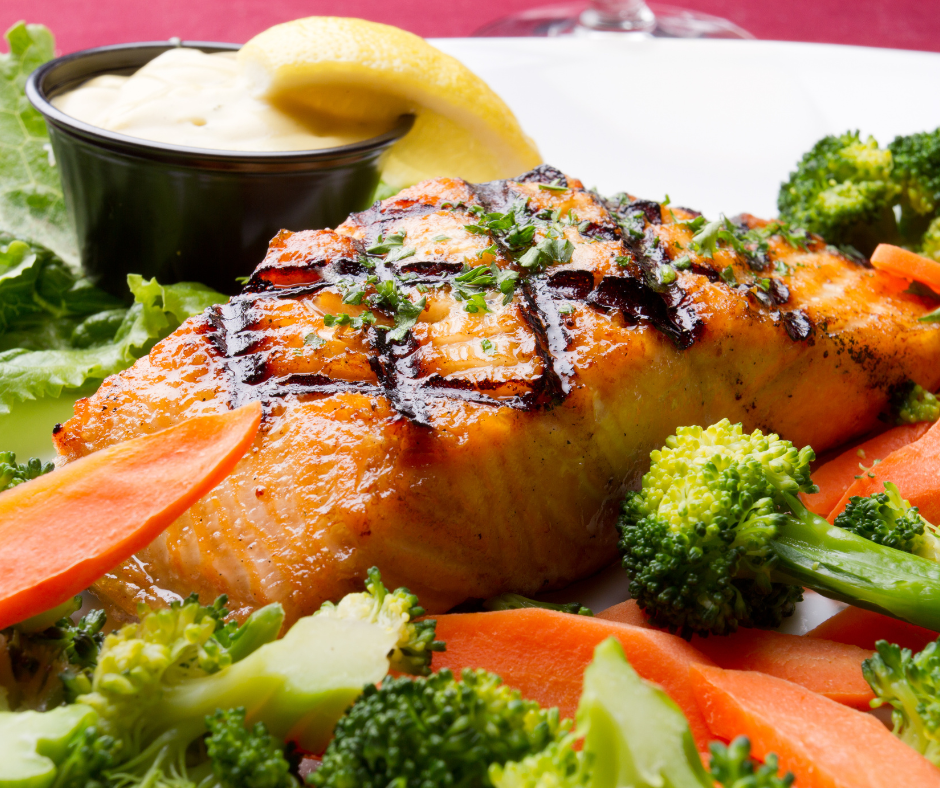
2. Smoked Salmon with Dill & Lemon
Alright… this is your “oh wow, you made this?” recipe.
And the best part? It’s stupid easy.
You’re not fighting the grill here—you’re letting it do its thing. Low heat, gentle smoke, and suddenly you’ve got flaky, buttery salmon that tastes like it came from a restaurant you can’t afford on a Tuesday.
Ingredients:
1–2 lb salmon fillet
Olive oil
Fresh dill
Lemon slices
Salt & pepper
Instructions:
Set your grill to 225°F.
Oil, season, and top with dill + lemon.
Let it smoke for 45–60 minutes until it flakes easily.
Pellet Pairing: Grillers Gold Fruitwood Blend Fish + heavy smoke = nope. Fruitwood keeps it clean, slightly sweet, and lets that salmon shine.
Griller’s Tip: Leave the skin on and don’t mess with it too much. The grill knows what it’s doing. You just need to stay out of the way.
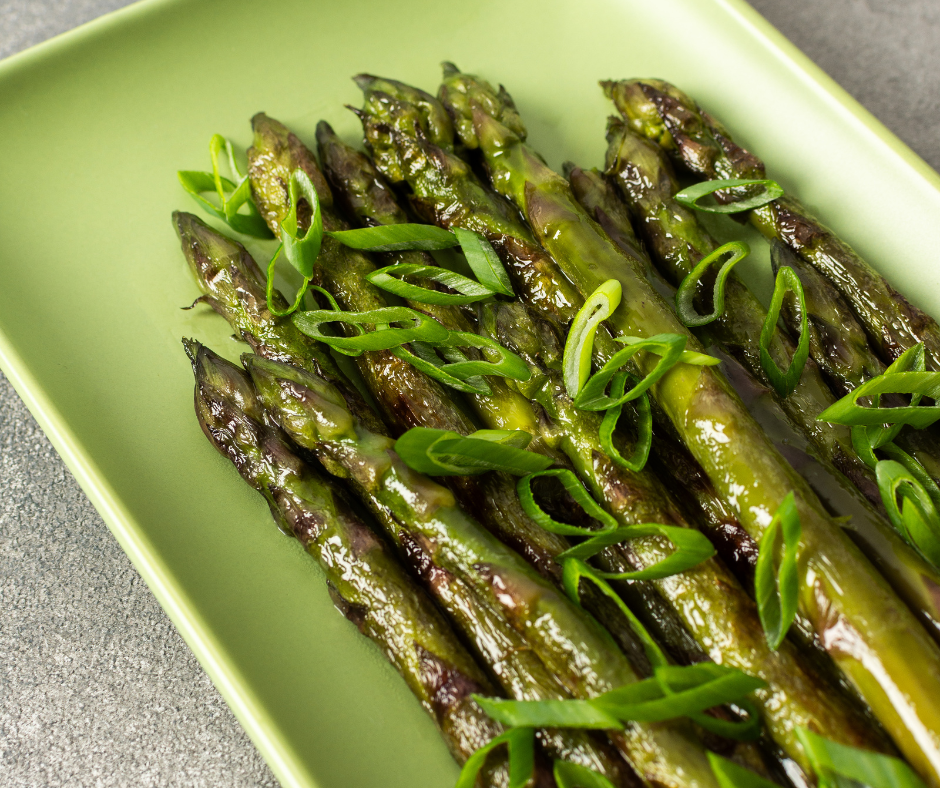
3. Grilled Asparagus with Parmesan
Let’s be honest—this is the side dish that makes people go:
“Wait… why is THIS so good?”
Because it’s not steamed. It’s not soggy. It’s got a little char, a little crunch, and just enough smoke to make it interesting.
And when you hit it with parmesan at the end?
Game over.
Ingredients:
1 bunch asparagus, trimmed
Olive oil
Salt & pepper
Shaved parmesan
Instructions:
Toss asparagus in oil, salt, and pepper.
Grill at 400°F for 6–8 minutes.
Pull and hit with parmesan while it’s hot.
Pellet Pairing: Fruitwood or Competition Blend Fruitwood keeps it light. Competition Blend adds just a touch more depth if you want it.
Griller’s Tip: Lay them across the grates, not along them—unless you enjoy feeding your grill vegetables one by one.
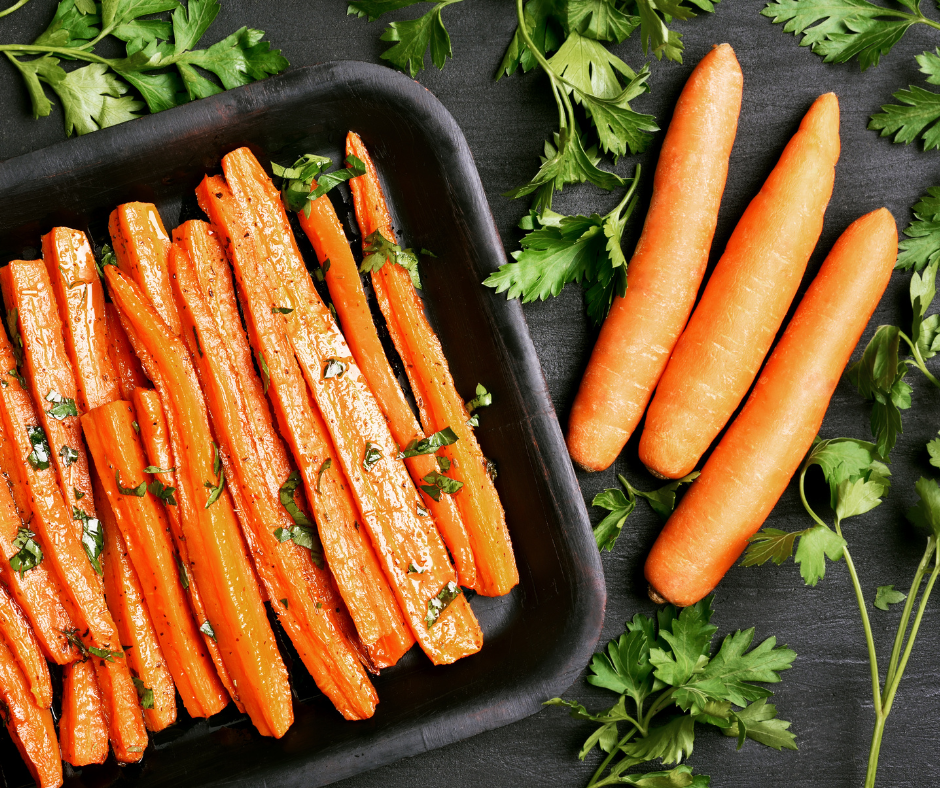
4. Honey Glazed Smoked Carrots
I know. Carrots don’t sound exciting.
Until you make these.
These come off the grill soft, buttery, slightly smoky, with that honey glaze caramelizing just enough to make people keep going back for “one more.”
And suddenly… the carrots are gone before the meat.
Griller’s Tip: Let the edges get a little dark. That’s not burnt—that’s flavor.
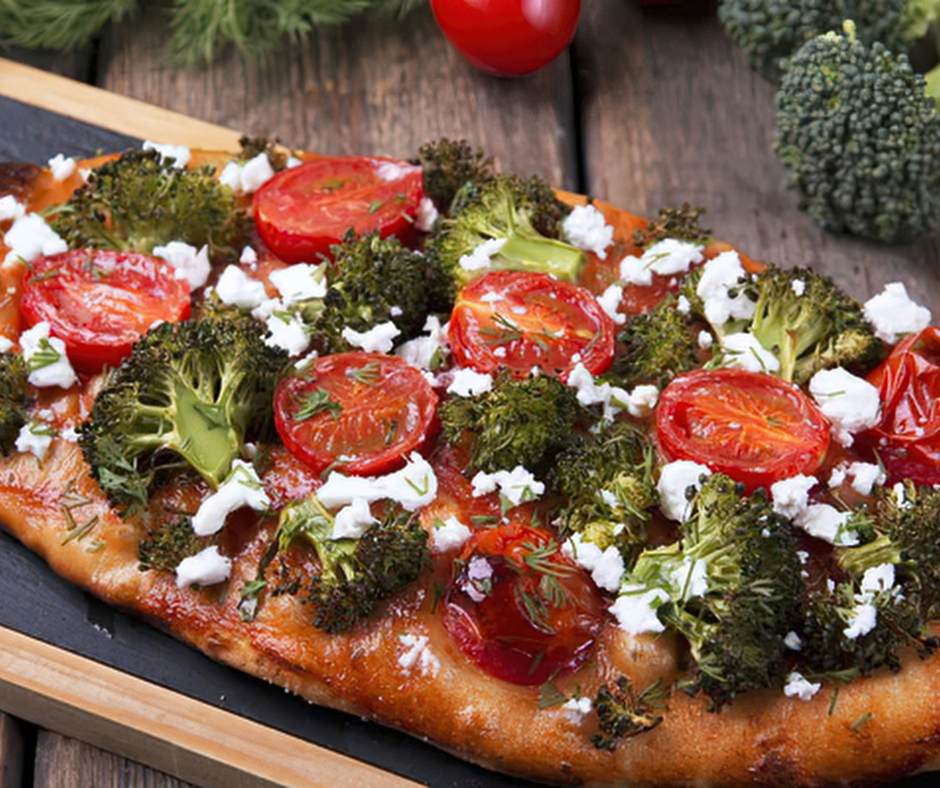
5. Backyard Flatbread Pizza
This is your “we’re not cooking… but we’re still cooking” meal.
It’s fast. It’s fun. And it’s one of the easiest ways to turn a random weeknight into something that feels like a Friday.
Crispy edges, melty cheese, a hint of smoke from the pellets…
And suddenly everyone’s hanging out by the grill again.
Ingredients:
Flatbread or naan
Olive oil
Mozzarella
Toppings (prosciutto, tomato, arugula, etc.)
Instructions:
Preheat grill to 400°F.
Brush flatbread with oil.
Add toppings and grill 8–10 minutes until crispy and melty.
Pellet Pairing: Competition Blend or Fruitwood Competition Blend gives it that slightly deeper, “pizza oven” feel. Fruitwood keeps it light and springy.
Griller’s Tip: Add fresh toppings (like arugula) AFTER it comes off. That contrast? Chef’s kiss.
Your Spring Grilling Cheat Code
If you remember nothing else, remember this:
Keep it light
Keep it simple
Let the pellets do the work
And when in doubt?
Grab the Fruitwood Blend. It’s the most forgiving, most versatile, and honestly… the one that makes you look like you know exactly what you’re doing.
Griller’s Tip of the Week
Don’t overcomplicate your first cook of the season.
You’re not here to prove anything. You’re here to get back in the rhythm.
A few easy wins → confidence comes back → THEN you go big.
FAQ
What’s the best pellet for spring grilling? Grillers Gold Fruitwood Blend. It’s light, slightly sweet, and works across chicken, fish, and veggies without overpowering them.
What should I grill first in the spring? Start with quick, forgiving recipes—chicken skewers, veggies, or flatbreads. Save the long cooks for later.
Do I need to deep clean my grill before spring? Quick clean, fresh pellets, and you’re good to go. Don’t overthink it—just start cooking.
Grilling Well for Game Day, Weeknights, and Real Life
There’s a moment a lot of us recognize lately.
You’re standing in the meat aisle. You reach for something familiar. Then you pause. Not because you don’t love grilling — but because groceries aren’t what they used to be.
And still… People are coming over. The game is on. Dinner needs to feel good.
Here’s the truth Grillers have always known: Some of the best food on the grill was never about premium cuts. It was about knowing which cuts could carry smoke, soak up seasoning, and stretch across a table full of people.
That’s where affordable cuts shine — not as a compromise, but as a smart, confident choice.
The Power of Affordable Cuts
Affordable cuts tend to share a few important traits:
They love marinades
They respond beautifully to smoke
They’re meant to be sliced, shared, and piled high
They feed people generously
These are the cuts built for real life grilling — the kind where food brings people together without anyone worrying about the receipt.
Flank Steak: When You Want Steak Night to Still Feel Like a Treat
The moment: It’s the weekend. Maybe there’s a game on, maybe there isn’t. You want steak — but you want it to feel relaxed, not precious.
Flank steak delivers every time.
It’s bold, beefy, and thrives on flavor-forward marinades. Sliced thin, it turns one piece of meat into a full spread — tacos, sandwiches, bowls — whatever the night calls for.
Chipotle-Lime Flank Steak Tacos
Why this works: This is a slice-and-share recipe. One steak feeds a crowd when treated right.
Why this works: Affordable, flavorful, and great as leftovers — which is always a win.
Why Affordable Cuts Work So Well on Pellet Grills
Pellet grills level the playing field. They add depth, balance, and consistency — exactly what affordable cuts need to shine.
Smoke becomes the flavor upgrade, not the price tag.
The Bigger Picture: Affordable Doesn’t Mean Less
Affordable cuts aren’t about cutting back. They’re about choosing well.
They’re about feeding people generously, keeping the grill lit, and letting food do what it’s always done best — bring people together.
Whether it’s game day, a weeknight, or just another reason to fire up the grill, these cuts prove one thing:
Big flavor doesn’t have to come with a big bill.
FAQ’s
What are the best affordable cuts of meat for grilling? Flank steak, flatiron steak, pork shoulder cuts, and chicken thighs offer excellent flavor and value.
How do I keep affordable cuts tender? Use marinades, cook to temperature, rest properly, and slice against the grain.
Whether it’s game day, a busy weeknight, or an unplanned gathering that turns into something more, affordable cuts make it easier to say “come on over.” They’re reliable, flavorful, and meant to be shared — exactly what grilling has always been about.
Fire up the grill, pass the plates, and let the rest take care of itself.
Let’s be real — once school’s back in session, weeknights can feel like a NASCAR pit stop. You’re juggling homework, sports practice, and the ever-popular “What’s for dinner?” chorus.
Here’s the good news: You can still get that fresh-off-the-grill flavor, even on your busiest nights. In fact, with the right game plan, grilling might be faster than the drive-thru.
This guide is loaded with family-friendly recipes that go from fridge to table in 30 minutes or less, make-ahead marinades, and the best pellet blends for those quick, high-heat cooks.
Quick Weeknight Grilling Recipes for Busy Families
These aren’t fussy, all-day smoke sessions — these are simple, flavorful, get-it-on-the-table-now recipes that fit into the after-school chaos.
1. Grilled Flatbreads in Under 10 Minutes
If you can turn on your grill, you can make these. Store-bought naan or pizza dough is your secret weapon — it’s ready to hit the grates and deliver that irresistible crispy-chewy crust.
How to Make It:
Fire up your grill to medium-high.
Brush both sides of naan or stretched pizza dough with olive oil.
Grill for 2–3 minutes per side until bubbly and lightly charred.
Add toppings — think Caprese style with mozzarella, tomatoes, and basil, or BBQ chicken with cheddar.
Slide back on the grill for a couple more minutes to melt the cheese.
Griller’s Tip: Pre-chop toppings over the weekend so you can throw these together on the fly.
Side Idea: A quick vinaigrette salad or bagged Caesar kit is all you need.
Pellet Pick: Fruitwood blend for that light, slightly sweet flavor that makes fresh toppings shine.
2. Skewers Three Ways — Quick, Easy, and Crowd-Pleasing
Skewers are the ultimate weeknight hack — fast cooking, endless combos, and they make veggies disappear off the kids’ plates like magic.
Chicken & Veggie Skewers (15 Minutes)
What you need: Cubed chicken breast or thighs, olive oil, garlic, lemon, smoked paprika, bell peppers, zucchini, onion.
How to: Marinate, thread, and grill over medium until the chicken hits 165°F.
What you need: Zucchini, cherry tomatoes, mushrooms, red onion, pineapple, olive oil, Italian seasoning.
How to: Brush with oil, season, and give ’em a quick char.
Pellet Pick:Fruitwood blend for that sweet, caramelized finish.
Pro Hack: Wooden skewers? Soak ’em in water for 20 minutes before grilling so they don’t go up in flames.
3. Easy Veggie Foil Packets (15 Minutes)
When you want the veggies but not the cleanup, foil packets are your friend. Toss your favorites in olive oil and seasoning, wrap ’em up, and let the grill do the work.
Griller’s Tip: Add a sprinkle of feta or a drizzle of balsamic before serving for instant gourmet vibes.
Quick Tip: Preheat your grill fully so the pellets ignite cleanly and flavor kicks in from the first minute.
FAQ — Quick Weeknight Grilling
Q: What can I grill in 30 minutes or less? A: Flatbreads, skewers, foil packets, shrimp, burgers, thin chicken breasts — all fast, all delicious.
Q: How do I prep skewers ahead? A: Marinate and chop the night before. Thread ’em, wrap in plastic, fridge until ready.
Q: Which pellet blend is best for chicken? A: Competition or Fruitwood blend gives you that bold backyard flavor in minutes.
Q: Can I freeze marinades? A: Absolutely — freeze the meat right in the marinade for an instant flavor boost.
Bottom line: With the right prep and the right pellets, you can make grilling your go-to weeknight dinner solution — no matter how crazy the back-to-school schedule gets.
So grab the tongs, fire it up, and get dinner done before the homework’s even started.
Summer is for gathering—backyard parties, block parties, and family reunions that fill your yard with laughter. But when you’re feeding a crowd, do you really want to settle for the same old burgers and hot dogs? Not this year. With your pellet grill and Grillers Gold Premium BBQ Pellets, you can serve up smoky, mouthwatering dishes that are budget-friendly and impressive enough to keep your guests talking.
Here are 5 pellet grilling hacks to help you feed a crowd without breaking the bank—or a sweat.
1. Pulled Pork Perfection
Why it’s a hack: One pork shoulder can make 20+ generous pulled pork sandwiches.
What you’ll need:
8–10 lb pork shoulder (bone-in)
1/4 cup yellow mustard
1/2 cup BBQ rub (your favorite blend of paprika, brown sugar, salt, pepper, garlic powder, cayenne)
Slice fruit and place in a greased foil pan. Mix sugar and cinnamon; sprinkle over fruit.
In a bowl, cut butter into oats until crumbly. Spread over fruit.
Smoke at 350°F for 30–40 minutes until bubbling and golden.
Serve warm with a scoop of ice cream.
Pro Tip: Make individual foil packet crisps for easy serving.
This summer, you don’t need to spend big—or settle for bland—to feed your favorite people. Fire up your pellet grill, grab a bag of Grillers Gold Premium BBQ Pellets, and show off your crowd-pleasing skills. Because nothing brings people together like great food—and great smoke.
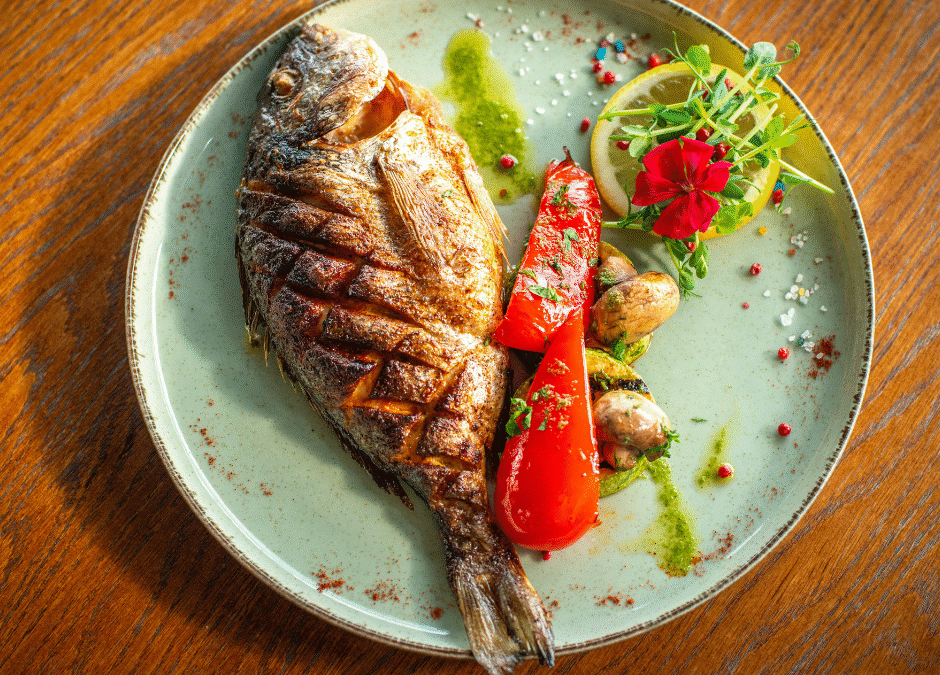
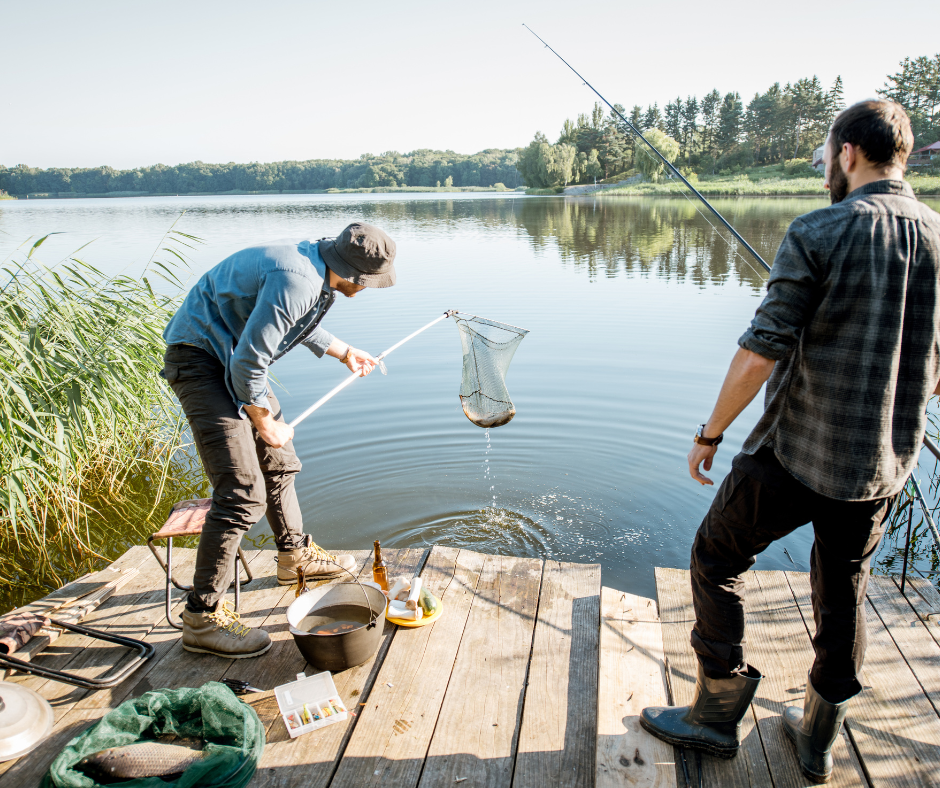
As summer kicks off and the Great Lakes come alive, there’s nothing better than grilling up your fresh catch over the smoky goodness of Grillers Gold Premium BBQ Pellets. Whether you’re reeling in trout from Lake Michigan or bass from an inland lake, freshwater fish is a summer tradition worth savoring.
June is prime fishing—and grilling—season. And with the right pellets and the right technique, you’ll elevate your catch from “just caught” to “can’t stop eating.”
Why Freshwater Fish & Pellet Grills Are the Ultimate Summer Pairing
Freshwater fish are lean, flaky, and mild-flavored—making them ideal for smoke-infused grilling. Your Grillers Gold pellet grill gives you:
Consistent heat for delicate fish
Kiss of smoke that complements, not overpowers
Flare-up-free cooking for tender, juicy fillets
Great Lakes Pellet Pairings
Celebrate the spirit of the lakes with these flavor-packed pairings:
Lake Trout – Try Cherry or Fruitwood Blend for a rich, slightly sweet smoke that pairs beautifully with flaky fish.
Smallmouth Bass – Use Competition Blend or Fruitwood Blend for a smooth, mellow flavor that enhances without overpowering.
Walleye & Perch – Go with Pitmaster Blend or Competition Blend to bring out their buttery texture with a light, aromatic smoke.
Whitefish – Bold and classic, Smokeshack Blend gives this meaty fish a hearty, Up North BBQ finish.
Catfish – Smokeshack Blend is your go-to here—deep, bold, and perfect for blackened or spicy seasoning styles.
Recipe: Cedar Plank Grilled Lake Trout
This simple but spectacular dish brings out the best in your fish—and your grill.
Ingredients:
1 whole Lake Trout, butterflied or 2 skin-on fillets
1 cedar plank, soaked in water for at least 1 hour
1 lemon, sliced
2 tablespoons olive oil
2 cloves garlic, minced
1 tablespoon fresh dill (or parsley if you prefer)
Salt & pepper to taste
Optional: thinly sliced red onion or a pinch of paprika
Preheat your pellet grill to 350°F using your selected Grillers Gold pellets.
Season your trout with olive oil, salt, pepper, and garlic. Place lemon slices and herbs inside the cavity or on top of fillets.
Place the soaked cedar plank on the grill for 2–3 minutes to toast slightly. Flip, then place the trout directly on the plank.
Grill for 20–25 minutes, depending on thickness, until the fish flakes easily and reaches an internal temp of 140–145°F.
Optional: Squeeze extra lemon and garnish with more fresh herbs before serving.
Serving Suggestions
Pair with grilled asparagus, corn on the cob, or baby potatoes
Serve with garlic aioli or dill yogurt sauce
Enjoy with a crisp beer or chilled white wine—bonus points if it’s local!
Recipe #2: Grilled Freshwater Fish Tacos
Fish tacos are a summer favorite—and a perfect way to use your fresh catch in a fun, flavor-packed dish. Whether it’s perch, walleye, or bass, grilling it with Grillers Gold pellets gives your tacos a smoky twist the whole table will love.
Ingredients:
1 lb freshwater fish fillets (walleye, perch, or bass work great)
Preheat your grill to 375°F with your chosen Grillers Gold pellets.
Season the fish with olive oil, lime juice, and the following spice mix:
1 tsp chili powder
½ tsp cumin
½ tsp smoked paprika
¼ tsp garlic powder
¼ tsp onion powder
Salt and pepper to taste
Place directly on the grill or use a grill basket for smaller fillets. Grill for 3–4 minutes per side, until the fish is cooked through and flakes easily.
Assemble tacos with warm tortillas, grilled fish, and your favorite toppings.
🔥 Pro Tip: Want a little crunch? Add crushed tortilla chips or grilled corn for texture!
Two Ways to Win with Grillers Gold
Now you’ve got two sure-fire recipes to make the most of your June fishing trips—or a quick market run. From rustic cedar-planked trout to fun, festive fish tacos, there’s no better way to enjoy Great Lakes bounty than on your pellet grill with Grillers Gold Premium BBQ Pellets.
So load up your grill, stock the cooler, and make every weekend taste like summer vacation.