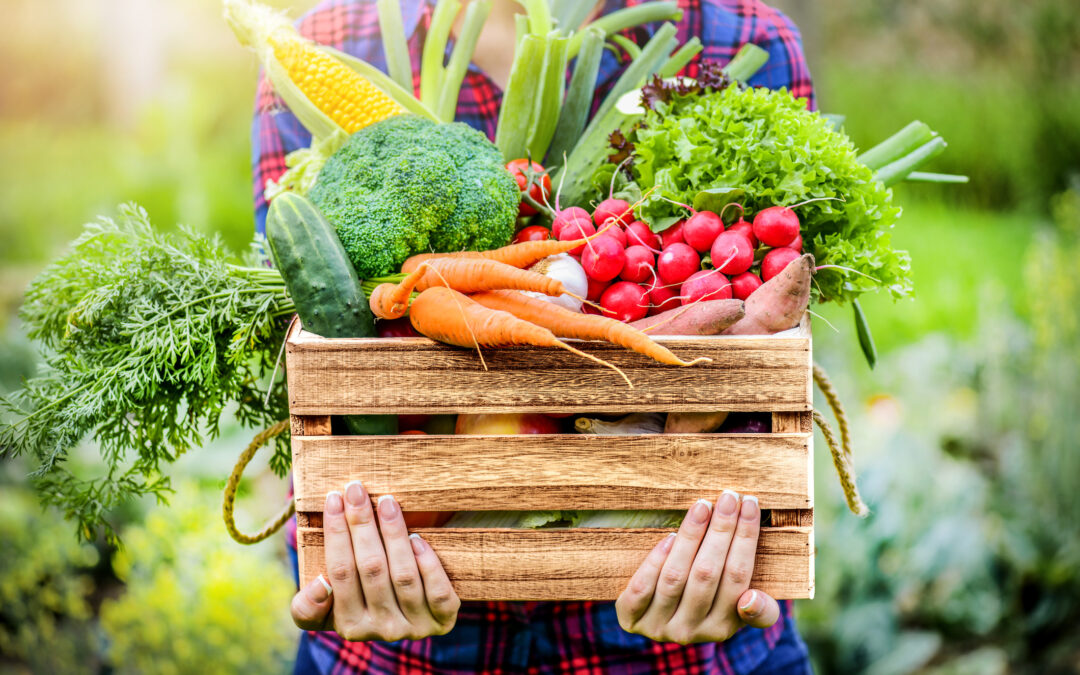
One of our favorite things to do in the summer is to head to the local farm stands and load up on all the wonderful fresh produce that’s farm fresh and just loaded with flavor as compared to the same items found in the supermarket.
Of course, you’re thinking “Hey – wait a minute? Isn’t this blog about grilling?” Well, yes friends it is, and we’re going to show you what you can do with the combination of your grill, farm stand produce and of course … Griller’s Gold Premium Hardwood Pellets.
Prep Your Grill
Whether a rural farm stand or an urban weekend farmer’s market, right now you can find great produce packed with nutrients, flavor, texture and color to make your tables and plates bright and fresh. For all of these recipes, we’re recommending a medium heat in your grill – for an electronically –controlled pellet grill, 350 is the right number.
If cooking on charcoal, set your grill up for indirect cooking – coals only on one side of the grill. For a gas grill – set two burners on medium and shut off one to give you a cooler zone to work with. On gas and charcoal grills, use a smoke tube filled with Griller’s Gold pellets to give everything that good wood-cooked flavor.
Now let’s have some fun!
What Vegetables Should You Buy?
So many vegetables are fantastic when kissed with the grill. In every case, you’re looking for bright colors, clean shapes, and lack of insect damage. Don’t hesitate to ask the people manning the stand for advice on picking the best of what they have to offer.
We buy onions, sweet corn, peppers of all colors and types, romaine lettuce, green beans, squash, beets, portabella mushrooms, asparagus, broccoli, cauliflower, kale, escarole, arugula, carrots and of course, tomatoes. Any and all of these do great with as little cooking as a quick marking of grill marks from a hot grill, all the way to cooked down to soft (and generally sweet).
Farm Stand Recipes
Here’s some great farm stand recipes to try. All of these assume that you’re going to wash your produce in advance!
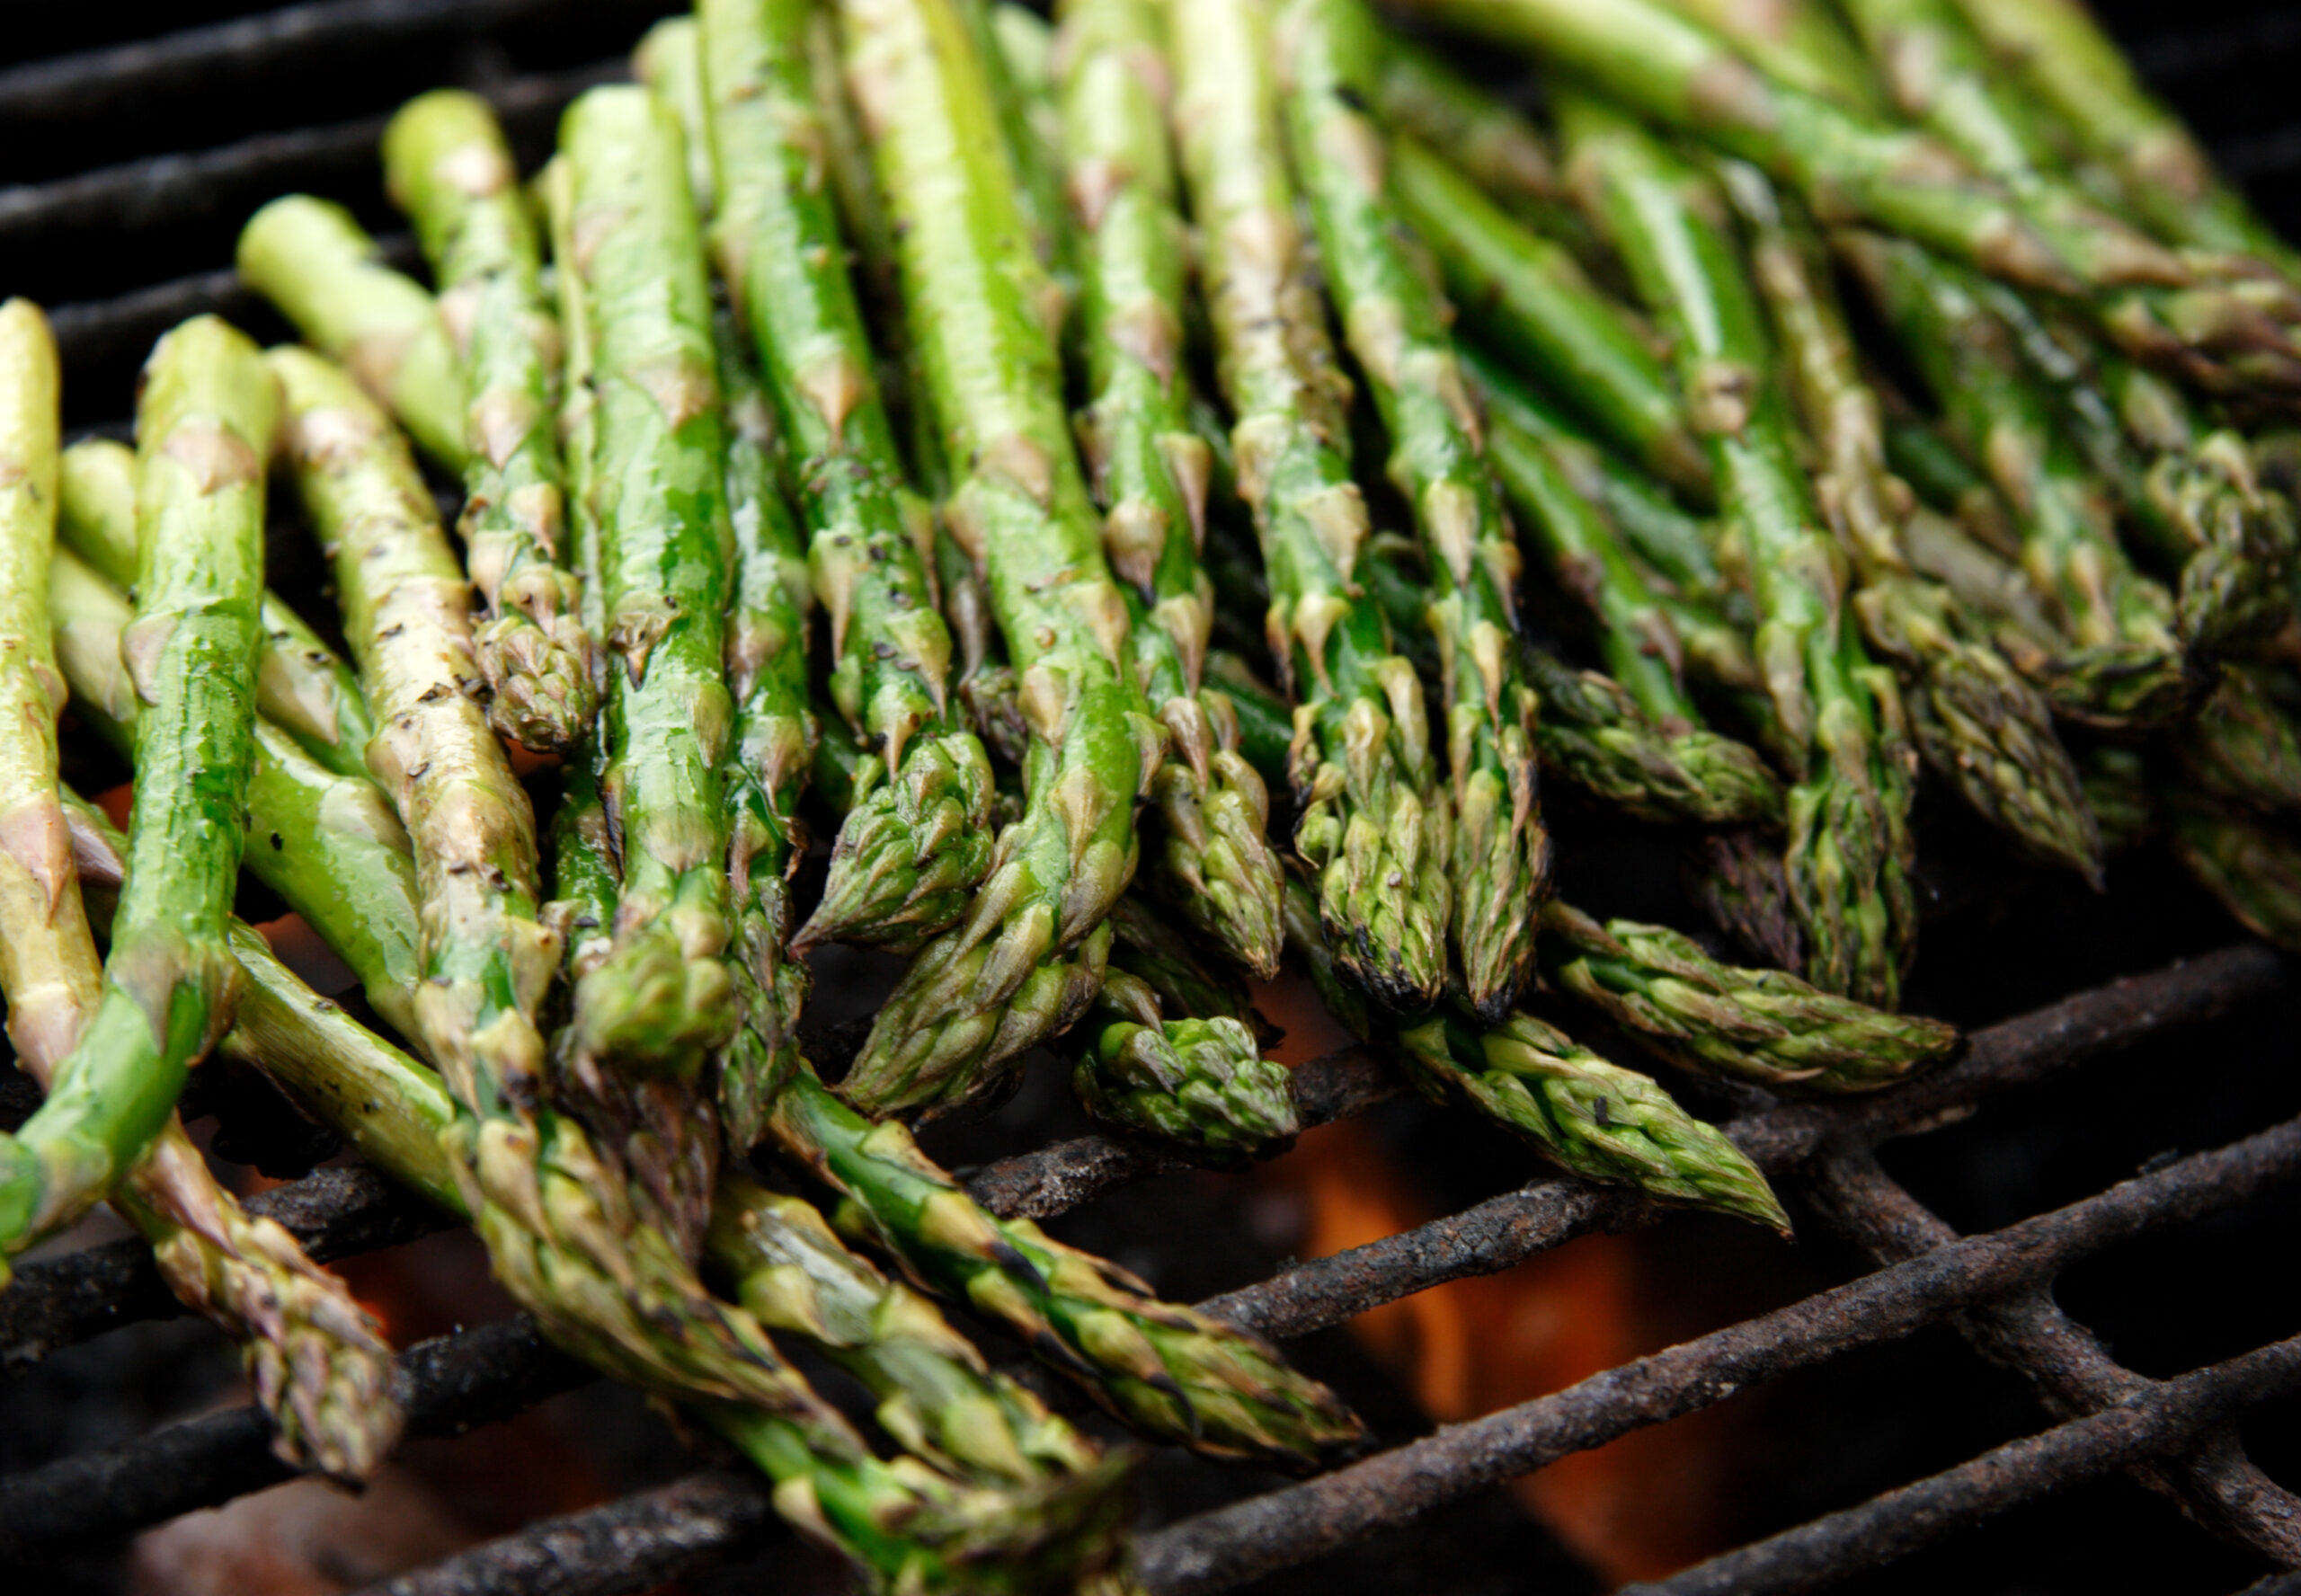
Grilling Asparagus
Nothing is easier to grill than asparagus – the only rule to follow is to set it on the grill perpendicular to the way the grid runs. Bet you can figure out the “why” on that one!
Our favorite way to grill asparagus is to simply snap off the tough ends, then just drizzle with a bit of olive oil, roll it around to spread it evenly, then hit it with a touch of salt and pepper.
Put it on the grill (perpendicular!) and cook for about 8-10 minutes, rolling every 2 or 3 minutes to even out the brown. We like ours a bit crisper, so we go only 5-7 minutes depending on the size of the stalks.
For a nice variation on this theme, just drizzle with your favorite balsamic vinegar while it cooks – the vinegar will caramelize from the grill heat. A super easy method that’s also tasty is to toss it with a store-bought Italian salad dressing prior to grilling.
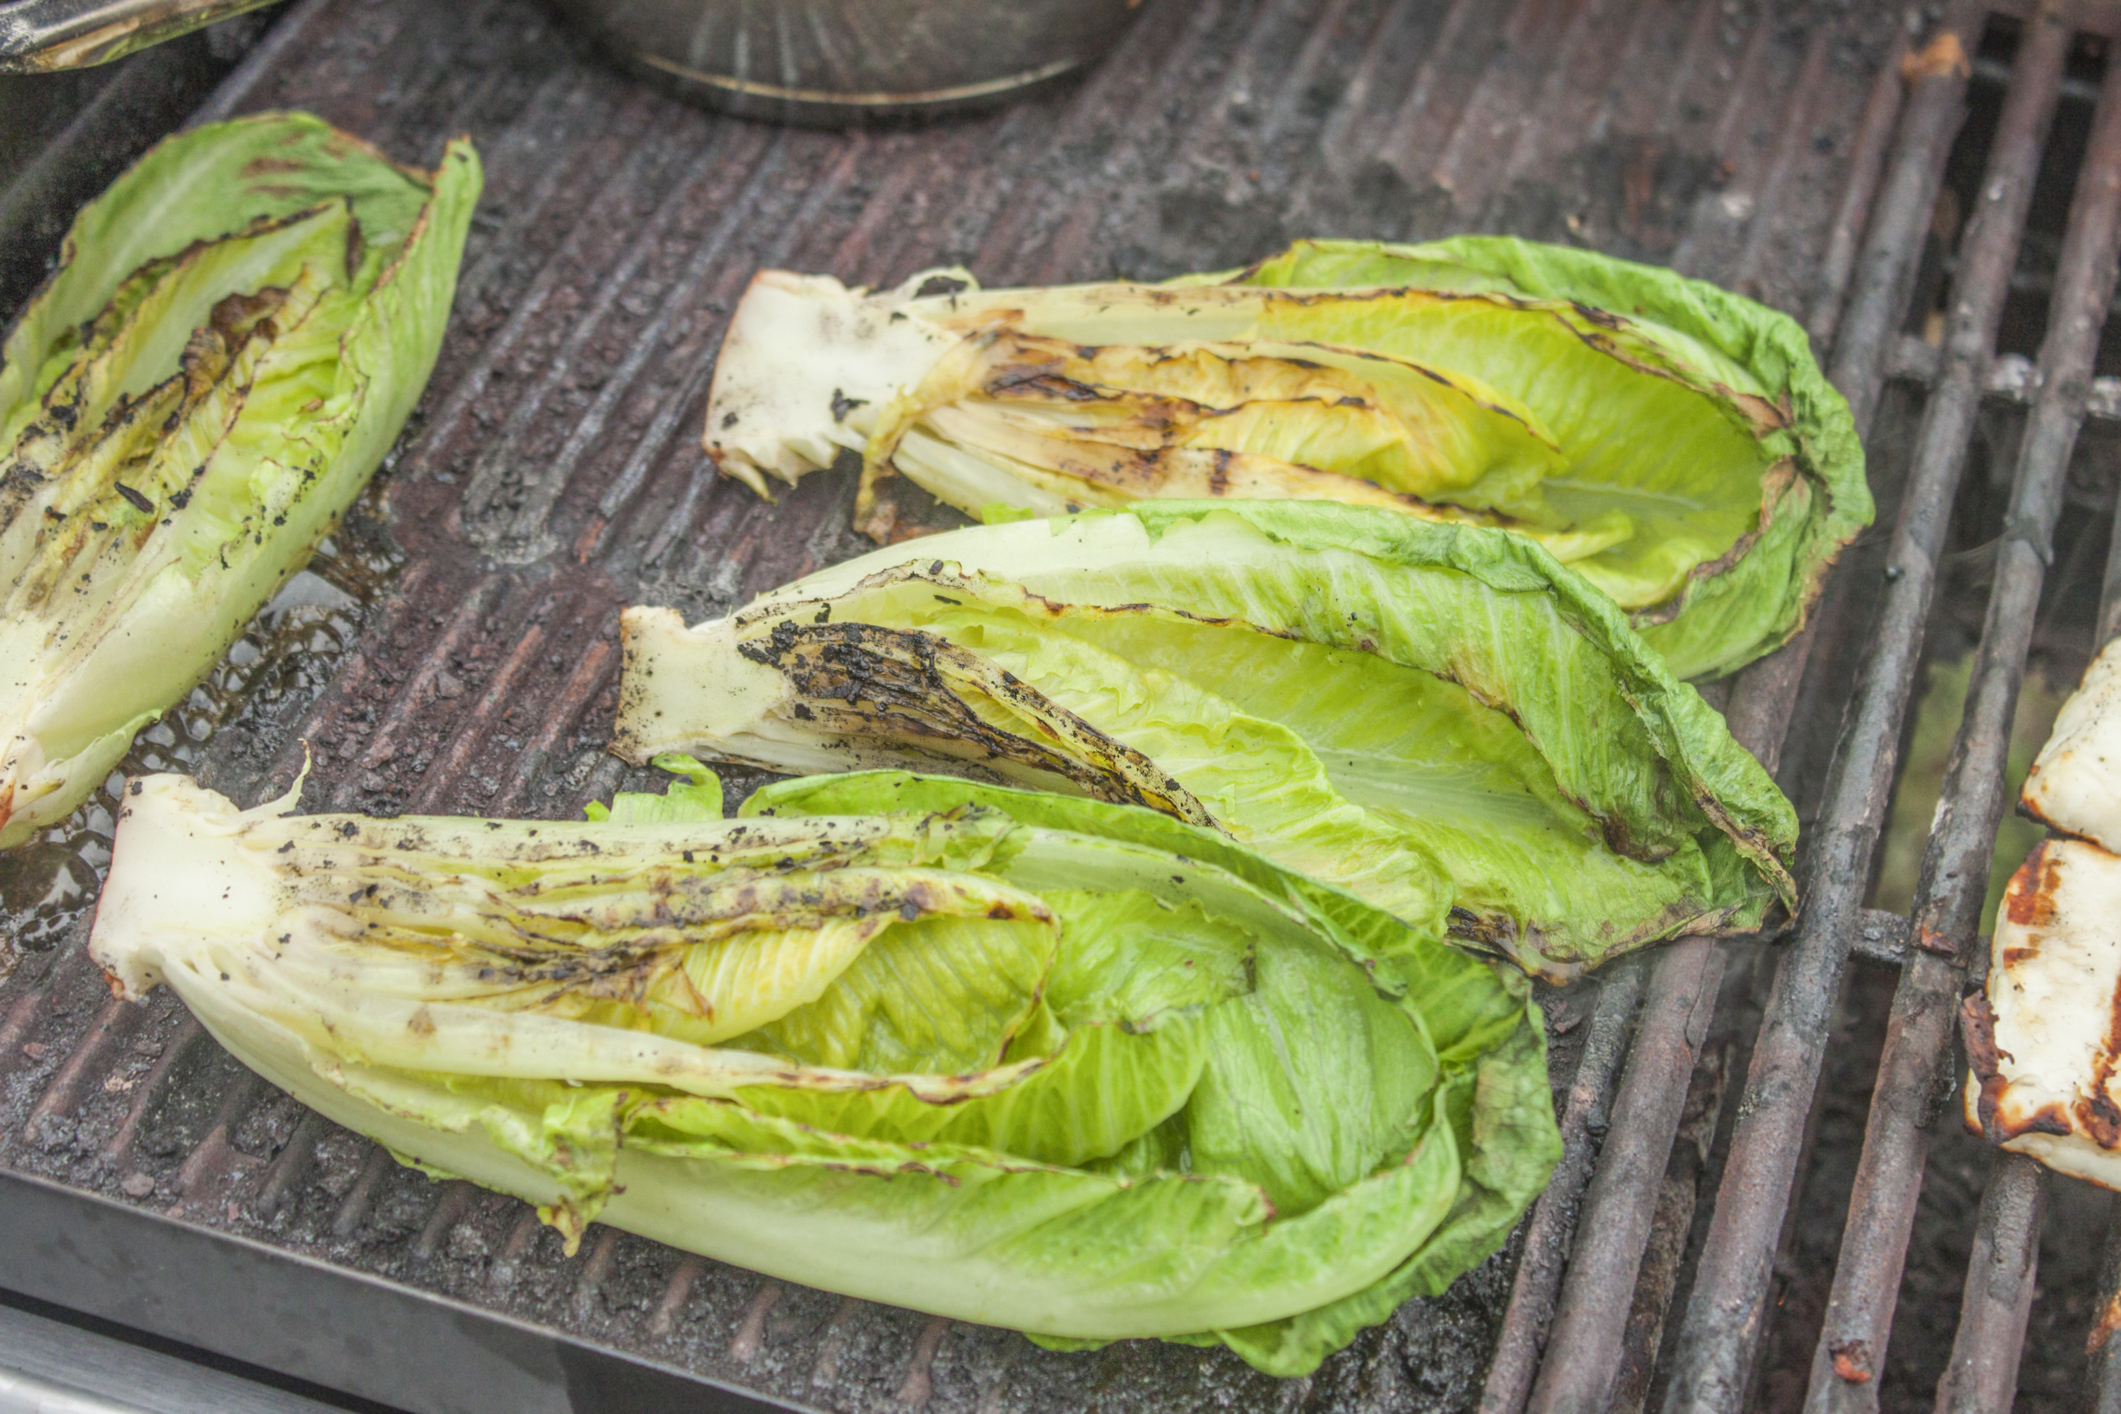
Grilled Caesar Salad
Yup, we said this! Lettuce, especially romaine, when gently/quickly grilled will get a sweet nutty flavor. The method is quite simple.
Buy compact heads of romaine, or if in the store, romaine hearts work great for this. Peel off any floppy/non-crisp leaves on the outside – we usually take off a full layer. (Save for salad or use as garnish if they look ok!) Cutting from the root end, split the heads in half, and then cut the heads in half again leaving a quarter of a romaine head. Holding them by the root end, give them a quick rinse in cold running water and then let them drain root end up in the sink. After they drain a bit, give them a vigorous shake to get out as much water as possible.
The grilling is simple – walk them out to your hot grill and put them on! For all grills, give your grate a quick spray with cooking spray or wipe with a cooking oil soaked paper towel or kitchen towel to keep things from sticking.
On gas and charcoal, you’re cooking with direct heat. Working quickly, put the romaine right on the grate, cut side down at an angle to the grate pattern – gives nice markings. Turn after 1 minute – so if you’re doing say 8 of them, by the time you get the last one on, the first one will need to turn. Turn to the next cut side and repeat with the others, again, 1 minute only, and that’s it.
Serve with a drizzle of your favorite Caesar dressing.
Here’s our quick favorite Caesar recipe: ½ cup of Mayo, 1 tsp lemon juice, 2 tsp worcestershire, ½ tsp red pepper hot sauce (optional) and 1 tsp anchovy paste (optional). Whisk together, then add ¼ cup grated parmesan cheese, ¼ tsp salt and some grinds of fresh pepper. Fantastic! Also delicious with blue cheese dressing, crumbled blue cheese and bacon bits!
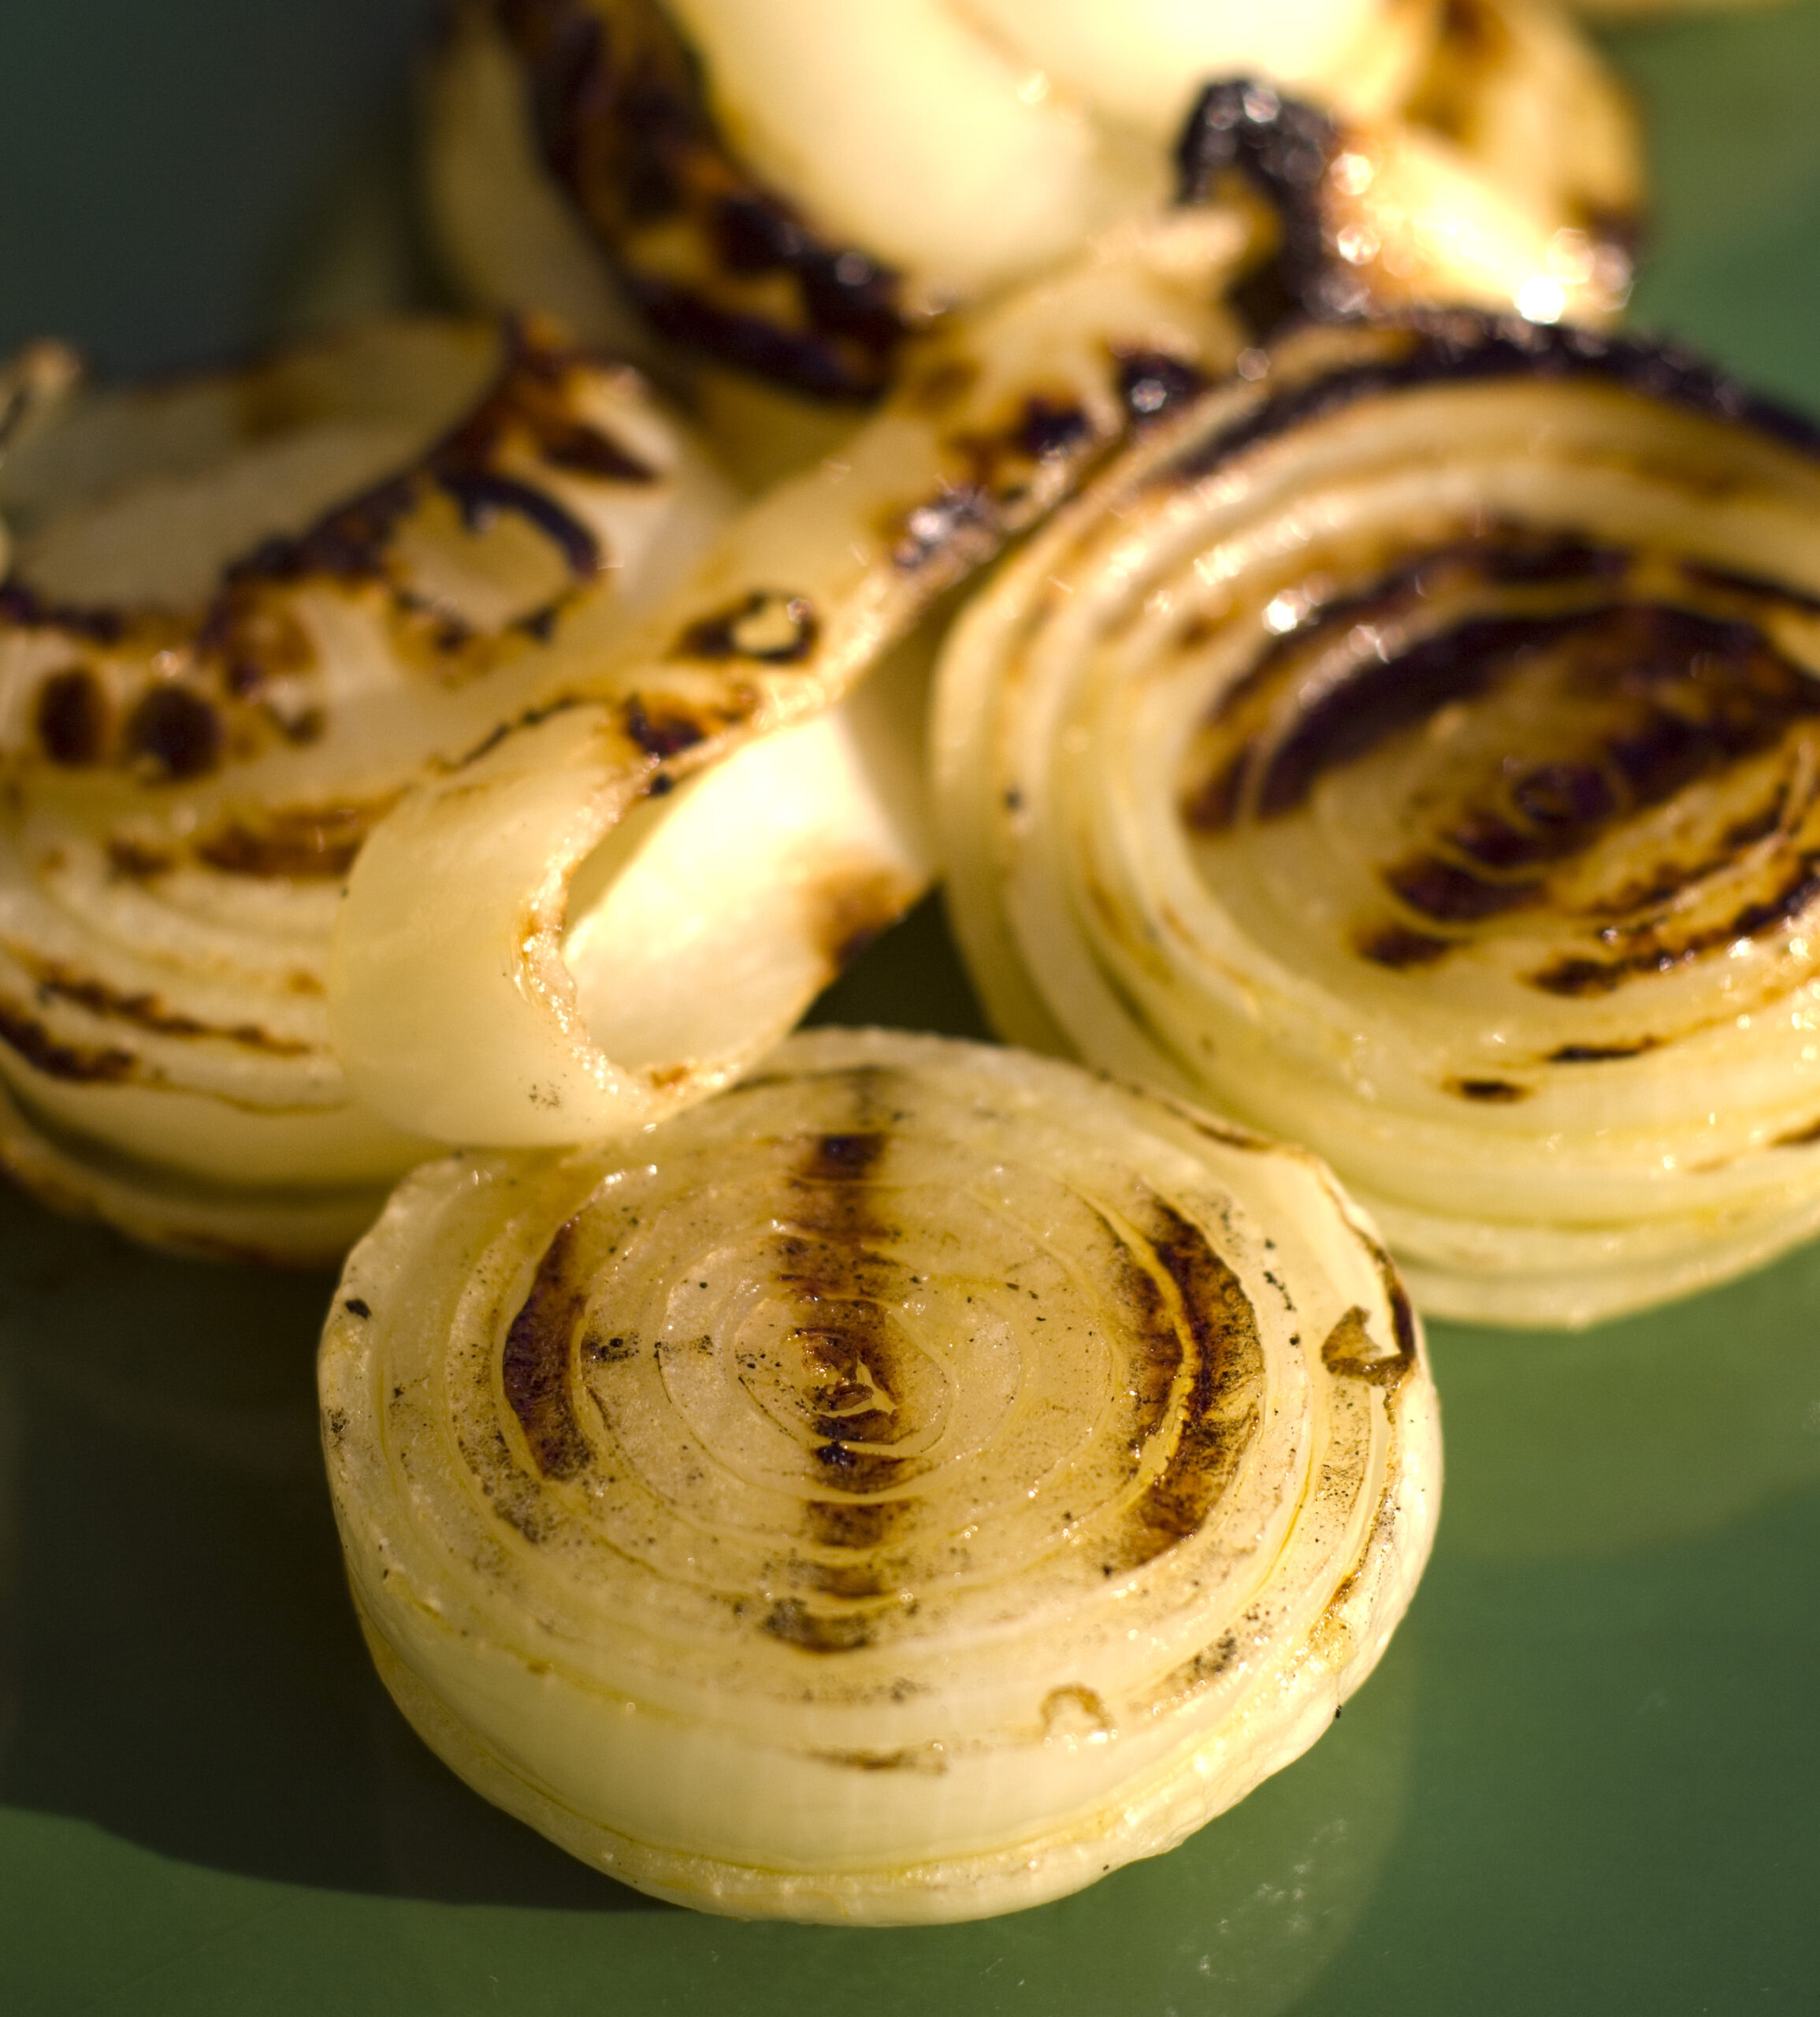
Grilled Onions – A Summer Staple
Grilled onions are a summer staple for us – a big slab on a burger, served as a side to a steak or chop, or even chopped after a gentle grilling and put in a salad, you can’t beat the sweetness that comes out from grilling. These also pick up the flavor beautifully from Griller’s Gold pellets in a wood pellet grill.
Prep: peel the outer skin off the onion and slice into ¼” to ½” thick slices. Brush with olive or cooking oil on both sides and place directly on the grill over direct heat. For just a light marking for having on a salad, cook about 2 minutes per side, then off. Let cool a touch and then cut the rings into quarters and toss with the salad.
For a burger or as a steak side, let cook a bit longer – 3-4 minutes a side – then move onto the indirect heat (on a gas or charcoal grill) and let cook about 4 more minutes. A light sprinkling of salt or seasoned salt will really “pop” the sweetness on these.
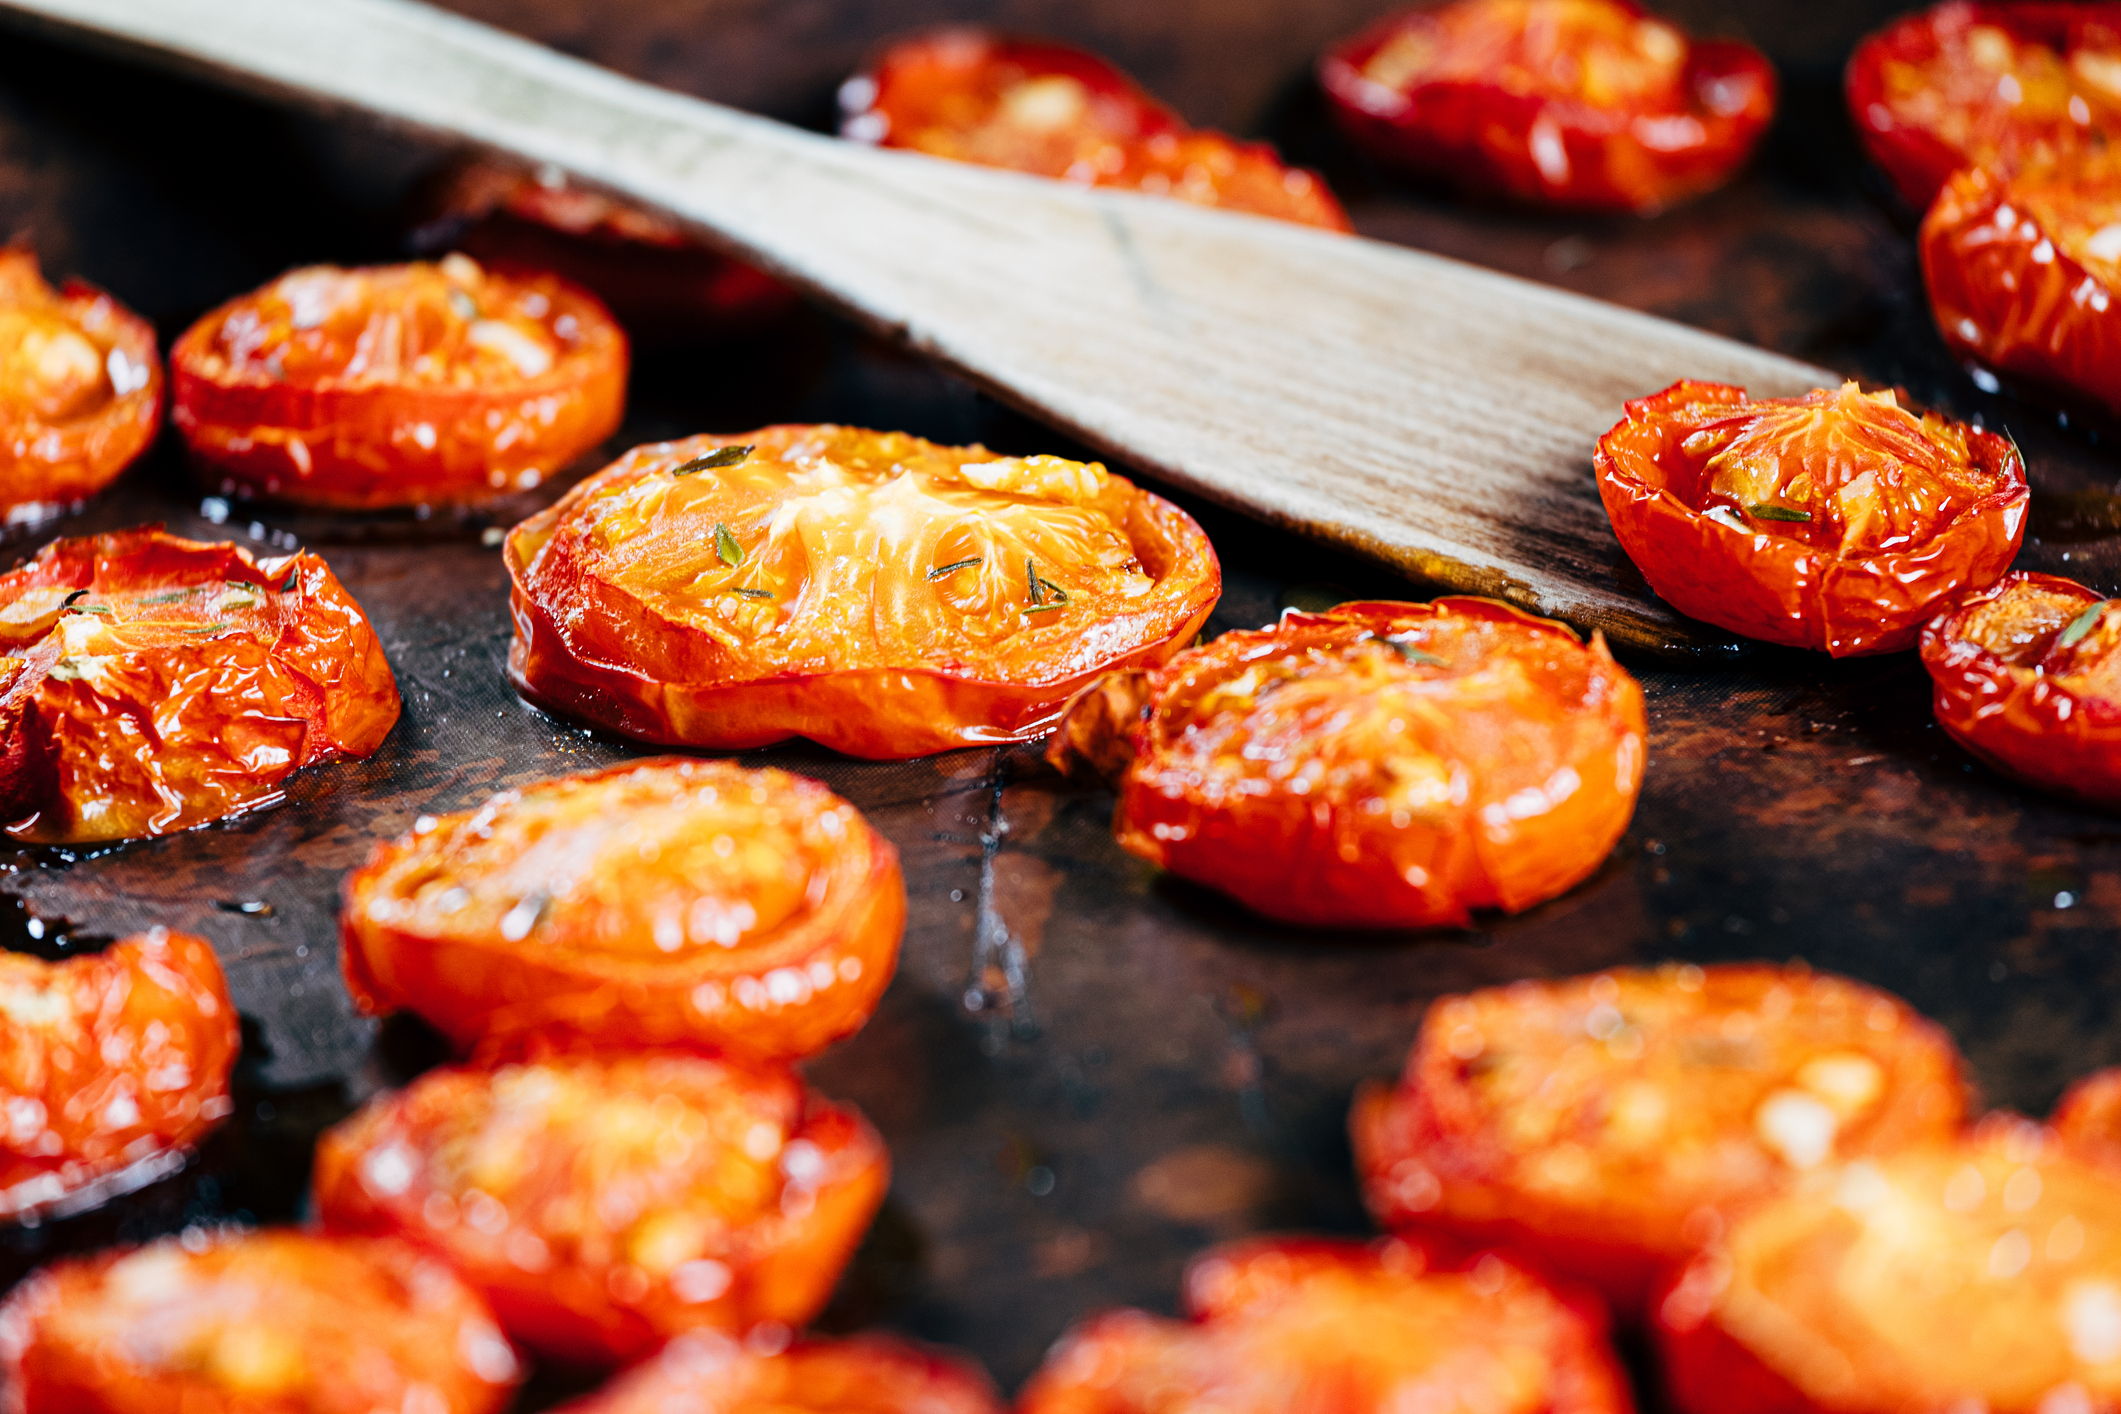
Tomatoes on the Grill
Grilled roasted tomatoes are madly good and could not be easier. Using Griller’s Gold hardwood pellets in a pellet grill will give them a great woodsy flavor. Just about any variety works, but we like doing this with Roma tomatoes.
This is super easy for prep – give the tomatoes a quick wash, then cut in half lengthwise. Drizzle the cut sides with a bit of olive oil and put the tomatoes cut side down on the direct side of a medium heat grill. Leave them cut side down for about 3 minutes to mark and caramelize them then flip them skin side down and roast another 8-10 minutes until soft and hot all the way through. Sprinkle with some coarse kosher salt and a grind of pepper, and for an extra touch top with some snipped basil leaves and thyme. Serve hot off the grill as a side with a steak, chop or fish, OR (and even better), cool and chop and use to make salsa. So good!
Colorful Grilled Peppers – So Good!
Red, green, yellow and orange bell peppers are fantastic when grilled – you can serve them hot as a side dish or let cool and serve as a side, a topping or in a salad.
Again, simple prep – cut the flesh into strips (we like them about an inch wide), put on the grill, turn every 2 minutes until done – over direct heat. We also love cooking the mini multi-colored peppers whole in the same way.
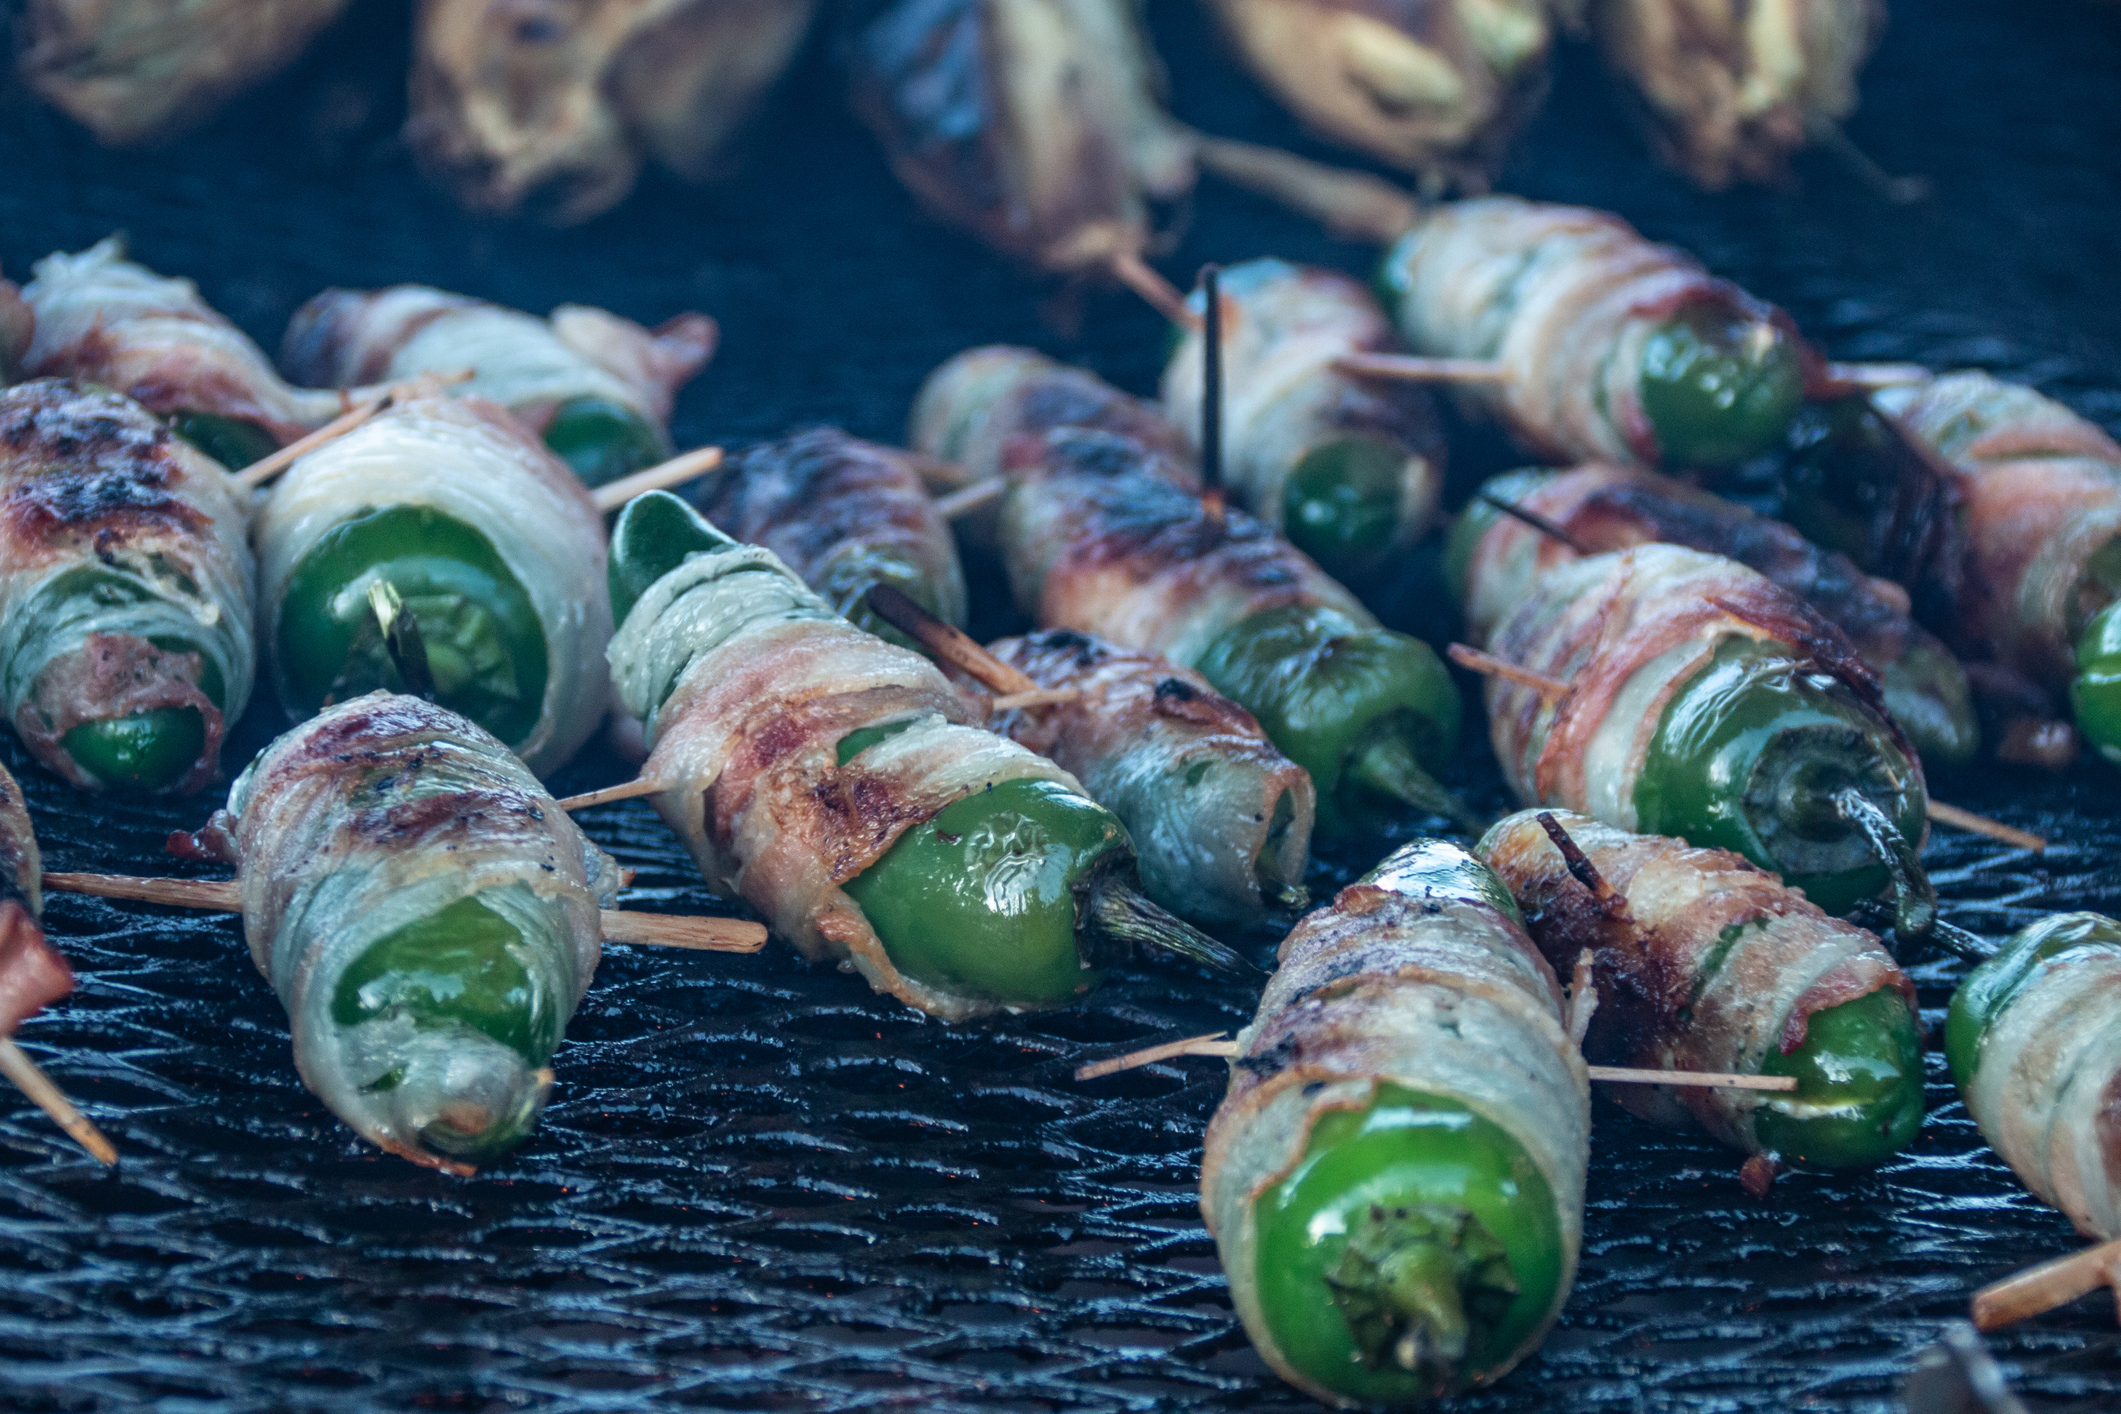
Bacon-wrapped Jalapeno Poppers
Nothing better than fresh farmed jalapenos – fire, flavor, heat! To make delicious poppers, use medium sized jalapenos (about 3” long).
Prep: Put on gloves! Cut the top off, then cut down one side and around the bottom to be able to open up the pepper. Scrape out all the seeds and white ribs – that’s where the majority of the heat is (and if you want to leave a few at “screaming hot”, leave some in!).
Mix up equal amounts of cream cheese and shredded mild cheddar, then put a dollop in each pepper and close it around the cheese. Wrap each pepper with a strip of bacon, and secure with a toothpick. As you do this, cover the open end with the end of the bacon – this keeps the cheese in. Cook over direct heat turning frequently until the bacon is cooked and the pepper is tender.
Kaboom!
Mixed Grilled Veggies
A super easy way to enjoy the grilled veggie flavor is to cut up a bunch of different veggies and put them in a big bowl, toss with some oil and a bit of balsamic, then dump into either a big roasting pan (foil disposable is fine unless you have one you’re ok with putting on the grill) a specially-designed grilling basket, or a big cast iron skillet.
For this we like a mix of bell peppers, green beans, mushrooms, zucchini and onions – good additions are asparagus, broccoli and cauliflower.
Preheat the pan on the grill for a few minutes before adding the veggies. Cook them over direct heat, tossing them about every 4 or 5 minutes until they are your desired doneness. Broccoli and Cauliflower are also great this way on their own – cut up a mix of one, the other or both, toss with a couple of tablespoons of olive oil then roast. Finish with a gentle sprinkle of your favorite seasoned salt – a smoked salt is especially tasty with this.
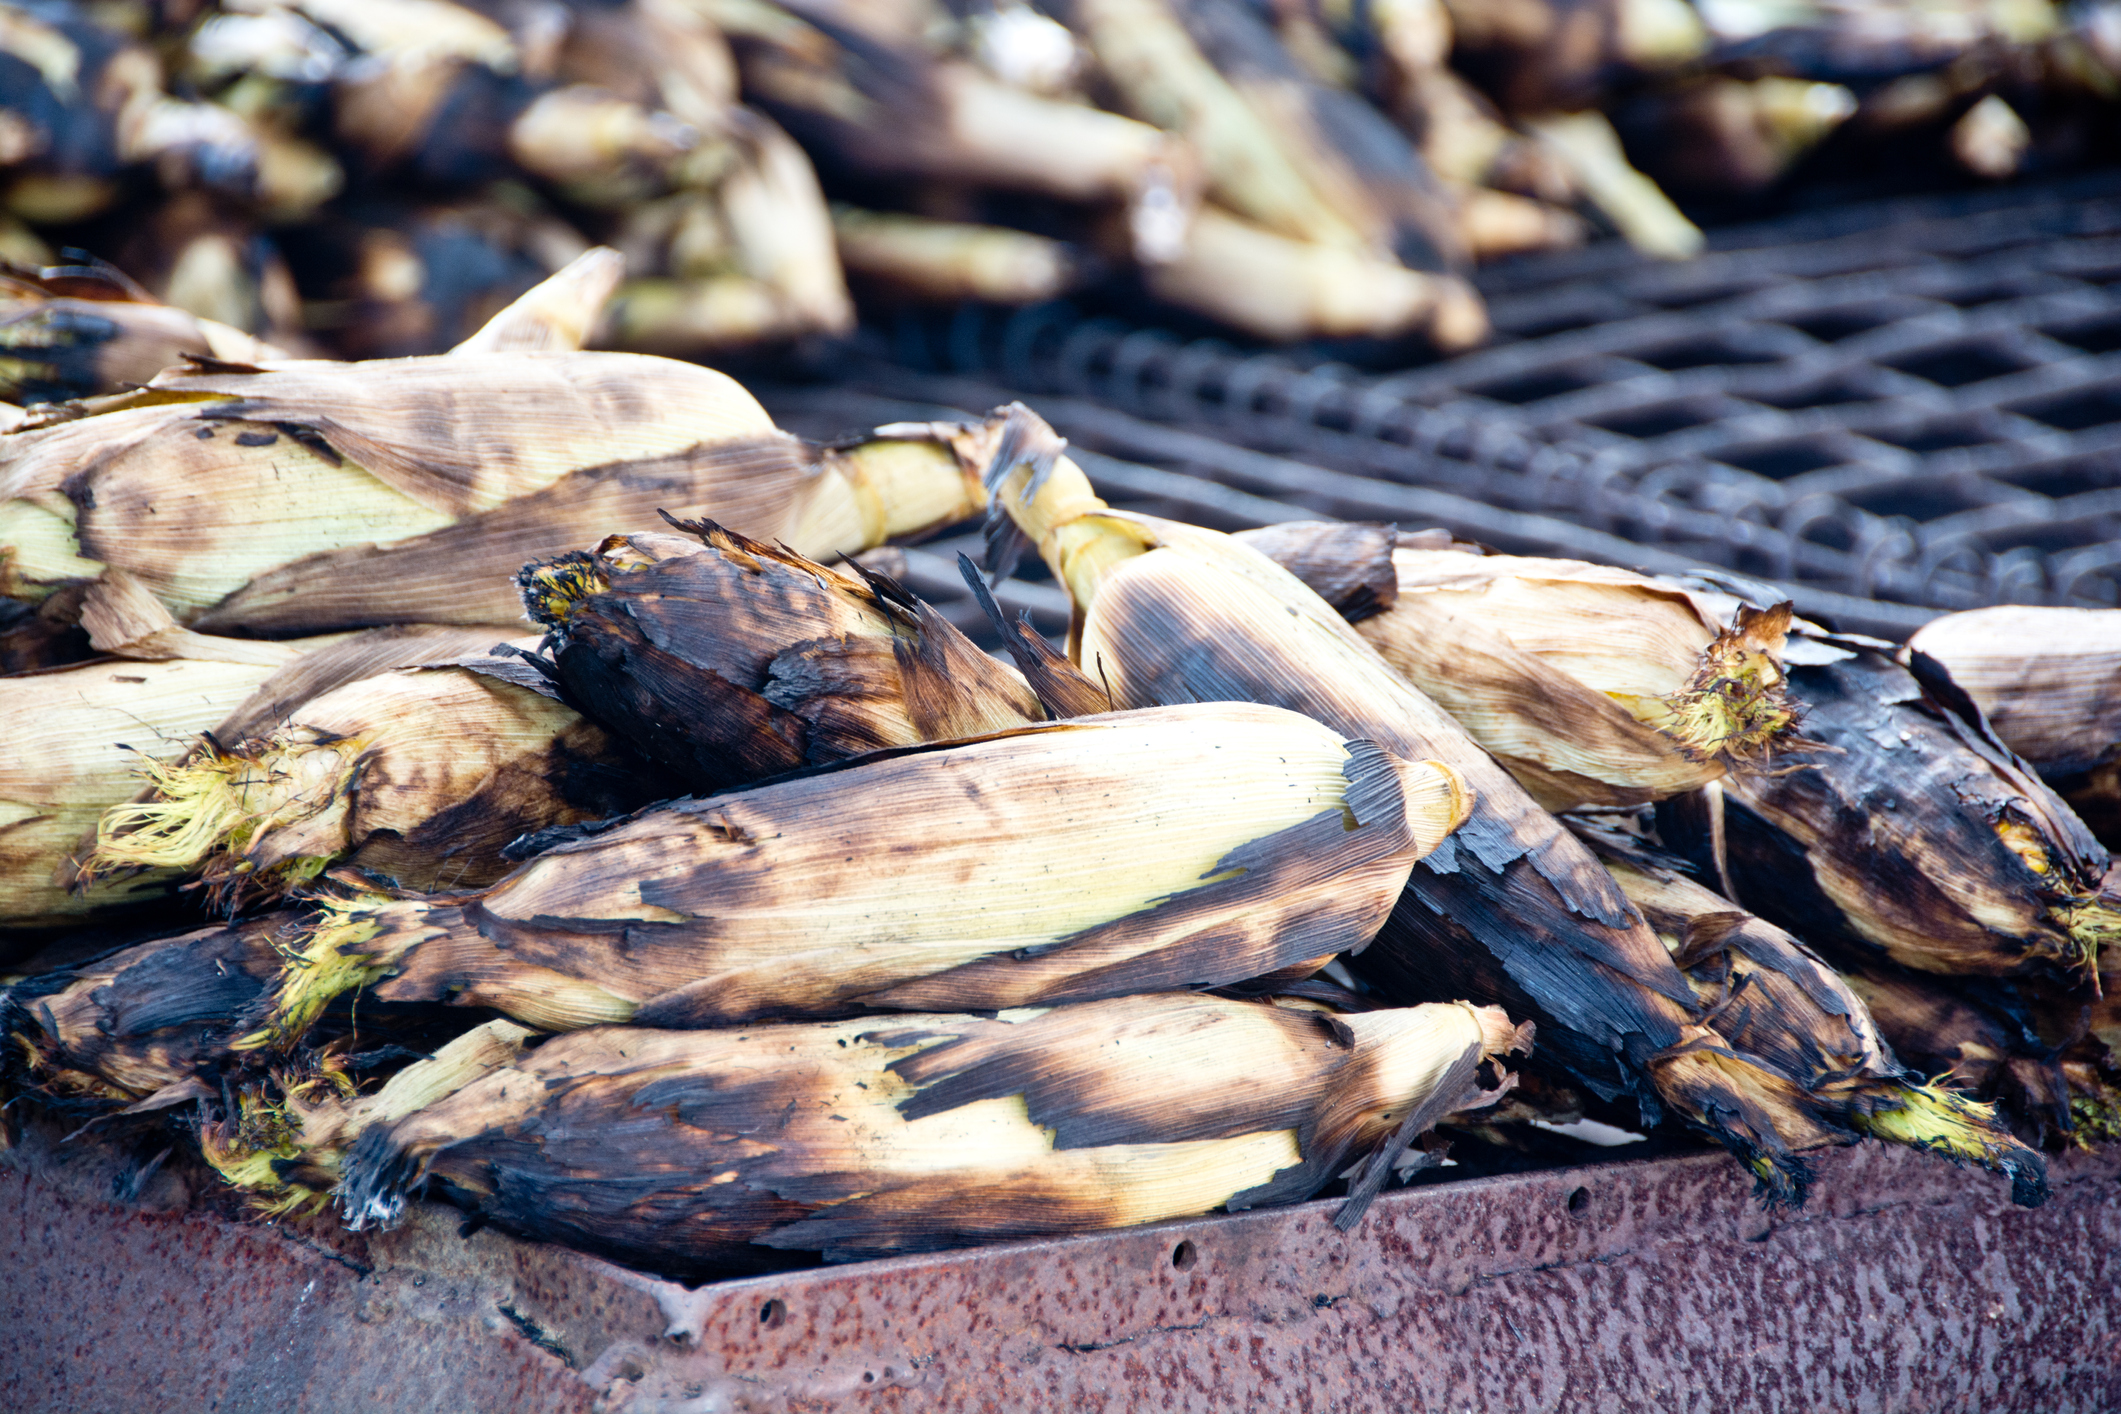
And finally … Sweet Corn
There is nothing better than an ear of freshly picked sweet corn roasted on the grill. For the best results, get corn that was picked the same day or worst case, within a day. Holding and refrigeration are the enemies of sweet corn – the sugars rapidly turn to starches. It’s that milky sweetness and snap of the kernels that you want and that comes from freshness. Be sure to ask the purveyor when it was picked.
Our favorite way to grill it is to simply pull the husks back just enough to allow pulling out of most of the silk then push the husks back into place. Heat your grill to medium direct heat. Put the corn directly on the grill (using direct heat) and turn the ears ⅓ turn every 3-4 minutes. They are perfect in 9-12 minutes when you’re on medium direct heat. Shuck and enjoy with your favorite toppings – just butter; butter, salt and pepper; butter and Old Bay seasoning; or our fave, Elote style with mayonnaise, Elote seasoning (Try the one at Trader Joe’s!) and a squeeze of lime juice. Fantastic!
These ears of corn are ready to eat, having been freshly roasted on the grill.
Farm Stands are a bounty of amazing goodness in the summer and are natural companions to your grill. Head out, get some of the earth’s bounty, fire up that grill and enjoy!
Most people when they think of using their wood pellet grill smoker only think in terms of classic barbecue fare – smoked meats, typical sides, etc. But that hot chamber with its wafting and tasty smoke can also be used to make some delicious snacks. Like anything done in the smoker – all it takes is time, some tasty seasonings and the heat and smoke from your smoker, fueled of course, by Griller’s Gold natural hardwood pellets.
Dry Smoke is Key for Smoky Snacks
One thing to keep in mind on these recipes – these are all designed for DRY smoke – if your smoker has a water pan in it, don’t fill it. That may make heat control more difficult, but thankfully these recipes are not very temperature sensitive. Additionally, these are great “extra space” recipes in your smoker – if you’re doing a long smoke of something and you have some room, put one of these in and make some extra treats – again, provided that you’re doing a dry smoke like on a pellet grill fired with Griller’s Gold pellets.
Also, note the recipes below don’t have a recommended type of Griller’s Gold pellet – that’s because all the flavors will be good with these – just use what you have on hand or what you’re using already in your smoker.
Here’s a few ideas that will be a hit at your next party – all of them are very easy and completely delicious!
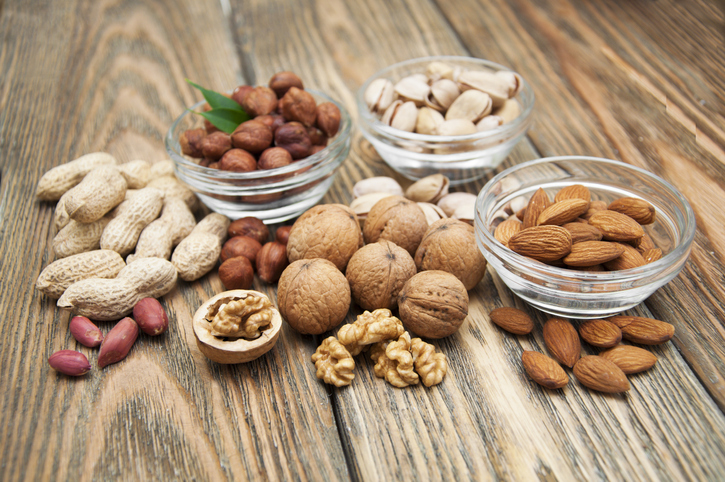
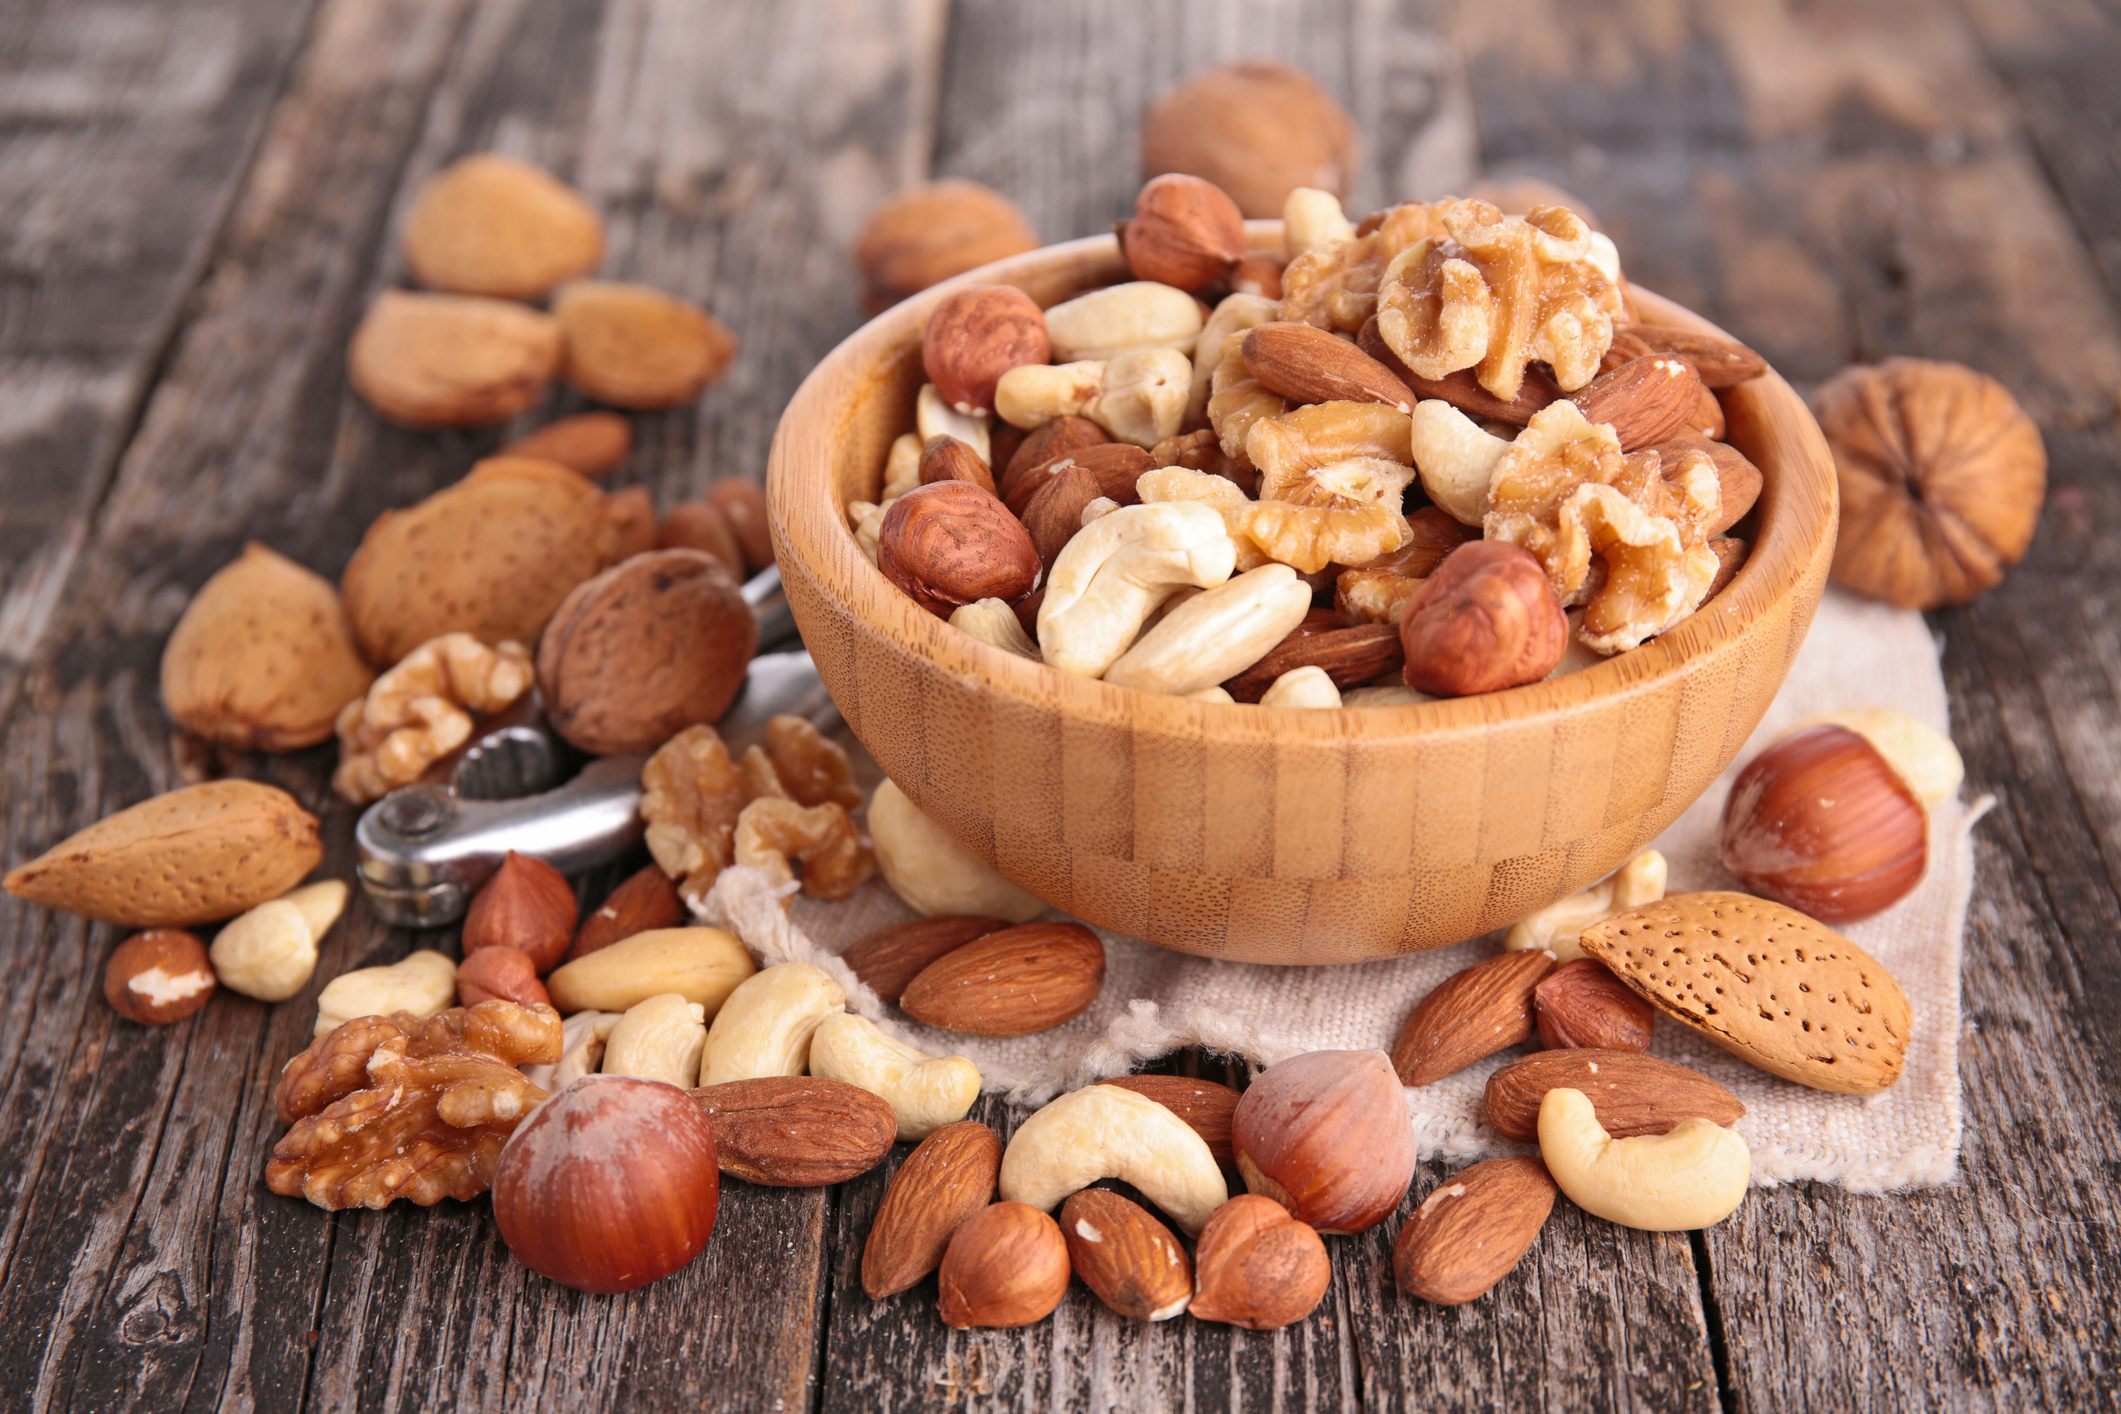
Smoked Nuts
Rather than paying extra for a fake smoke flavor on mixed nuts, how about the real thing?
This is one of those “it’s so easy why didn’t I think of it before?” recipes and using a wood pellet grill makes these especially easy.
Here’s the ingredients: 1 container of your favorite nuts – mixed, single variety, whatever works for you. Here’s the method: Dump them into a foil pan and put them into the smoker at between 180 degrees and 250 degrees for an hour or so, stirring every 15 minutes or so – more time if you want more smoke flavor, less time for a more subtle flavor.
We quote a temperature range there because these can go on with other food, but if doing them by themselves on a wood pellet grill, go to the low end – 180 degrees as pellet grills tend to kick out more smoke at lower temps.
Now, to kick them up a notch, do this – for every 3 cups of nuts, melt 3 tablespoons of butter and whisk in 1 tablespoon of worcestershire sauce, 1 t each of garlic powder and onion powder and if a spicy kick is wanted, a few shakes of your favorite hot sauce. Toss this with the nuts prior to smoking. You’ll see this same mixture below.
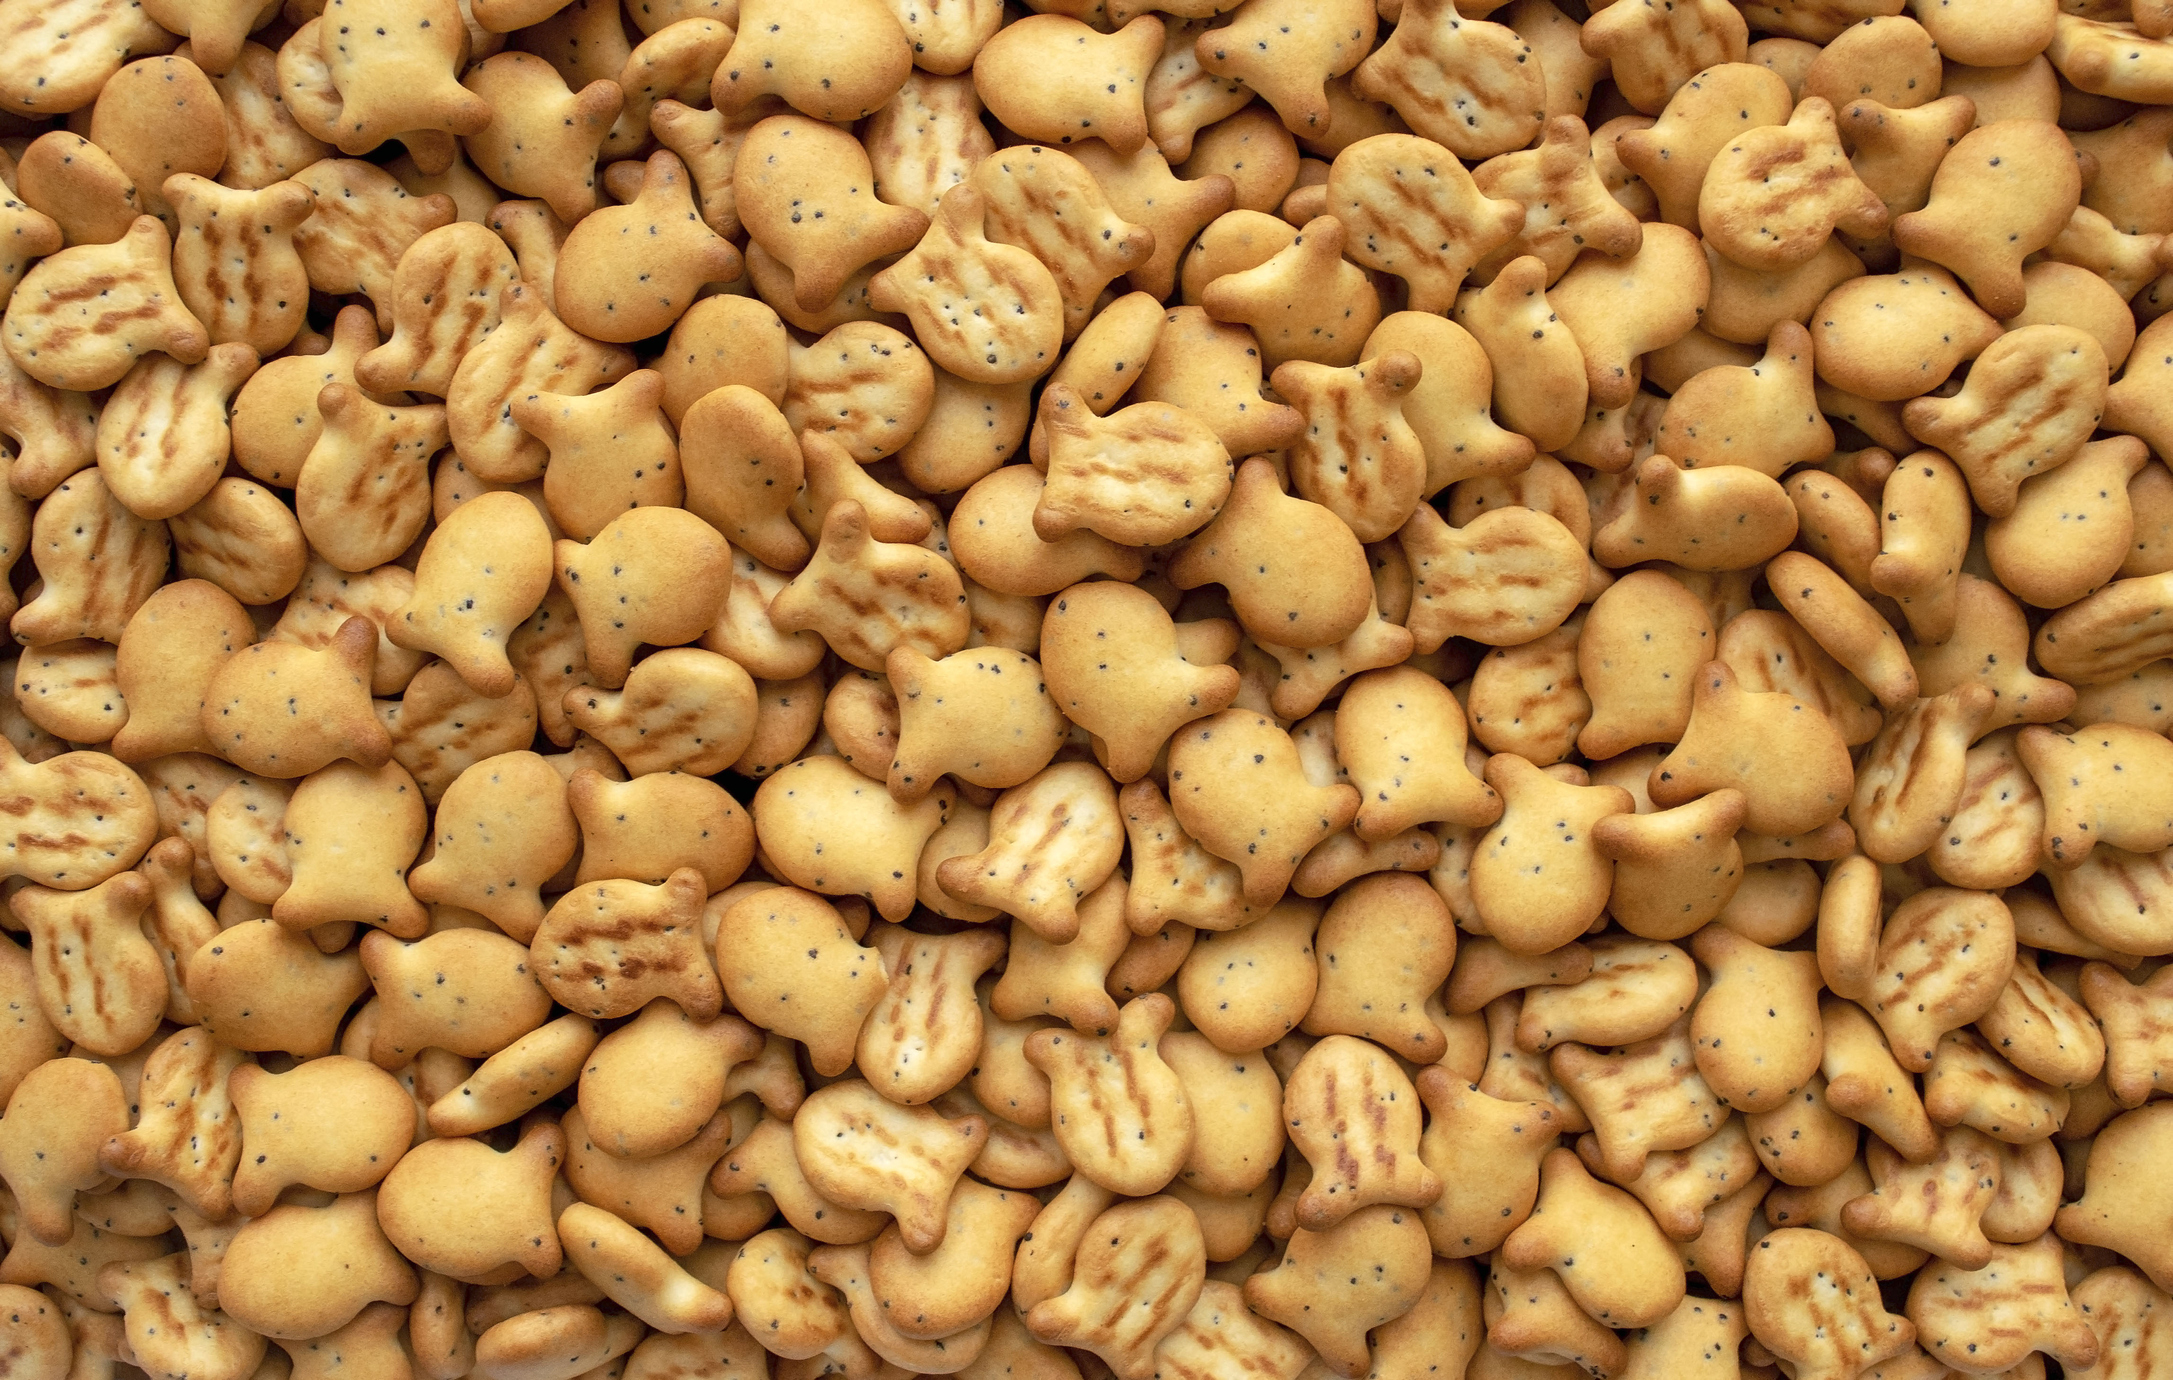
Smoked Goldfish™ crackers or cheese crackers
Again, super easy – for one bag of Goldfish crackers or a regular sized box of cheese crackers, simply toss them with a ¼ cup of cooking oil mixed with 1 tablespoon of worcestershire sauce, 1 teaspoon each of garlic powder, onion powder and paprika, and if you want heat, ¼ t of cayenne pepper.
Spread in a foil pan and put in the smoker for an hour, stirring every 15 minutes. Temperatures are ok from 180 to 250 on these as well. Absolutely delicious and we double dog dare ya to not eat a huge handful hot from the smoker. Amazing!
Smoked Nacho Cheese Tortilla Chips
Yeah we said that. These are even easier – it’s literally dump, smoke, eat like it’s your job.
Spread a bag of nacho-cheese flavored tortilla chips out on a sheet pan and slide them into your pellet smoker at 180 degrees – let them go 1 hour, stirring every 15 minutes.
You’ll never eat another “straight from the bag” nacho cheese tortilla chip again. Also works great with potato chips, especially cheese flavored.
Smoked Queso Dip
This has been quite the rage of late in the BBQ social media forums and it couldn’t be easier.
There are a thousand different recipes for this online.
Here’s the one we’ve found to be the best combo of easy and tasty:
Taco Meat or Chorizo: Using a prepared taco seasoning and ground beef, prepare 1 lb of taco meat to the instructions on the package. Can also substitute crumbled chorizo sausage, browned and drained. For this recipe, use a ½ pound of the taco meat or browned chorizo
1 can Rotel tomato/chile pepper mixture
1 cup diced raw onion
1/2 cup diced pickled jalapenos (can be omitted if desired)
20 ounces of Velveeta cheese cut in 1” cubes (note – regular cheese like cheddar will not melt evenly enough for this, you need the pasteurized process cheese to work right)
⅔ cup of sour cream
Mix together the prepared taco meat, the Rotel, onion and jalapenos or chiles and spread out in a foil pan, then scatter the cubed cheese over the top. Smoke for 45 minutes at 250 degrees, stirring every 15 minutes, then stir in the sour cream and smoke 15 minutes more. Serve hot with tortilla chips and enjoy!
Smoked Chex Mix
Who doesn’t love a big batch of homemade Chex mix? Everyone that makes it puts different custom touches in their mix.
Here’s a link to a great oven-toasted Chex party mix recipe that we’ve used a lot and it’s always a winner. And here’s how you kick it to the next level – instead of toasting this in your oven at 250 degrees, smoke it in your wood pellet smoker with Griller’s Gold pellets for 1 hour, stirring every 15 minutes.
Also, the linked recipe calls for using sheet pans – this also works fine in a foil roasting pan – just make sure you’re stirring it well to expose as much of the crunchy stuff to the smoke. It’s great with a mug of cold beer!
Try Your Own!
Do you have a favorite snack recipe that requires some oven baking? One of the beautiful things about wood pellet grills fueled with Griller’s Gold pellets is that they offer great temperature control and will give your food a subtle “baked in a wood burning oven” flavor. Any oven-baked canapé or appetizer will be extra tasty when baked in your pellet grill. Experiment a little – we have yet to find something that wasn’t just a bit tastier after a ride in our pellet smoker. Pick the perfect wood pellet for your next meal, and, happy smoking!
Grilling fish and seafood tends to be one of those things that seems scary for many grilling and barbecue fans. The delicate nature of fish along with the fact that it can go from perfect to “order pizza instead” in the blink of an eye, are all things that scare many otherwise expert, outdoor chefs away.
The reality, however, is once you master a few things, cooking fish is no more difficult than anything else—it just requires a bit of attention to detail.
Fortunately, pellet grills or pellet smokers can make cooking fish especially easy to do. With their electronic temperature controls combined with the great taste of the wood pellet fuel, making fish on a wood grill fueled with pellets like Griller’s Gold pellets couldn’t be easier. That said, great results can be had on a gas or charcoal grill—just make sure to manage your heat. And it’s easy to add that wood grill flavor to charcoal or gas grills by just using Griller’s Gold pellets. More on that below.
What type of fish should I grill?
In terms of what kind of fish to make on the grill—well, the answer is “any is great.” After all, people have been cooking fish over fire for as long as they’ve been catching and cooking fish!
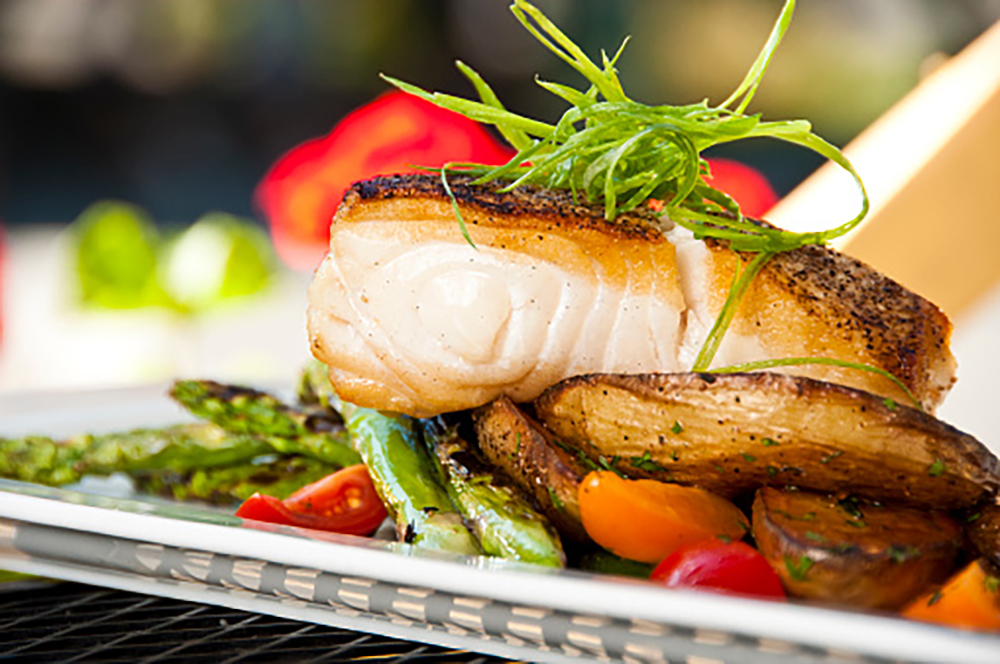
Thicker cuts of firmer fleshed fish tend to work better on the grill—halibut and swordfish are ideal for the grill; trout, salmon, grouper, redfish, cod, and other less firm fish can also be grilled very successfully, and small/thin filets such as panfish filets (sunfish, crappies, bluegills) require the most attention as they cook the fastest, but again, are great on the grill.
When is fish done?
Most chefs like to cook fish to just past medium rare—which means the fish is juicy, just past opaque, and can be pulled apart in layers easily. For temperature, about 130 degrees in the center.
You often hear “cook to flaky” which most chefs think is dry and overdone – this is when the fish pulls apart into fine “flaky” bits. That is usually around 145 degrees or higher.
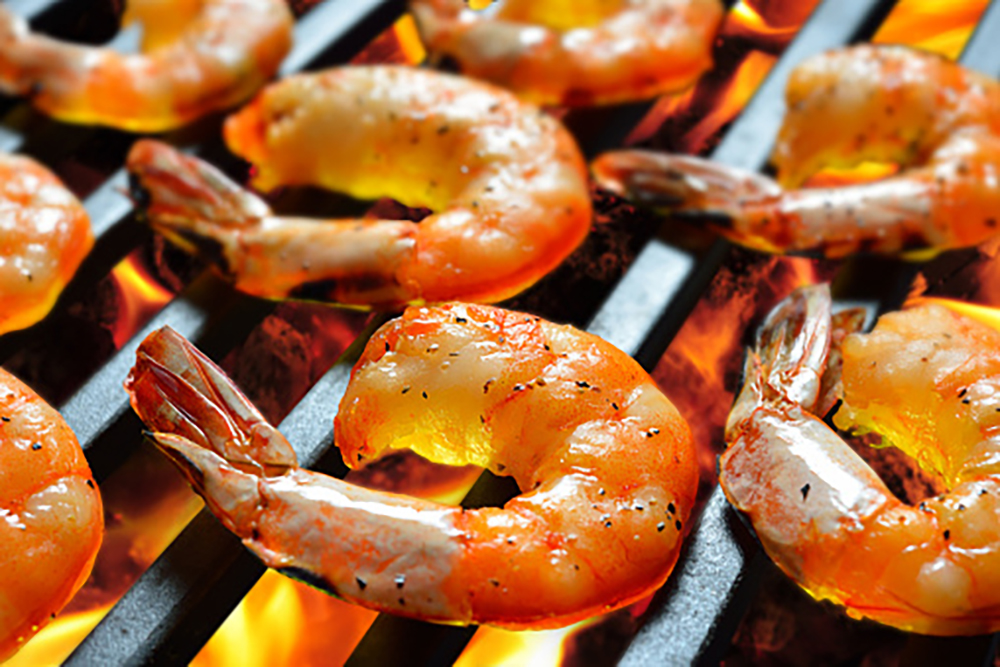
Shellfish and crustaceans like shrimp and lobster LOVE the grill—and the good news is that their firmer texture makes them a bit more forgiving.
For shrimp, fish, lobster and scallops, “perfectly done” is opaque but tender—once it becomes opaque, it’s pretty much done—and that doesn’t take a long time! But don’t overcook—it gets tough and rubbery.
Rules for Success:
Manage your heat—on a wood pellet grill, use 350 degrees as your maximum heat, and depending on how smokey you want your fish, you may want to go as low as 225 degrees—classic “low and slow” territory. Specific examples are below.
Clean and oil your grill’s cooking grid—fish loves to stick to dirty grill grids. Before you preheat your grill, give the grid a good scrubbing and then brush it with cooking oil. Preheat, and just before you put the fish on, brush it again with oil. Following this regimen will keep your fish from sticking.
Use a marinade with oil on your fish—whisking oil into your fish’s marinade will also help it to avoid sticking.
PAY ATTENTION—fish cooks really fast—so stay by the grill, and keep track of your cooking time.
Use the fish rule of thumb for cooking time—8 minutes of total cook time for a 1” thick piece of fish over medium-high (400 degrees) direct heat. Using this as a starting point, you can usually, pretty successfully cook fish, adjusting cook time for variables such as distance from heat, heat level (medium is 350), indirect versus direct, etc.
Recipes and Cooking Methods:
Let’s have some fun and try it out!
Here are some great techniques for cooking on pellet wood grills, charcoal grills, gas grills, and some great/easy recipes to try:
Expert Hints for Cooking Fish
Here’s a great fish cooking checklist that works on all types of grills:
Portion your fish. Smaller/thicker pieces of fish work the best on the grill but even if using thinner fish, cutting into smaller size pieces that fit your spatula will ensure you are able to turn the fish without it falling apart.
Clean and oil the grids. Remove the cooking grid from the grill and give it a good scrubbing to remove old food, grease and carbonized “gunk”, then brush it with cooking oil like canola, vegetable or peanut oil. Many outdoor chefs we know buy an extra cooking grid that they use just for fish and they keep it super clean.
Preheat to medium heat. 350 degrees if your grill has a numeric temperature control or to medium heat if it doesn’t (like on a gas grill). Once the grill is fully preheated, brush the grid with oil again, and put the fish on. See special hints for gas and charcoal below.
Cook the fish turning once halfway through the cook time. If you’re using the “8 minute rule” a good way to do this is go 3 to 4 minutes on the first side, flip it and then adjust the rest of your cooking time depending on how cooked it is when you turn it.
Use a heated platter! Remove your fish to a heated platter when it’s done – for some reason, fish loses its heat much faster than a beef steak or pork chop. Head that off by preheating your platter in a warm oven and putting the fish on it right off the grill. Don’t overdo it though—you’re going for warm, not hot.
Use a Cast Iron Skillet. For smaller fish filets like panfish and tilapia, use a cast iron skillet on the grill, brushed well with oil. You’ll still get the great grill flavor but your fish won’t fall apart on the grill grates. Avoid cooking on aluminum foil—it just doesn’t work as well as a good cast iron skillet.
Cooking fish on a Wood Pellet Grill
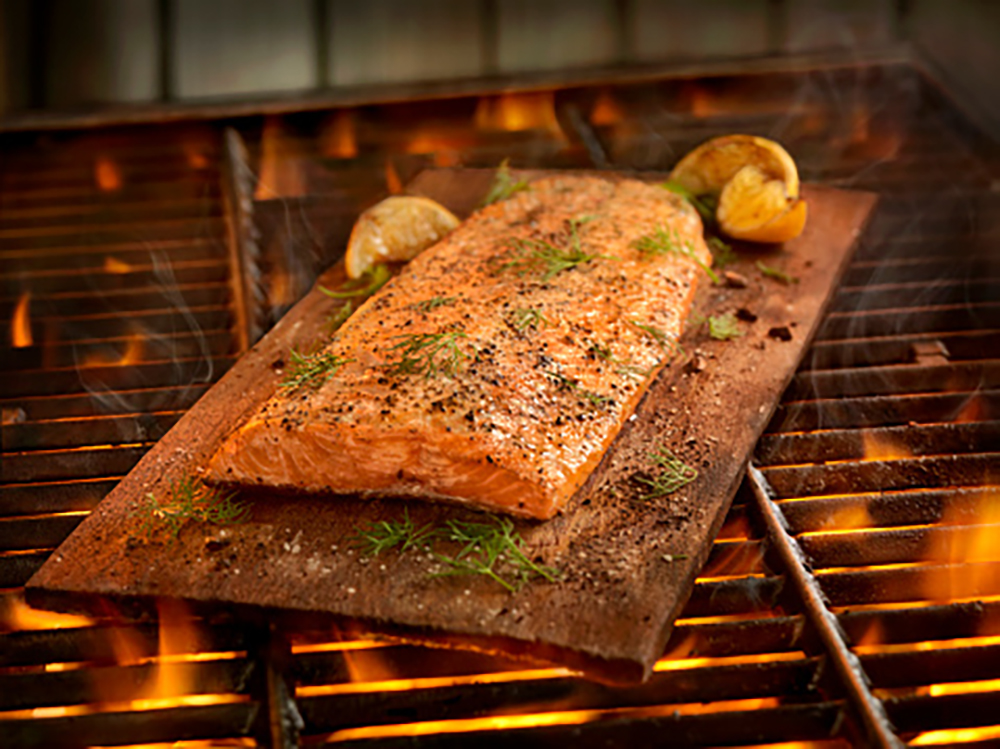
First of all, start with the right wood fuel—Griller’s Gold! Fish, interestingly responds well to both mild and sweet woods like the Griller’s Gold Cherry or Fruitwood blend, and also to stronger flavors like Hickory, Smokehouse Blend, and Competition Blend. The key is to just experiment and learn what you like best. From there, follow the hints above!
Cooking fish on a Gas Grill
The good news is that with a gas grill it’s easy to manage heat – but get to know your grill’s heat—learn what burner setting gives you 350F. Also, you can get the great taste of wood fire grilling by using Griller’s Gold pellets in your grill. There are perforated tubes and boxes on the market that work great on gas grills—just fill them up with your favorite Griller’s Gold wood fuel pellets and put them below the grate on the flame deflector bars.
The heat from the gas flames will light off the pellets and you’ll get great smoke flavor! If you don’t have a pellet tube or box, the “cigar” method below works well too.
One additional hint for best success—preheat the grill with all burners lit, then when you put the fish on, shut off the middle burner(s) and put your fish there—you’ll get a good sear as the grid will be hot from the burner being on, but that area will cool a bit and the grill will act more like an oven. Then follow the rest of the above hints.
Cooking fish on a Charcoal Grill
The same reasons that make charcoal fun—the “meat/fire/good” equation, the heat, etc. can also make it tricky with fish. Here are 3 quick hints that are additional to the ones above.
Use less charcoal, less charcoal = less heat. For a typical regular-sized “kettle” grill (like a 22” Weber kettle), use about 25 briquettes or a half-chimney of charcoal—you’ll get about 350 degrees of temperature from it.
Set up for indirect cooking. Concentrate your lit charcoal on one half of the grill, and cook on the other side—this is more “oven” like but it will yield the best results.
“Cigar method” Use Griller’s Gold pellets for extra flavor. Place a cup or so of Griller’s Gold pellets in the center of a doubled piece of aluminum foil, roll into a closed “cigar” shape (closed at both ends) and poke several holes top and bottom in the foil. About 4 or 5 minutes before you put the fish on, put the “cigar” directly on your coals. You’ll get great smoky wood-grilled flavor! You can also use a smoke tube or box like above.
Quick & Tasty Recipes for Grilling Fish
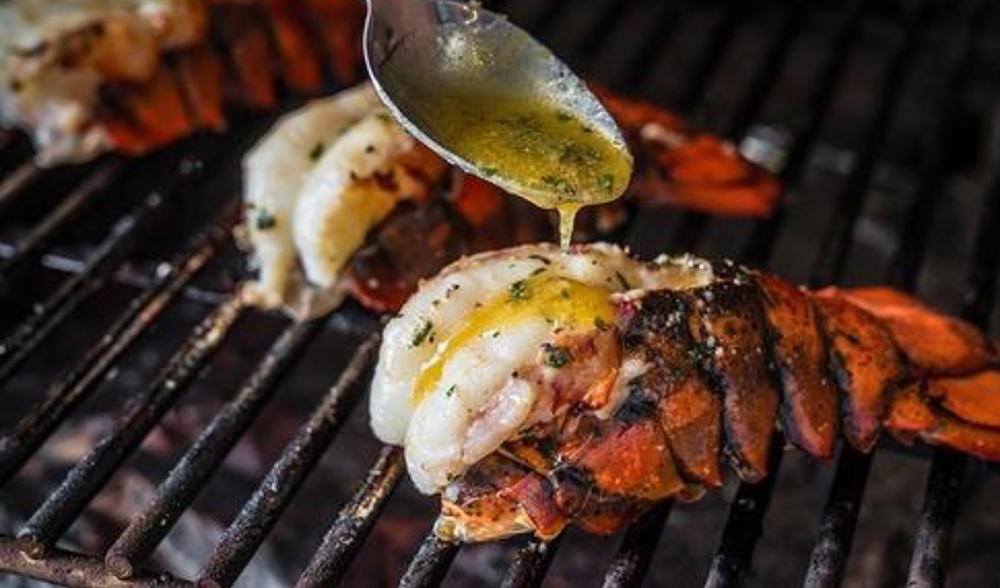
Garlic Butter Shrimp, Lobster, or Scallops
Melt a stick of butter and add, whisking well:
juice of ½ lemon
2 cloves of minced garlic
½ tsp Old Bay seasoning
½ tsp paprika
Brush over the shrimp, lobster, or scallops prior to cooking and after turning. By the way, this is delicious on just about any fish—and for that matter—chicken breasts too!
Spectacular Lobster Tails
Using strong scissors or kitchen shears, cut the underside of the tail from where it joins the body to just short of the flippers. Spread the tail apart and then pull the meat out of the tail without detaching the flipper end, then close the shell underneath it. Spread the meat out over the tail. Prepare your grill per above instructions. Brush well with the garlic butter mixture above and place on grill meat side down.
Grill for about 2 ½ minutes, then turn the meat side up, brush with more garlic butter mixture and grill until just cooked through, time will be dependent upon the size of tails.
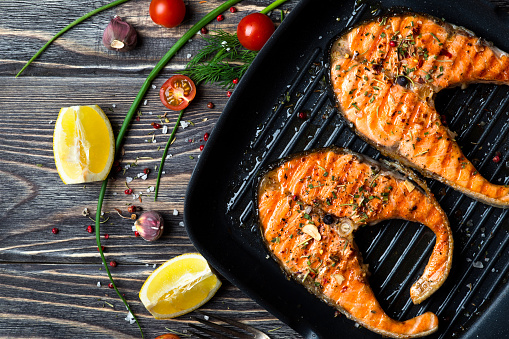
Chili-Brown Sugar Salmon, Grouper, or Trout
Prepare your grill and your portion of your fish for cooking. Mix together:
2 T brown sugar
1 T chili powder
1 tsp kosher salt
1 tsp black pepper
Brush your fish filets with olive oil and then sprinkle well with the seasoning. If cooking skin-on fish, just season the skinless side. If your fish is skinless, season both sides. Place skin side down (without skin, it doesn’t matter), cook 3 minutes, then turn and cook until fish is done to your liking. This preparation is also great on freshly caught lake bass and walleye.
“Blackened” grilled fish
Purchase a good quality blackening seasoning like Paul Prudhomme’s Cajun Redfish Magic. Melt a good quantity of butter and brush your filets (Chilean sea bass, redfish, grouper, mahi-mahi, catfish, bass, walleye, even salmon are all great this way) with the butter and then season generously with the blackening spice. Grill as usual, brushing with more butter at the turn.
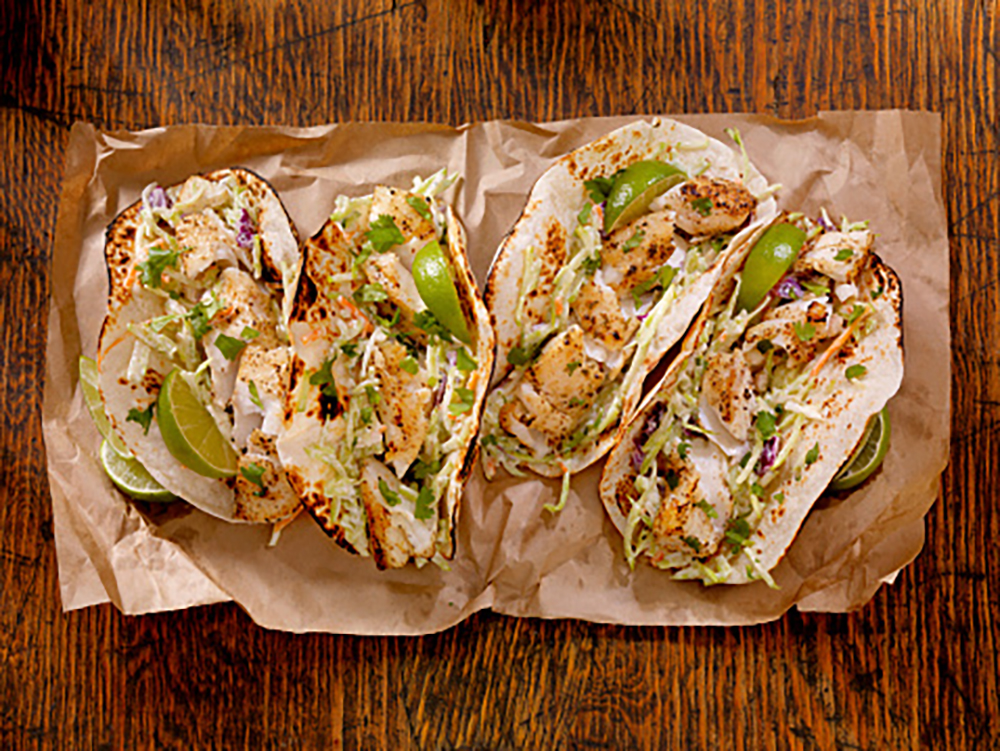
“Bright and Tasty Tilapia”
While this recipe is great on tilapia, it’s also great for other small-filet fish like panfish or even perch filets.
juice of 1 lime
2 cloves of garlic, minced
2 T fresh cilantro chopped fine
2 T olive oil
Whisk the above ingredients together and brush over your fish. Let marinate for 5 minutes (no more or you’ll wind up with ceviche!) then onto your pre-heated grill. If you’re feeling confident in your skills, cook directly on the grid, otherwise put into a preheated cast iron skillet on the grill—no more than 2 minutes on the first side though!
Turn and cook until done—probably only 2 or 3 minutes more. Serve immediately!
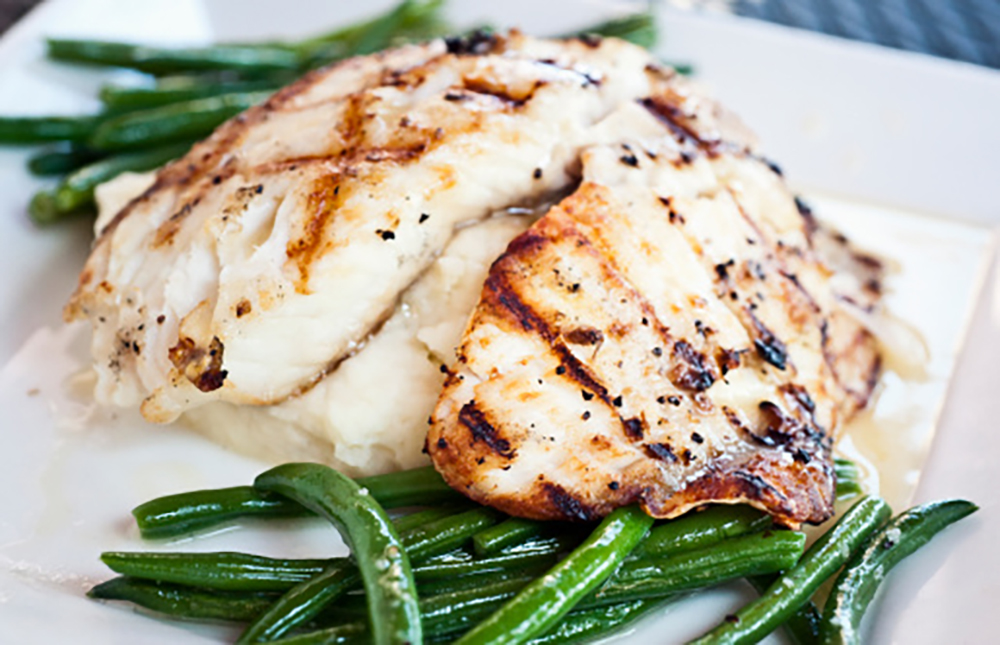
Super Simple Chilean Sea Bass
While not inexpensive, Chilean Sea Bass (aka Patagonian Toothfish) is one of the best flavored fish there is. And if you don’t feel like popping the big $$ for it, this recipe works great on cod as well.
Melt a generous amount of butter
Brush your fish servings with the butter, then season gently with salt and pepper
Grill to done, brushing with more butter at the turn.
Since Chilean Sea Bass tends to be thicker, measure the thickness of your filets and adjust cook time accordingly, going a bit longer on the first side.
Results: Mmmmm. Perfect. Seriously, nothing better than this!
And that’s it! Get your fish on, and use Griller’s Gold pellets for outstanding flavor!
Is there a more special occasion than a home-cooked holiday feast? We think not. So we’d like to encourage you to look at holiday grilling as the celebration it is. Pick elegant foods to cook on your pellet grill before you put them at the center of your holiday table. Thanks to Peter Jautaikis, whose The Wood Pellet Smoker & Grill Cookbook inspired us, we propose:
Hickory
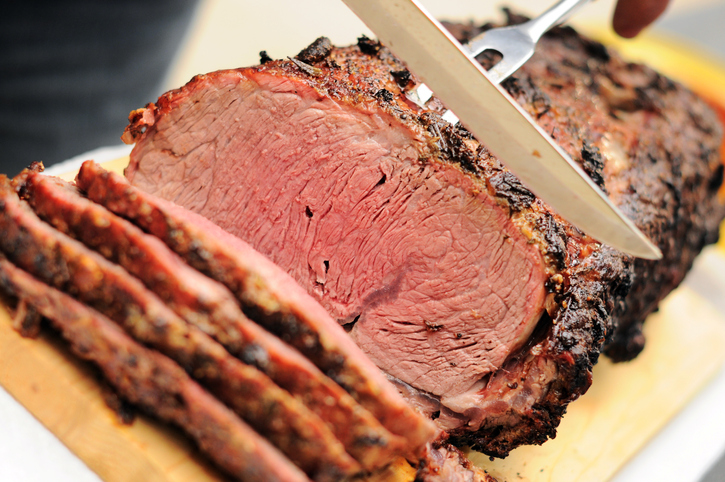
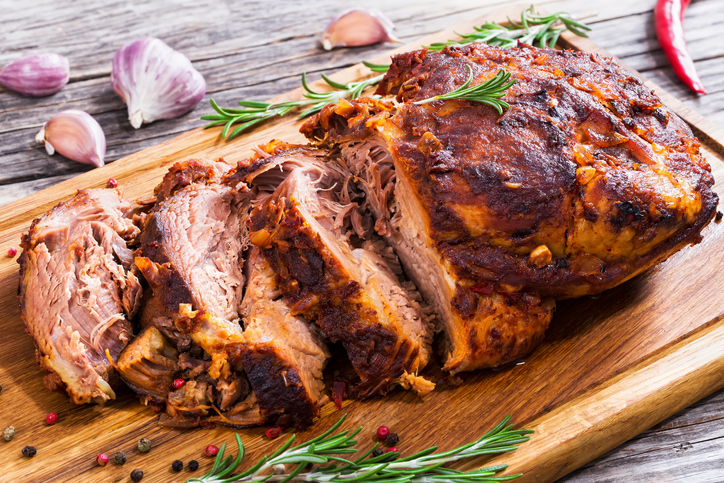
New York Strip Roast for the main event
A NY strip steak is always a good call for the meat lover; it says ‘steakhouse’ and that means quality. Now picture serving thick NY strips cut right from the roast which has been smoked over hickory pellets after being rubbed with garlic and the prime rib spice mix of your choosing. The flavor is luxe, the meat is a treat. Consult your butcher to order the right size for your holiday gathering, and plan for time to marinate, smoke, and rest the meat. Something this special is worth the effort.
Now that you’ve gone all festive for the main dish, let’s move on to starters and sides
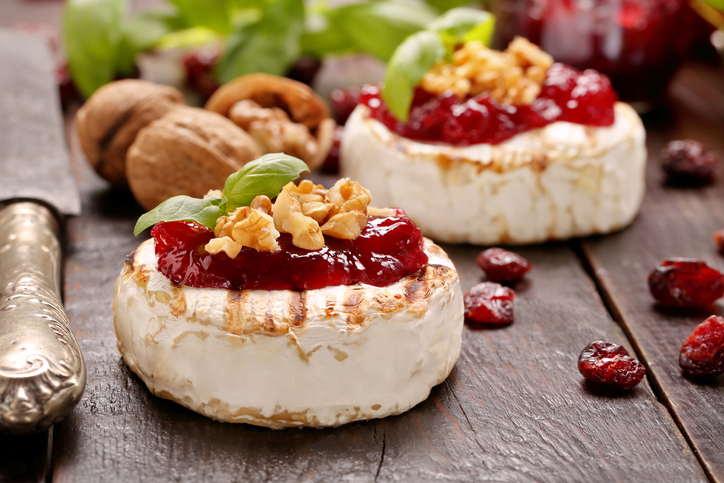
This grilled Brie with cranberries looks seasonal and tastes very rich and indulgent, too. We recommend you spread it on grilled bread slices.
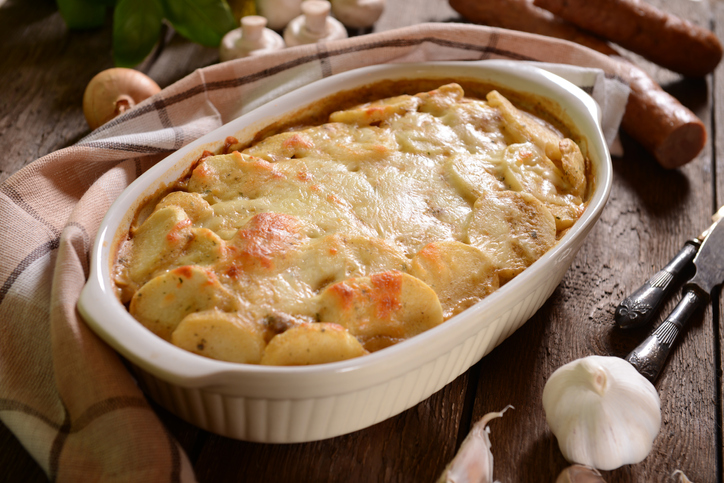
Finally, for a perfect starch to accompany that fancy NY strip roast, take scalloped potatoes to a whole new level with perhaps the ultimate luxury ingredient: the truffle.
Add earthy truffle flavor to your favorite scalloped/au gratin potato recipe with a dash of white truffle oil, which is available at many groceries and specialty food stores this time of year. Or, choose a cheese that includes truffles, and grate into the cream sauce. Get even more savory by layering mushrooms into the baking pan. If you want to skip the improv and have all those ingredients mapped out in one easy yet fabulous recipe, try Chef John’s Truffled Potato Gratin from Allrecipes.
We wish you and yours all the joy of feasting this holiday
season.
What’s not to love about Bluetooth BBQ thermometers? They generally cost around $50—a nice price for a holiday gift that’s perfectly situated between ‘stocking stuffer’ and ‘splurge.’ They help you stay warm indoors while your food heats up on the grill outside. They connect to your phone. And they earn a whole lot of enthusiasm from consumer reviewers. This helpful grilling technology also has big fans on the Griller’s Gold team—here’s how Scott summarized the joy.
“We love using ours so you can keep an eye on what’s happening without being tied to the grill or smoker.”
This is what real-world users say they’re glad to get from
these grilling tech goodies:
Convenience and comfort—you monitor your outdoor cooking without standing outdoors. (This is especially welcome when you’re preparing slow-cooked, smoked foods.)
Ease of use—from quick setup on your mobile phone to clear temperature readouts on the screen.
Digital precision—those temperatures are going to be exact. With multiple probes, you can even check the temps in different parts of a larger cut of meat to ensure consistency.
Four top-rated Bluetooth meat thermometers
These 5 picks all get five-star ratings on Amazon. (There are plenty of additional choices that get four-plus scores, too.)
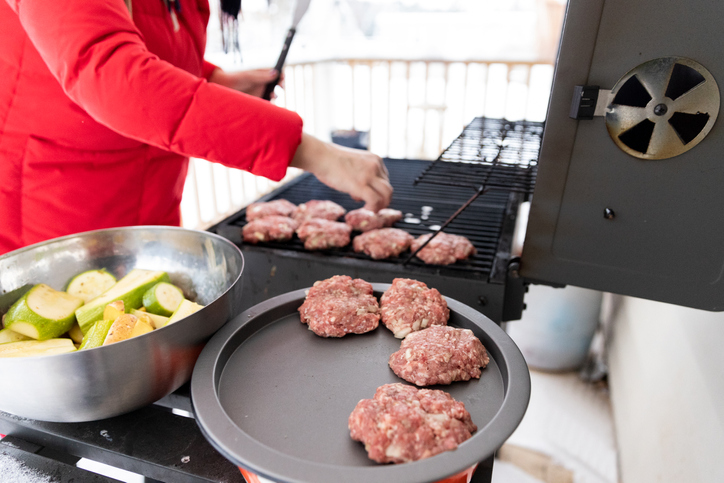
While you’re thinking about winter grilling, here are some best practices when the weather outside is frightful . If your holiday gift shopping list needs some more items, check out our griller gift list post, updated for Christmas 2019. And send Griller’s Gold pellets to your friends with wood pellet grills; you can order on Amazon.
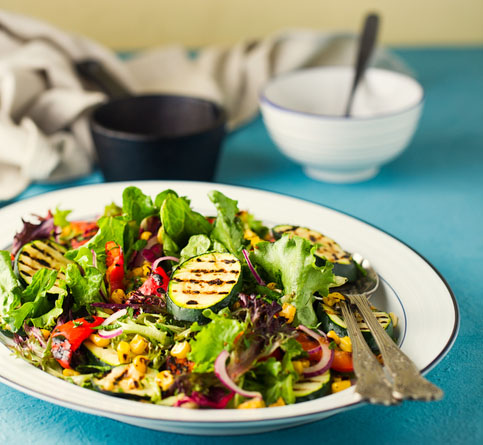
This summer, we’re serving up three great side dishes. They’re going to look kind of familiar, but each is deliciously distinct from its traditional picnic ancestor. What makes these sides the next generation of outdoor dining goodness? It’s simple. The main vegetable in each is grilled.
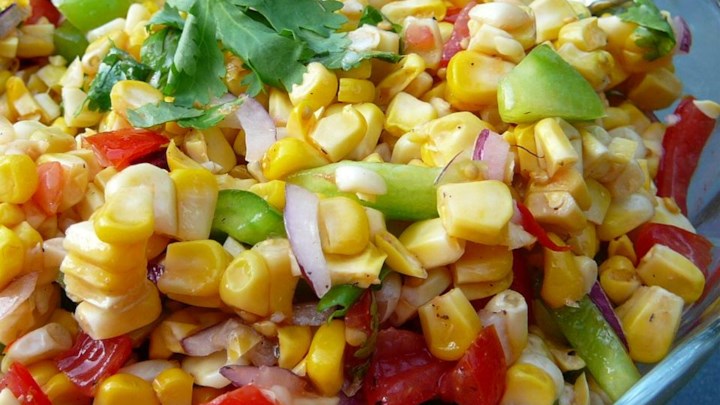
Corn off the cob
First up, check out this grilled corn salad. Why leave corn on the cob once you’ve roasted it up? Slice it off and then mix it into a bowl with fresh, colorful ingredients like green pepper, tomato, and red onion, with a cilantro and olive oil dressing. (From allrecipes.com)
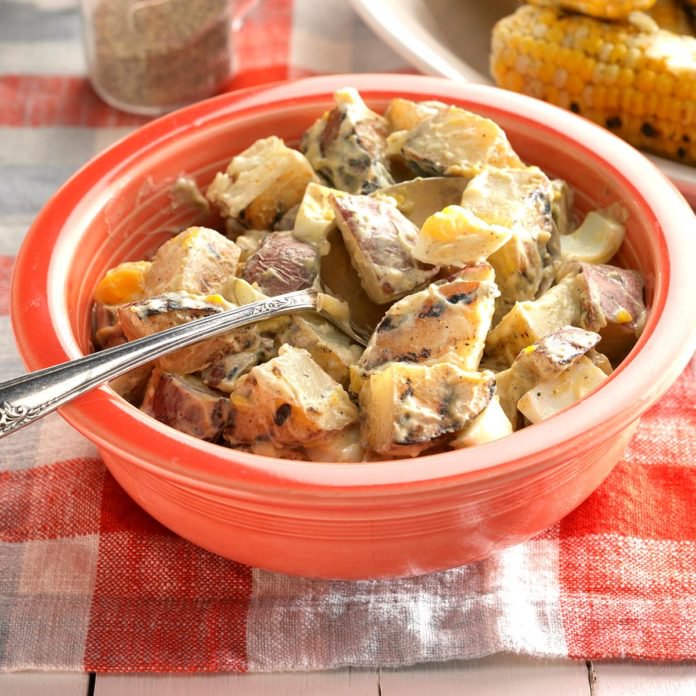
Sophisticated spuds
Next, we have a creamy grilled potato salad. Start by browning and crisping up the potatoes on the grill, then go rich with a dressing of mayonnaise zipped up by pickle juice, paprika, and mustard. Add the crunch of chopped dill pickles and the yumminess of boiled eggs. (From tasteofhome.com)
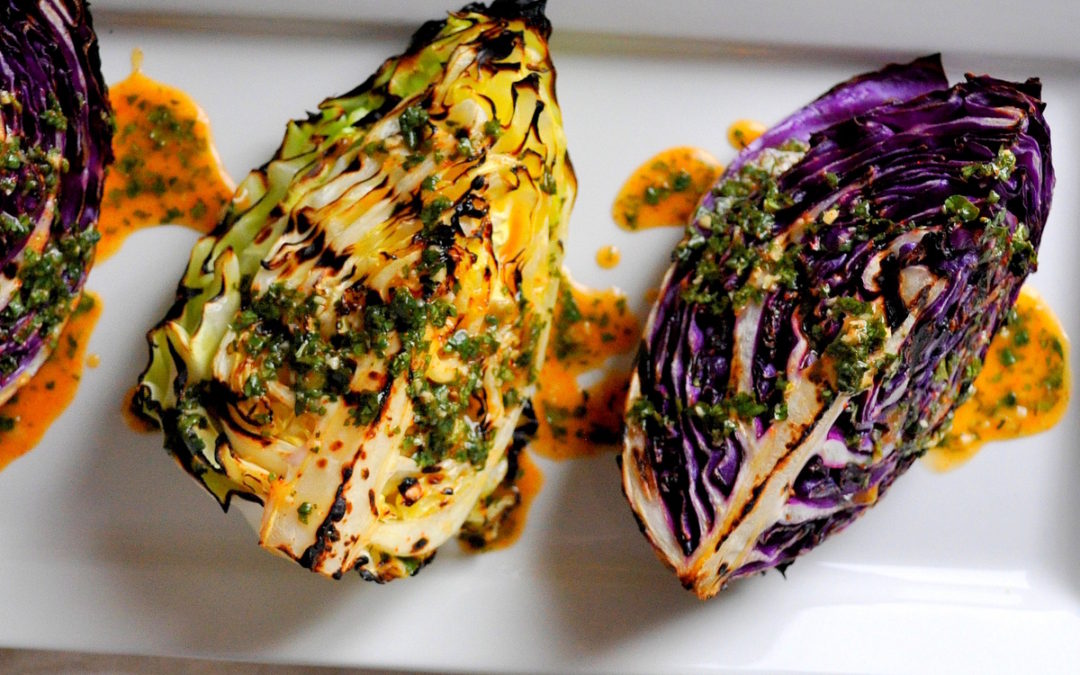
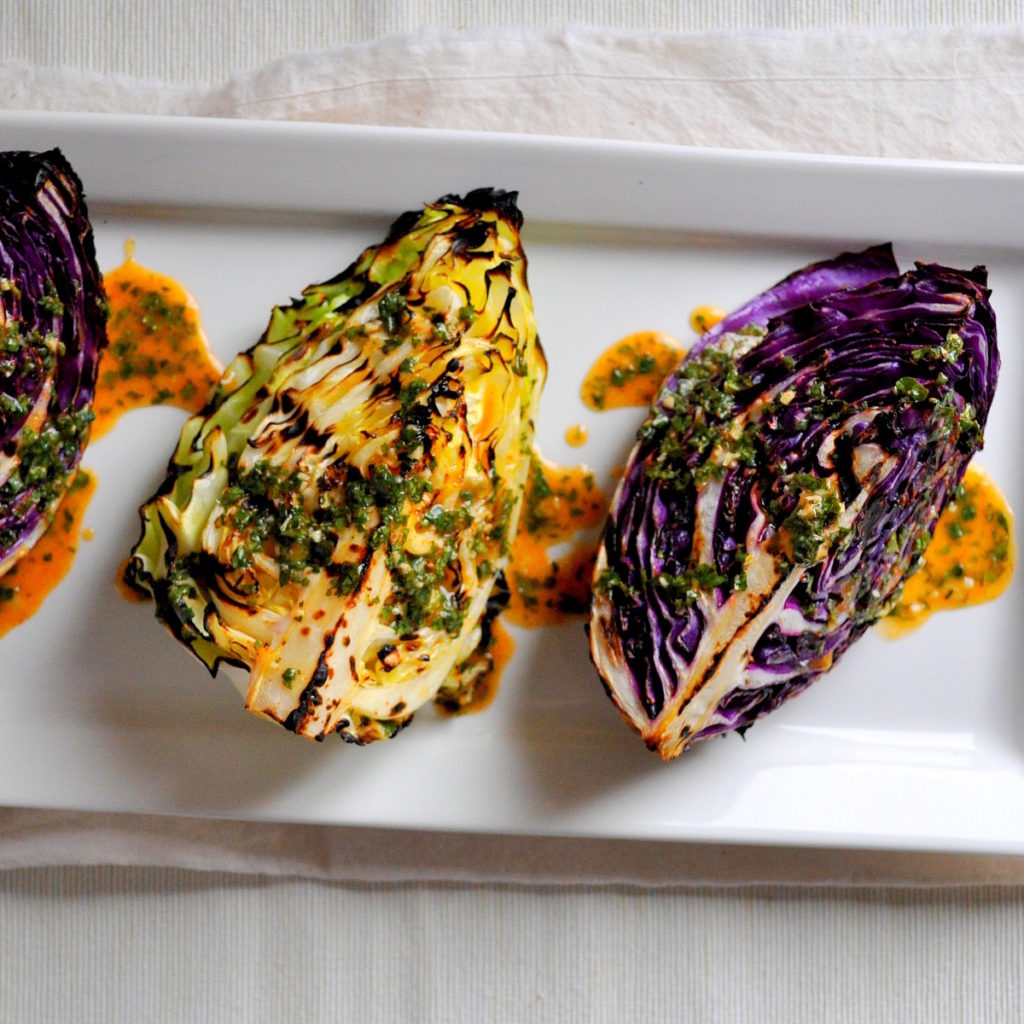
Slaw that slays
Finally, there’s this gorgeous grilled variation on a coleslaw theme, two-toned grilled cabbage wedges with spicy lime vinaigrette. (From breannasrecipebox.blogspot.com)
Learn more about mixing and matching these sides with other items on your BBQ menu here.