by Grillers Gold | BBQ, Grilling, Holiday
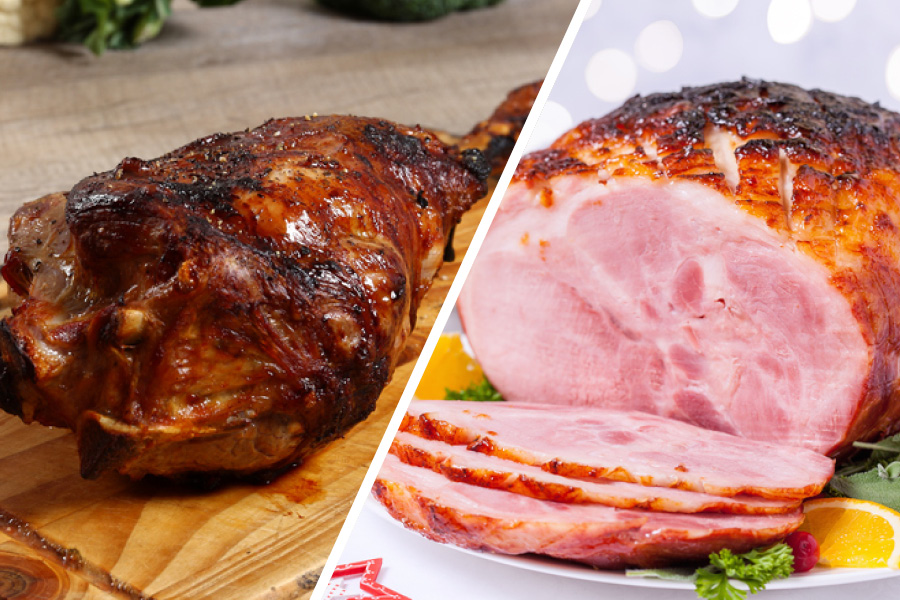
Lamb or ham? That is the question.
Does your family put a leg of lamb at the center of the Easter table every spring?
Keep up the tradition but update it, too, by grilling your leg of lamb.
Methods of cooking lamb
- Many top chefs strongly encourage boning the leg before grilling. Butterflying is the most common suggestion. Leave it to your butcher to carefully separate the meat from the bone while keeping the main pieces connected. Then the meat is spread out in one piece, like a butterfly opens its wings. Try this recipe here.
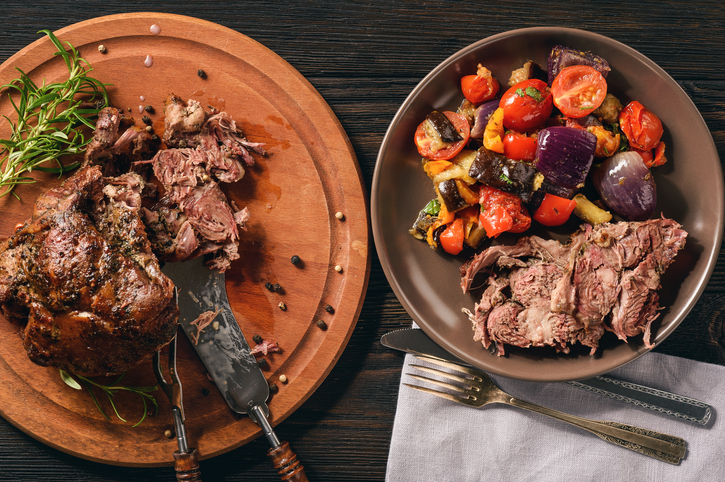
- Instead of butterflying a boned leg of lamb and cooking it whole, slightly more ambitious home cooks carefully cut along the four natural muscle separations, which are visible, and pull the four pieces apart. Grilling the lamb this way contributes to the most delicious crust, makes it easier to determine the doneness of pieces of different thickness, and simplifies carving. Try this recipe here.
- For a simpler approach, grill the leg bone-in. Because this cut is so thick, it requires slow cooking over indirect heat – perfect for the wood pellet grill. Try this recipe here.
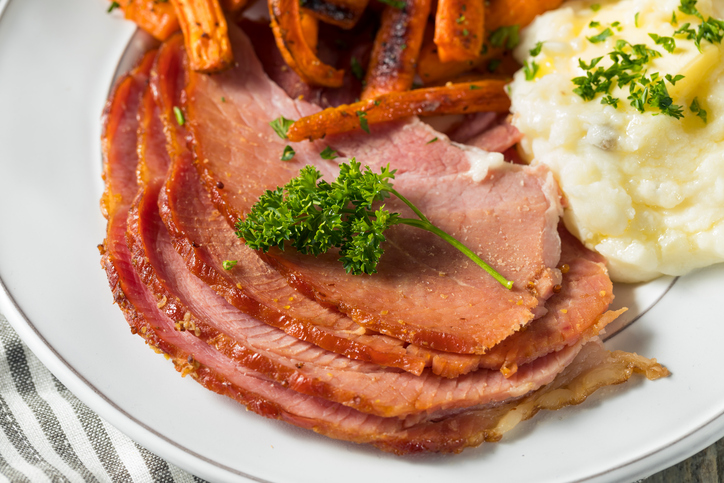
If your family typically cooks ham for the holiday, this year, try smoking one for yourself.
Learn how at HowToBBQRight.com Here’s what these savvy smokers say:
“You can indeed smoke a ham from scratch. It’s a pretty interesting process, involving brining for 12 to 14 days, among other things. If you want to save the time but want to add your own delicious smoked flavor in your own backyard, start with a pre-cooked ham.”
The site’s Malcolm Reed offers this great recipe (also shown here in video) to get the juices flowing. Malcolm combines a pre-cooked ham, a homemade sweet glaze, and an expedited smoking technique. Yum.
Malcolm adds this tip:
“Since we’re essentially “double-smoking” the ham, you should stay away from using stronger woods like Hickory or Oak. These will easily overpower the natural flavor of the ham. Place the ham on the smoker and check it every hour. If the outside starts to look a little dry, use some of the glaze for basting.”
The entire cooking time should take about 2 ½ – 3 hours.
Whether you choose lamb or ham, enjoy a great grilled holiday.
BACK TO BLOG
by Grillers Gold | BBQ, Flavor
We’ve all been there. You head to the kitchen late Saturday morning, excited to start on that special BBQ meal you’re planning for the evening. And then you open the recipe in the cookbook or magazine or on your tablet and look up ‘marinated flank steak’ or ‘cooking time for BBQ brisket.’ Whoa! Marinating takes hours or overnight. Or you were planning on using a slow-cooking method like smoking. (Think ‘pig roast’—there’s a reason the professionals spend serious time with their meat on a spit.) Either of these favorite kinds of grilled foods take hours and hours for which you need to plan.
Marinating
Marinating is done for two reasons: to tenderize meat and to add flavor. Let’s focus on the important tenderizing function, because that’s what impacts cooking time.
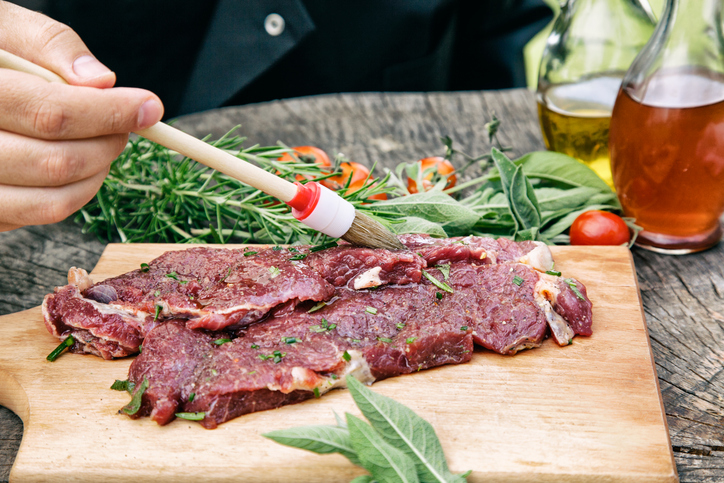
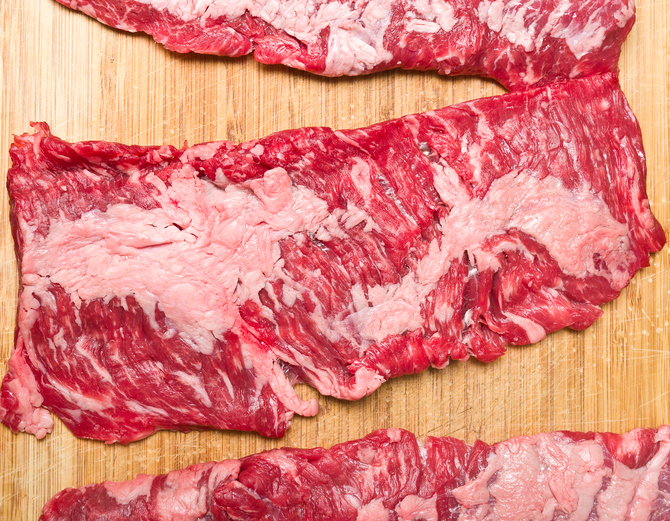
Active enzymes and acids in marinating liquids help break down connective tissue in the meat, thus tenderizing it. So certain cuts of meat that contain a lot of connective tissue really benefit from a marinade.
- Acid marinades might be based on wine, lemon, lime, or orange juice, vinegar, buttermilk or yogurt.
- Enzyme marinade ingredients include papaya, pineapple, kiwi and Asian pear.
Contact is key: the marinade must meet as much of the surface of the meat as possible. This is why flat cuts of meat, like flank steak, benefit most from tenderizing marinades. Don’t marinate thicker pieces of meat, because they’ll just get soggy on the outside while staying tough on the inside. See Slow Cooking (below) for thick cuts. Place meat in a heavy zip-top bag with the air squeezed out and turn it often to be sure all surfaces meet the marinade. Refrigerate to avoid the growth of harmful bacteria. Let meat come to room temperature before cooking.
More tender meats with less connective tissue benefit from a short bath in a marinade, mainly to add flavor. Chicken is a great example. Marinating chicken breasts will not impact your cooking schedule.
Chuck eye, flank steak, skirt steak and hanger steak are all good cuts of beef that do well when marinated. Other suggestions include bottom round, eye of round, and top round. Bonus: they’re much less expensive than more tender, ready-to-grill strips or rib eyes. Try this flavorful carne asada marinade recipe.
Fun reminder: The liquid in which meat marinates is called marinade (marinate is the verb, marinade is the noun).
Read more about the science of marinating here.
And remember, the same general principle of allowing ample time applies to soaking dried beans or brining meat. Check your recipe and put yourself on schedule to start your prep as far in advance as needed.
Slow cooking
The cooking process itself helps break connective tissue down into gelatin. So slow cooking is ideal for thicker cuts that can’t be penetrated by marinades. While crockpot and oven braising also require you to budget your time, we’re going to focus on outdoor slow cooking here, namely smoking. When you’re smoking meat, it will be on your grill for upwards of 30 minutes per pound. Some cuts can be on the smoker for 20 hours.
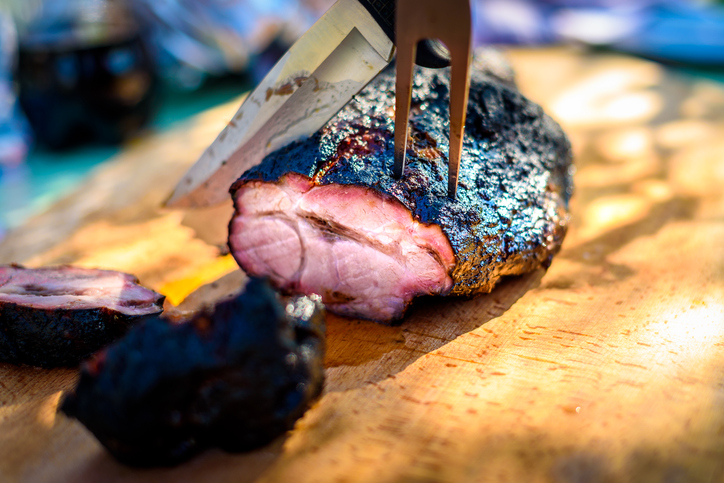
Low temps and long cook times combined make smoking a great technique to employ for tender, really flavorful meals from those less-expensive, low-quality cuts. (Those pricey lean cuts of meat would dry out when slow-cooked.) Beef brisket, pork shoulder, and ribs are inexpensive cuts that wouldn’t be palatable unless they’re slow-cooked, so they’re often smoked and barbecued. Try this feisty recipe for smoky, spicy pulled pork using the boneless pork butt cut.
Make a plan and take your time to really enjoy your grilled and smoked meats. And read about a great meal that’s always worth the time you invest, grilled turkey
And a shout out to a most informative source for this article: TheSpruce.com
BACK TO BLOG
by Grillers Gold | BBQ, Featured, Grilling
From the fine Floridians at Grill Junkie, here’s a whole lot of hot info on grilling and smoking in cool spells. Yes, even in Florida, wind and weather can challenge the outdoor cook. You need to make adjustments to help ensure success. Read this excerpt, check the forecast, and get ready to BBQ with attitude all year ‘round.
The Prime Directive: Keep your BBQ hot enough to smoke, no matter how cold it is.
Smoking in cold temperatures presents several challenges. When operating a charcoal, gas or wood-fired backyard smoker, the weather is always something you need to pay very close attention to. When temperatures are very low you need to be especially careful. Reaching and maintaining ideal smoking temperatures can be difficult at best, and very hard if the wind is blowing. Metal smokers are particularly challenging because the metal acts to conduct the heat quickly away from your BBQ, grill or smoker.
Temperature
The first thing to imagine is the temperature difference. On a nice warm summer day, you might find that your smoker, sitting in the sun, has an internal temperature around 100° F. without a fire in it. Open the lid to get things ready and maybe it cools down to 85° F. If your target temperature is 225 degrees F. then you need a fire that will increase in smoker temperature by 125-145° F. If, on the other hand it is a cold, overcast day the internal temperature of your smoker could be 35° F, meaning you need to increase the temperature by 190° F. This is near twice the temperature difference. This means that you will have to have better temperature control, a hotter fire, and more fuel than usual on hand.
Wind

Now we need to take into account the wind. The most important thing about wind is the direction relative to your smoker. Some smokers, like the large offset smokers, have a definite airflow path. Air comes into the smoker through the firebox and moves across the cooking chamber and out the stack. If the wind is blowing in this direction the increased airflow will burn your fuel faster and can cause high-temperature spikes. This means keeping the vents closed down more than normal. If the wind is going in the other direction it can stop the airflow entirely and keep the heat out of your cooking chamber. It is best to let the wind add to the airflow and not stop it so if possible position your smoker so that the wind is blowing in the direction of the natural smoker airflow. It is very important to keep an eye on the wind as well as your smoking temperature.
Precipitation

Of course, it’s very difficult to smoke in heavy rain but cold weather also brings the occasional unanticipated light rain or snow. When water hits your smoker it is going to evaporate. Evaporation pulls heat from your smoker. If, during the course of a smoke you find some rain or snow falling it is time to open up the vents, getting things stoking, and bring up the temperature to offset this heat loss. Keep a close eye on it and you should be okay.”
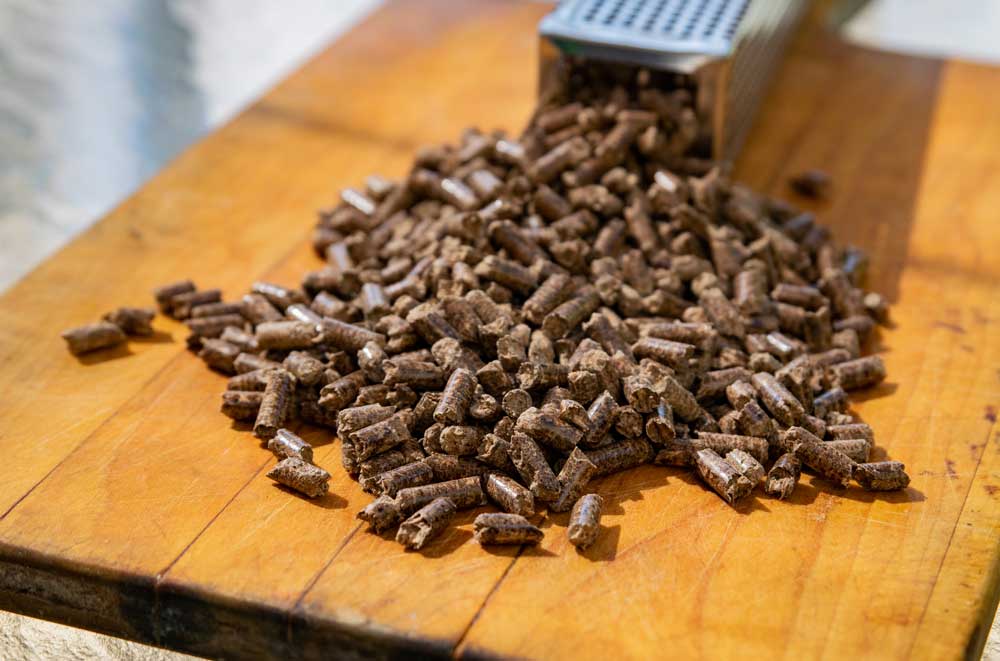
Read more about the technical aspects of smoking and cooking on a wood pellet grill in this article about Indirect Heat.
BACK TO BLOG
by Grillers Gold | BBQ, Flavor, Grilling, Holiday
Here are two things about wood pellet grills that should fill your heart with gratitude this Thanksgiving:
1. True indirect heat, just like your oven.
2. Great taste unlike any appliance in your kitchen can deliver.
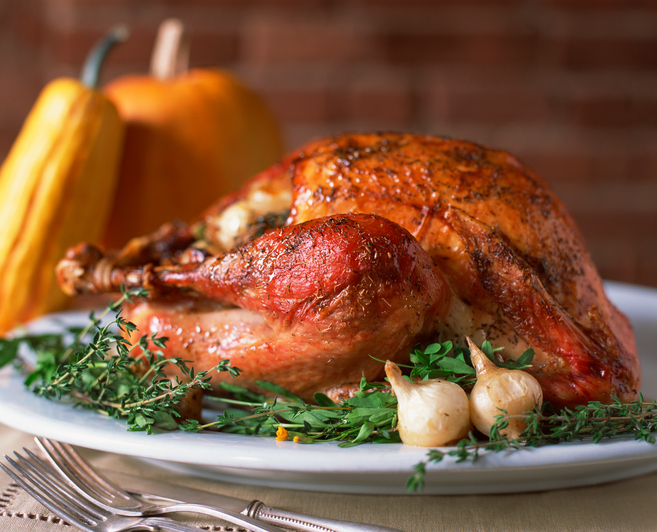
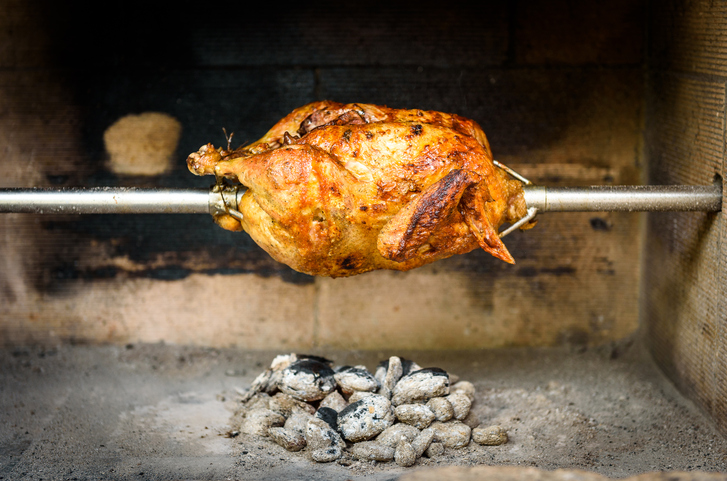
Do something different with that bird this Thanksgiving!
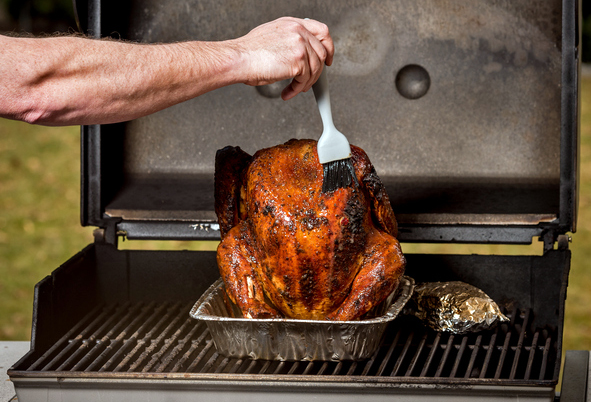
Roasting your Thanksgiving bird in the oven is the traditional way to go. But if you’re looking to take Thanksgiving to the next level, why not riff on tradition this year, using your wood pellet grill’s special super powers? You can get that crispy-skin-on-the-outside/juicy-meat-on-the-inside goodness, and fantastic flavor, too.
Indirect heat isn’t just something any grill can deliver. A wood pellet grill, however, controls temperature and circulates heat evenly throughout. There are no hot spots, no undercooked areas, no variation from one place in the bird to the next. It’s all good with indirect heat!
What’s even more amazing is the flavor. Wood pellets add a smoky taste that’s special. And simply delicious.
Let’s get cooking!
The farm-to-table experts at the University of Illinois Extension spell out simple turkey-on-the-grill guidelines here. And depending on how big your grill is, you can also fit in a few baking dishes on the side. Anything that you could cook in the oven, you can bake on a wood pellet grill. Try this scalloped potatoes recipe for a classic Thanksgiving side. You can also check out some tasty autumn vegetable dishes here for more inspiration!
Smoky flavor for everyone
If you’re one of those confident outdoor cooks who knows how to get indirect heat on your conventional grill, you can get smoky wood pellet flavor for your bird with a smoker box or tube. Thanksgiving is a great time to get smokin’ without a wood pellet grill.
Enjoy the holiday and thanks for reading!
BACK TO BLOG
by Grillers Gold | BBQ, BBQ Pellets, Grilling
While America justly claims barbecue as its own today, there’s history to this cooking technique. And it goes way back in time – to the days when cavemen (and women!) discovered the kind of miraculous combination of meat and heat. The idea of roasting food over a fire was embraced by many ancient civilizations around the globe.
First, let’s travel back about 200,000 years.
That’s the age of the cooking artifacts found near Carmel by archaeologists at Israel’s University of Haifa. The evidence there tells us that large, meaty hooved animals, such as cattle, deer, and boars, were on the menu. Our ancestors would have probably first just thrown the meat into an open fire, then eventually discovered the effectiveness of green, inflammable wooden skewers to hold the meat over the flame.
Things inevitably got more sophisticated.
(It’s a long way from a green stick to a wood pellet grill!) Wooden frames held larger pieces meat far enough away from the flame so as not to incinerate dinner and cookware alike; this approach mandated slower cooking times and added the flavor of smoke. With that taste came preservative qualities: smoke reduces the moisture that allows bacteria to grow, so perishable meat could be smoked, dried and salted for future consumption. In ancient China, India, and Japan, smoking food has been popular for thousands of years. Ceramic urns for smoking are called kamados in Japan and tandoors in India.
The use of spits and metal implements in ancient Greece is documented in Homer’s Iliad and The Odyssey. Then there’s the gridiron, the precursor to today’s grill, which was developed early in the Iron Age. Note that the Greeks basted the meat in wine and salt, and feasted outdoors. Sound familiar?
Look in the Hebrew Old Testament books of Exodus and Leviticus for references to burnt offerings of animals. The smoke rose to God, but the meat of the animals was eaten by Moses and company.
Fire plus food – that’s the simple, but absolutely brilliant idea.

No wonder barbecue has endured, and pleased the world’s palates, through the ages. If you’re looking to add even more flavor to your BBQ, check out our bbq series, Sauces of Honor: Chicken and Sauces of Honor: Pork.
Thanks to our source for these historical facts, amazingribs.com. If you want to dig into a great big fun serving of their barbecue scholarship, visit the site and check out the best-selling Meathead: The Science of Great Barbecue and Grilling, authored by website founder Meathead Goldwyn.
Come back to this blog for more history lessons in the months ahead!
BACK TO BLOG
by Grillers Gold | BBQ, BBQ Pellets, Flavor, Grilling
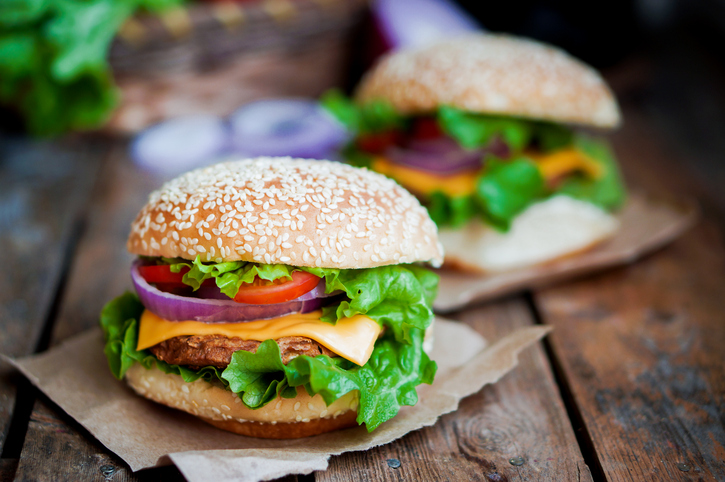
The burger is the American griller’s favorite food choice. Surveys from organizations like National Cattleman’s Beef Association and Hearth, Patio and Barbecue Association say so year after year. How much better can it get for the burger? A few food writers at the Detroit Free Press and Huffington Post shared their tips and perspectives to do better by your burger. Here’s how to upgrade your hamburger grilling game.
Look at all the elements together.
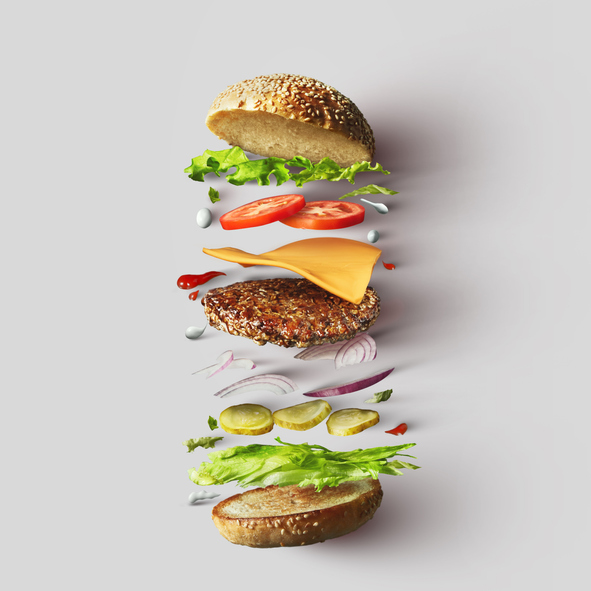
The meat, the condiments, the toppings and the bun. Choose all with equal care. Get creative!
Burger meat needs fat.
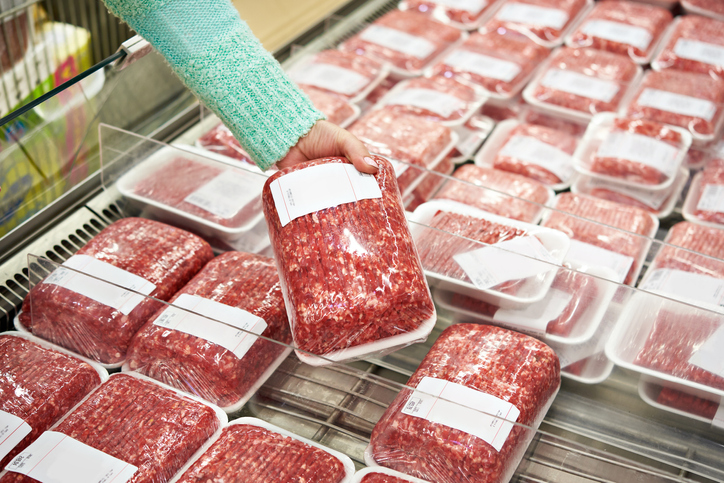
Experts generally recommend a mix that’s typical of ground chuck: 80% lean meat and 20% fat. Ground round is a bit leaner, 85% meat to 15% fat. Ground sirloin is usually labeled 90% lean. If you’re cooking with grass-fed beef, check out these helpful tips here.
Season your meat.

Don’t add too much in the way of ingredients, just spices.
Handle the burger as little as possible to avoid making the meat cook up rubbery.
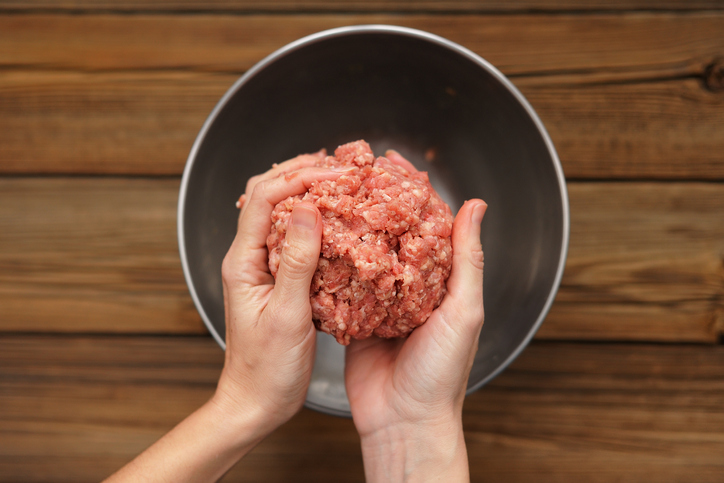
Less is more! Mix the burger meat and seasonings gently, shape patties with a soft touch, and resist the urge to squeeze the juices out with a spatula.
Form the perfect patty
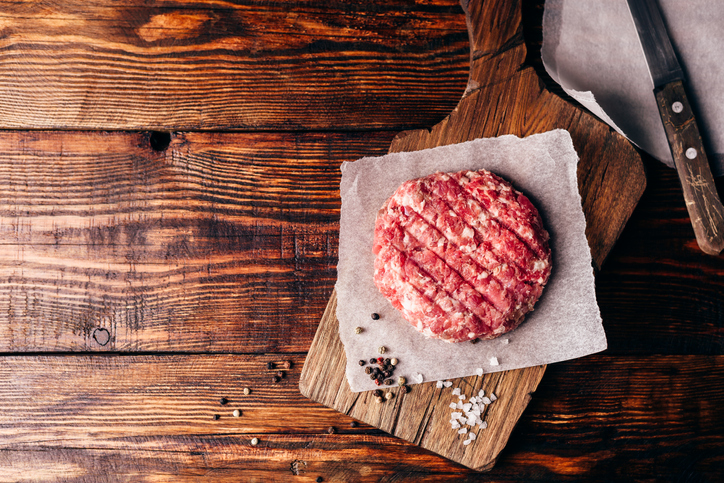
Use about 6 ounces of meat in a patty that is at least ¾” thick and 3-1/2” diameter. Put a little dent in the center of the raw patties with your thumb so the burgers don’t puff up on the grill; it works!
For a great burger using condiments and toppings that come from Greek cuisine, try the Olympian Burger recipe from beefitswhatsfordinner.com
BACK TO BLOG