“Baby Back Ribs”
Doesn’t that phrase just float off the tongue? Make your mouth water? It’s so good a restaurant even made a jingle out of it … “mmm hmmm’s Baby Back Ribs, mmm hmmm’s Baby Back Ribs (barbecue sauce).”
Yet rarely does anything strike fear into the hearts of barbecue enthusiasts like making ribs! (Ok, except maybe brisket …). AND, everyone likes something a bit different – spare ribs, St. Louis cuts, “fall off the bone”, no, with “a good tug”, dry ribs, sauced ribs, auuugh! What’s a barbecuer to do?
What’s to do? Make this recipe of pork baby back ribs. We are positive that a) you’ll love them and b) they will be “better than any restaurant” good. And it’s easy to do.
Easy Pork Baby Back Ribs
First, a caveat – this recipe is for pellet grills. Not exclusively, but … we’ve written it for doing on a pellet grill. If you’re rolling smoke on a charcoal kettle, a bullet or offset smoker, or something else .. well 90% of what we’re going to say applies here, and just know you’ll need to use your knowledge of your gear to do what we’re recommending here. There’s some special notes for you gas and charcoal grillers at the end of the article.
And another thing about this method – you will be shocked by the simplicity of this. You may have heard of “3-2-1” ribs, Texas Crutch ribs, people boiling ribs in advance of smoking (WHAT????) etc., all in the search of perfect ribs. We have found that the best ribs come from a minimalist approach. Set the right temp, season, and rub, onto the smoker, leave them alone until done. That’s it! Aren’t there a few in-between things? Not really!
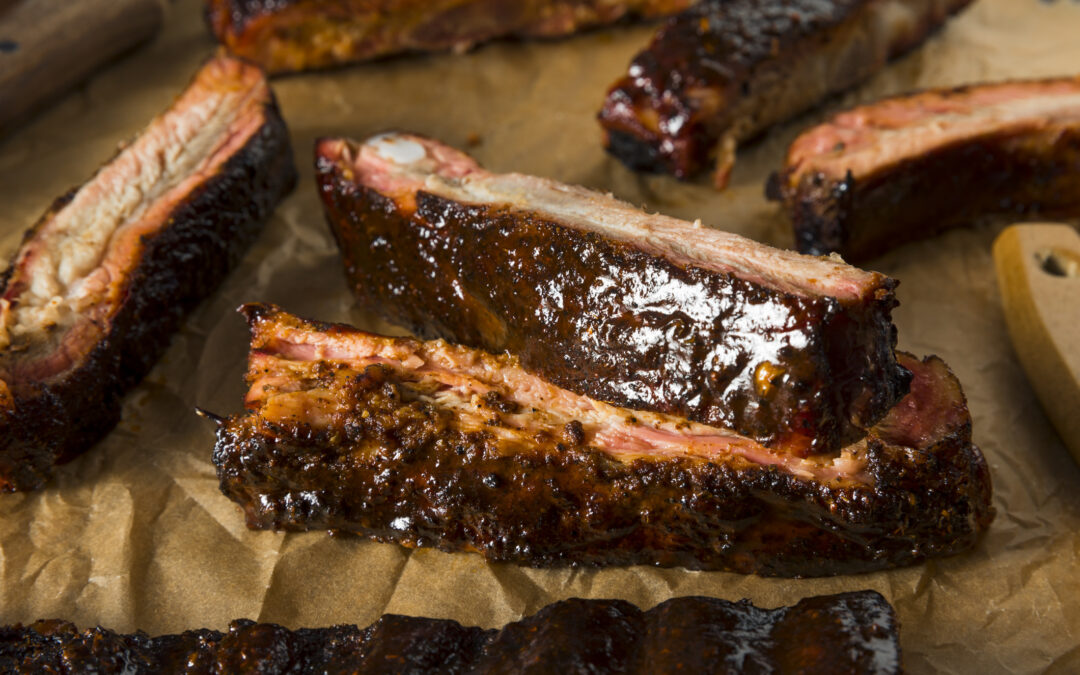
And a final note: This method delivers ribs that pull cleanly from the bone but do have a bit of “al dente” toothsomeness to them. They are NOT fall-apart, fall-off-the-bone ribs. IF you want that result, follow this method below to doneness, then simply coat them with sauce, put them in a roasting pan with a cup or so of beer or apple juice in the bottom, then tightly seal up with foil and bake in a 300-degree oven for 45 minutes. That final oven run will make them fall apart and will still be the best ribs you’ve ever eaten.
So let’s roll smoke:
Buying Baby Back Ribs
As noted above, there are St. Louis Cut ribs, there are baby back ribs, spare ribs, rib tips, beef ribs, etc. We have found that the easiest, meatiest ribs are pork Baby Back Ribs. As implied, they come from the back of the pig, where the ribs join the spine and they include loin meat along with them – the pork loin is actually cut away from these ribs at the butcher.
Ideally, buy baby back ribs that are minimally processed – you can get these from your butcher, but also Costco sells them that way. Minimally processed means just cut and packaged, not soaked/brined or injected with anything. You can tell if they’ve been more processed if there is some fine print on the package about them containing “up to x% solution” – “solution” is a fancy name for saltwater. Now don’t get us wrong, those are fine – you just need to account for that in your seasoning.
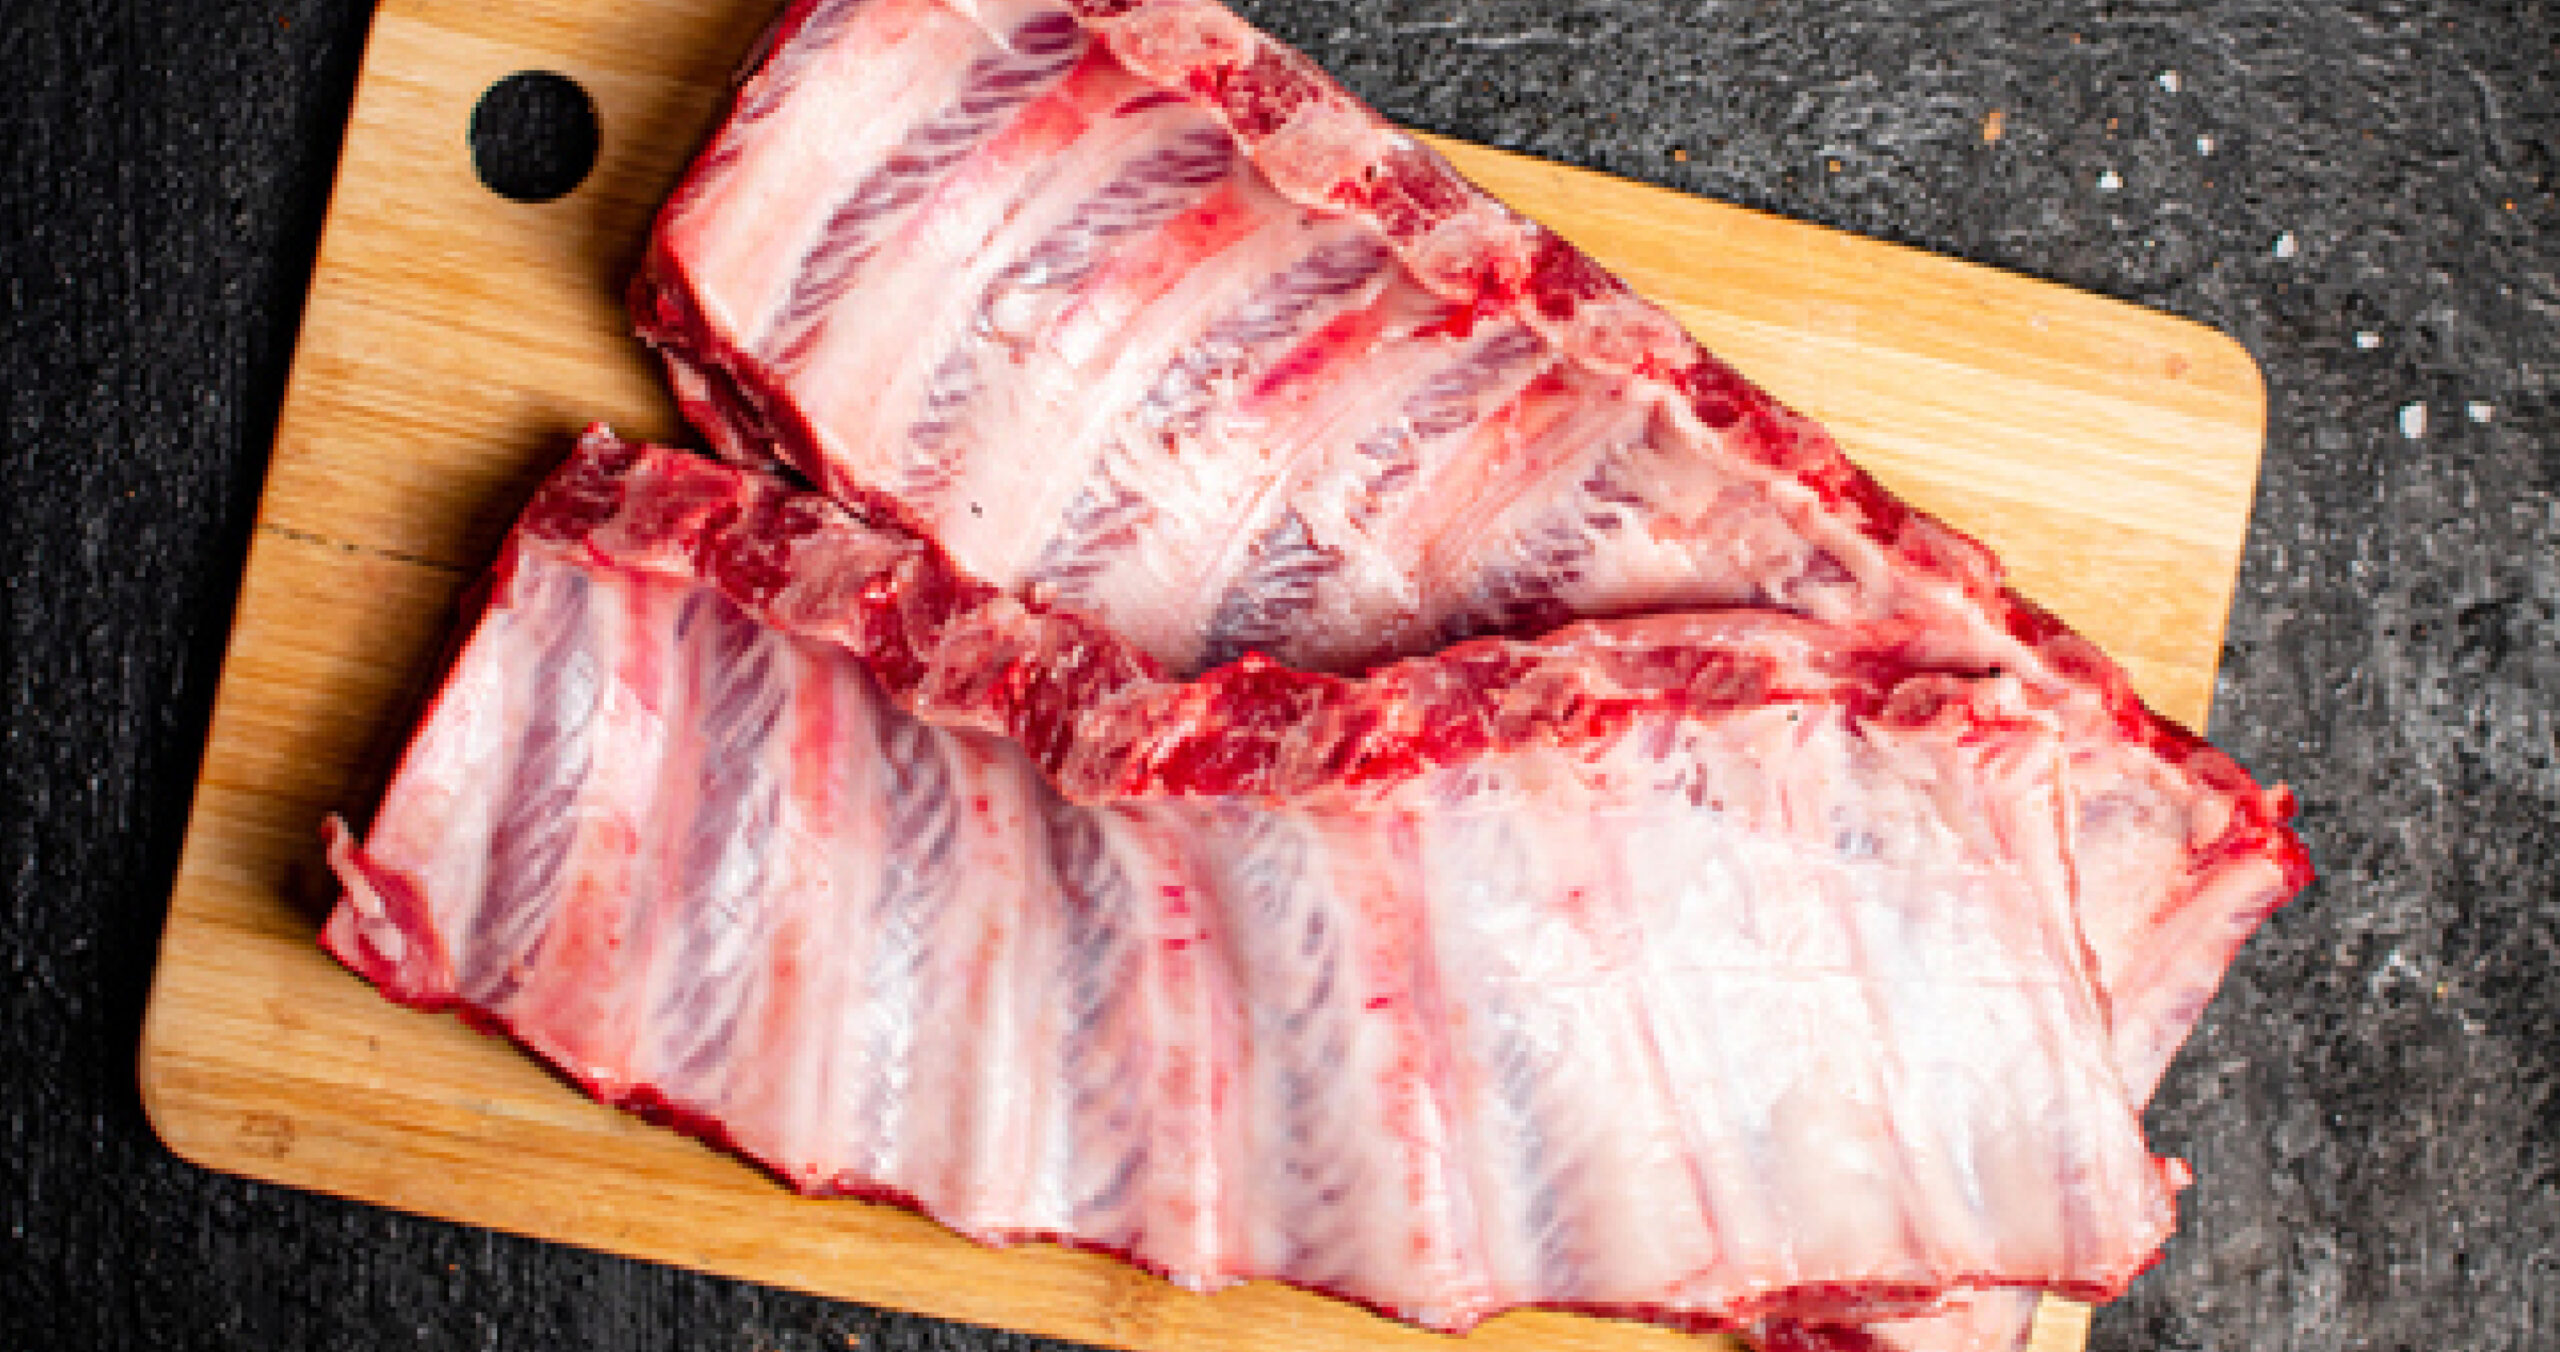
Ribs (baby backs and other cuts) when butchered have a tough membrane adhered to the inside of the ribs. If buying from a butcher, ask them to remove it. Generally, Costco ribs have already had the membrane stripped off but grocery store ribs usually do not. Not to worry, we will show you how to remove it if it’s there.
Also, a great time to stock your freezer with ribs is the week after either Memorial Day, July 4th, or Labor Day – those are all traditional rib-cooking weekends and the stores usually have overstock specials after the holiday. In fact, the ribs pictured in this article were purchased the week after July 4th at only $2.99/lb.
Set up the Smoker!
Again, this recipe is optimized for a pellet grill or smoker, and of course, for best results, use Griller’s Gold Premium BBQ Pellets. In terms of which variety of Griller’s Gold pellets to use – we suggest using your favorite. That said OUR favorite for baby back ribs is good ‘ol Hickory. Griller’s Gold Hickory will deliver that hearty and smoky flavor that we all associate with great barbecue.
Fire up your pellet grill or pellet smoker with an initial temperature of 180 degrees – or, if so equipped, set it on the “SMOKE” setting or “Super Smoke” setting (these are particular features of certain brands/models of pellet grills – don’t sweat if you don’t have that – just set it for 180 or whatever you have close to that).
This initial temperature setting will deliver the most smoke for a great initial flavor shot on your ribs. The meat absorbs the most smoke flavor right at the beginning of a cook.
That pesky membrane …
This is where you learn how to remove that membrane – and it is way easier than you think. It does require a special bit of gear – a standard table butter knife!
Working in the middle of a rack on the inside and holding the knife flat, slip the rounded end of the butter knife under the edge of the membrane by about an inch or so, then lever it up gently (so as to not tear the membrane) to pry up the membrane.
Push it under another inch or two and repeat the levering action, then put your fingers under the membrane, pull out the knife and pull upwards working from one end and then the other – that membrane will pull cleanly away in one piece. The first time we learned that technique, our barbecue minds were blown!
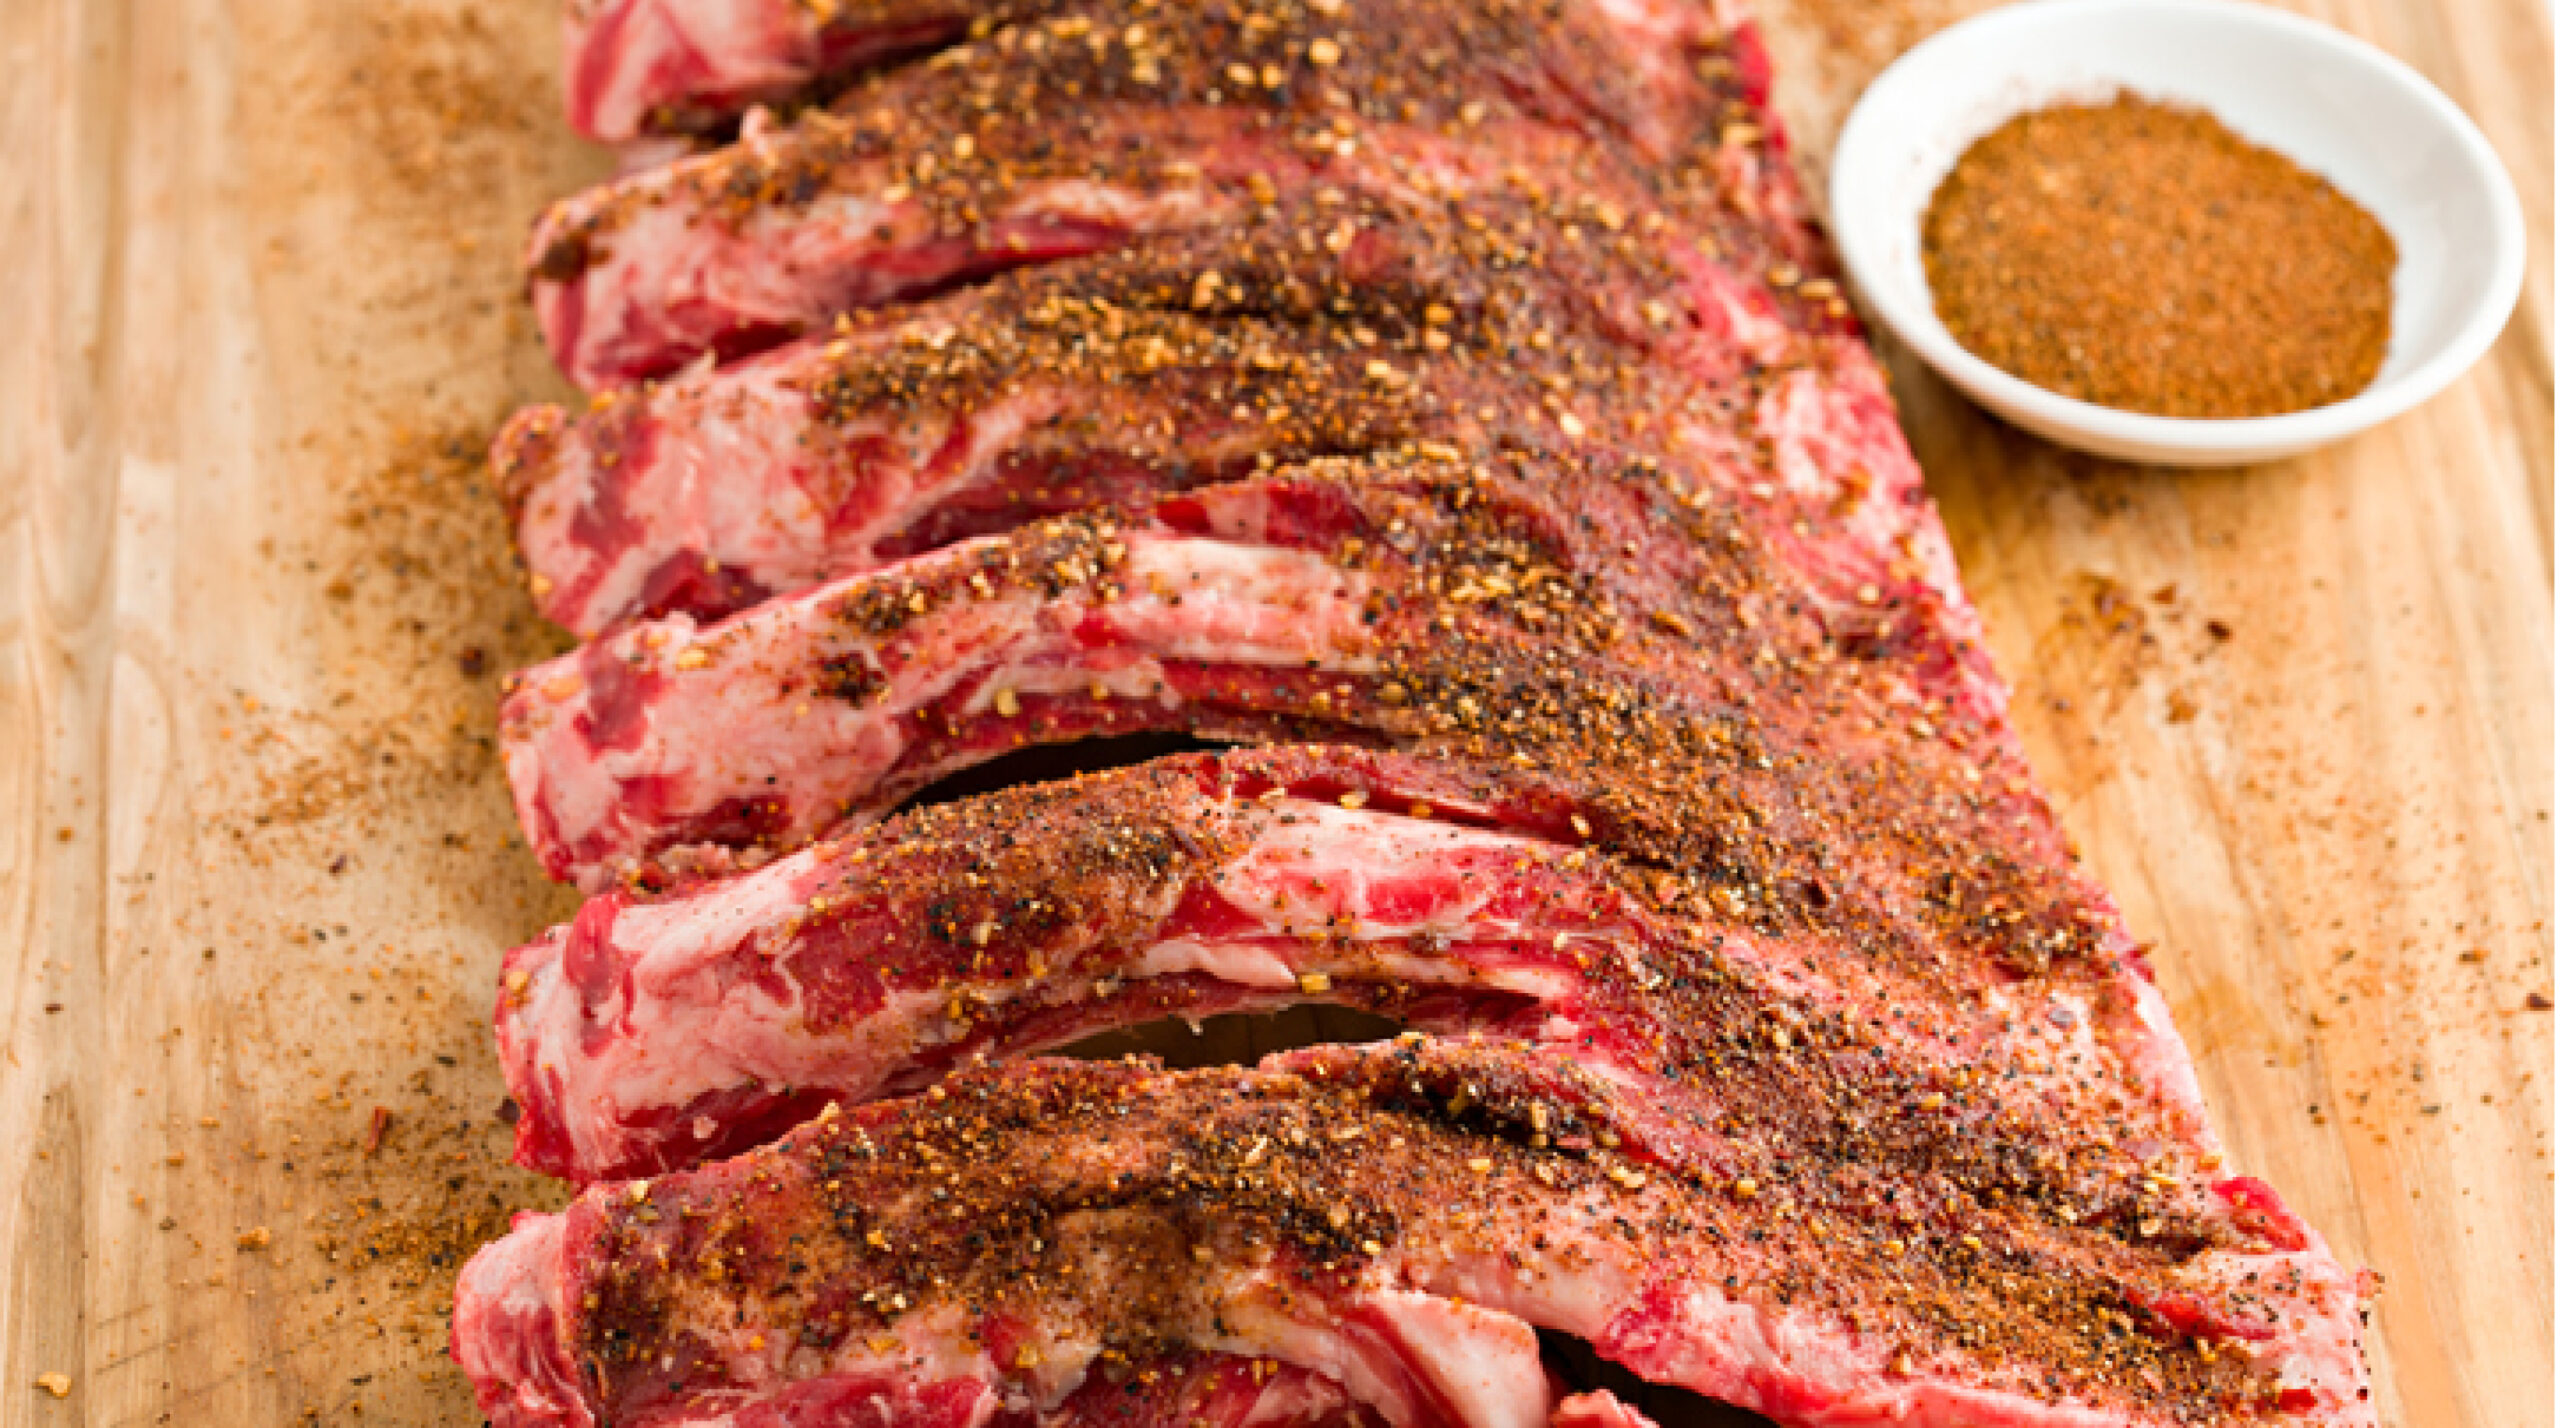
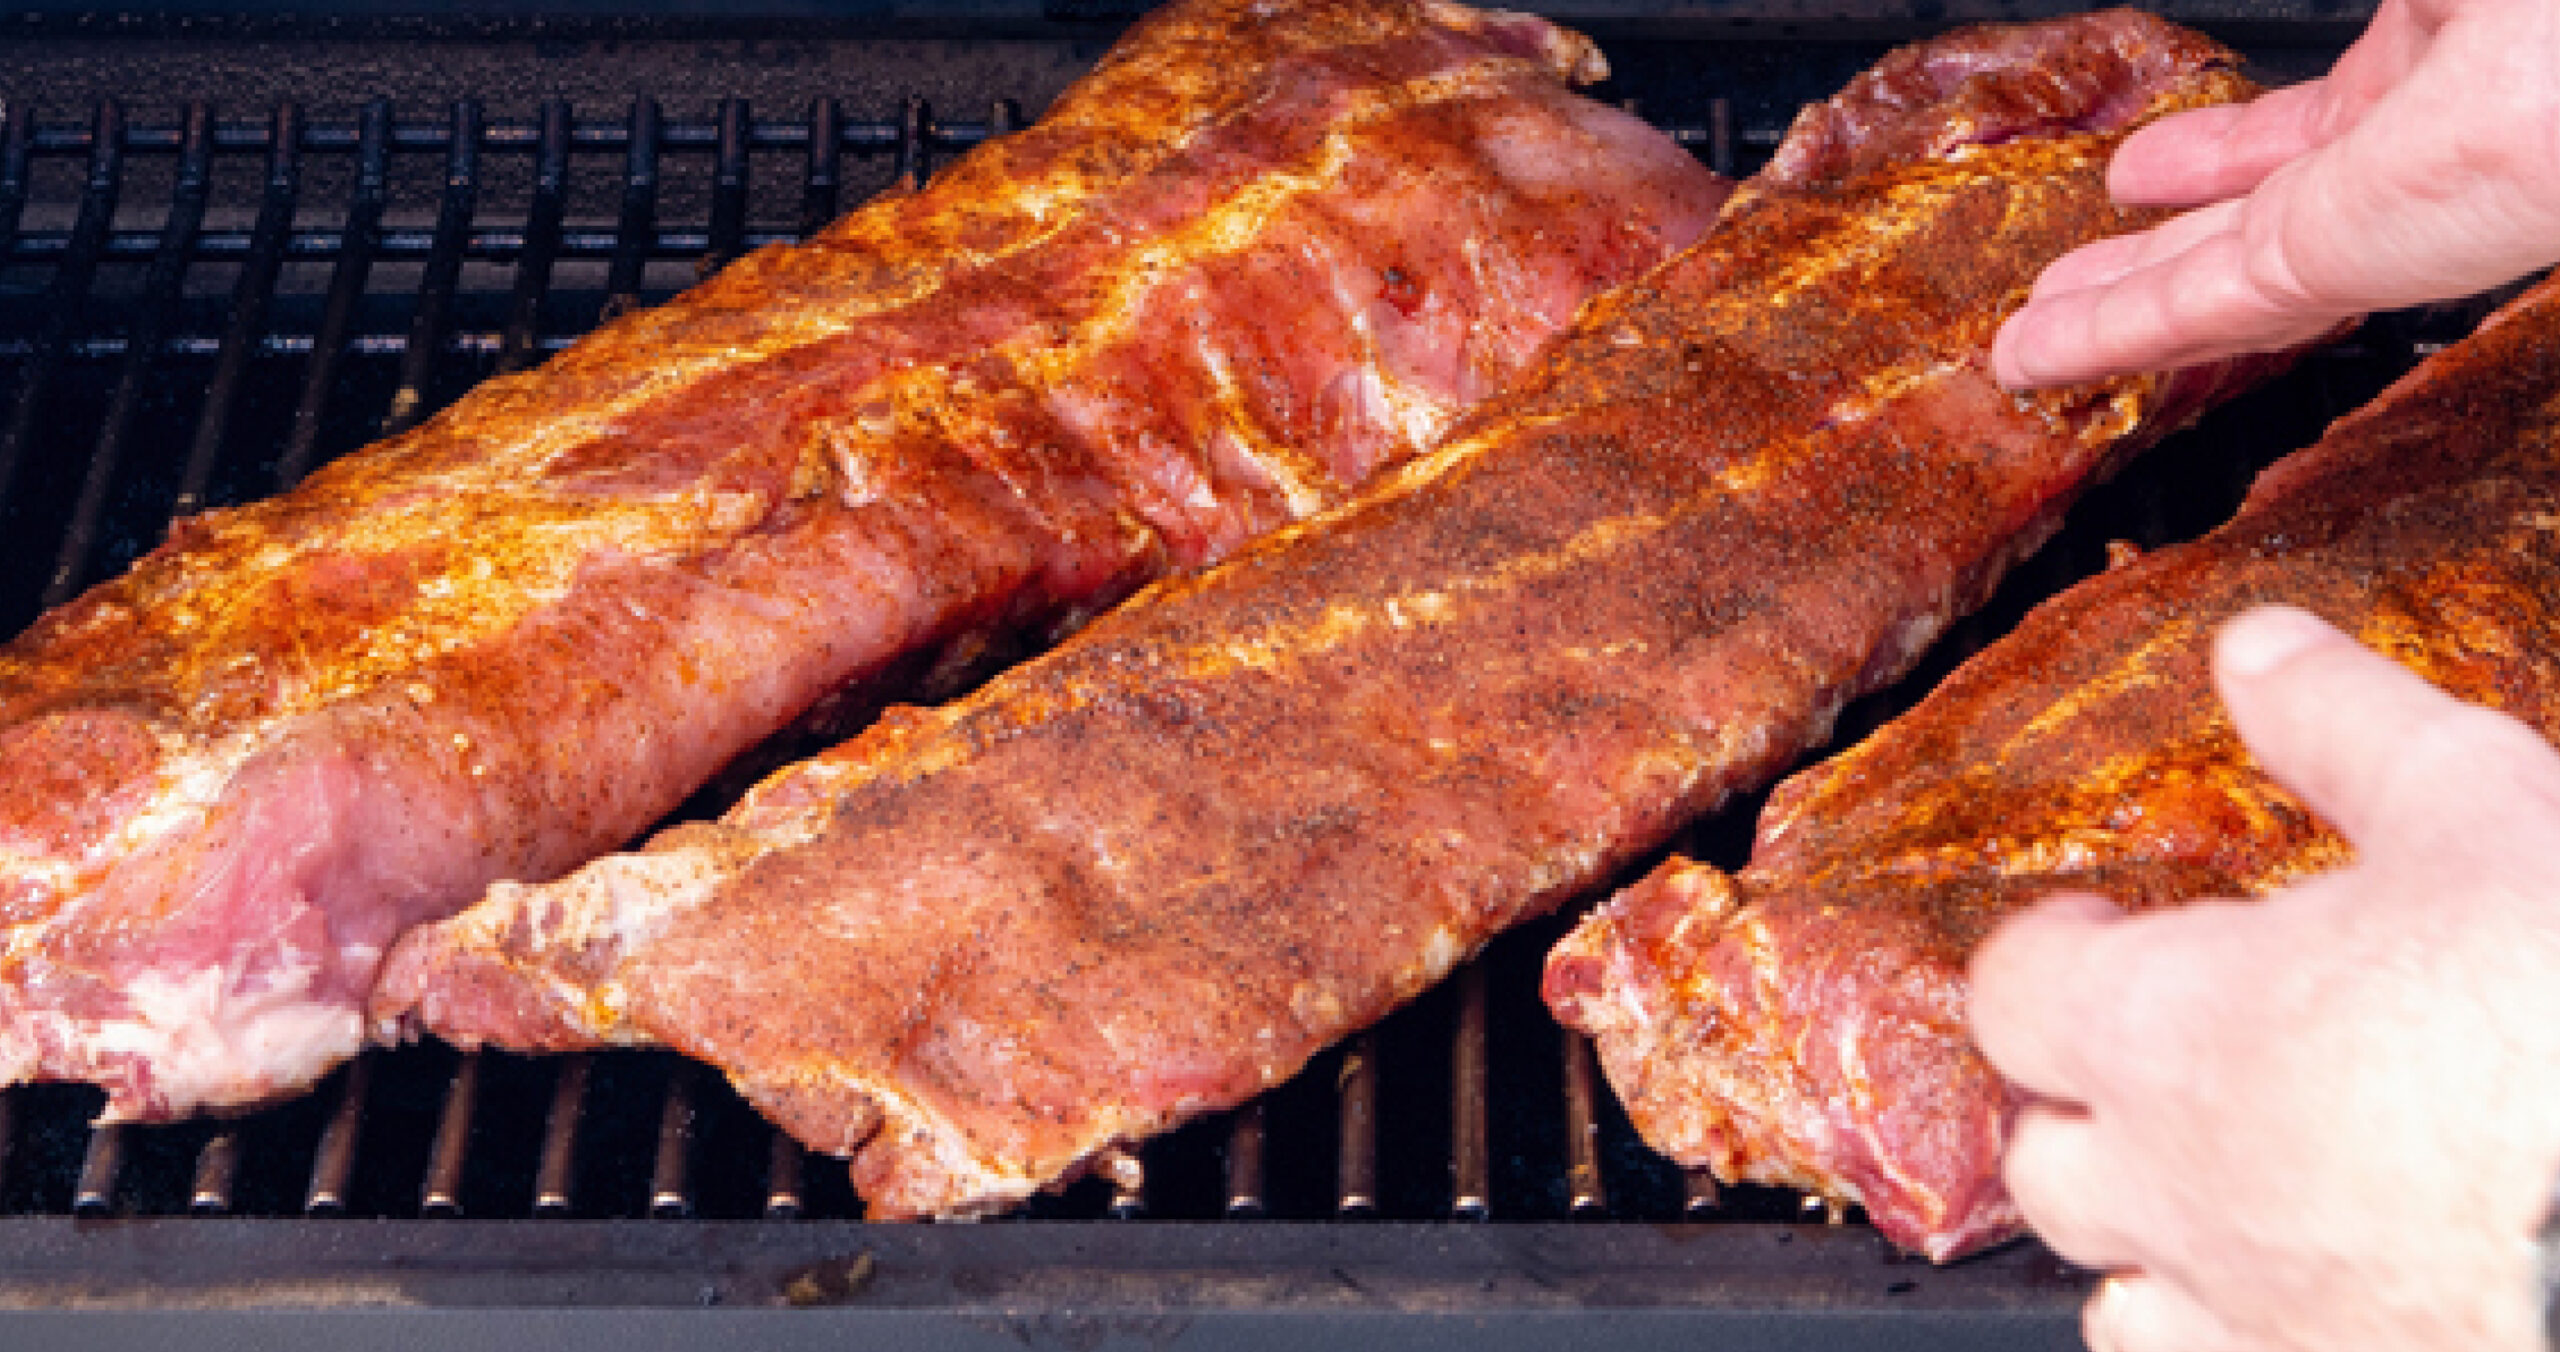
Rub those baby back Ribs!
Now we get into some fun – here, use what you like. If there’s a commercial BBQ rub that you’ve used on pork or ribs and enjoy, well, use what you know. If you’re not sure what you’d like, we suggest using “Memphis Dust” from Meathead Goldwyn.
This peppery rub is fantastic on ribs and other pork. Note, it does NOT have salt in it – so if using it, be sure to season your ribs well with kosher or large grain sea salt as well.
Why kosher salt? It is more minerally-tasting, it doesn’t have the metallic taste of iodized table salt, and the larger nuggets or flakes are easier to control when applying. To apply the rub, first, give your ribs a quick rinse in the sink with cool water and then leave wet – this helps the rub stick and dissolves the sugar in the rub, helping make the bark.
Then, generously sprinkle or shake your rub evenly over the ribs. Note, the game is NOT to hose the ribs down with rub – just use enough to flavor them. Refer to the pictures below to get a sense of how much. If you’re a measuring type, about 2 tablespoons of rub per rack is good.
ONTO THE SMOKER!
Ok, your ribs are rubbed, and your smoker is 180 degrees. Put them on the grate meat side up, close it up, and walk away!
If are doing more than will fit on your grill laying flat, a commercial rib rack works great to hold them edgewise, OR, another good trick is to coil them meat side out – just make sure there is airspace between the racks or coils using either method.
Again, close it and walk away for an hour. After 1 hour, without opening the smoker, increase the temperature of your pellet smoker to 225 degrees – this will increase the rate of cooking without a big penalty in smoke flavor.
Why shouldn’t you open the smoker? Simple rule our grandma always told us: “If you’re lookin, it’s not cookin’.”
The beauty of a pellet grill or smoker is that they run beautifully unattended for hours as long as the pellet hopper is full of Griller’s Gold Premium BBQ pellets. So go away again for 3 hours at this point.
Walk the dog, watch a movie, go grocery shopping, whatever you want – but don’t open that smoker! (Ok, if you do peek the world doesn’t end, but what happens when you do that is your grill’s thermostat will sense a drop in temp and will seek to compensate.
What we’ve found is that the longer stretches of unfluctuating temperature (other than the normal 10-20 degree swings that any pellet grill will do) gives better results.
When are they done? Learn the “Bend Test”!
Baby Back Ribs typically will take between 3 ½ and 5 hours to get to perfection (more about that in a minute). Baby back ribs and other pork ribs are done when they split when doing the “bend test”.
What’s that? Simple – you’re going to pick up a rack of ribs with tongs, with the end of the tongs at the 4th or 5th bone down, and you’ll bounce them – if they are done, the meat will split right at the tongs.
Pro Secret – The Rest
As much as we love the idea of our guests coming to the smoker with empty plates and slicing off part of a slab for them, hot from the smoker, the reality is the best meats, and ribs are right in this club, benefit from a post-cooking rest.
Therefore, if you’re cooking ribs for a 6:30 PM dinner, you’ll want to get them on the smoker around lunchtime. Because ribs aren’t particularly thick, the rest doesn’t have to be long. But when your ribs are done based on the bend test above, remove them to a platter, take them into the kitchen and wrap them with a layer of heavy-duty foil, then place them in a picnic cooler that is lined with a folded towel and place another towel on top of the package of ribs and close up the cooler.
If you need to cut them to make them fit, go ahead and do it but don’t cut them into individual ribs or other serving sizes just yet. This is called the “Faux-Cambro” trick – a “Cambro” is an insulated food service container that restaurants use to hold hot food at serving temp.
A standard picnic cooler or even a cheap styrofoam one will work just fine for this. Let the ribs rest for a minimum of 30 minutes, and ideally an hour or so. We’ve found they will stay hot (and hot enough to be in the “safe” zone for bacteria growth, so hotter than 165 degrees) for up to 4 hours this way.
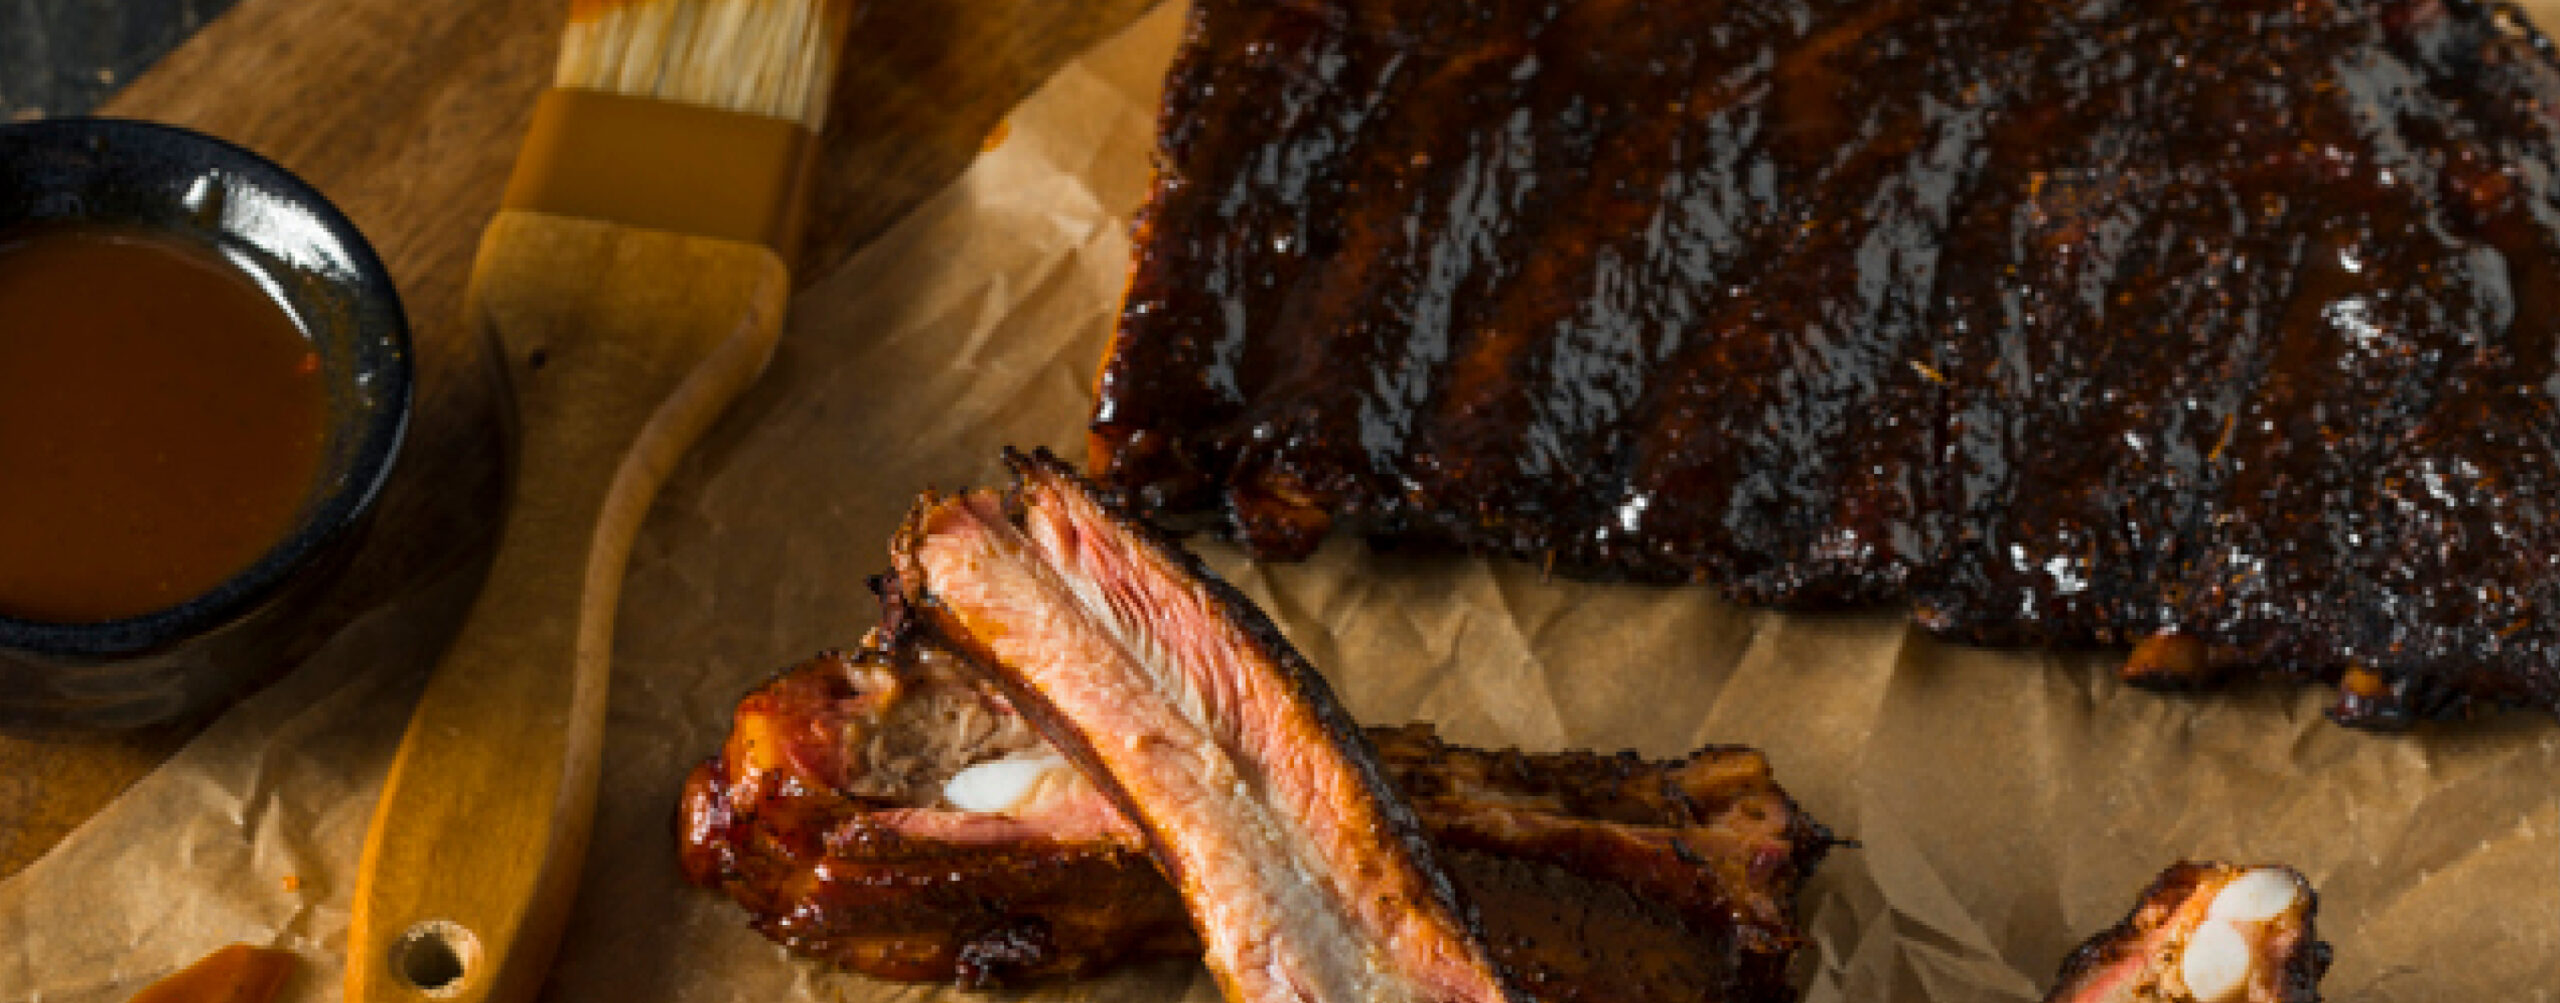
To Sauce or Not to Sauce? That is the question.
There are some folks that think sauce is an insult to perfectly cooked barbecue and then there’s us: we have barbecue sauce running in our veins!
IF you’re in the first group, well, your ribs are done. Go enjoy. For the rest of us? Let’s get saucing!
There are a million sauces out there, and a million sauce recipes out there – we say “use your favorite”. Seriously – if you like the sweet smokey taste of Chicago, the vinegary peppery taste of North Carolina and Memphis, the peppery tomato flavors of Kansas City – great, use what you want. But here’s a method that’s great for that final touch.
While your ribs are resting, crank your pellet grill to 450 degrees and let it preheat at that temp for at least 15 minutes past when it hits that temp – you want all that metal in there to be radiating heat.
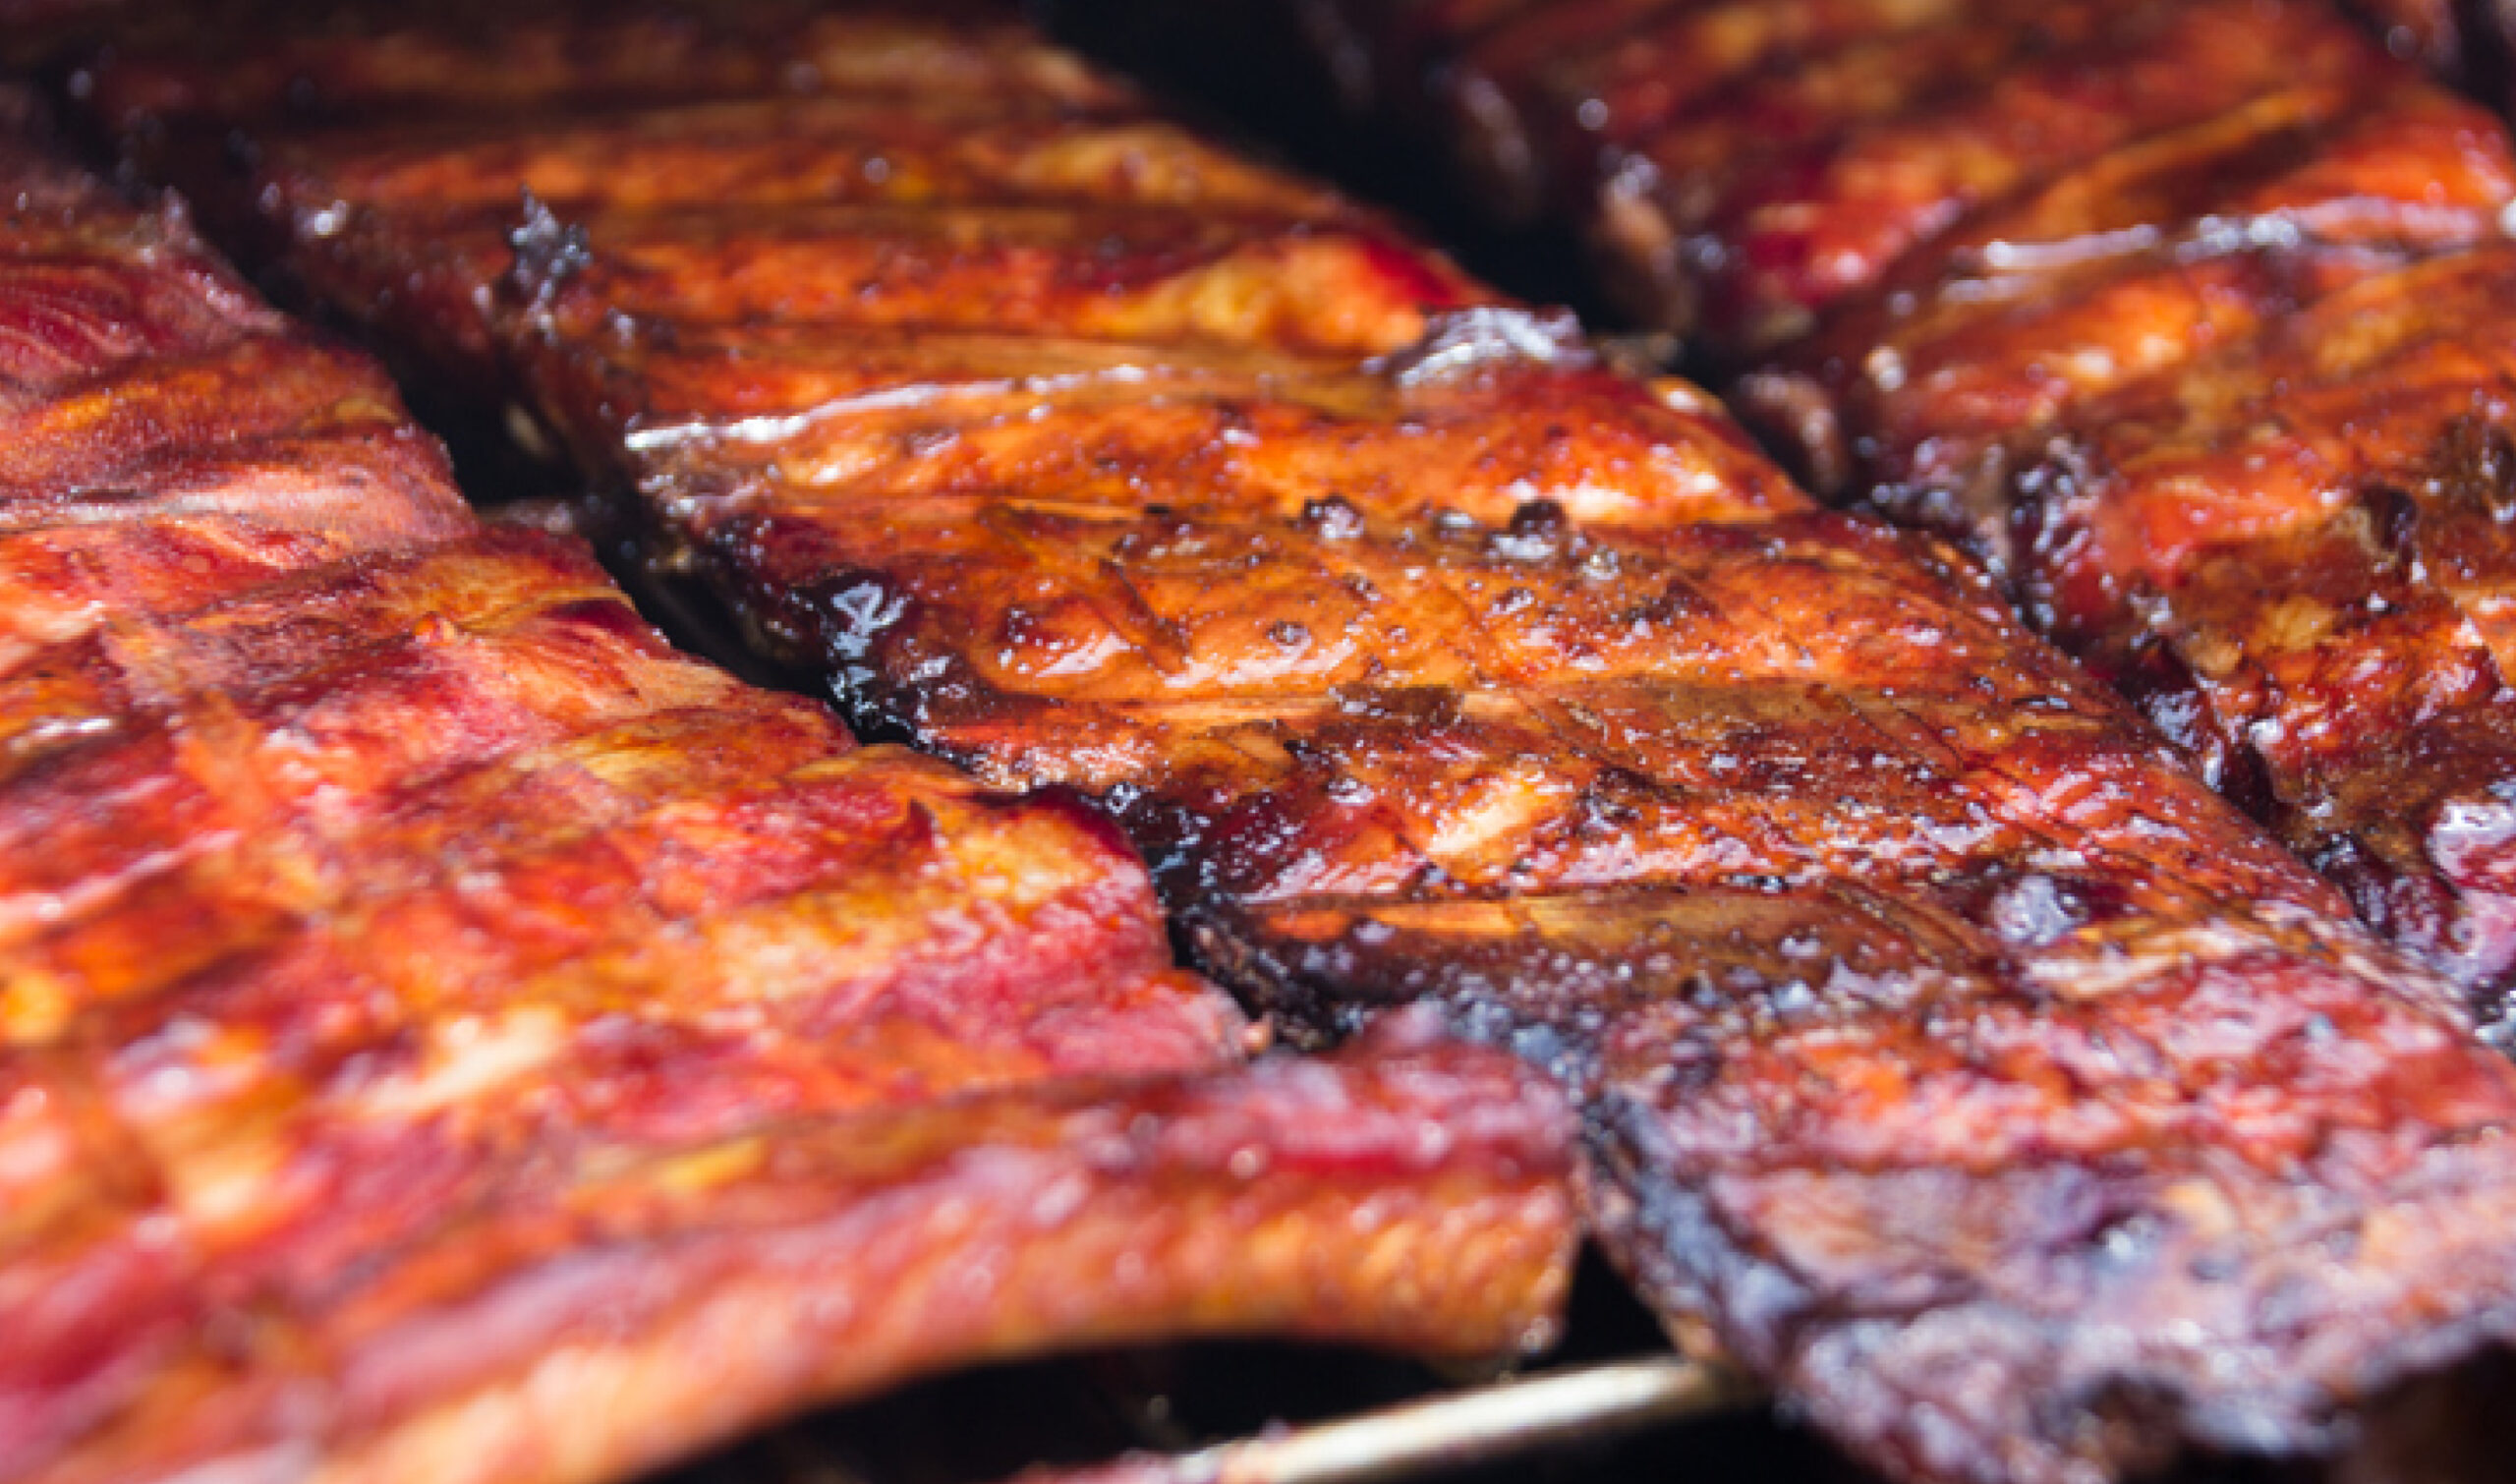
Take your ribs out of the “Faux-Cambro”, unwrap them, and one thing we like to do here is cut them into serving-size pieces – we like 2 bones per piece. Spread them out on a sheet pan or platter and brush both sides with sauce, then put them on the hot pellet grill, meat side down.
Let them go for about 4 minutes then flip them meat side up and brush the meat side again with sauce and let them go for about 6 minutes. At this point, if you want to serve your guests ribs hot off the grill, this is a great time to do it, otherwise platter them up and serve!
What this step does is caramelize the sugars in the sauce, gives the ribs some grill marks (see the picture below), and cooks off some of the moisture in the sauce so the ribs are glazed with sauce.
And that’s it – you’ve made the best ribs of your life, AND you know how to do it.
Finally … sides and pairings
Sides: We love baked beans with ribs, au gratin potatoes, french fries, coleslaw, you name it.
Pairings: Our favorite wine with ribs is a big fruity red Zinfandel. Ribs also pair beautifully with your favorite beer, our favorite pairing being a session IPA – there’s something about the easy hops and maltiness of a session IPA with the barbecue sauce that sends us to heaven.
And finally, after dinner – a fantastic choice is a smokey, peaty single malt scotch whiskey. The smoky flavors that you’ve had in your mouth and nose through dinner will pop with this final touch.
Quick notes for those not using pellet grills:
- If using charcoal, set up for low and slow, and use either a smoke tube or a “cigar” (foil package poked with holes) filled with Griller’s Gold Premium BBQ pellets to get that good smoke flavor. Because temp changes are hard in a charcoal grill, don’t sweat the “180 degrees” step above. When you’re saucing, use indirect heat otherwise the sauce will burn.
- If using a gas grill, preheat the grill on high, then shut off all but one burner and run that one on medium to low to get to the desired 225-250 degrees. Don’t worry about starting at 180F – that’s a pellet grill thing. Use a smoke tube or cigar package loaded with Griller’s Gold pellets to get your smoke on.
Grill on!