Budget Cuts – Great Eats On the Cheap!             

Budget Cuts – Great Eats On the Cheap!             

Right now is the time of year when everyone’s taxes roll around – and whether you’re lucky enough to get a refund, or have to pay, it certainly makes you think twice about expenditures. And let’s face it, groceries have gotten more expensive this year. 

So in this edition of the Griller’s Gold Blog, let’s have a look at some ways to have a great meal cooked on your pellet grill fueled with those amazing Griller’s Gold Premium Wood Pellets

Let’s do this!

Budget Cut – Chuck Eye Roast (the Beefy Secret!)

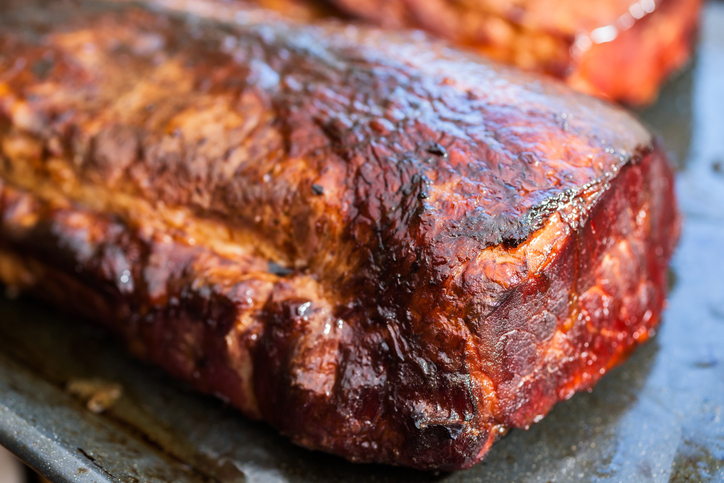
A chuck eye roast is a roast cut from the center of the chuck. The chuck is the primal cut that encompasses the shoulder part of beef cattle, so it is a working muscle.

Chuck is typically what you use to make beef stew or pot roast.  It likes a long, slow cooking method for maximum tenderness.  BUT!  The chuck eye, by the way it’s cut, can actually be grilled like a steak to medium rare. 

Chuck eye roasts are kind of oval in cross section and square to cylindrical in shape and are between 2 and 4 inches thick. A direct cousin of the Chuck Eye is a Delmonico Steak – which is a steak cut from the chuck eye.

Chuck eye roast - budget cuts blog from Grillers Gold

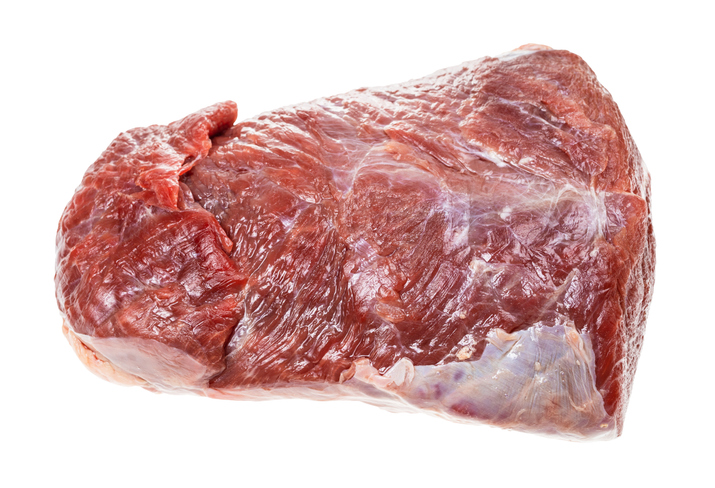
The thing we like about a chuck eye is you can see a clear grain direction in the meat (in this photo it is running from the lower left to the upper right) therefore, when carving it, it is easy to spot the grain and make cross-grain slices, which enhances the tenderness of your finished meat.

We love doing a Chuck Eye roast on our pellet grill using the reverse sear method. 

Here’s how…

Reverse Sear Method for Chuck Eye Roast

Buy: 

Chuck Eye Roast (2-4 lbs) – plan on ½ lb precooked weight per person. When we spot them at the grocery store, we usually buy two – one for now, one for the freezer!

Prep: 

Go over the outside the roast and trim off any silver skin or obvious gristle.  Because it is a working muscle, there will be some connective tissue that cuts through the roast – don’t worry about that, we’ll deal with it when it’s done and carved.

Seasoning: 

We like to do at least a 2 hour kosher or sea salt “dry brine” on it prior to cooking. Give it a generous sprinkling of salt all over at least 2 hours prior to cooking (but if you have time, 6 hours or even overnight does wonders!), then immediately before cooking, we coat it with a generous hit of freshly ground black pepper, granulated garlic, granulated onion and paprika.  If you want a pop of spice, a nice shake of chili powder also adds to the flavor.

Grill Prep: 

Make sure your grill is clean as you’re going to need to fire up to hot temperature later to sear.  Load up with your favorite Griller’s Gold Premium Wood Pellet – the stronger flavors are great with this – Cherry, Hickory, Smokeshack or Competition Blend work great, as does Charcoal, although that has a more subtle flavor.  Preheat to 250 for the “low and slow” part of the cook. 

Cooking: 

Once the grill is stable at 250 (most pellet grills take about 15 minutes for this), put the meat on, insert a probe in the thickest part and close it up! 

Set a timer for 20 minutes for turning. Turn the meat every 20 minutes until the internal temp hits 125F for medium rare. If you like it more done, adjust accordingly.

Rest: 

Take the meat off the grill, wrap it in a double layer of heavy duty foil, then nestle it in some folded towels. We like to put it in a picnic cooler as well.  Let it rest for 1 hour.  About 15 minutes before the rest ends, fire your grill to it’s highest temperature (ours goes to 550F) and let preheat. 

Sear:

Unwrap the meat and bring it to the grill.  Sear it on the grill for about 8 minutes, turning every 2 minutes, so each side will be against the grill for two 2-minute cycles, then bring it in. 

Serve:

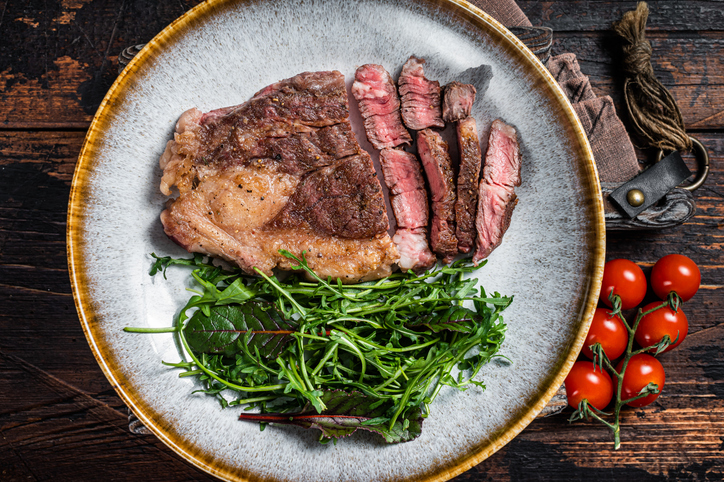
Slice it across the grain (you remember that, right?) in ¼” or so slices and enjoy.

We love this with the usual steakhouse sides of garlic mashed potatoes, a good veggie like sauteed spinach or roasted asparagus, and a bottle of big red wine – Merlot, Cabernet, or if you got a nice tax refund, how about a French Bordeaux?  Gotta live a little right?

Budget cut chuck sliced and served on a plate with a green salad and tomatoes


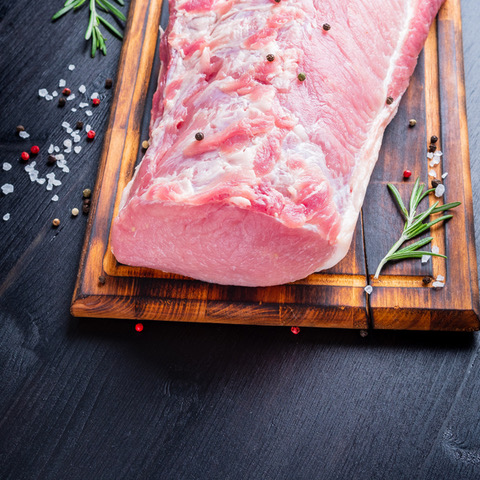
Budget Cut – Pork Loin Roast:

Thankfully due to the abundance of pork production in the US, pork prices have stayed pretty low, so our favorite thing to do is a whole pork loin roast on the grill.  These massive cylinders of meat are great for serving a crowd, and the nice thing is, it responds beautifully to the Reverse Sear method we just described. We’ll note the differences as we go here.

two budget cut pork loins on brown parchment paper

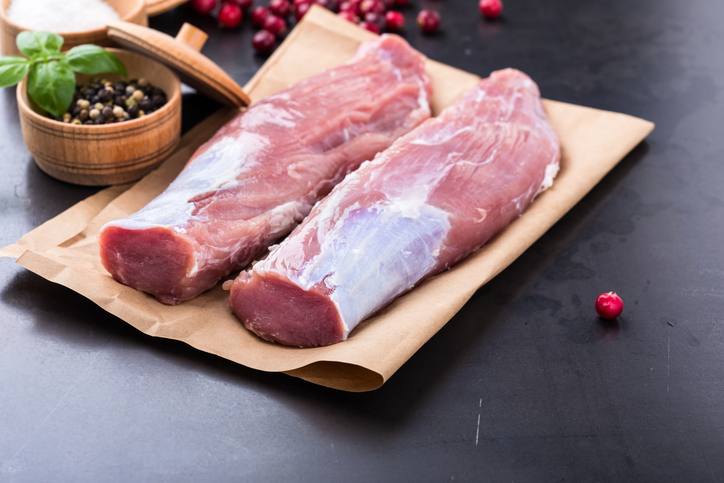
A whole pork tenderloin is usually a 5 to 6 pound piece of meat, about 18” to 24” long. It is about 4 or 5 inches in thickness and is oval shaped in cross section.  The price on these varies between as low as $0.99 a pound to about $4.00 a pound.

The cut is comprised of several muscles, so the texture and flavor varies end to end.  In fact, you can buy one of these and butcher up into a good amount of “freezer food” with roasts, pork chops, etc.  We love buying these for that reason. 

In the picture here, the lower right end is the “sirloin” end and the upper left end is the rib end.  The rib end meat is a bit fattier.  In the middle is the “center cut” which is where typical pork loin roasts are cut from, and the sirloin end is usually sliced into thin “breakfast” pork chops.  But put away that knife, because we’re cooking this bad boy whole today!

Reverse Sear Method for Whole Pork Loin Roast

Buy: 

You’re buying a whole pork loin roast – these are most easily found at Sam’s Club, Costco and other large big box retailers and they are in cryovac packaging.  Try to avoid buying ones that say “up to 12% solution of pork broth, salt and …” – those are pre-brined and while they cook up nice, they can be a bit salty and that limits your seasoning creativity a bit.

Prep:

Take it out of the package.  That’s it. No need to trim these. They will occasionally have a fat cap on one side, and that’s fine – leave that for flavor.

Season:

Just like for the chuck eye roast, first dry brine it with a generous hit of kosher or sea salt for a couple of hours.  But DON’T do that if you bought one with the solution injected in it.  After the dry brine, we like to mix up a rub of equal parts sugar, fresh ground pepper, granulated garlic and onion, paprika, and then ½ part chili powder and ¼ part dry mustard powder.  For a large roast, use 2T for the whole parts in your mix, which means a ½ part becomes 1T and a ¼ part becomes 1/2T.  Rub it generously all over the meat.

Grilling, Resting and Searing:

Follow the instructions for the Chuck Eye roast – it’s the same with one exception – go low and slow until it hits 140F internal.  Pork is best between 145 and 150F when finished.

We love to cut this into thin slices if we’re doing sandwiches, or in thick pork chop like slices if we’re serving as a plated dinner.

seared budget cut pork loin - close up of the pork loin

Some additional great “Budget Cuts”

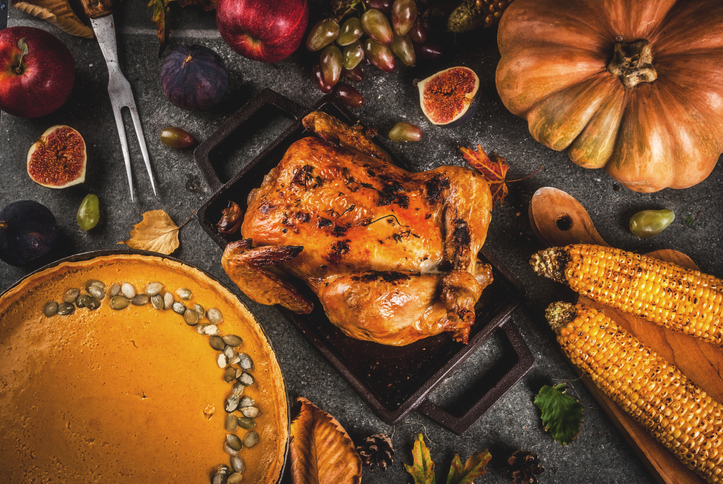
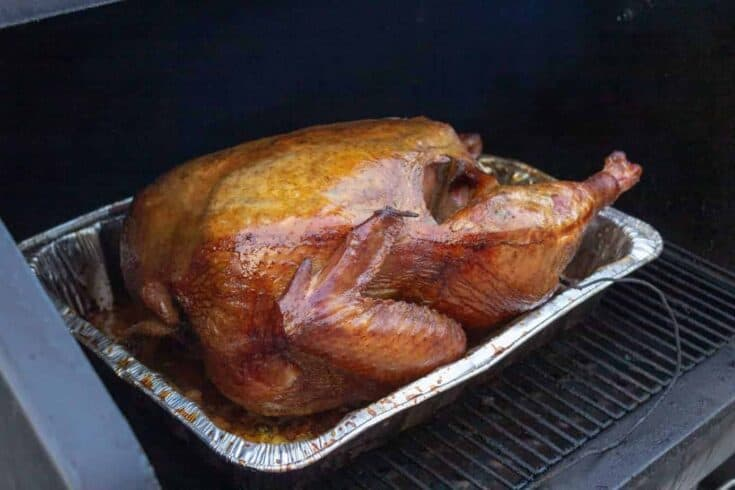
For chicken, we love chicken thighs and for some reason those are always inexpensive!  We also love turkey – whole turkeys are always a great value year round – usually priced between $3 and $4 a pound. 

That’s a wrap!

You see!  You CAN eat like a king without spending a fortune.  Wishing you a happy spring time!  Thanks again for reading the Griller’s Gold Blog!

Thanksgiving Feast on the Pellet Grill

Thanksgiving Feast on the Pellet Grill

Thanksgiving is in a few short weeks and it’s our favorite food holiday!

Every family has all of their own wonderful traditions and favorite dishes.  The great thing about owning a pellet-fueled grill, besides fueling it with Griller’s Gold Premium Hardwood Pellets, is that with the precision temperature control these grills provide, they can serve as an additional oven for your kitchen, fueled with delicious smelling and tasting hardwood!

Many traditional thanksgiving foods will really benefit from the “kiss” of wood smoke flavor that you’ll get when cooking on your pellet-fueled grill. And of course, not every item is compatible. 

So in this post, we’ll cover making an OUTSTANDING turkey on your pellet grill and then ideas for sides that work well with being cooked in a wood-fueled environment.  On to the bird!

Up close shot of Thanksgiving turkey being carved

Fantastic Wood-Roasted Turkey

Making a turkey on a pellet grill does not have to be complicated in any way. 

In fact, you can go as simple as:

  • Buy a turkey
  • Thaw it
  • Remove the packaging and the giblets package
  • Fire your grill up to 350F
  • Season it with salt and pepper
  • Put the turkey on the grill
  • Close it up
  • Take it off when the breast meat is 165F in the center.
  • Rest it for 30-45 minutes tented with foil
  • Carve! 

That’s as easy as it can be and it’s delicious that way. We will frequently do this super-simple method on a Sunday when we want to make food to feed the family for the week. It’s just so easy.

But, we’re here to talk about a fantastic bird, so here’s how you kick that up several notches!

Choosing the Turkey

Our turkey journey starts with the bird. We have tried a variety of different turkeys – all natural/minimally processed, fresh, frozen, free range, you name it. We have found that the “big brand” bird that everyone knows is also the most consistent in terms of quality, cutting, preparation and ease of cooking. These birds come pre-brined, so that step isn’t necessary.

If you do like to use minimally-processed turkeys, they really benefit from an overnight brining. If you’re not sure how to do it, visit YouTube or Google – there’s tons of resources.

Seasoning Your Thanksgiving Bird

We like to season the turkey with barbecue blogger Meathead Goldwyn’s “Simon and Garfunkel Rub”. We mix up a big batch of it – it is thyme, parsley, rosemary, oregano, basil, bay leaves and sage all ground up together! 

To season, start by rubbing the skin overall with a few tablespoons of cooking oil or olive oil and then sprinkle the rub generously over the turkey along with salt and pepper.  Be sure to season the cavity too! Then we tie the legs and wings close to the body with butcher string.

We like to roast the bird in a foil roasting pan and to raise the bird off the bottom of the pan so the air can circulate, we put a bunch of chunky-cut aromatic veggies across the bottom of the pan – quartered up onions, large pieces of carrot and celery do great for this. Those vegetables can then be used to flavor up your gravy with the pan drippings that land in the pan from the bird.

When cooking a turkey on the pellet grill, we don’t stuff it. We have found that by the time the stuffing is cooked to a safe temperature that the breast meat is overcooked, so we’ll do the stuffing in a side dish pan while the turkey rests.  See below.

On to the grill!

Thanksgiving turkey in the roasting pan on the grill

Preheat your pellet grill using your favorite Griller’s Gold Natural Hardwood pellet flavor – for turkeys we use Competition Blend the most – to 225 degrees F. We’re going to start low and slow as pellet grills put out more smoke flavor at lower temps, then we’ll boost the heat and roast as usual. 

Let your grill preheat at least 15 minutes at this lower temp and then load up the bird into the grill. If you have a temp probe, insert it deeply into the breast meat, but don’t hit the ribs in the center of the bird.

Close up the grill and go watch some football for 90 minutes. 

In that time, the turkey skin will absorb a nice kiss of that delicious wood smoke. At the 90 minute mark, head back to the grill and turn up the temperature to 350F, and give the bird a 180 degree turn to the opposite direction. At this point, total cook time is dependent on the size of your bird, but the average size turkey (15 to 16 lbs) should take about 2 to 3 hours more time to finish up. 

We like to check on the bird and give it turns about every 45 minutes for even cooking.  The bird is done when your probe thermometer reads 165 degrees in the deep part of the breast meat.  Check it in several places.  The legs should be about 185 in the deep part of the drumstick and thigh.

Key Tip – RESTING the turkey

Now for the most important part:  RESTING! 

Bring the bird into the kitchen, lift it off the vegetable bed in the pan and put it on a platter or sheet pan. Put a “tent” of heavy duty foil over it and leave it alone for at least 30 minutes while you’re getting the rest of the meal on.

In fact, Gordon Ramsay recommends resting turkeys a full hour!  There is a lot of thermal mass there, and it will stay hot and ready to serve, but the rest really lets the bird finish cooking and redistribute the juices for moist meat and flavor.

And that’s it – after the rest, carve and serve!  It will be fantastic and the skin will be out of this world – that’s the chef’s treat for cooking and carving it.

Thanksgiving side dishes

Thanksgiving Side dishes

As promised, here’s a list of sides you can also do in your pellet-fueled grill:

Gravy

You made your bird in a roaster with a bunch of aromatic veggies – that pan will have lots of tasty drippings in it.  Dump a quart of either turkey or chicken stock over the veggies to “rinse” the drippings off, then pour off into a large measuring cup or gravy separator.

Simmer your roasted veggies with the stock for 10-15 minutes to extract flavor and also concentrate the stock. Skim or separate the fatty drippings from the stock and use those to make your roux for your gravy.  Your gravy will have a wonderfully smokey flavor.

Stuffing/Dressing

After the bird comes off, put a baking dish with your stuffing in it out on the grill and bake it for about 30 minutes while the bird rests. It will pick up a little smokey flavor from the grill and be extra tasty.

Vegetables

Grilled vegetables on the pellet grill are outstanding! Have a look at our Farmstand Vegetables post for ideas!

Desserts 

Wood grilled fruit cobblers and “brown bettys” are outstanding when baked on a wood-fired oven, and your pellet grill, fired by Griller’s Gold pellets is exactly that – a wood-fired oven.  Bake at the same temp and time as in your recipe but do it on your pellet grill for extra flavor!

Smoked Old Fashioned Cocktail 

Yeah, we went there! Before your holiday guests arrive for the day, pour a bottle of your favorite bourbon into a shallow large baking dish like a lasagna dish. Fire up your pellet smoker at the lowest setting and use the “smoke” or “super smoke” setting if you have it.  Put the pan of bourbon on the grill and close it up, and smoke your bourbon for 20 minutes.  It will pick up a wonderful smokey flavor and aroma.  Use it to make bourbon Old Fashioneds!

Happy Thanksgiving everyone!

Pin It on Pinterest