Memorial Day is the unofficial start to grilling season—and what better way to kick it off than with an epic Smashburger Bar that’ll have your guests talking all summer long?
Forget the usual burgers—this year, it’s all about that crispy, juicy, crave-worthy smash. And don’t worry, we’ve got you covered with tips for the perfect smashburger, flavor-loaded topping combos, and simple sides that won’t keep you from the party.
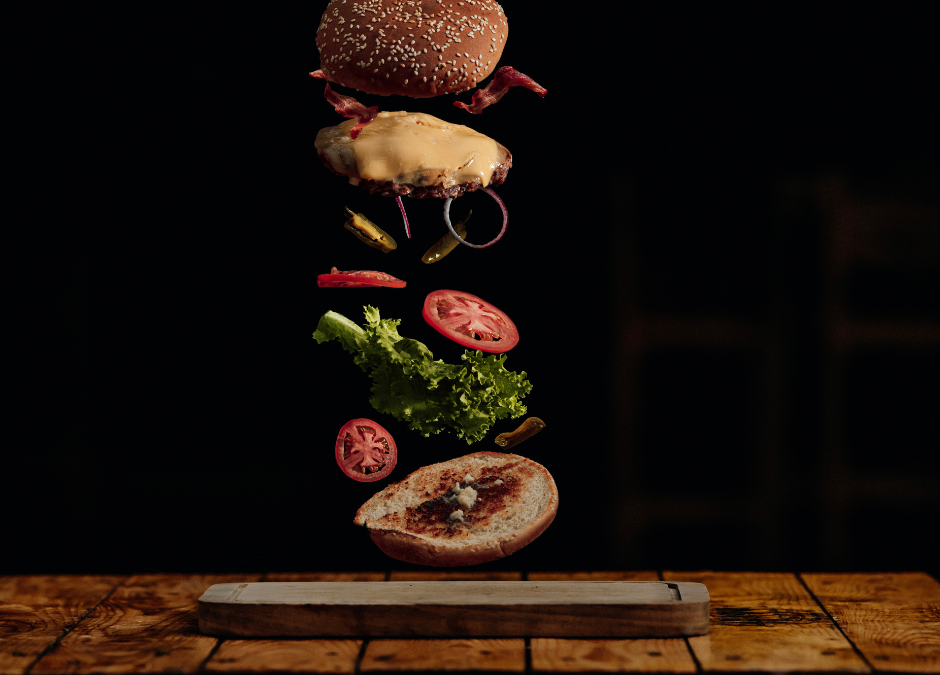
What Makes a Smashburger So Dang Good?
The magic of the smashburger is in the crust—that golden-brown, crispy edge formed when a ball of ground beef hits a screaming-hot griddle or cast iron skillet. That crust locks in the juices, delivering flavor you just don’t get from thicker patties. It’s a flavor bomb of beefy goodness with crispy bits around the edges and a tender center that makes every bite satisfying.
Here’s how to make the perfect smashburger:
Use 80/20 ground beef. The fat gives it flavor and helps that crust form.
Form 2-3 oz. loose meatballs. Don’t pack them tight—you’re not making meatballs for spaghetti here.
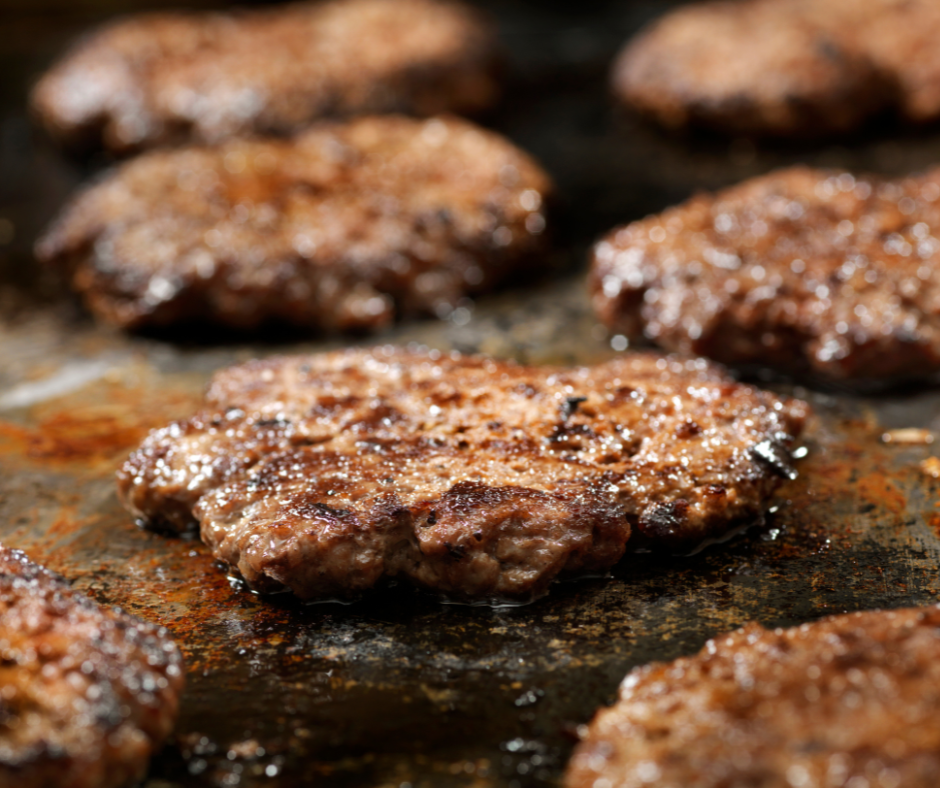
Use a ripping hot flat surface. A cast iron griddle or flat top on your grill is ideal.
Smash hard and fast. Use a metal spatula or burger press to smash those balls into thin patties. Let them sizzle without moving for 2-3 minutes.
Salt generously after the smash.
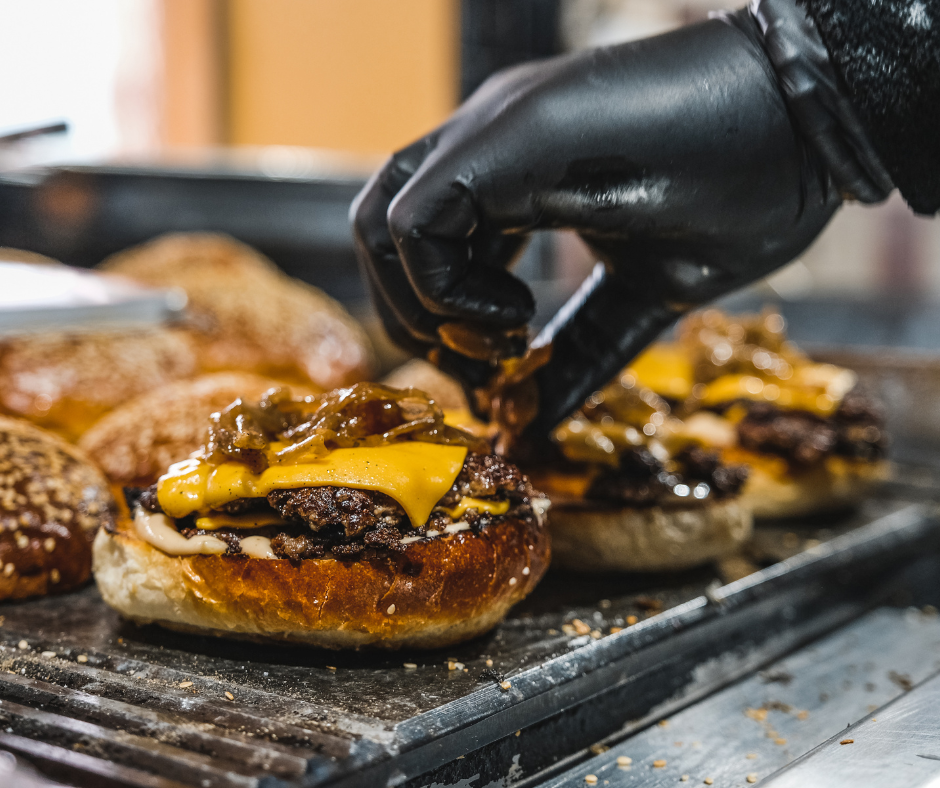
Flip once, add cheese, and stack. American cheese is the classic. Stack two patties for the ultimate bite.
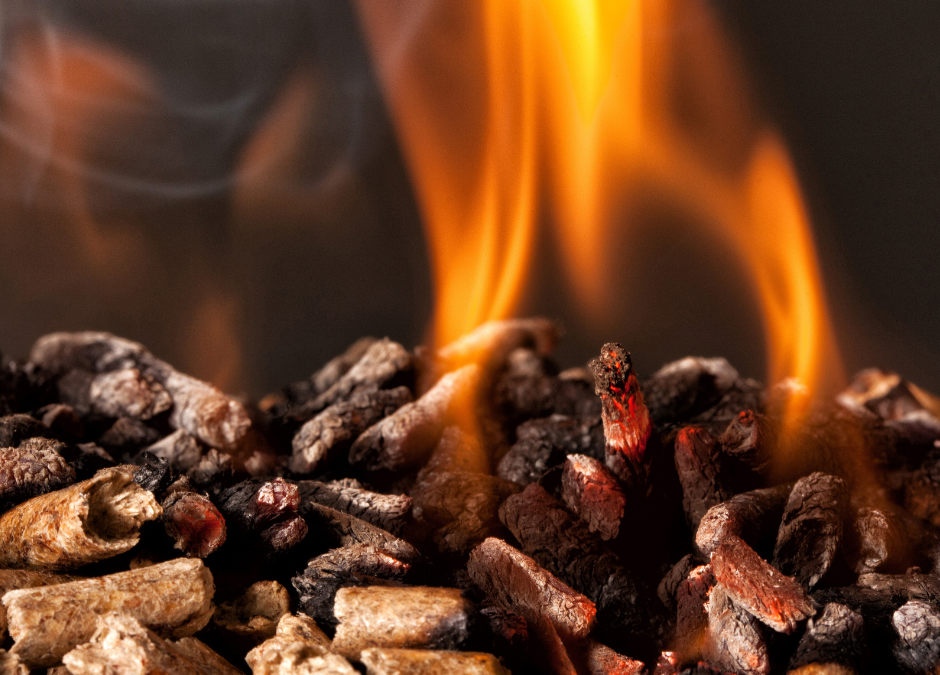
💡Pro tip: Use Griller’s Gold Competition Blend or Cherry pellets to bring a subtle smoke flavor to your burgers. Even on a griddle, your grill’s ambient smoke will infuse the meat for that unmistakable backyard barbecue flavor.
And here’s a fun host trick: grill everything you can! Not just the patties—throw your onions, mushrooms, bacon, and even pineapple slices on the grill to deepen the flavor of every topping. The grill is the star of the show today, so let it work its magic.
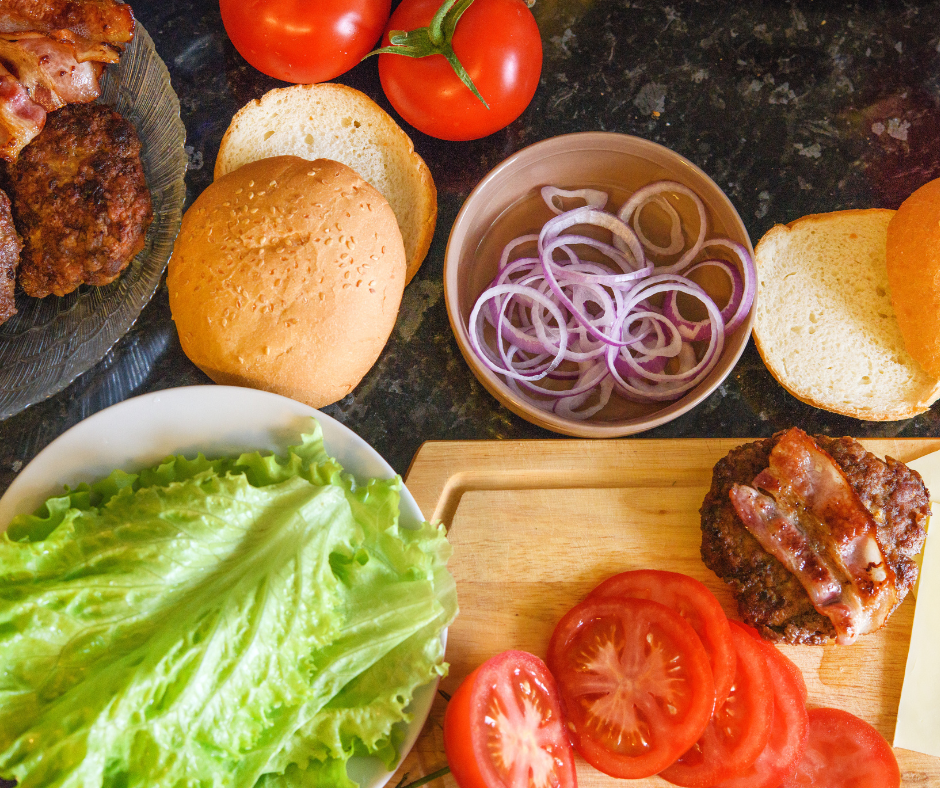
Build-Your-Own Smashburger Bar
This is where things get fun. Set up trays of pre-cooked double smash patties and let guests build their dream burgers, or keep the griddle going and smash them to order while your guests watch the show. The sizzle, the aroma—it’s all part of the experience.
To make it easy and interactive, offer a few signature combinations and then leave plenty of grilled and fresh toppings out for freestyle creations.
Keep it simple, crowd-pleasing, and grill-friendly:
Grilled Corn on the Cob: Brush with butter and sprinkle with smoked paprika and parmesan.
Smash Potatoes: Boil small potatoes, smash on a grill-safe pan, drizzle with oil, grill until crispy.
Chili Lime Watermelon Wedges: Fresh, hydrating, and unexpected.
Loaded Grilled Tots: Toss frozen tater tots on a grill pan, top with cheese, bacon, and green onions.
Pro move? Make your side dishes ahead of time, or prep them to grill alongside your burgers so you’re not stuck inside. Memorial Day is for hanging out—not hovering over the stove.
Final Touch: Let Guests Get Hands-On
The beauty of a smashburger bar is that it turns your backyard into a burger lab. It’s interactive, it’s fun, and it gets people talking. Set out trays with buns, toppings, sauces, and labels—or go the extra mile with mini chalkboard signs or printed menus showcasing signature combos.
Want to really wow them? Offer mini “burger passports” so guests can “check off” each burger they try.
Add in some patriotic flair with red, white, and blue serving trays or bandana napkins. Hang a few string lights, crank some summer tunes, and make your grill the centerpiece of the celebration. And don’t forget the cooler: stock it with lemonade, iced tea, and local brews to keep everyone cool while that griddle stays hot.
Fire It Up!
A smashburger bar is more than a meal—it’s an experience. With a hot grill, great toppings, and the right people around you, you’re setting the stage for one unforgettable Memorial Day. And thanks toGriller’s Gold pellets, that perfect blend of heat and flavor will carry every burger bite home.
Now grab your spatula, bring the sizzle, and let’s smash into summer.
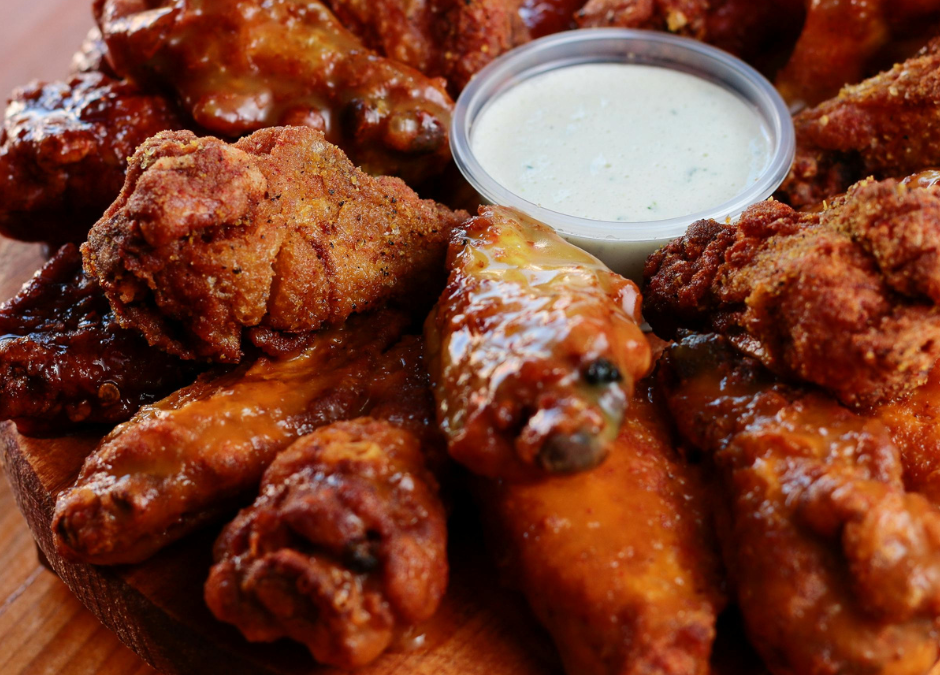
Whether you’re cheering on your team during playoff hockey, throwing together a Friday night hang, or just giving in to a midweek craving (no shame in that game), smoked wings are the GOAT of the grill. And if you’re seeing them everywhere on Instagram and TikTok—there’s a reason. These babies are crispy, smoky, saucy perfection.
So let’s break it down, shall we? Here’s exactly how to make smoked wings that will have your crew licking their fingers and asking for more.
🛒 First up: The Ingredients
You’ll need:
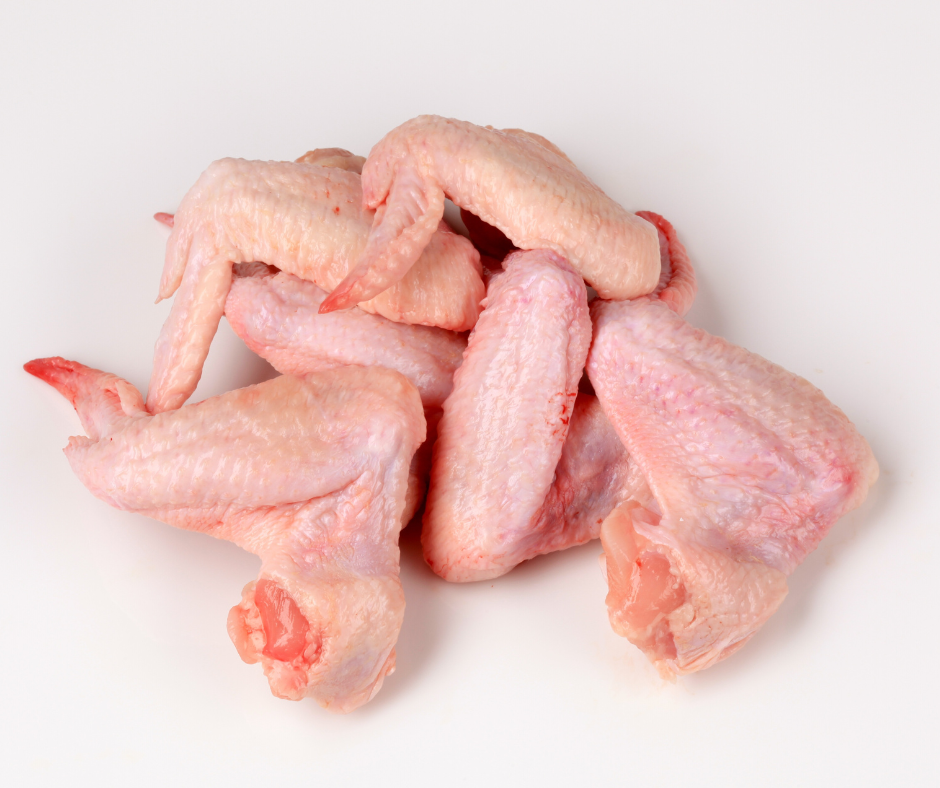
2–3 lbs of chicken wings, drumettes or flats (or both!)
1 tbsp olive oil
Your favorite dry rub (we love something sweet & spicy)
A killer wing sauce: • Honey-Sriracha 🍯🌶️ • Garlic Parmesan 🧄🧀 • Chipotle-Lime 🌶️🍋 • Buffalo with a twist 🦬🔥
👩🍳 Step-by-Step: How to Smoke Those Wings Like a Pro
Step 1: Dry and Season Pat those wings dry with paper towels. This is key to getting crispy skin. Want to level it up? Toss them in 1 tbsp baking powder before adding seasoning—trust us, it’s a grill hack that works.
Drizzle with olive oil and toss in your dry rub of choice. Let them hang out in the fridge for 30 minutes to 2 hours if you’ve got the time. (Overachiever bonus: let them sit uncovered overnight.)
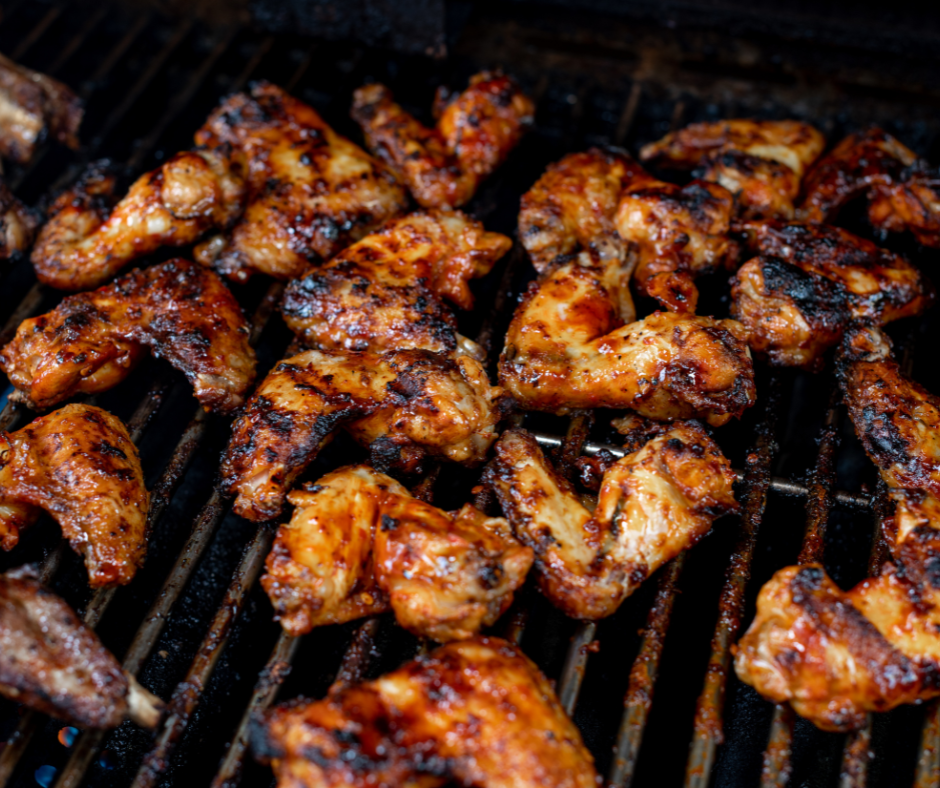
Place wings directly on the grates (or use a wire rack over a baking sheet). Smoke for about 60–75 minutes.
Step 3: Crisp ‘Em Up Crank the heat to 375°F–400°F for the last 10–15 minutes to crisp the skin. Flip halfway through. The internal temp should hit at least 175°F for that perfect juicy bite.
Step 4: Sauce & Toss Now for the fun part—toss your wings in a bowl with your favorite sauce. Keep it classic or get wild. We’re not judging. For our Buffalo with a Twist recipe, keep reading…
Want extra saucy wings? Toss ’em, then put them back on the grill for 5 minutes to caramelize the sauce.
Sauce Spotlight: Buffalo With a Twist 🦬
We all love classic Buffalo wings, but why not give ’em a little glow-up? This version still brings the heat, but with a creamy, tangy kick that’ll have your guests wondering what your secret is. (Tell them if you want. Or don’t. We won’t say a word.)
Here’s how to make it:
🧄 Buffalo Ranch Twist Sauce
1/2 cup Frank’s RedHot (or your favorite hot sauce)
1/4 cup melted unsalted butter
2 tbsp ranch dressing (yes, we said ranch)
1 tsp honey
Pinch of garlic powder (because garlic makes everything better)
Optional: a few dashes of Worcestershire sauce for extra depth
Instructions: Whisk it all together in a bowl until smooth. Warm it up just before tossing to help it coat the wings beautifully.
This sauce hits all the right notes: spicy, creamy, tangy, and just a little sweet. It’s a crowd-pleaser and totally TikTok-worthy.
Want to go full mad scientist? Add a squeeze of lime or a splash of pickle juice for even more personality.
🔥 Pro Tips from the Pit
Smoking at a lower temp first helps the meat soak up that wood-fired flavor.
Baking powder = crispy skin magic. Science, baby.
Try dry-rub-only wings with a dipping sauce if you’re not into messy fingers.
🏒 Hosting a Hockey Night? Do This:
Make two batches: one sauced, one dry rub only
Serve with celery, carrot sticks, and ranch or blue cheese
Have cold beer or hard cider on deck. 🍻
That’s it! Easy, impressive, and totally drool-worthy. Tag us if you make a batch—we’d love to see your saucy masterpieces.
If you are reading this, then we are going to assume you own a pellet grill, or want one. That means you already know it’s one of the best tools for making delicious, smoky meals with ease.
But like any great cooking equipment, a pellet grill needs regular care to keep it running smoothly and producing amazing food. Whether you’re a weekend griller or a year-round BBQ enthusiast, here’s a complete guide to maintaining your pellet grill.
After all, amazing pellets don’t work as well in a dirty grill.
Why Pellet Grill Maintenance Matters
Taking care of your pellet grill isn’t just about keeping it clean—it’s about performance, longevity, and safety.
A well-maintained grill:
Cooks more consistently
Prevents unexpected shutdowns and temperature fluctuations
Reduces the risk of grease fires
Extends the lifespan of your investment
Let’s break down how to properly maintain your pellet grill, from daily upkeep to seasonal deep cleans.
1. Regular Grill Cleaning: The Key to Longevity
Pellet grills create a lot of smoke and ash, which can build up over time. A little routine cleaning goes a long way in preventing problems.
After Every Cook
Empty the grease bucket and wipe down the grease tray to prevent buildup.
Brush off the grill grates with a non-metal brush while they’re still warm.
Check for excess ash in the burn pot—if it looks clogged, vacuum it out when the grill is cool.
Every 3-5 Cooks
Vacuum out the fire pot and bottom of the grill to remove leftover ash.
Wipe down the temperature probe to ensure accurate heat readings.
Deep Clean Every Few Months
Remove and clean the heat baffles, drip trays, and interior walls with a grill-safe degreaser.
Use a shop vac to clean out ash and pellet dust from the hopper and auger.
Inspect the venting system and chimney for any blockages.
2. Pellet Management: Store & Handle Pellets the Right Way
Pellets are the fuel for your grill, and keeping them in great condition is essential.
Store pellets in an airtight container to prevent moisture absorption.
Keep them in a cool, dry place—humidity can cause swelling, which leads to auger jams.
Empty the hopper if you’re not using the grill for a while to avoid moisture damage.
3. Inspect Key Grill Components for Smooth Operation
Your pellet grill has a few important parts that need attention to keep it running efficiently.
Check the auger to ensure it’s feeding pellets properly—if it gets jammed, remove the pellets and clean the area.
Listen for the fan—an unusual noise could indicate a blockage or mechanical issue.
Inspect the gasket around the lid—if it’s worn out, replace it to prevent heat loss.
4. Proper Startup & Shutdown Procedures
How you start and shut down your grill impacts its longevity.
🔥 Start the right way:
Open the lid.
Set the grill to the lowest setting or “smoke” mode.
Allow the fire to stabilize before adding food.
⏳ Shutdown process:
Follow the manufacturer’s shutdown cycle.
Let the auger stop completely before turning off the grill.
Keep the lid open for a few minutes to allow the burn pot to cool.
5. Seasonal Grill Care: Weather Protection Tips
A pellet grill can be used year-round, but the elements can take a toll.
🌧️ Cover it up! A waterproof cover will protect your grill from rain, snow, and direct sunlight. ❄️ Winter grilling tips: Allow extra preheat time and consider using an insulated blanket. ☀️ Summer storage: Keep your pellets dry, as humidity can cause them to swell and jam the auger.
A Little Maintenance Goes a Long Way
By following these simple maintenance steps, you’ll keep your pellet grill in top shape for years to come. Not only will you avoid unnecessary repairs, but you’ll also enjoy consistent, flavorful grilling every time you fire it up.
Now that your grill is in peak condition, what’s next on the menu?
I know what you’re thinking—plant-based BBQ? Really? But trust me on this one.
Whether you’re doing Dry January, trying to eat a little healthier, or just looking to mix things up, I’ve got some ideas that’ll have you firing up the grill with a big ol’ smile. And we’re not skimping on flavor, thanks to Grillers Gold Premium Wood BBQ Pellets.
Let’s dive in!
Why Give Plant-Based BBQ a Shot?
Look, you don’t have to go full vegetarian to enjoy the magic of plant-based BBQ. This is about adding something new to your grill game, and honestly? These dishes are so good you won’t even miss the meat. Plus, with Grillers Gold Premium Wood BBQ Pellets, you’ll get that smoky, charred flavor you love in every bite.
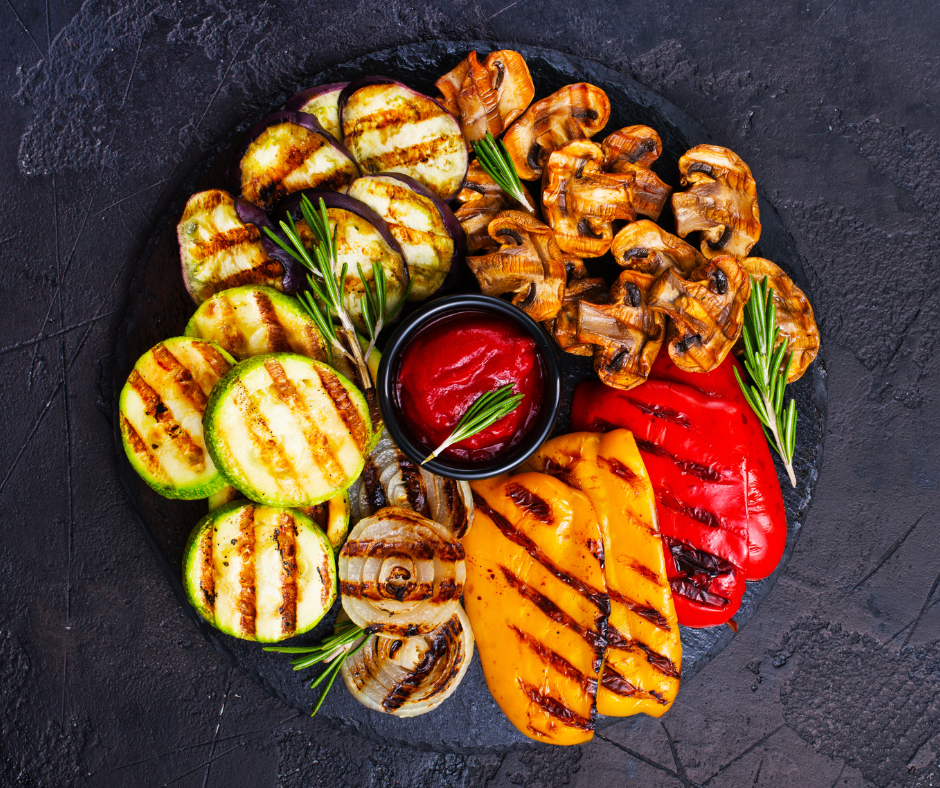
Veggie Dishes That’ll Blow Your Mind
Here are some super easy, crazy delicious ideas to get you started. These aren’t your typical “rabbit food” dishes—these are grill-worthy creations that’ll make you say, “Why didn’t I try this sooner?”
1. Smoked Cauliflower Steaks
Think of these as the veggie version of a T-bone. Slice a big ol’ cauliflower into thick slabs, brush with olive oil, and season with smoked paprika, garlic, and cumin. Toss them on the grill with Grillers Gold Cherry Pellets, and you’ve got yourself a smoky, savory masterpiece.
2. Grilled Portobello Mushroom Burgers
Portobellos are the MVPs of the plant-based world. Marinate them in balsamic vinegar, soy sauce, and garlic, then grill over Smokeshack Blend Wood Pellets. Slap one on a toasted bun with your favorite toppings, and you’ve got a burger that’ll make you forget about beef (at least for tonight).
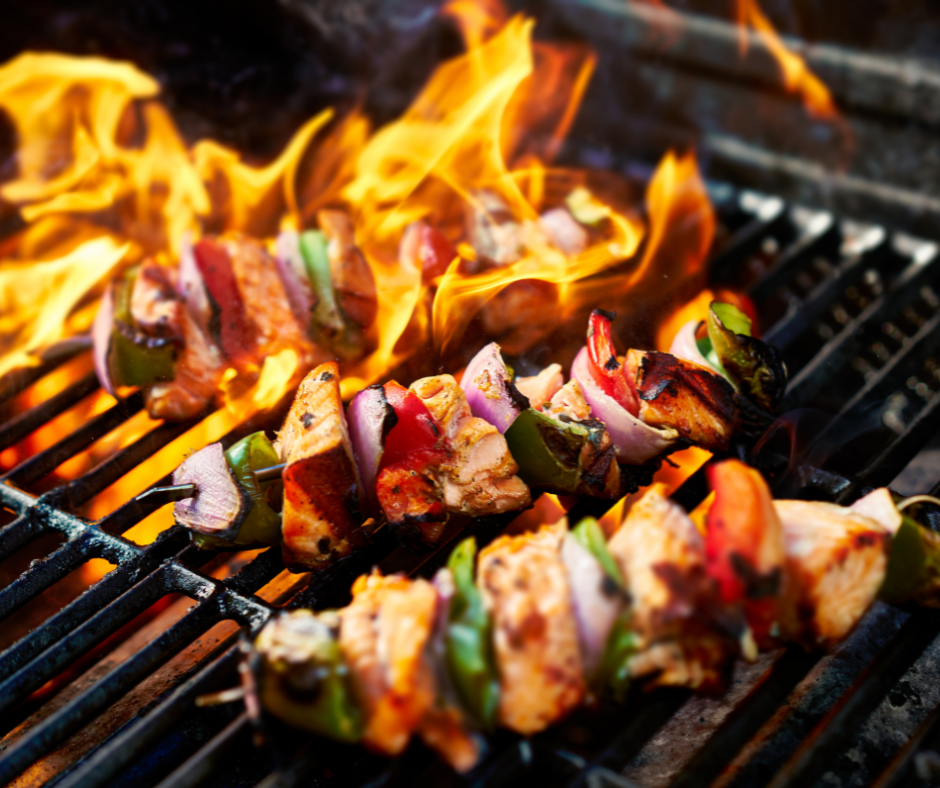
3. Skewered Veggie Kabobs
Who doesn’t love food on a stick? Load up skewers with bell peppers, zucchini, cherry tomatoes, and red onions. Brush with herby olive oil and grill over Fruitwood Blend Pellets for a light, colorful dish that’s perfect for sharing.
4. BBQ Jackfruit “Pulled Pork”
Okay, hear me out. Jackfruit is wild—it shreds like pulled pork and soaks up sauce like a sponge. Toss it with your favorite BBQ sauce, then smoke it on the grill with Hickory Wood Pellets. Pile it on a bun and prepare to be amazed.
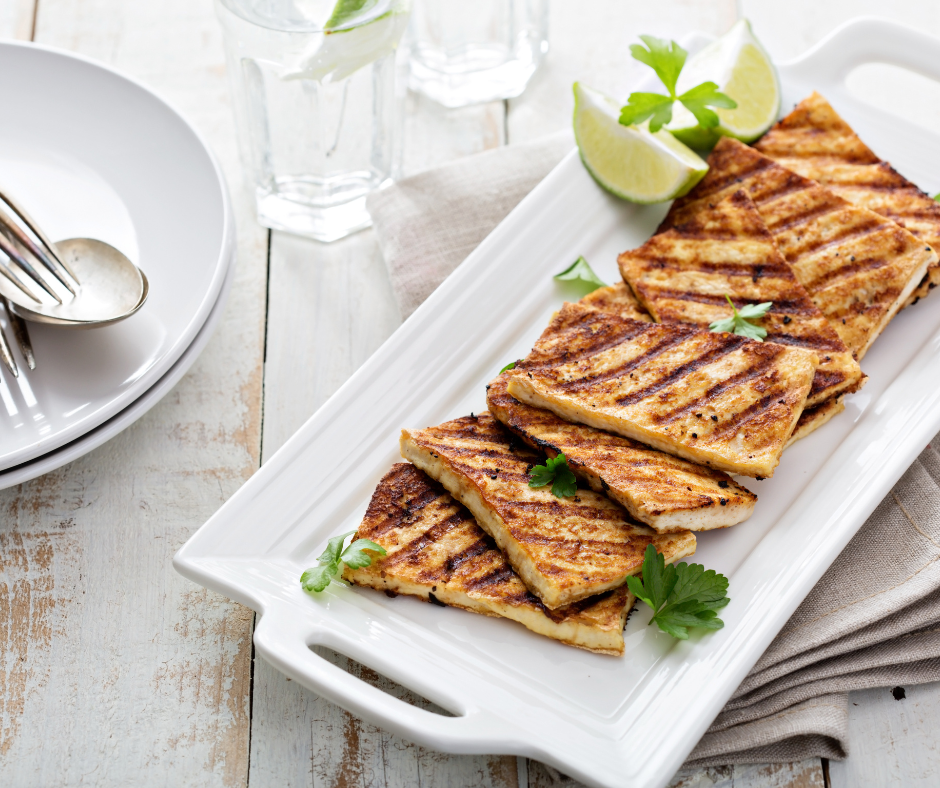
5. Smoked Tofu Slabs
Tofu gets a bad rap, but when you do it right? Game changer. Slice extra-firm tofu, marinate in a soy and ginger glaze, and grill over Smokeshack Wood Pellets. Smoky, crispy, and packed with flavor.
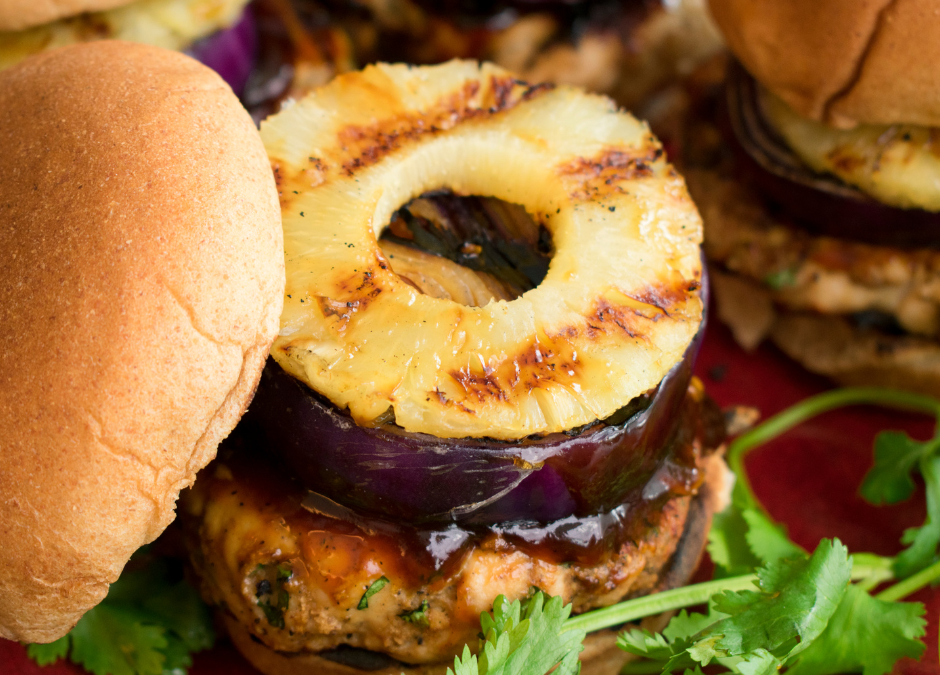
6. Grilled Pineapple Rings
Grilled fruit? Yes, please. Pineapple rings get all caramelized and juicy on the grill. Use Fruitwood Blend Pellets for a nutty, buttery vibe, and drizzle with honey or sprinkle with cinnamon. Dessert is served.
Tips for Nailing Your Plant-Based BBQ
Pick the Right Pellets: Different wood pellets = different vibes. Cherry for sweet, Mesquite for bold, and so on. Experiment and find your favorites.
Marinate Like a Pro: Veggies love a good soak in flavorful marinades. Go bold with spices, citrus, and herbs.
Preheat Your Grill: Don’t skip this step, especially in the winter. A hot grill = those beautiful grill marks and perfect caramelization.
Have Fun with It: BBQ isn’t about perfection; it’s about enjoying the process. Try grilling unexpected things like bread or plant-based cheeses—you might just discover a new favorite.
Let’s Make This Your Best January Yet
I get it, going plant-based might feel like a stretch. But trust me, with these recipes and Grillers Gold Premium Wood BBQ Pellets, you’ll be the king (or queen) of the grill in no time. So grab your apron, fire up the grill, and let’s make some magic.
Your taste buds will thank you—and who knows? You might just start a new BBQ tradition.
It’s summer! The season of impromptu gatherings, outdoor meals and hanging with friends and family.
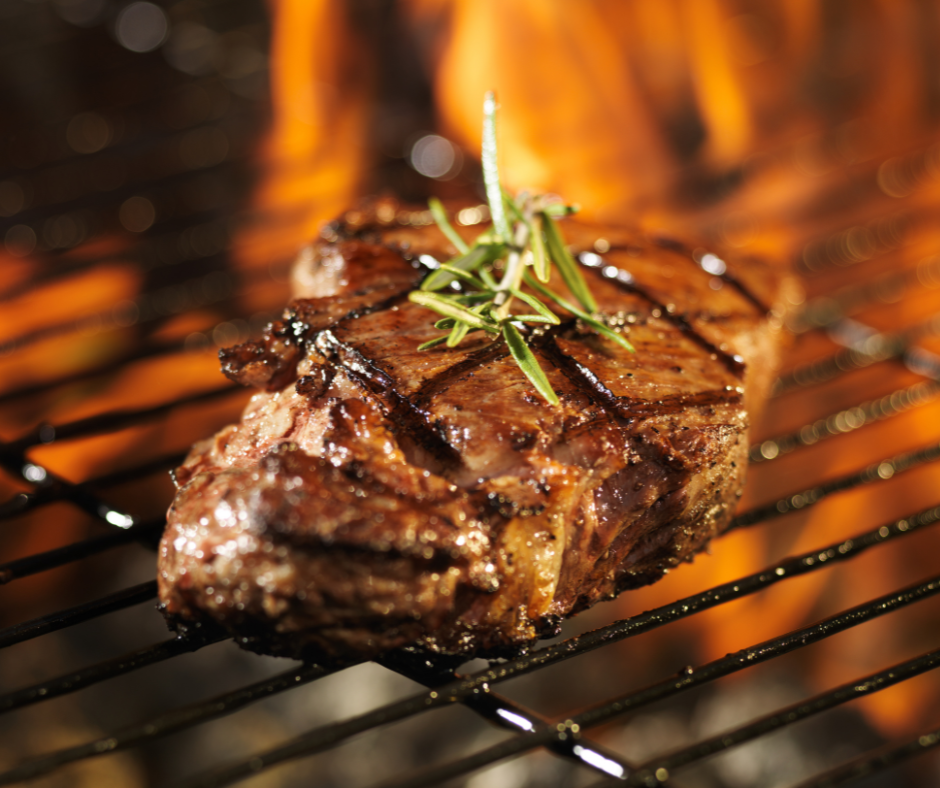
So let’s set the scenario – it’s a weekend day, you’re out in the yard doing some work and friends who live a little distance away ping you to let you know they are in the area and want to stop by to say hi. They arrive and you enjoy some refreshments on the patio and enjoy conversation. Then one of your neighbors pops over to say hello, and the party grows and so on, right? As the afternoon continues on, you ask if anyone wants to stay for dinner. Anyone up for steaks, you ask?
The challenge with steaks for a crowd is that it’s difficult to manage a bunch of steaks on a grill – you have to tend it the whole time which takes you out of your gathering, and individual steaks often wind up unevenly done. As usual, there’s a better way!
Luckily, you happen to have a nice sized 5 pound ribeye roast in the fridge as they were on special this week! So, normally a big rib roast is a slow-roasted special occasion thing but they are great for serving some tasty beef to a good sized crowd. It’s all in how you slice it.
Obviously, the trick is to have it on hand – we always keep one in the freezer – and believe it or not, if you have it wrapped in plastic, you can dunk it in a cooler of cold water and it will thaw fully in just a couple of hours. That is a great trick that works with pretty much any cut of meat or fish – just make sure it’s well sealed up in plastic.
The way we’re going to cook this is of course on your pellet grill fired up with Griller’s Gold natural hardwood pellets. We’re going to use a hotter version of reverse searing without the searing part – the trick here is to keep turning the meat over.
Truthfully, we’re roasting it as we would in an oven. Only our oven is outdoors, and delivers a wonderful wood-roasted flavor because of those awesome Griller’s Gold natural hardwood pellets!
So let’s do this!
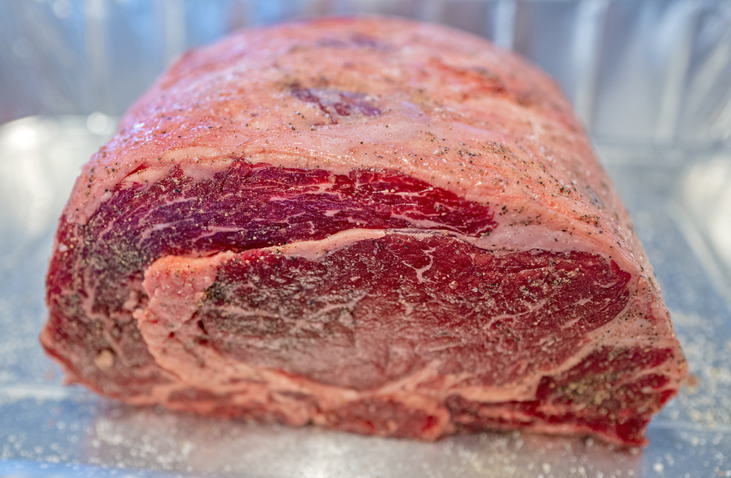
Prepping the Ideal Ribeye Roast
BUY: 4-5 lb. ribeye roast – ideally, bone in, but boneless works great too. The trick is the thickness of the meat – a roast this size will be at least 4” thick. If bone-in, get at least a 2-bone roast.
TRIM: Trim back any fat cap and also the wedge of fat as the meat transitions to the bones – that extra fat can cause your grill to flare up and that’s no fun. After trimming, drizzle olive oil (or other vegetable oil of your choosing) all over it and use your hands to cover it evenly.
SEASON: Just salt. Give it a very generous sprinkling of kosher salt. If you do think you want more seasoning on it, add pepper and perhaps some garlic powder, but really, just salt works great. If you have time, put it on about 2 hours before you start cooking.
PREHEAT: 325F with any of your favorite Griller’s Gold pellet flavors. For this, really anything works, but either Smokeshack or Competition Blend are probably our faves.
COOKing Your Rib Roast
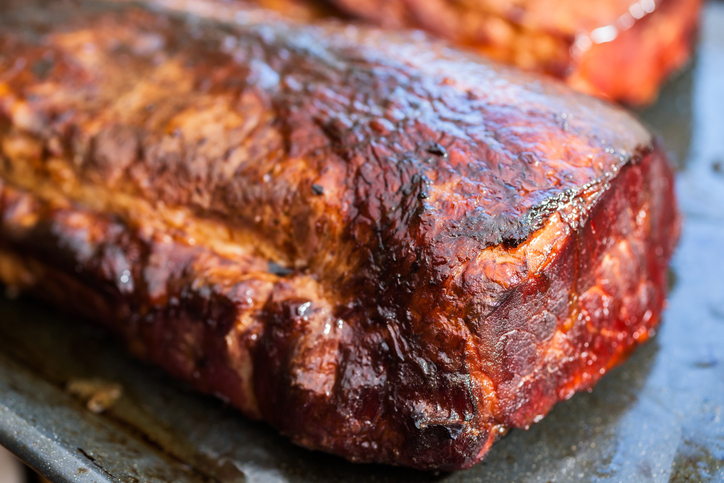
The technique is simple – you put it on, and you turn it every 20 minutes until it is the right temp in the middle – this is where having a proper instant-reading thermometer is key. The higher temp and the coating of oil will give it a nice “crust” on the outside and it will get a wonderful wood-roasted flavor on it as well. One difference here – when you do a rib roast in the oven you typically put it ribs down (if bone-in) or rib-side down if boneless. With this, cook it more like a steak and put it cut side down and turn it to the other cut side – the only time we wouldn’t do that is is if you’re doing a roast that is larger than say 3 bones.
TIMING and Temperature: The cook time will vary with thickness, but for a 4-5 lbs 2 or 3 bone roast, you’re looking at an hour or so on the grill.
Temps: Rare (red warm center): remove at 120F; Medium Rare (hot bright pink center) remove at 128F; Medium (hot light pink center): remove at 135F. You’re on your own for temps above that, and whatever you do, don’t do this recipe if you want it well done please. It will dry out and be tough as leather.
REST: As always, resting is key, and we like to rest our big cuts in a cooler so as to retain the heat. Give it a good wrapping in 2 layers of heavy duty foil, then nestle in a small picnic cooler with a folded bath towel on top of it. That will help retain the heat and help the heat migrate throughout. Rest it for at least 10 minutes per 2 pounds of pre-cooked weight.
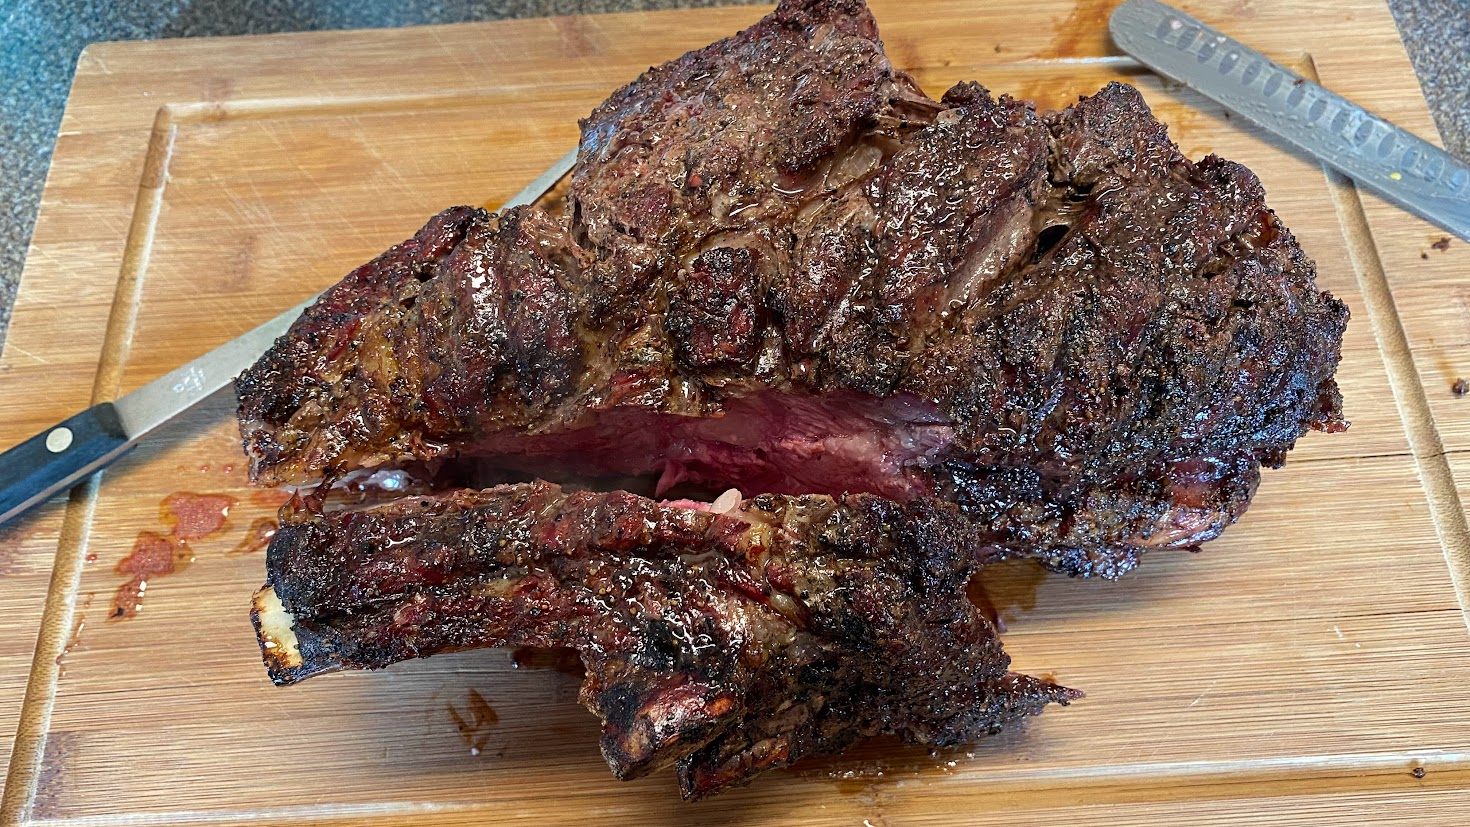
CARVING: As we said in the beginning – a great way to serve a crowd with this is in the carving. Take it out of the cooler, unwrap it carefully so you don’t lose any accumulated juices – pour those off into a bowl to hold while you carve. Then put it on a big board and have a warm platter ready (we just stick it in the grill while the grill does the shutdown).
Your first cut is to remove the bones – put the roast bone side down and work your knife along the curve of the bones to free the roast from the bones. Then (and this sounds crazy, but hear us out!), with the bone-side down on the board, cut it into 2-inch thick slices – so a 2 bone roast will yield two big slices, a 3 bone roast will yield 3, etc.
Next you’re going to lay those big slices flat on the board and cut them in half from the middle of the bone side to the top of the cap side, and then cut each of those pieces into ¼” slices. Arrange the meat on your platter and keep going until you’ve sliced up the whole thing!
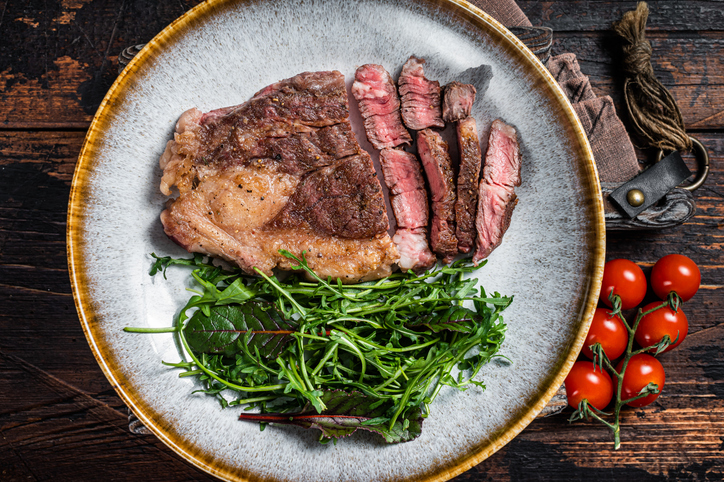
Now you have this marvelous platter of beautifully sliced steak, all having some “crust” on the outside of the slices – and it’s bon appetite time!
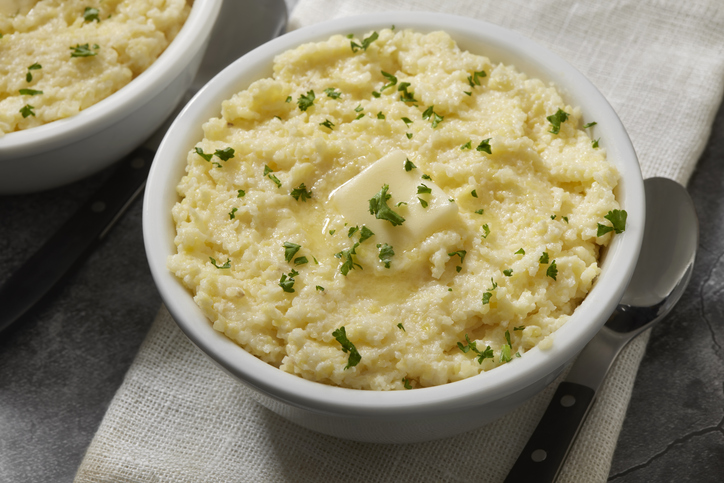
SIDES AND SERVING: We are a big fan of steakhouse side dishes – so we like to make creamed spinach, garlic mashed potatoes (although big fans of tater tots too!) and also a big Caesar salad with this meal.
And that’s it – you’ve fed a crowd easily, you didn’t struggle with cooking a bunch of individual steaks and, you were able to still be a guest at your own gathering. A win all around! Until next time!
Right now is the time of year when everyone’s taxes roll around – and whether you’re lucky enough to get a refund, or have to pay, it certainly makes you think twice about expenditures. And let’s face it, groceries have gotten more expensive this year.
So in this edition of the Griller’s Gold Blog, let’s have a look at some ways to have a great meal cooked on your pellet grill fueled with those amazing Griller’s Gold Premium Wood Pellets!
Let’s do this!
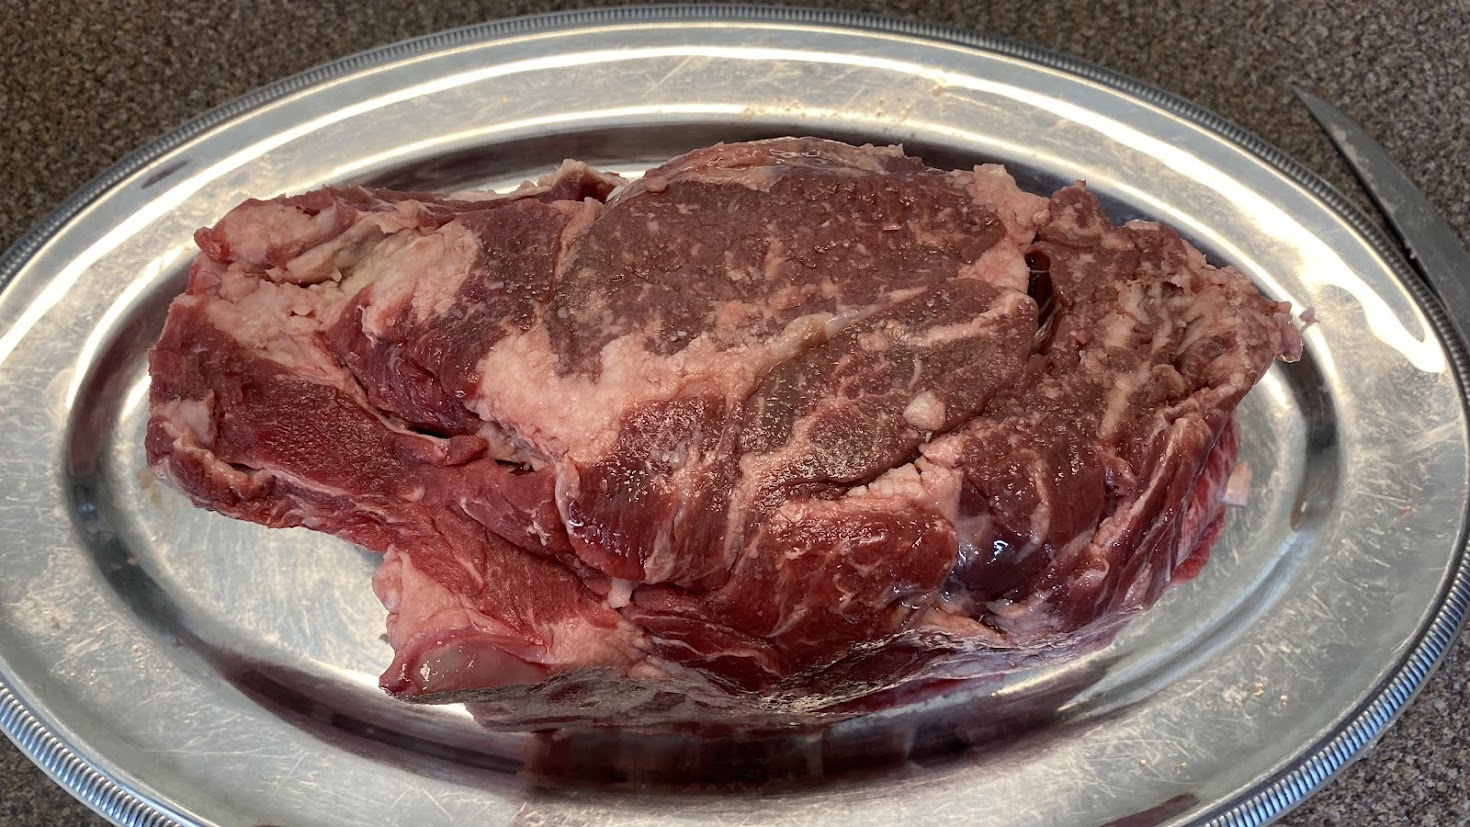
Budget Cut – Chuck Eye Roast (the Beefy Secret!)
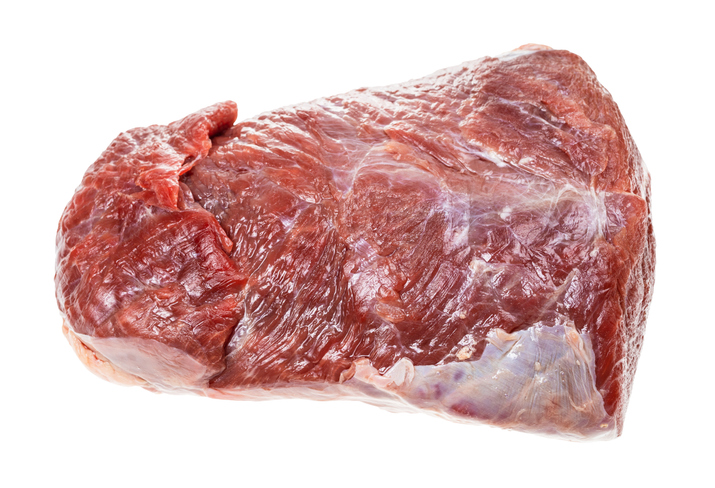
A chuck eye roast is a roast cut from the center of the chuck. The chuck is the primal cut that encompasses the shoulder part of beef cattle, so it is a working muscle.
Chuck is typically what you use to make beef stew or pot roast. It likes a long, slow cooking method for maximum tenderness. BUT! The chuck eye, by the way it’s cut, can actually be grilled like a steak to medium rare.
Chuck eye roasts are kind of oval in cross section and square to cylindrical in shape and are between 2 and 4 inches thick. A direct cousin of the Chuck Eye is a Delmonico Steak – which is a steak cut from the chuck eye.
The thing we like about a chuck eye is you can see a clear grain direction in the meat (in this photo it is running from the lower left to the upper right) therefore, when carving it, it is easy to spot the grain and make cross-grain slices, which enhances the tenderness of your finished meat.
We love doing a Chuck Eye roast on our pellet grill using the reverse sear method.
Here’s how…
Reverse Sear Method for Chuck Eye Roast
Buy:
Chuck Eye Roast (2-4 lbs) – plan on ½ lb precooked weight per person. When we spot them at the grocery store, we usually buy two – one for now, one for the freezer!
Prep:
Go over the outside the roast and trim off any silver skin or obvious gristle. Because it is a working muscle, there will be some connective tissue that cuts through the roast – don’t worry about that, we’ll deal with it when it’s done and carved.
Seasoning:
We like to do at least a 2 hour kosher or sea salt “dry brine” on it prior to cooking. Give it a generous sprinkling of salt all over at least 2 hours prior to cooking (but if you have time, 6 hours or even overnight does wonders!), then immediately before cooking, we coat it with a generous hit of freshly ground black pepper, granulated garlic, granulated onion and paprika. If you want a pop of spice, a nice shake of chili powder also adds to the flavor.
Grill Prep:
Make sure your grill is clean as you’re going to need to fire up to hot temperature later to sear. Load up with your favorite Griller’s Gold Premium Wood Pellet – the stronger flavors are great with this – Cherry, Hickory, Smokeshack or Competition Blend work great, as does Charcoal, although that has a more subtle flavor. Preheat to 250 for the “low and slow” part of the cook.
Cooking:
Once the grill is stable at 250 (most pellet grills take about 15 minutes for this), put the meat on, insert a probe in the thickest part and close it up!
Set a timer for 20 minutes for turning. Turn the meat every 20 minutes until the internal temp hits 125F for medium rare. If you like it more done, adjust accordingly.
Rest:
Take the meat off the grill, wrap it in a double layer of heavy duty foil, then nestle it in some folded towels. We like to put it in a picnic cooler as well. Let it rest for 1 hour. About 15 minutes before the rest ends, fire your grill to it’s highest temperature (ours goes to 550F) and let preheat.
Sear:
Unwrap the meat and bring it to the grill. Sear it on the grill for about 8 minutes, turning every 2 minutes, so each side will be against the grill for two 2-minute cycles, then bring it in.
Serve:
Slice it across the grain (you remember that, right?) in ¼” or so slices and enjoy.
We love this with the usual steakhouse sides of garlic mashed potatoes, a good veggie like sauteed spinach or roasted asparagus, and a bottle of big red wine – Merlot, Cabernet, or if you got a nice tax refund, how about a French Bordeaux? Gotta live a little right?
Budget Cut – Pork Loin Roast:
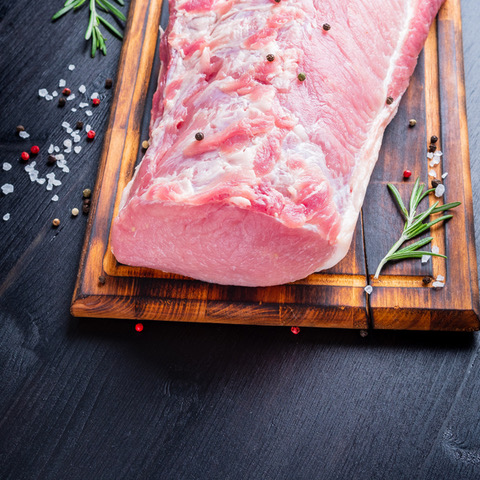
Thankfully due to the abundance of pork production in the US, pork prices have stayed pretty low, so our favorite thing to do is a whole pork loin roast on the grill. These massive cylinders of meat are great for serving a crowd, and the nice thing is, it responds beautifully to the Reverse Sear method we just described. We’ll note the differences as we go here.
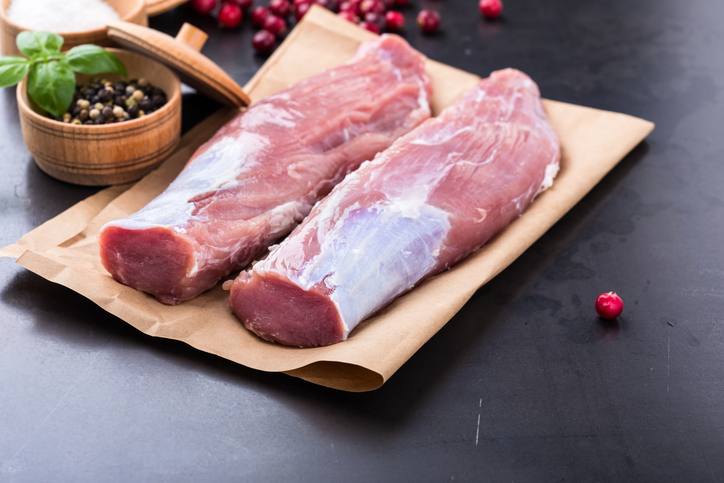
A whole pork tenderloin is usually a 5 to 6 pound piece of meat, about 18” to 24” long. It is about 4 or 5 inches in thickness and is oval shaped in cross section. The price on these varies between as low as $0.99 a pound to about $4.00 a pound.
The cut is comprised of several muscles, so the texture and flavor varies end to end. In fact, you can buy one of these and butcher up into a good amount of “freezer food” with roasts, pork chops, etc. We love buying these for that reason.
In the picture here, the lower right end is the “sirloin” end and the upper left end is the rib end. The rib end meat is a bit fattier. In the middle is the “center cut” which is where typical pork loin roasts are cut from, and the sirloin end is usually sliced into thin “breakfast” pork chops. But put away that knife, because we’re cooking this bad boy whole today!
Reverse Sear Method for Whole Pork Loin Roast
Buy:
You’re buying a whole pork loin roast – these are most easily found at Sam’s Club, Costco and other large big box retailers and they are in cryovac packaging. Try to avoid buying ones that say “up to 12% solution of pork broth, salt and …” – those are pre-brined and while they cook up nice, they can be a bit salty and that limits your seasoning creativity a bit.
Prep:
Take it out of the package. That’s it. No need to trim these. They will occasionally have a fat cap on one side, and that’s fine – leave that for flavor.
Season:
Just like for the chuck eye roast, first dry brine it with a generous hit of kosher or sea salt for a couple of hours. But DON’T do that if you bought one with the solution injected in it. After the dry brine, we like to mix up a rub of equal parts sugar, fresh ground pepper, granulated garlic and onion, paprika, and then ½ part chili powder and ¼ part dry mustard powder. For a large roast, use 2T for the whole parts in your mix, which means a ½ part becomes 1T and a ¼ part becomes 1/2T. Rub it generously all over the meat.
Grilling, Resting and Searing:
Follow the instructions for the Chuck Eye roast – it’s the same with one exception – go low and slow until it hits 140F internal. Pork is best between 145 and 150F when finished.
We love to cut this into thin slices if we’re doing sandwiches, or in thick pork chop like slices if we’re serving as a plated dinner.
Some additional great “Budget Cuts”
For chicken, we love chicken thighs and for some reason those are always inexpensive! We also love turkey – whole turkeys are always a great value year round – usually priced between $3 and $4 a pound.
That’s a wrap!
You see! You CAN eat like a king without spending a fortune. Wishing you a happy spring time! Thanks again for reading the Griller’s Gold Blog!