Let’s face it – things are expensive right now. Everything from the cost of toothpaste to gas has gone up. Unfortunately, groceries and especially less-sold grocery items like the BBQ meat cuts we know and love, have gone right up with them.
If tight budgets have you down, then you’re in the right place! We’re going to show you some simple ideas to make amazing grilled treats on a budget. All fueled of course, by Griller’s Gold Premium Hardwood BBQ pellets!
Enjoying the grill on a budget just involves making the same things you love with some twists. In this edition, we’ll do three things that “mimic” three faves, only on a budget.
We are replacing a big thick Ribeye, Wings, and Baby Back Ribs with substitutes that are just as tasty and more importantly, much less expensive than the originals.
Let’s hit it!
Ribeye on a Budget: Reverse-Seared Chuck Roast
Of all the foods to have gone sky-high, beef is probably the worst one. It’s a combo of poor demand during the pandemic that caused producers to scale back operations and then when demand returned, not being able to scale back up fast enough. Fortunately, there are signs that this is improving, but beef prices are still at a record high.
So, you’ve got a hankering for a big thick ribeye, but that cost is a way off? For about 40% of the price of a bone-in rib roast, you can get … a chuck roast! The ribeye’s tastier cousin.
I know, you’re saying “hey wait a minute … chucks can be tough as nails, they are for braising not grilling.” But we say “nay nay! Don’t knock it until you try it.” The trick to tenderness comes in three ways:
- Salt – we use the “dry brine” technique to get some deeper salt penetration and deliver tenderness
- Gentle cooking – we use the tried and true fave method of “reverse searing”
- Careful carving – We will carefully slice and carve the meat for the optimum tenderness
Now, this all said, a chuck’s “chew” will be more like a New York strip than a filet, so just be ready for that.
Buy and Trim on a budget:
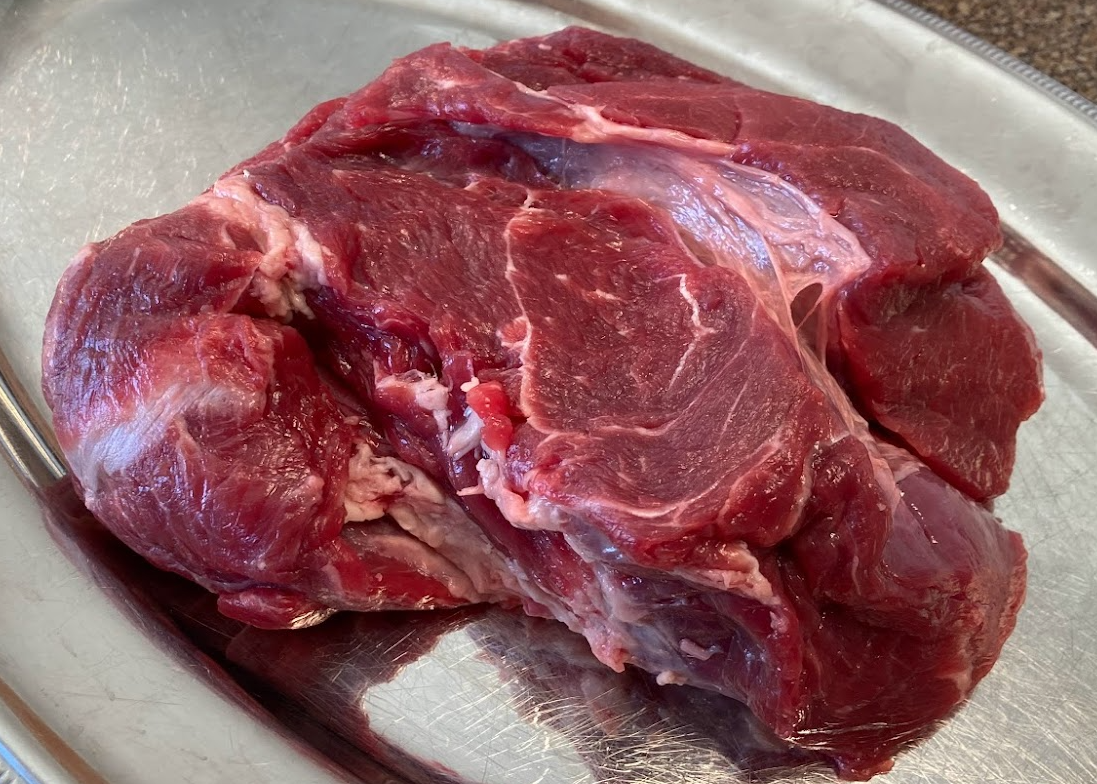
Buy the thickest chuck roast you can find – ideal thickness is 1 ½” to more than 2” thick. Look for chucks that have even marbling and ideally a minimum of hard ridges of gristle. When you get it home, trim off any hard exterior gristle lines, any silverskin, and hard bits of fat on the outside. Leave what is between the muscle sections alone until after cooking.
Dry Brining:
As you’ve probably learned, great juiciness and tenderness can come from brining. (This is typically done to turkeys and chickens.) As the salt is absorbed into the meat, it “denatures” or untangles the tangled-up protein strands in the meat.
The dry brine technique is simple.
Take the meat out of the package, put it on a plate or a pan, ideally with a rack under the meat to give it some air space, and sprinkle it generously with kosher salt. Then you leave it unwrapped in the fridge overnight. That’s it.
You’ll find that about an hour after the salt goes on, it will have all dissolved. As you check on it, you’ll see that some moisture has come to the surface of the meat, then disappears again. That’s the brining process at work.
So the day before cooking, get the salt on it and put it in the fridge. About 2 hours before cooking, take it out, give a rinse in the sink to wash off any residual brine and you’re ready for the next step!
Now, what if you didn’t plan ahead? No worries – even a 4-hour dry brine at room temp has a good effect.
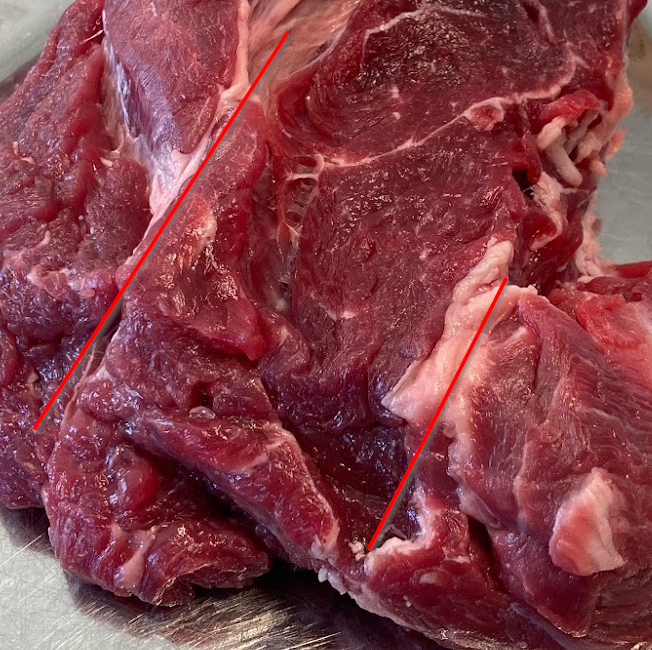
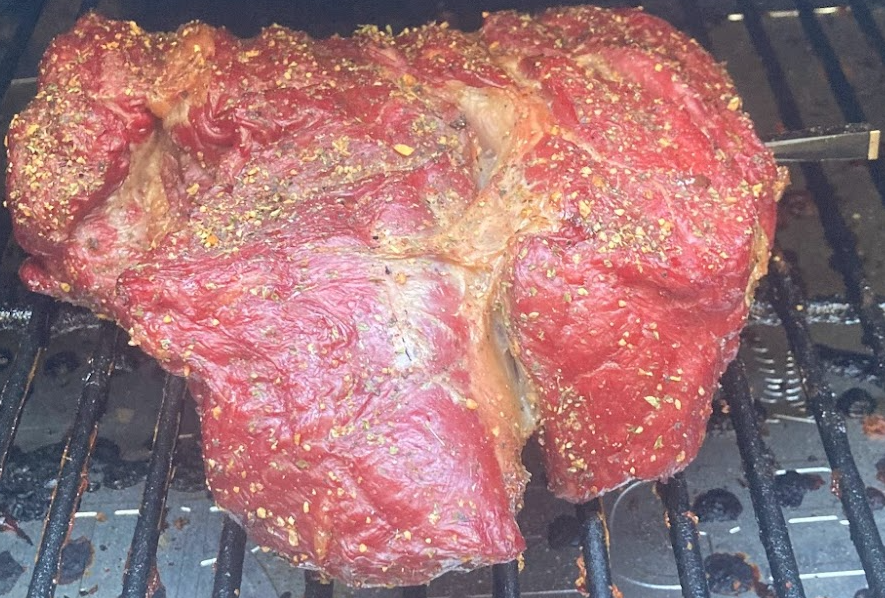
Key thing at this step – examine the meat and get to know where the muscle divisions are before you cook it. This will help you with the carving later. In this photo, you can see natural divisions between muscles marked with red lines. We’ll split it along those lines after cooking and then slice off any gristle or sinew, leaving just delicious tender meat.
Reverse Searing:
For the cooking technique, we’re going to use reverse searing. That’s the technique where you cook low and slow until just before your meat is the desired doneness, then, you rest it, and then sear it just before serving.
Here’s the steps:
(PSST…if you want a more detailed description of the Reverse Searing process then check out our other blog: Expert Technique – Reverse Searing)
- Fire Up:
Fire up your pellet grill to 225 degrees. If you like it extra smokey, start at 180F or use the “Smoke” or “Super Smoke” settings, depending on how your grill is equipped.
For beef, we like Griller’s Gold Competition Blend or Smokeshack Blend the best. If using a charcoal or gas grill, you want low heat – make a small fire and put it to the side, or only light off one burner on your gas grill.
Get it preheated well – at least 15 minutes at grilling temp. - Season, Meat on and Turning:
Seasoning: We like to add just a touch more surface salt at this point, plus garlic powder and fresh ground pepper. But you do you on that one. Just remember that the meat already has a salty thing going.
Thermometer: if you have a probe thermometer or other style of “insert and leave it” meat thermometer, this is a good time to use it.
Depending on the thickness of your chuck, it can take anywhere from 30 minutes to 90 minutes to reach your doneness temp. We like to turn the meat every 20 minutes or so just to evenly cook it. - Targeted Doneness:
While we like our meat on the rare side of medium-rare, because Chuck isn’t inherently tender like a filet or ribeye, you’ll want to go a bit more done. We like to do the reverse sear to about 130 degrees (this is where we set our probe thermo’s alarm) which is on the low side of Medium Rare (135) but the meat will carryover a bit.
- Rest:
When the meat hits the target temp, take it off to a platter, cover it with foil (1 layer of heavy duty, 2 layers of regular), then cover that platter with a couple of folded bath towels (we keep several old clean towels for this purpose).
This creates a little rest nest for the meat. Rest at least 30 minutes, ideally an hour. This rest helps even out the heat in the meat and helps tenderize it. - Sear:
20 minutes before serving time, fire the grill back up to at least 450, or, one of our favorite methods, heat a heavy skillet, ideally cast iron over medium-high heat on the stove.
Sear the meat to a beautiful brown crust – we like to turn it every 2 minutes until each side has had two “rides” on the heat.
Time to carve! - Carving: So you’ve already rested the meat before, so you can carve it right when it comes off.
First divide the meat along the muscle lines that you so carefully noted when you were dry brining it, then trim off any hard gristle lines or undesired fat. Each piece will likely have a gristle line along the side that connected it to the other piece.
Note the red lines in the picture below, those are the gristle areas that you need to trim off. Then just carve those pieces in relatively thin slices, stacking them on a serving platter.
Pour any accumulated juice over it, and if you want a “rock star” touch – melt a couple of tablespoons of salted butter and pour over the meat.
Bonus points if it’s a compound butter!

This “budget” style of steak will be so good it will make you think you’re royalty! Hint: Don’t share your secret with your guests!
Chicken Thigh “Wings”
Due to the popularity of chicken wings in restaurants, and the labor-intensive process to cut them, wings are inherently much more expensive than good ‘ol chicken thighs.
Chicken thighs are thicker, meatier, and well, most would say, even tastier than the ‘ol chicken wing. Here’s a quick and easy technique to make tasty, crisp-skinned chicken thighs ready to toss with your favorite wing sauce:
Buy budget Friendly:
Simple: bone-in, skin-on chicken thighs. Ideally don’t get the ones with the back bone and meat attached (and if you do, look up on YouTube on how to remove that, then save them to make chicken soup).
Prep:
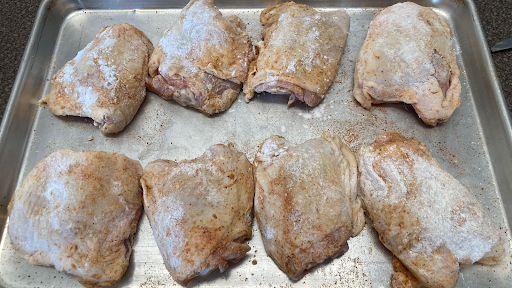
We like to rinse off the chicken after it’s out of the package then spread it on a baking rack to air dry a bit. This next step will be the kicker step: take all the thighs and dump them into a big mixing bowl, add a couple of tablespoons of baking powder (yes we said that!) sprinkled evenly over them.
Season them generously with salt and pepper, or if you like, a barbecue rub. Then toss them to distribute the baking powder and seasonings. The baking powder aids in crisping up the skin.
Fire Up:
No low and slow here, friends, heat is what you want. We like to preheat to 425 degrees for at least 20 minutes, ideally 30 minutes. For Griller’s Gold BBQ pellets, really anything works great for this – we like either Charcoal Blend or Competition Blend for chicken parts on the grill. If you’re grilling over charcoal or gas, well, get the grill good and hot, but ready to cook indirect, which means charcoal on one side, and for gas, one burner shut down.
Cook:
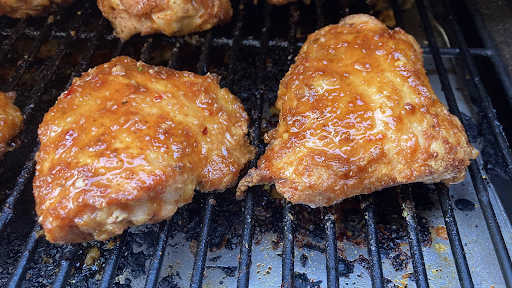
Put the thighs on the grill, skin side up to start, then turn them every 10 minutes until done – which should take about 30-40 minutes at 425.
Done is 185F with an instant-read thermometer pushed down to the bone in the center of the thickest piece you have on the grill.
Sauce:
We love to sauce them three different ways:
- Barbecue: For this, you’ll be brushing them with sauce on the grill. When the chicken is done, brush them with your favorite BBQ sauce, flip sauce side down and brush again. Close up the grill for 2 mins, then repeat. Remove and serve.
- Buffalo: For medium-hot buffalo sauce, melt ¼ cup butter then add ¼ cup Frank’s Red Hot sauce, 1 tsp brown sugar, and 1 tsp fresh minced garlic. Whisking well. Simmer for 2-3 minutes to blend flavors, whisk up well again and toss with your thighs.
- Spicy/Sticky Asian: We love this one! Whisk together ⅓ cup soy sauce, ¼ cup honey, 2T canola or other vegetable oil, 1 tsp garlic powder, ½ tsp ground ginger, ½ tsp dry mustard and 1 tablespoon either Sriracha sauce or Thai Red Curry paste. Can reduce the hot stuff if desired. Toss with the thighs.
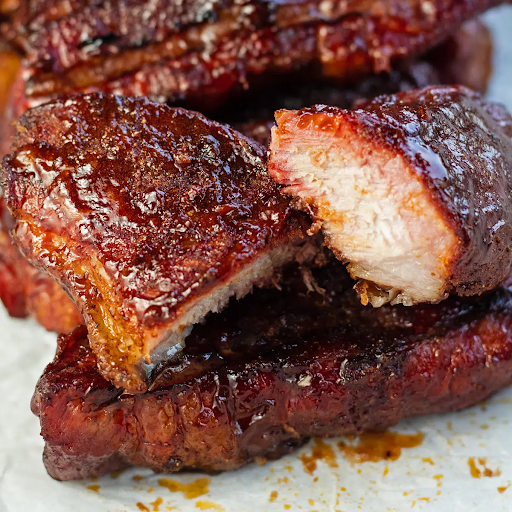
Pork Shoulder “Boneless Ribs”
Pork Shoulders and cuts like Pork Shoulder Steaks are a great way to have that satisfying pork rib flavor on a budget. “Boston Butt” roasts or Pork Shoulders (they are the same … yeah don’t ask why a shoulder is also a “butt”) come from the shoulder of the pig and because they are a worked muscle they are super flavorful. Treat them like you’re cooking ribs and you may never go back to baby backs!
budget Buy:
We like to buy whole pork shoulder roasts, either bone-in or boneless for this. If you buy bone-in, remove the bone which is a blade-like thing that is usually exposed on one edge.
Just follow it down with a boning knife to cut it free. You can also buy pork shoulder steaks which are steaks crosscut from the shoulder cut. The problem is they are usually cut too thinly. If you’re working with a butcher or have a good grocery store meat counter they can cut them for you. The ideal thickness is at least 1” thick.
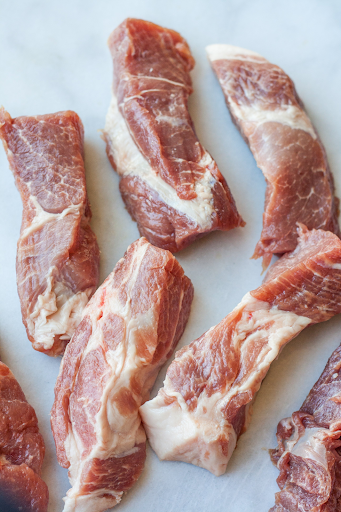
Cut and Trim:
Your goal is strips of meat, not unlike “chicken fingers”. They should be about 1” thick and 2” wide and as long as you can cut them from the roast. We like to cut 1” thick slabs and then cut those into 2” wide strips. Cut off any surface fat on any of them.
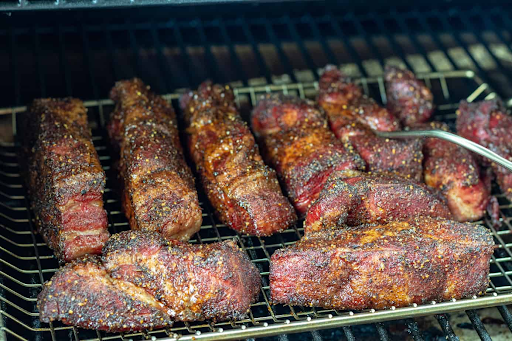
Season:
A good “rib rub” is what you want here – use your favorite!
For extra flavor and moisture, first toss the “ribs” with about ½ cup of yellow prepared mustard until evenly coated. Then throw on a generous amount of rub and toss to coat evenly.
Fire Up!
Preheat your pellet grill with Griller’s Gold BBQ pellets to 250 degrees for at least 20 minutes. For this recipe, we prefer Griller’s Gold Hickory, Applewood, or Competition Blend pellets.
Cook:
Lay the strips crosswise across the grill grate. Turn them every 30 minutes. They are done when they are cooked through and very tender. The internal temp should be about 185F degrees or more – up to 205F. Cooking can take up to 3 hours.
Sauce and Sear:
Remove the “ribs” from the grill then fire the grill up to 400F. Lay the “ribs” back across the grill grate and sauce them on one side, then turn and sauce again. Let run 2 minutes, then turn and sauce again, 2 more minutes, turn and sauce again. Remove and serve!
So … they aren’t the satisfying “meat on a bone” like baby backs. But gotta say these are super tasty and if you have anyone in your family who is “bone squeamish”. This is also an excellent way to get the great taste of ribs without bones. They are also great party “finger food” as well, with no bone mess to deal with.
And that’s Inflation Grilling Hacks!
Grill on friends! Until next time.