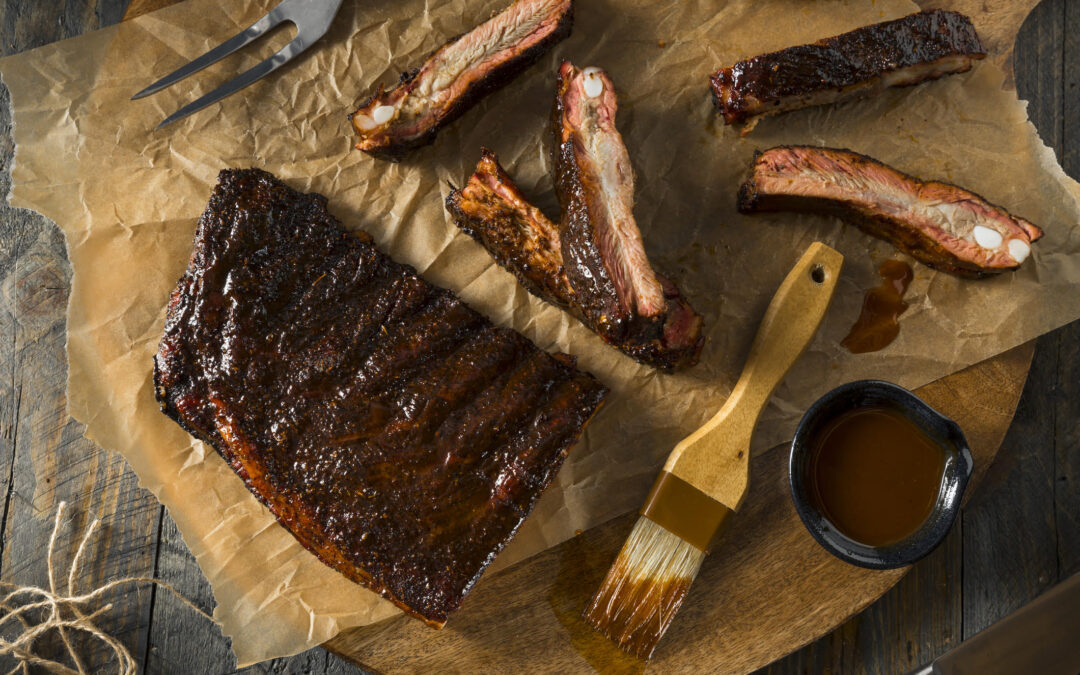
“Summertime and the livin’ is easy”, goes the song. So should making great food to serve at summertime celebrations. Here at Griller’s Gold, one of our summertime faves are pork baby back ribs. Now, many grillers and barbecuers are afraid of them – and there are a thousand techniques out there including the “3-2-1” method, preboiling them (NO NO NO!!!), fast cooking (it works, but not as good), etc. So our topic today is how to make GREAT ribs with an easy to make method.
The great thing is that a pellet-fueled grill makes this super easy. The grills are thermostatically controlled for even temps, and they self-feed fuel so there’s no fire maintenance. Speaking of fuel, Griller’s Gold Premium Hardwood pellets give great flavor to ribs. We’ve used pretty much every pellet we make in making ribs, and they all work great, but that said, for pork baby backs, we love either Hickory or Fruitwood Blend. So let’s do this!
This recipe delivers ribs that are tender, not chewy, with a nice clean “tug” of the meat coming off the bone. They are not “fall off the bone” ribs – those usually only happen when you braise ribs in a sauce after smoking.
What to Buy
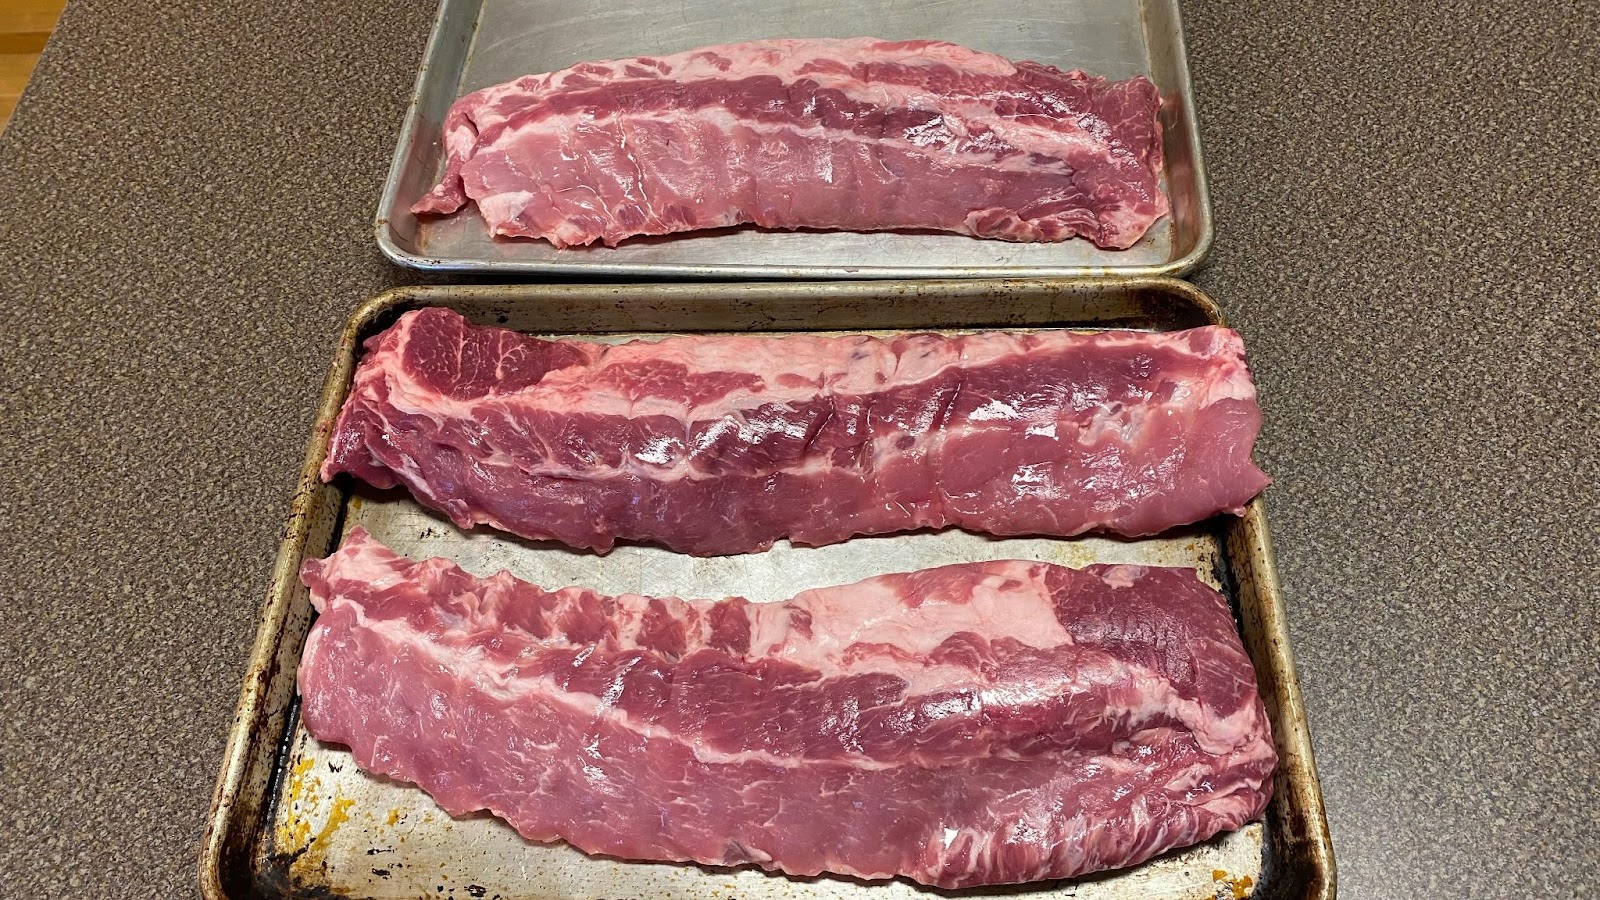
Pork Baby Back ribs – these are the rib sections from the back of the hog nearest the spine and have a lot of meat on them – much more meaty than St. Louis cut ribs. We like to buy the minimally-processed ribs – often you’ll find them with a notation on the package of “contains up to 10% of a solution of …” which is that they are injected with a brining solution. We find those to be too salty tasting for our taste. Great sources for minimally processed ribs are at Costco and Sam’s of course – and they come in 3 packs. Figure a half-slab of ribs per person, so a 3 pack should serve 12.
Prepping Your Ribs
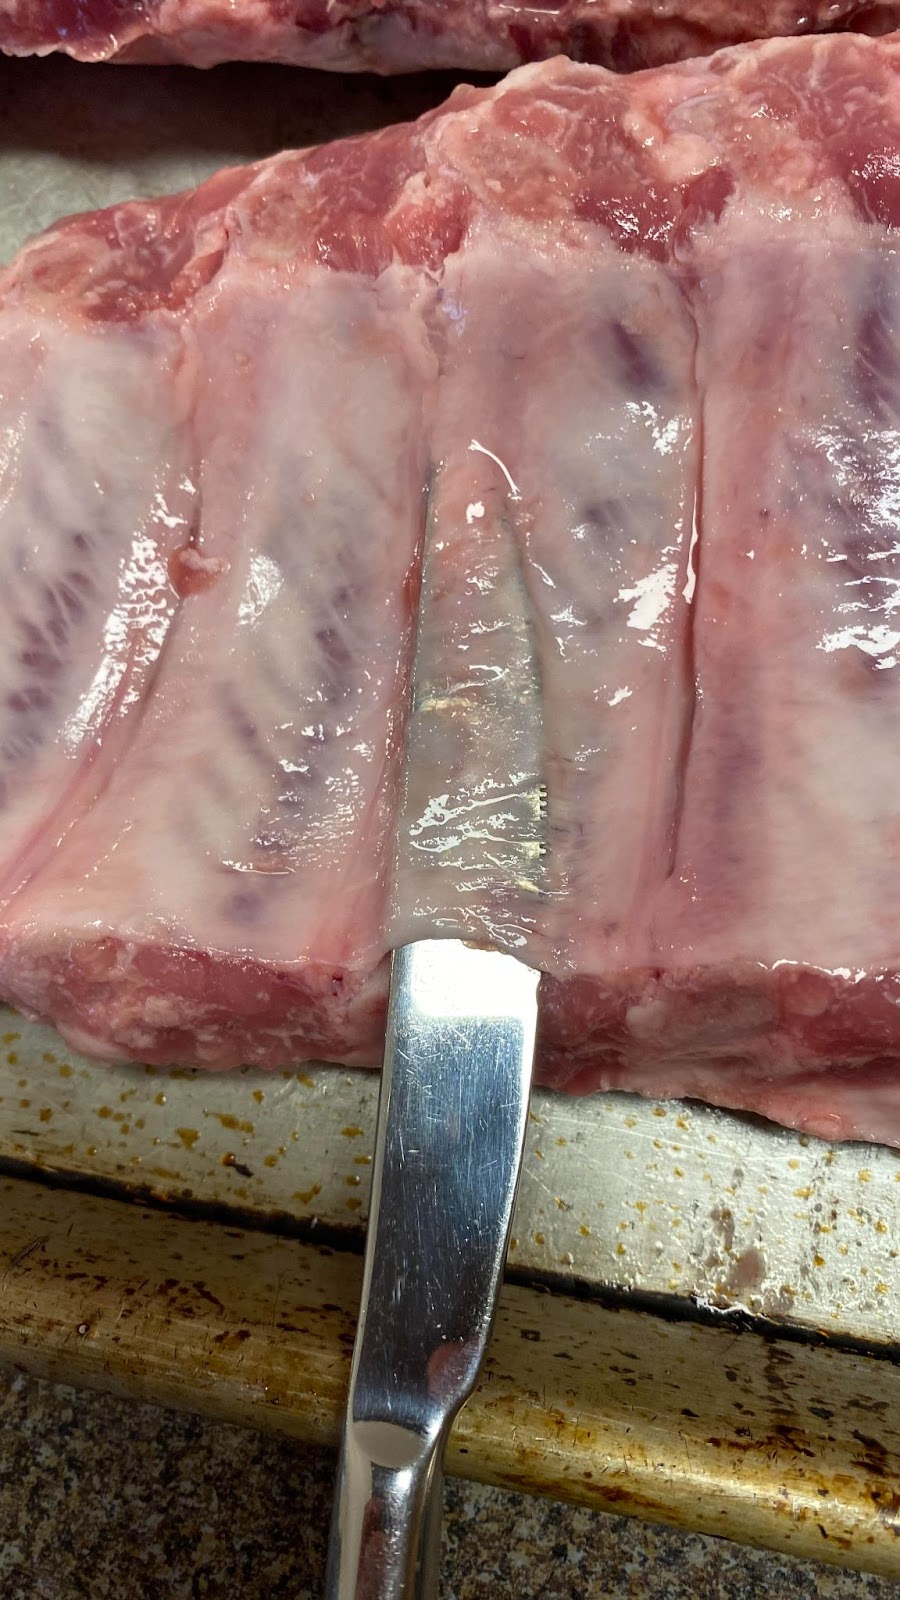
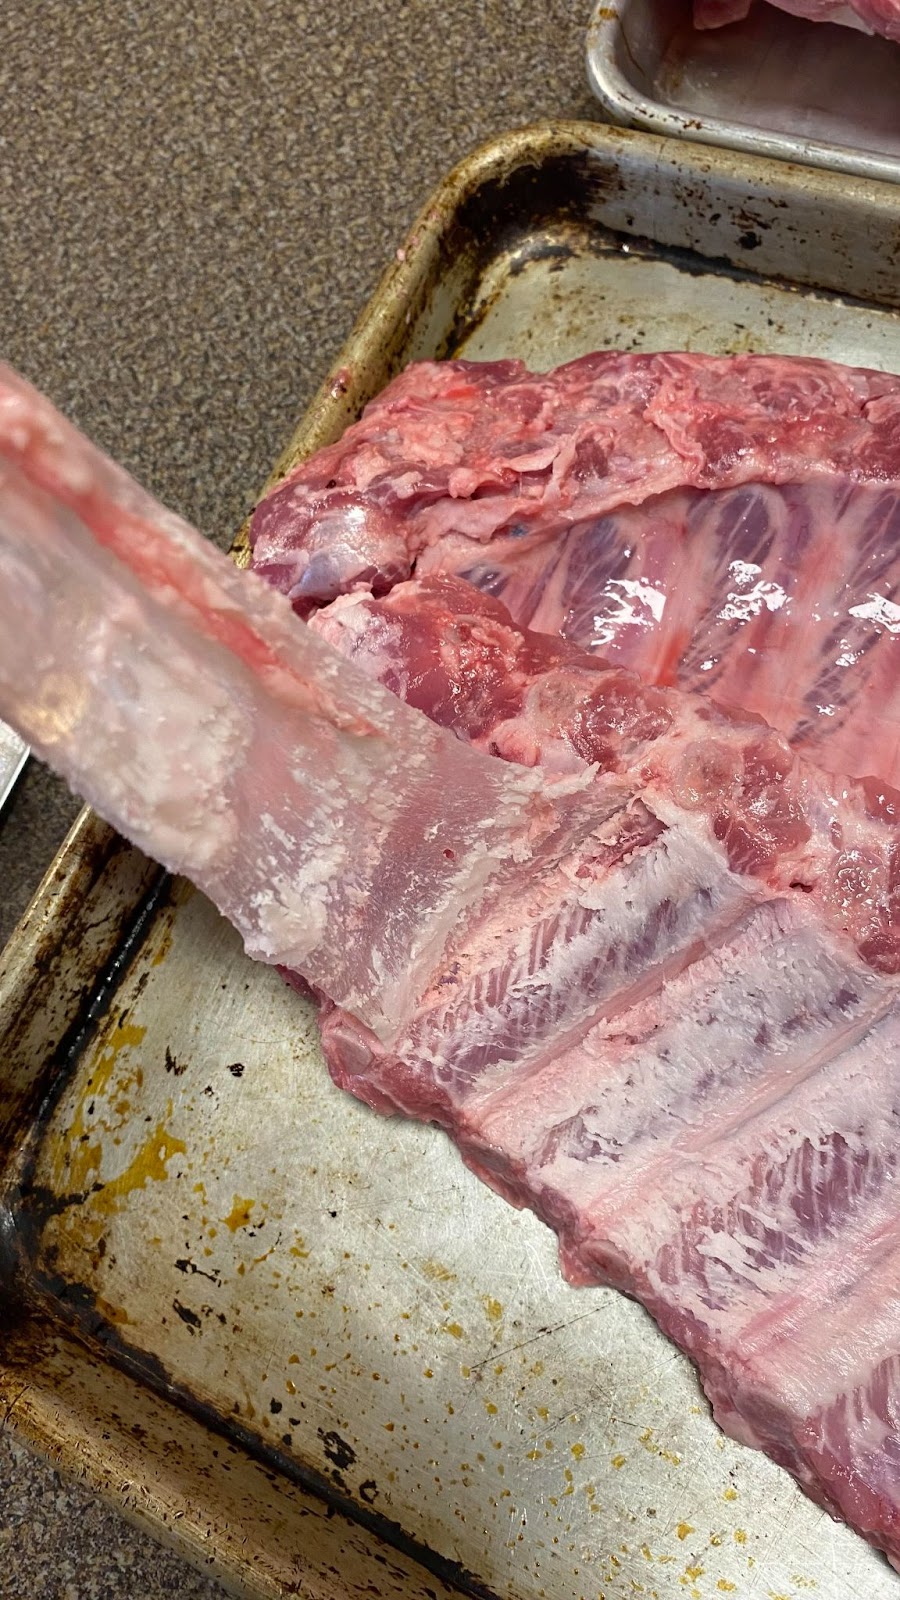
Generally speaking, ribs straight out of the package will have a membrane on the underside. That needs to get removed as it gets chewy as it cooks. Costco ribs frequently have had it removed. You can tell if it was already removed or not by how the underside of the ribs look – if they have a shiny/glossy coating – that’s the membrane.
Now some people think this is a very difficult thing to do, but they just haven’t found the right technique yet.
Here’s what to do:
1) Get a butter knife – up, a non-sharp butter knife is ideal for this technique.
2) Work from the side of the ribs away from the backbone. In the photo below one end of the ribs is sharply cut off at a near 90 degree angle while the other side sort of slants away. Start at the sharp cut off end.
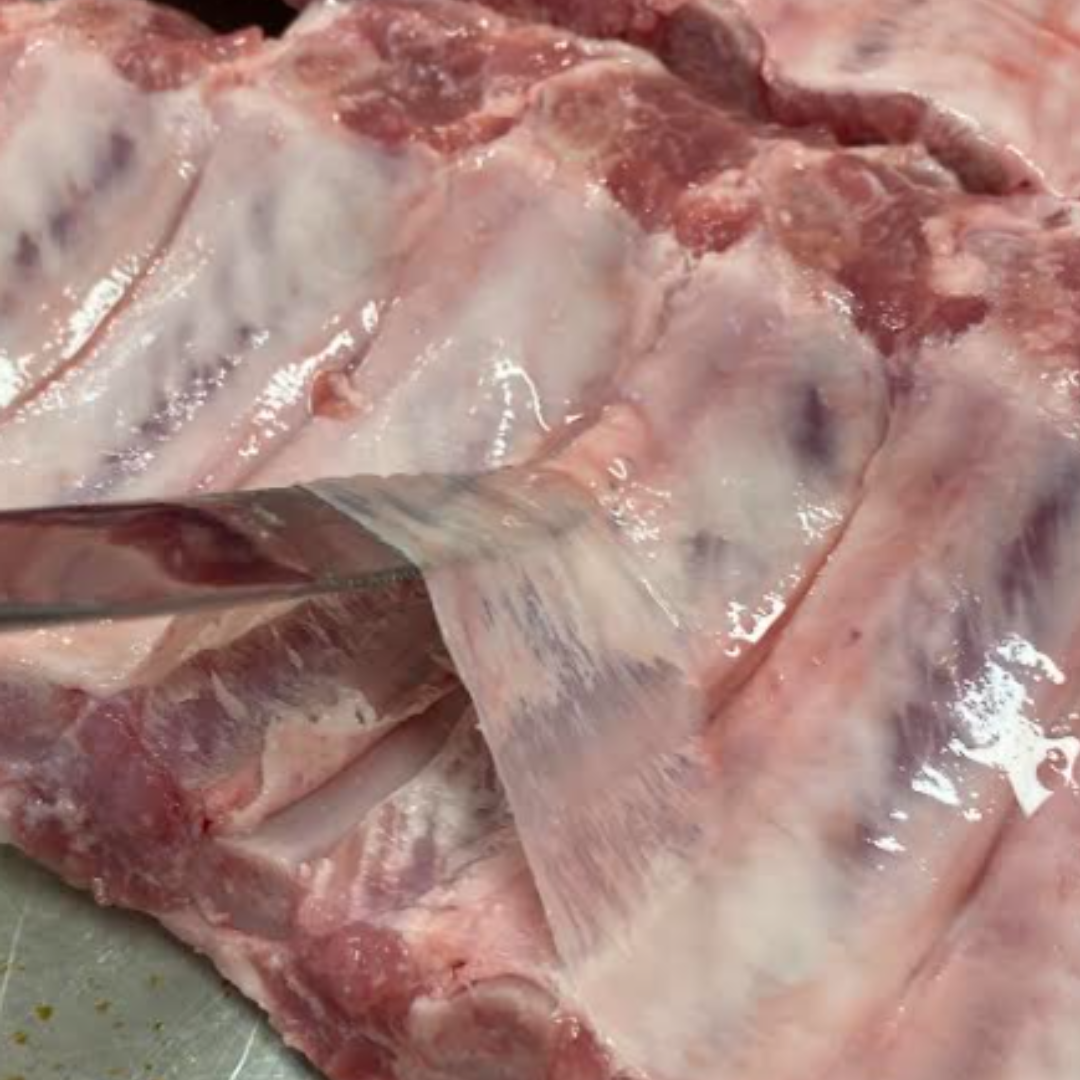
3) At the rib that’s closest to the middle of the slab, slip the butter knife under the membrane – it’s sort of a scraping action where you’re scraping the membrane up off the bone. Once the knife is inserted about half the length of the bone, lever it upwards, levering the membrane up – you can hear it tearing away. With a clean (not greasy/slimy) hand, get your thumb under the membrane and start pulling upwards – it will start peeling away. Work to one end and pull the membrane completely off, and then work the other direction to finish. Most of the time it will come off in one piece and the first time you do that you’ll feel like you pulled Excaliber from the stone!
4) From there, clean the ribs up a bit – if there are little bits of meat hanging off anywhere, just cut those off as they typically will burn and become dry and hard anyway.
Seasoning Your Ribs
Ok, we’re going to share a secret with you here. Our head blogger developed this rub recipe about 30 years ago and we’re here to say that even with all the commercial rubs out there, this works the best. And it’s simple to make. For enough Rub for 3 slabs of ribs:
- 2 T (tablespoons) EACH of kosher salt, sugar, ground pepper, paprika, garlic powder and onion powder
- 1 T chili powder
2 t (teaspoons) dry mustard powder (we like the Colman’s brand) - 1 t ground cumin
- ½ t ground ginger
Mix up well and put it into an empty shaker container. By the way, we use so much of this that we make it in quantities where the tablespoons above turn into cups!
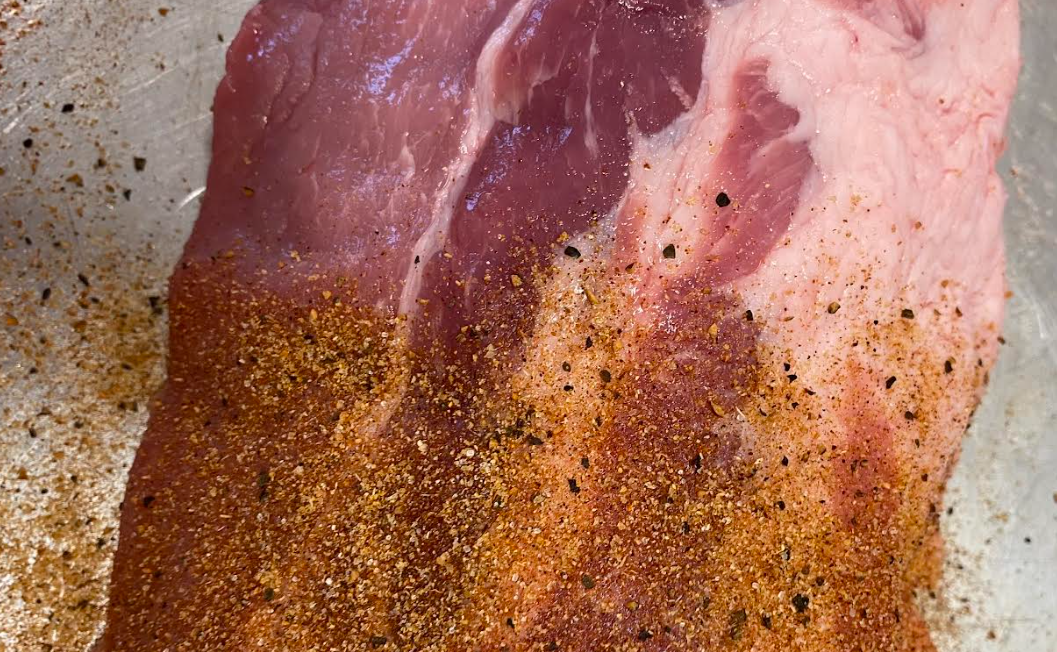
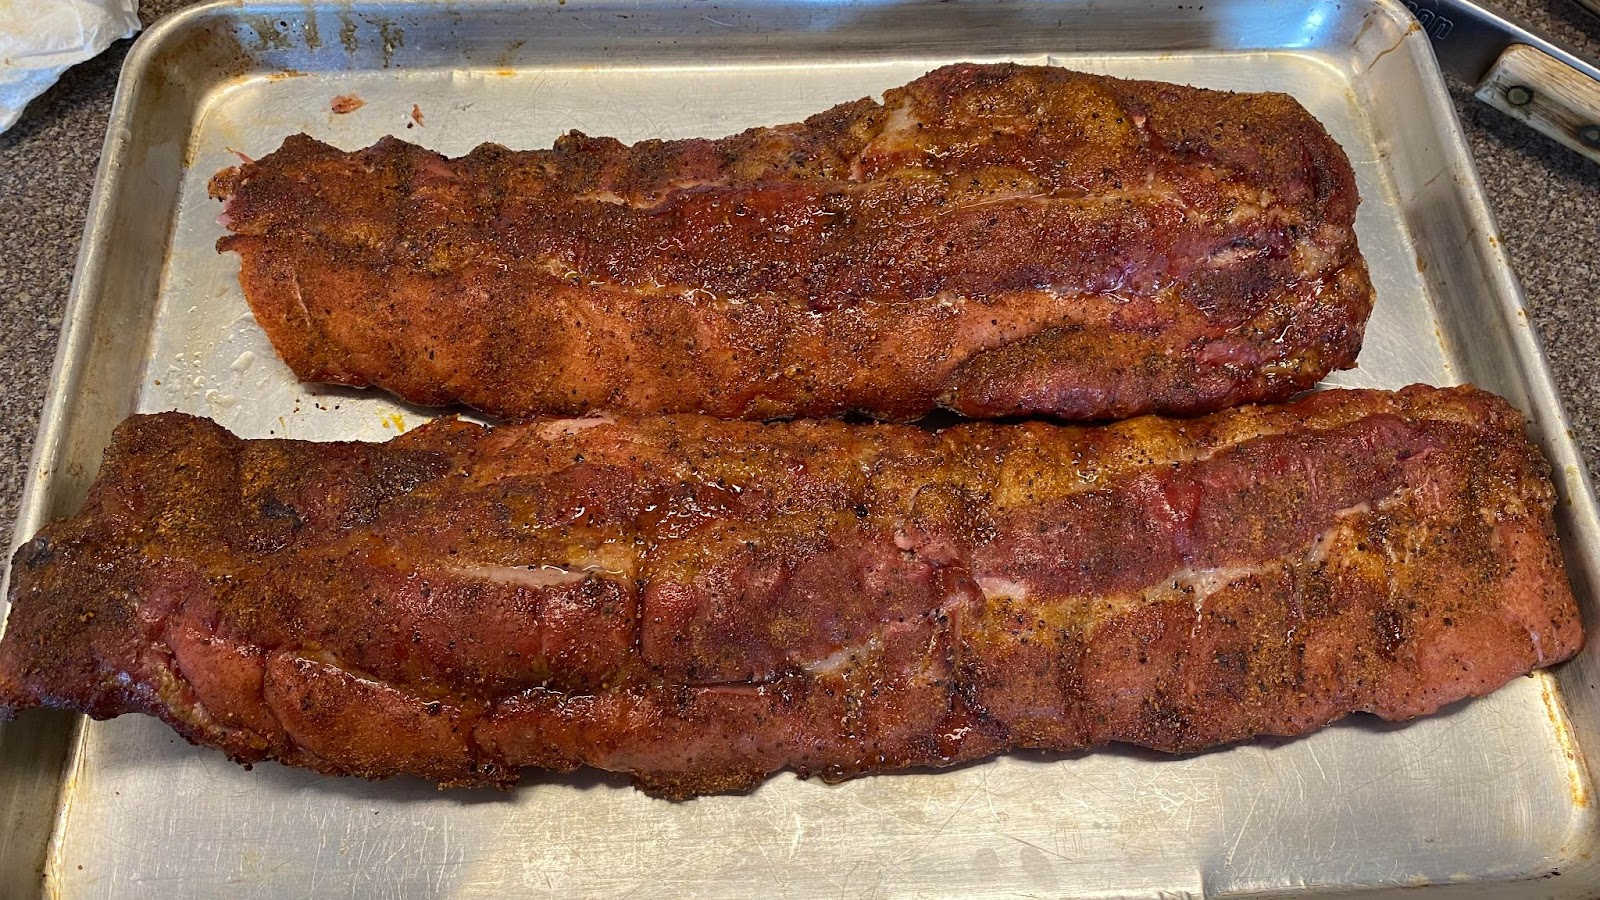
Generously shake the rub over the meaty side of the ribs, you don’t want to sprinkle it, you want to cover it! See the photo below to see how much you need to apply. Flip the ribs over and and give a good shake on the bone side but you don’t need as much on that side.
That’s it, let’s cook!
Grill Prep for Your Baby Back Ribs
Load your pellet grill’s hopper with Griller’s Gold pellets and fire it up to deliver 225F temp (the reason we say “deliver” is that some grills run a little higher, some a little cooler. It pays to know how your grill behaves). We like to let ours preheat for a solid 20 minutes, even though it comes “to temp” in 10 – it helps to get all that metal heated up evenly.
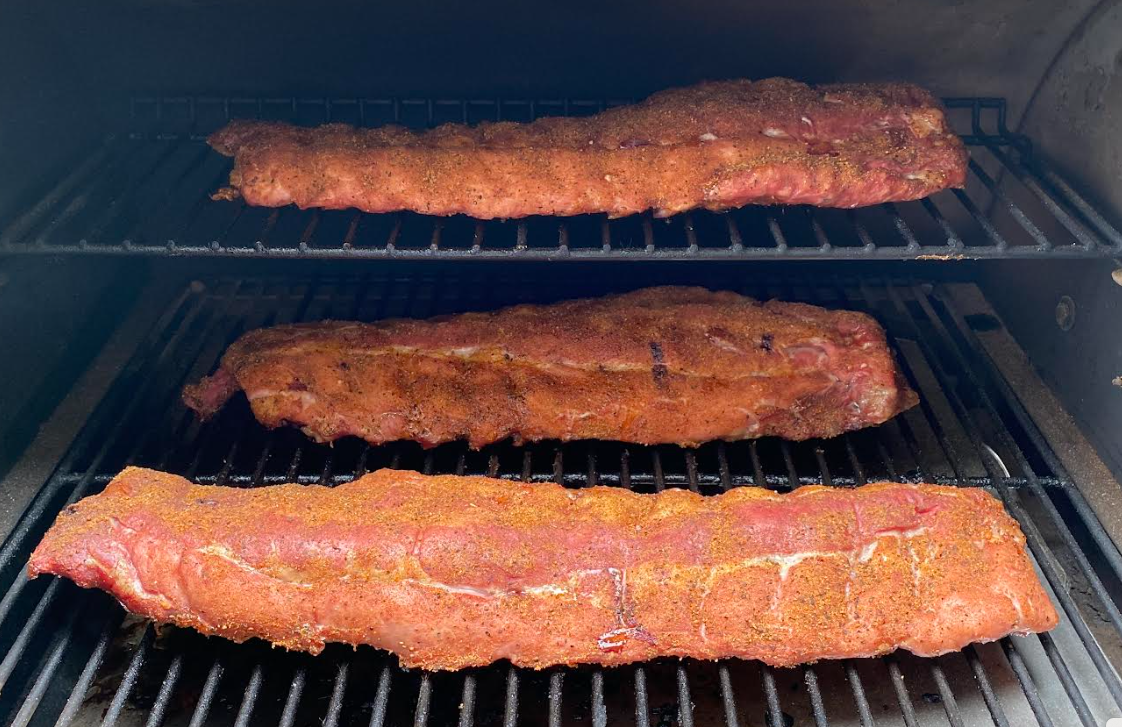
And go put them on the grill – meaty side up, bone side down. Leave some room around them to let the air and smoke circulate. On the pellet grill we use the most (which is pretty small, truthfully), 3 slabs fit perfectly – 2 on the main grate, 1 on the upper. Close the lid, set a timer for 3 ½ hours and GO AWAY. Seriously, leave it alone. If you’re lookin’ they are NOT cookin’. You don’t need to baste, spritz, etc. They will cook just fine without your fussing.
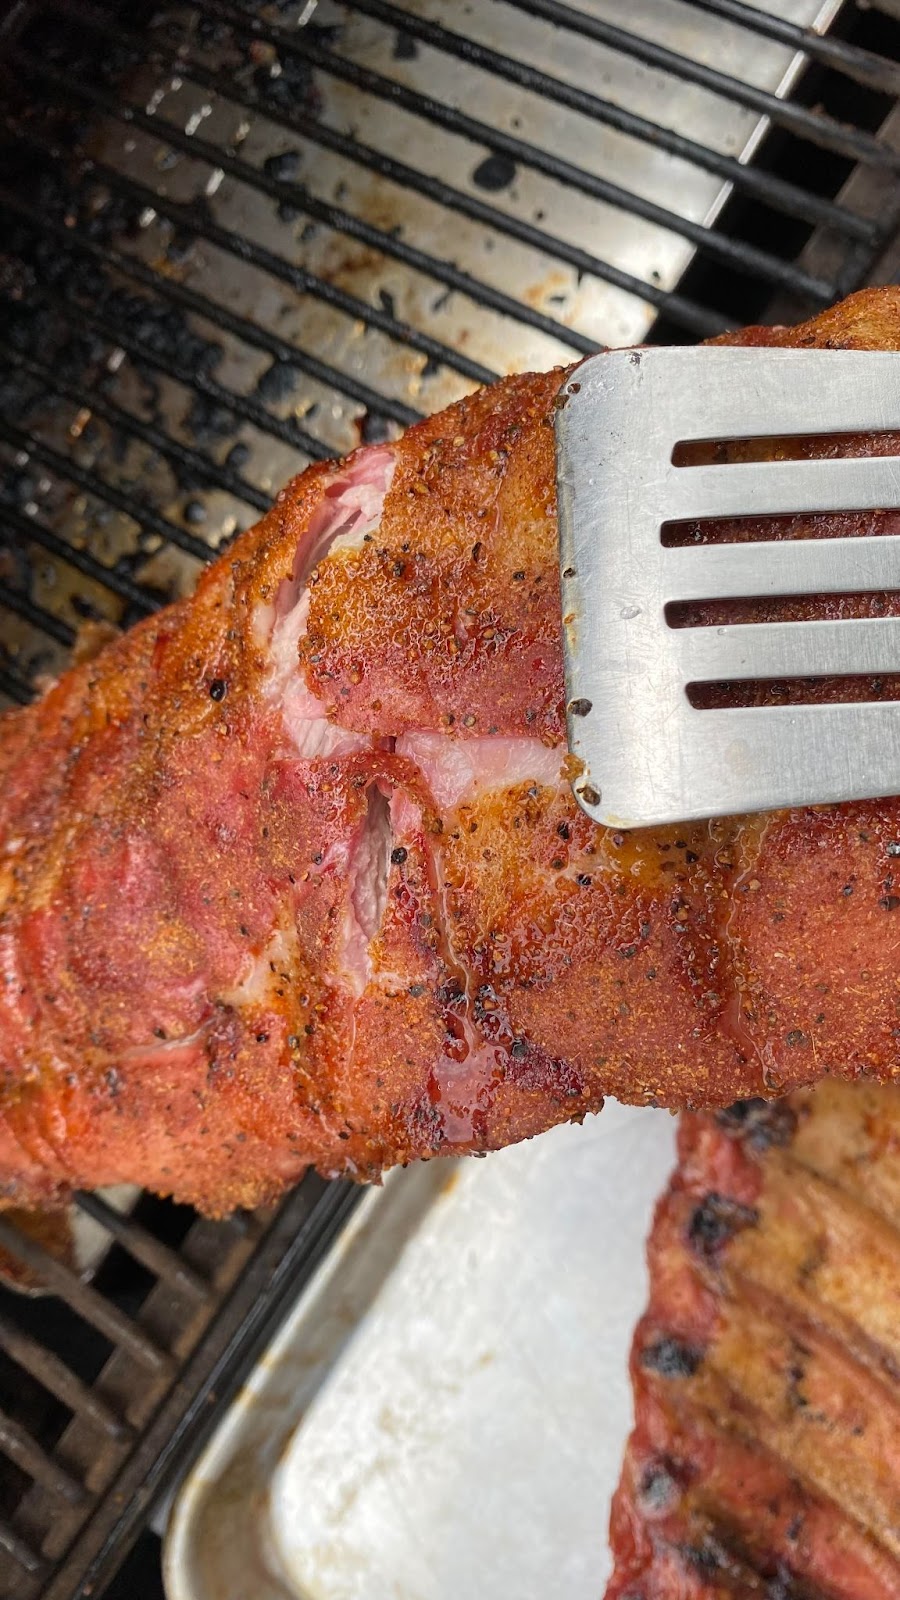
At 3 ½ hours, come back to do the “crack test”. This is where you lift a slab up with a pair of tongs in the middle. If the ribs are done, you’ll see the bark crack and slab start to split in half. When you see that split or crack, they are done on the grill – see the picture below.
Please note, not all slabs will get done at the same time – but that’s ok because you’re going to rest these! If you have a slab that’s not quite cracking at the same time as the others, give it more time on the grill, usually an extra half hour will do the trick.
Resting Your Ribs
Here’s where this recipe becomes great for summer fun. We like to make these starting pretty early in the morning so that they are done late morning – say on at 7:30 and off around 11:00 AM. They can go in the resting cooler for several hours until you’re ready to remove them, sauce them up and serve them! Now this said, if you are having these for lunch, you can do without the rest, but your ribs will be more tender and tasty if you can build in some rest time.
Serving Your Baby Back Ribs
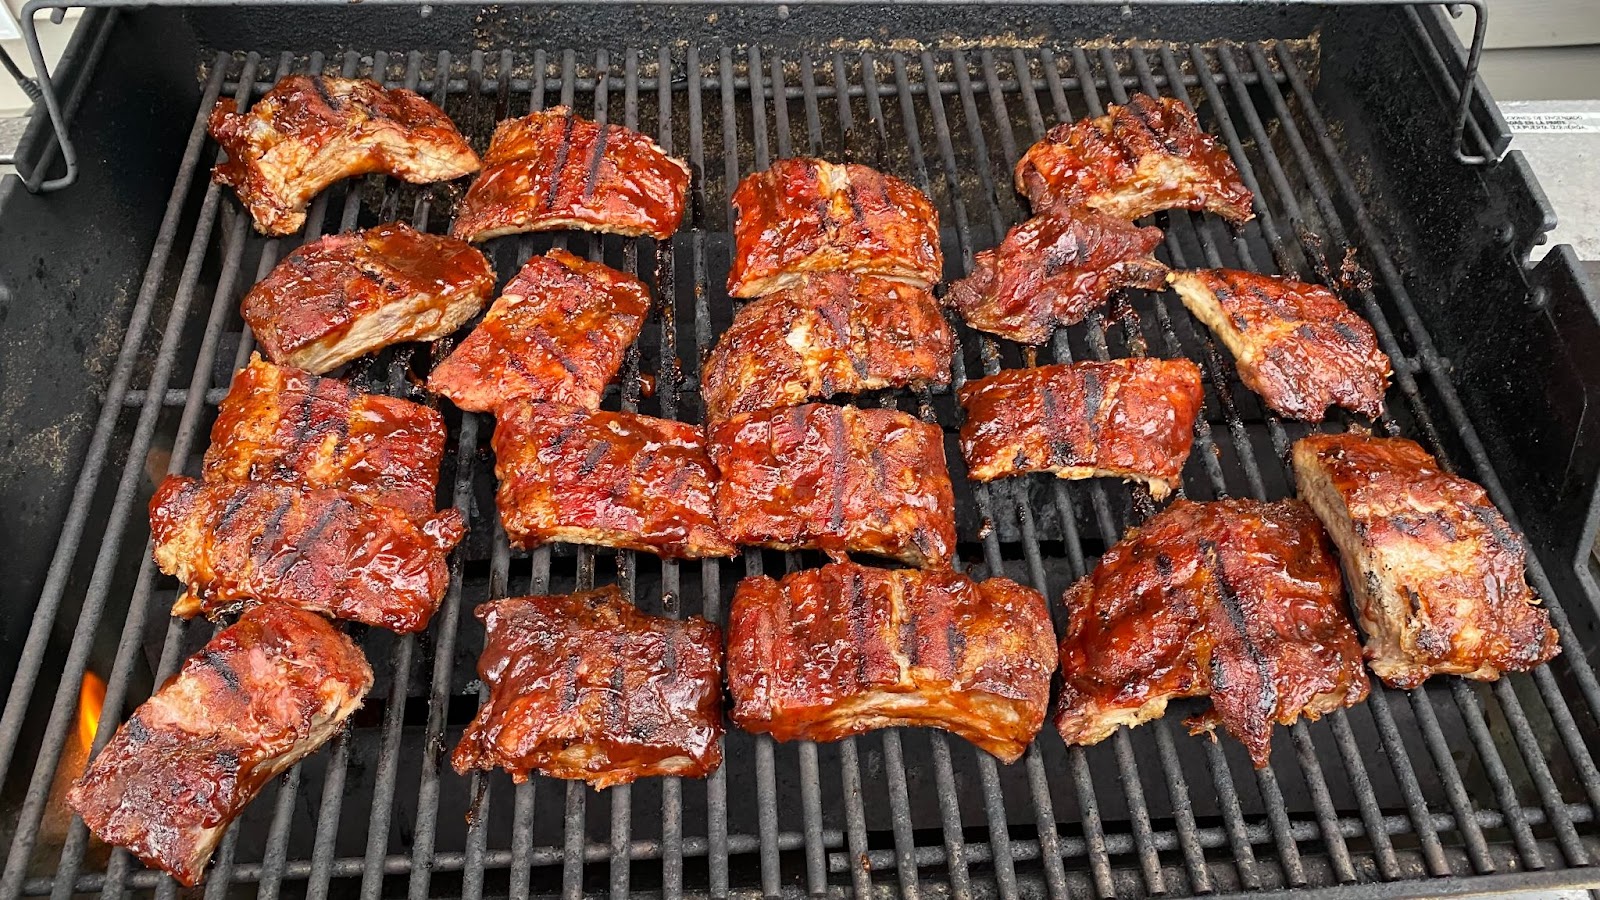
We like to cut the ribs at this point into serving pieces – generally 2 ribs per piece. Then make a double layer of heavy duty foil, pile the rib pieces in and close it up like a packet. For 3 slabs it requires two packet. Nestle the packets in the bottom of a picnic cooler. Then fold up an old bath towel and put it on top for some extra insulation, and close up the cooler. Let rest at least an hour and up to 6 hours.
When you’re about 20 minutes from dinner, relight your pellet grill to 400F. Or, if you have one, a gas grill is fine for this step – run it at medium heat. Before you head to the grill, generously brush your favorite barbecue sauce over the meaty sides of the ribs. Head out to the grill, put the rib pieces sauce side down and close the grill. Set a timer for 3 minutes (time is important here as you don’t want to burn the ribs). At 3 minutes, give them a flip to the bone side down and heat for another 3 minutes. Then take them off and serve!
We love our ribs with cole slaw, baked beans, au gratin potatoes, mac and cheese, corn bread, and more for sides.
That’s it! Ribs can be so easy to make and so easy to get spectacular results just by keeping things simple!
Until next time! Keep on grilling!